
Is your kitchen sink soap dispenser running low or empty? Filling it might seem simple, but doing it the right way can save you from mess and frustration.
In this guide, you’ll learn exactly how to fill your kitchen sink soap dispenser quickly and without spills. Whether you’re new to using one or just want a smoother refill process, these easy steps will help you keep your kitchen tidy and your soap dispenser working perfectly.
Keep reading—you’ll wonder why you didn’t try this sooner!
Tools And Materials Needed
Before filling your kitchen sink soap dispenser, gather the right tools and materials to make the process smooth and mess-free. Having everything ready helps you avoid interruptions and spills. Plus, it makes the whole task feel quicker and less frustrating.
Essential Tools
- Funnel:A small funnel helps you pour soap neatly without spilling. It fits perfectly into the dispenser opening.
- Paper Towels or Cloth:Keep some handy to wipe any drips or spills immediately. This keeps your sink area clean and tidy.
- Screwdriver:If your dispenser has a removable pump, you might need a screwdriver to detach it for easier filling.
- Measuring Cup:Useful if you want to control the amount of soap you add precisely.
Recommended Soap Types
- Liquid Dish Soap:Choose a soap that matches your needs—gentle on hands or heavy-duty grease-cutting.
- Hand Soap:If your dispenser is for handwashing, pick a soap formulated for skin care.
- Refill Soap Concentrate:Consider using concentrated soap mixed with water for economy and longevity.
Additional Tips
- Check Dispenser Size:Know your dispenser’s capacity so you don’t overfill and cause spills.
- Use Distilled Water:If diluting soap concentrate, distilled water prevents clogging and buildup inside the dispenser.
- Keep the Area Dry:Before starting, dry around the dispenser to avoid soap mixing with water and making a slippery mess.
Have you ever tried filling a soap dispenser without a funnel? It usually ends up with soap everywhere except inside the dispenser. Using these simple tools can save you from that frustration.
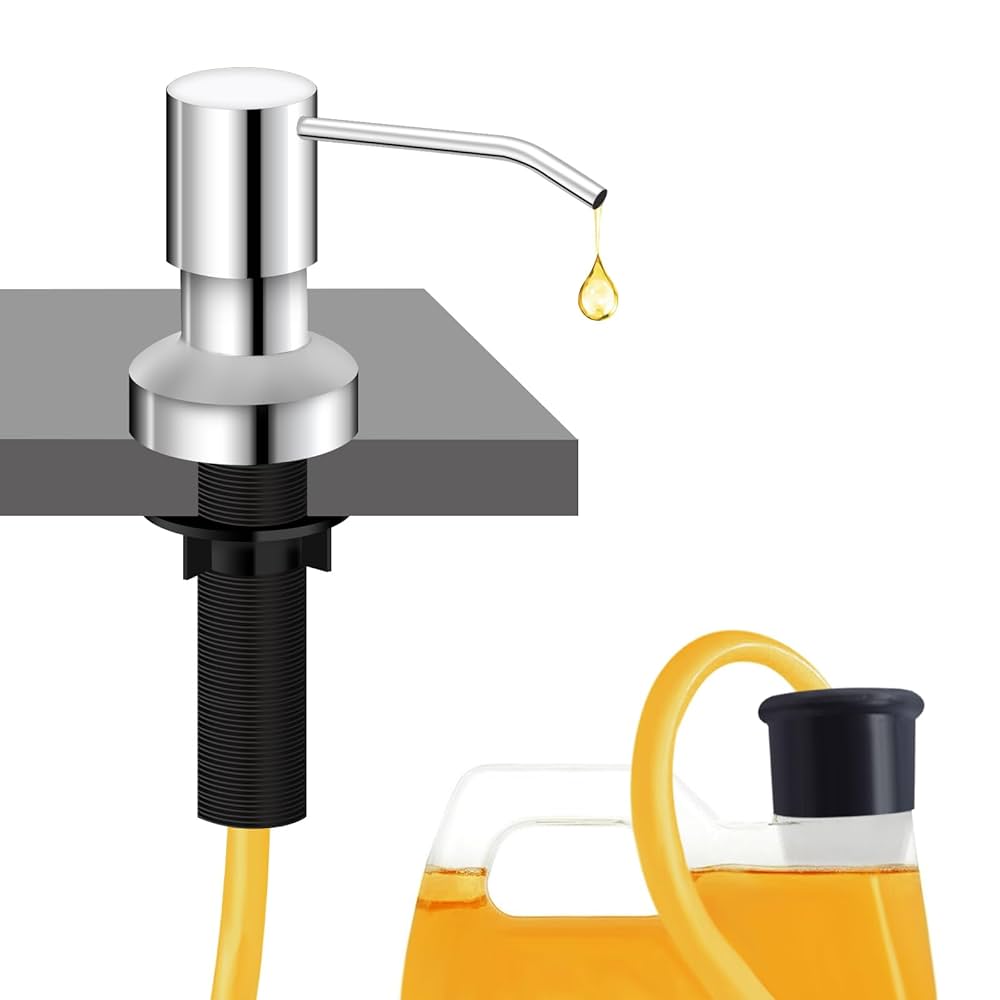
Credit: www.walmart.com
Locate The Soap Dispenser
Before filling your kitchen sink soap dispenser, you need to find where it is. Most soap dispensers sit near the faucet. Knowing its exact spot helps avoid spills and messes.
Soap dispensers usually have a pump that looks like a small bottle top. This part stays above the sink surface. The soap container is often hidden below the sink.
Check Around The Sink Rim
Look closely at the sink edges. The soap dispenser pump is often installed through a hole in the sink or countertop. It usually sits near the faucet or to one side.
Some sinks have a dedicated hole for the dispenser. Others use an existing hole meant for a sprayer or soap pump.
Look Under The Sink
Open the cabinet doors below the sink. The soap container connects to the pump above. It looks like a small plastic bottle.
The container holds the liquid soap. You can see a tube running from the bottle to the pump on top.
Identify The Pump Top
The pump top is the part you press to get soap. It looks like a small nozzle or button. It is often made of plastic or metal.
Cleaning this part helps the soap flow smoothly. Check if it moves up and down easily before filling.
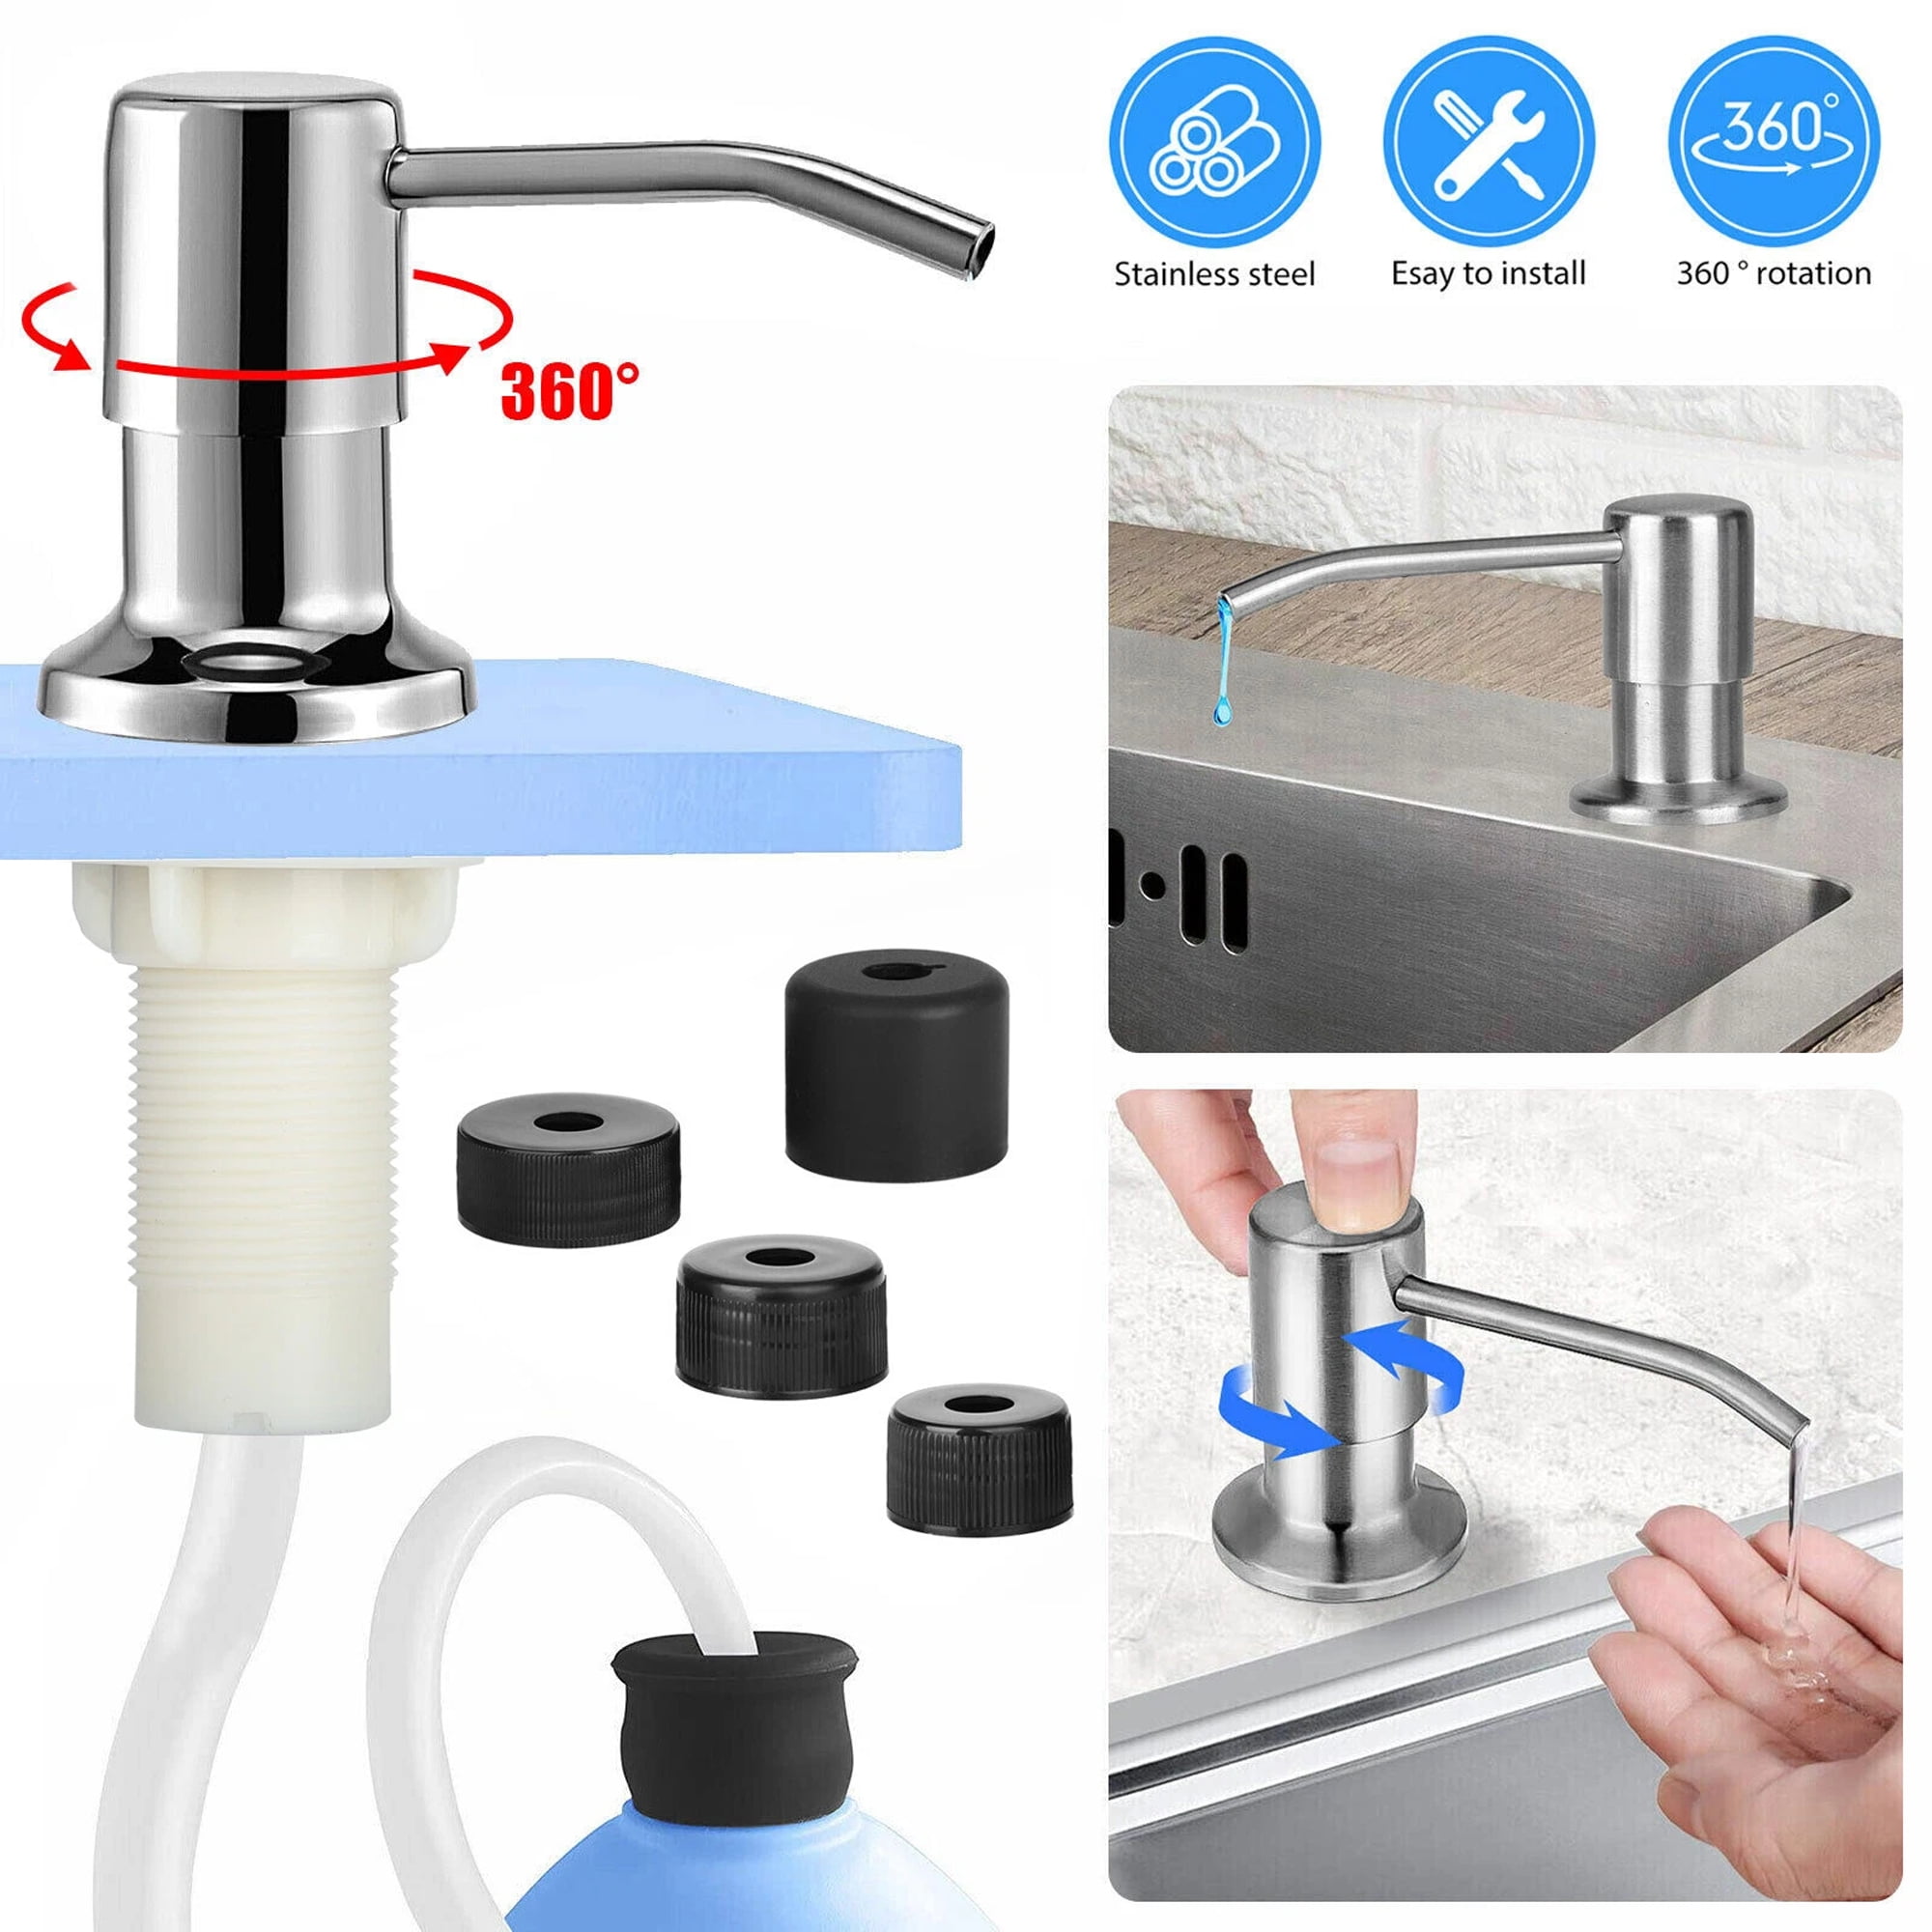
Remove The Dispenser Pump
Lift the dispenser pump gently from the sink to remove it. This allows easy access for refilling the soap container below.
Removing the dispenser pump from your kitchen sink soap dispenser might seem like a small task, but it’s crucial for a smooth refill experience. Ever struggled with a stuck pump while your hands are covered in soap? We've all been there. Let's make this process as seamless as possible.
Understand The Dispenser Type
Before you start, identify your dispenser type. Is it a built-in model or a standalone bottle? Each type requires a slightly different approach. Knowing this will save you time and prevent unnecessary frustration.
Grasp The Pump Head Firmly
Use a firm grip on the pump head to avoid slipping. A secure hold ensures you don’t accidentally spill soap all over. Remember, a little caution now prevents a big mess later.
Twist Counterclockwise
Turn the pump head counterclockwise gently. You might feel some resistance at first. Keep twisting until the pump loosens completely.
Lift The Pump Out
Once loosened, lift the pump straight up. Notice any soap residue on the pump tube? This is a good time to clean it for a smoother pump action later.
Check For Blockages
Inspect the pump and tube for any blockages. A clogged tube can cause the dispenser to malfunction. Clearing it now ensures a hassle-free refill and usage.
Ready For Refilling
With the pump safely removed, you’re now ready to refill. Wasn’t that easier than expected? A little preparation goes a long way in making everyday tasks more efficient.
Refill The Soap Reservoir
Refilling the soap reservoir is a simple task that keeps your kitchen sink soap dispenser ready for use. It only takes a few moments but makes a big difference in your daily routine. Knowing how to do it properly prevents messes and wasted soap.
Locate And Remove The Soap Dispenser Pump
First, find the soap dispenser pump on your kitchen sink. Usually, it’s the small nozzle sticking out near the faucet. Twist the pump counterclockwise to remove it gently without forcing it.
Removing the pump reveals the reservoir opening underneath. This is where you will pour in the soap.
Choose The Right Soap For Your Dispenser
Not all soaps work well with dispensers. Thick or creamy soaps can clog the mechanism. Use liquid dish soap or hand soap designed for dispensers to avoid blockages.
If you’re unsure, check the soap bottle label or try diluting thicker soap with a little water. Have you noticed your dispenser getting stuck after refilling? The soap type might be the cause.
Pour Soap Carefully To Avoid Spills
Use a small funnel or pour slowly to fill the reservoir without making a mess. Overfilling can cause soap to leak out when you replace the pump.
Fill the reservoir about three-quarters full. This leaves room for the pump and avoids overflow when you press it.
Secure The Pump Back In Place
Once filled, place the pump back onto the reservoir and twist clockwise until snug. Don’t overtighten, as this can damage the threads or cause leaks.
Give the pump a few presses to prime it and start dispensing soap smoothly. If it doesn’t pump right away, press a few more times or check for clogs.
Reassemble The Dispenser
Reassembling the kitchen sink soap dispenser is the final step after filling it. This step ensures the dispenser works properly and looks neat on your countertop. Careful reassembly prevents leaks and keeps soap flowing smoothly.
Take your time and follow these simple instructions. A correctly reassembled dispenser saves you effort in the long run.
Align The Pump Head With The Bottle
Start by placing the pump head on top of the soap bottle. Make sure it sits straight. A crooked pump can cause soap to leak or block the flow. Press gently but firmly to secure it in place.
Screw The Pump Head Tight
Turn the pump head clockwise to screw it onto the bottle. Tighten it just enough to hold firmly. Avoid over-tightening, which can damage the dispenser or make it hard to use.
Check The Dispenser For Proper Function
Press the pump a few times to test if soap flows out smoothly. If it feels stuck, unscrew and realign the pump. Repeat until the soap dispenses without trouble.
Secure The Dispenser To The Sink
Make sure the dispenser base is firmly attached to the sink or countertop. Tighten any mounting nuts underneath using your hands or a wrench. A stable dispenser won’t wobble or come loose.
Tips For Choosing Soap
Choosing the right soap for your kitchen sink dispenser improves cleaning and protects your skin. Different soaps work better for certain tasks and dispenser types. Consider your needs and preferences carefully before buying soap.
Type Of Soap
Liquid dish soap is common and easy to refill. Some dispensers accept foam soap, which uses less liquid. Check your dispenser’s instructions to pick the correct soap type.
Skin Sensitivity
Soaps with harsh chemicals may irritate sensitive skin. Look for gentle formulas labeled “mild” or “for sensitive skin.” Natural or hypoallergenic soaps reduce the risk of dryness or redness.
Cleaning Power
Choose soap with strong grease-cutting ability. Citrus or antibacterial soaps remove food residue well. Avoid soaps that leave sticky residues or film in the sink.
Scent Preferences
Soap scents can enhance kitchen freshness. Pick mild or natural fragrances to avoid overpowering smells. Unscented soap suits those who prefer no added aroma.
Eco-friendly Options
Biodegradable or plant-based soaps reduce environmental impact. These soaps often come in recyclable packaging. Consider eco-friendly soaps to support sustainable living.
Common Troubleshooting
Common issues can arise when filling a kitchen sink soap dispenser. Understanding these problems helps keep the dispenser working smoothly. Troubleshooting saves time and prevents frustration.
Most problems involve clogs, leaks, or pump malfunctions. Simple fixes often solve these issues quickly. Keep the dispenser clean and check parts regularly.
Clogged Nozzle Or Pump
Soap can dry and block the nozzle or pump. This stops soap from dispensing properly. Remove the pump and soak it in warm water. Use a small brush or toothpick to clear the nozzle.
Dispenser Not Pumping Soap
The pump may be stuck or damaged. Press the pump several times to loosen it. Check if the pump spring works freely. Replace the pump if it remains stuck.
Leaks Around The Dispenser
Leaks can occur if the dispenser parts are loose. Tighten the soap bottle or pump assembly. Inspect the seal or gasket for damage. Replace worn seals to stop leaks.
Soap Bottle Is Empty Or Low
Sometimes the problem is simple. Check the soap level inside the bottle. Refill the bottle with soap if it is empty or low. Use liquid soap made for dispensers only.
Air Bubbles In The Pump
Air bubbles block soap flow in the pump tube. Pump the dispenser a few times to remove air. If bubbles persist, remove the pump and refill slowly. Avoid shaking the bottle to reduce bubbles.

Credit: www.kraususa.com
Maintenance And Cleaning
Regular maintenance and cleaning keep your kitchen sink soap dispenser working well. Dirt and soap build-up can block the pump and cause leaks. Clean the dispenser often to prevent clogs and maintain smooth operation. Simple care steps extend the dispenser’s life and keep it looking nice.
Cleaning The Soap Dispenser Pump
Remove the pump from the soap dispenser. Rinse the pump under warm water to clear soap residue. Soak the pump in vinegar for 15 minutes to remove tough build-up. Use a soft brush to clean hard-to-reach areas. Rinse again and dry before reattaching.
Wiping Down The Dispenser Bottle
Use a damp cloth to wipe the dispenser bottle outside. Avoid harsh chemicals that can damage the finish. For stubborn stains, mix mild soap with water. Wipe gently and dry with a soft towel. Regular wiping keeps the bottle clean and shiny.
Checking For Leaks And Damage
Inspect the dispenser for cracks or leaks. Tighten any loose parts carefully. Replace damaged parts immediately to avoid water damage. Test the pump after maintenance to ensure it works smoothly. Early checks prevent bigger problems.
Refilling Tips To Avoid Mess
Use a funnel to pour soap into the dispenser bottle. Avoid overfilling to prevent spills and clogs. Clean any soap drips around the opening after refilling. Proper refilling keeps the dispenser clean and functional.

Credit: food52.com
Frequently Asked Questions
How Do You Refill A Kitchen Sink Soap Dispenser?
To refill, remove the dispenser pump by twisting it counterclockwise. Pour soap into the reservoir without overfilling. Replace the pump and twist it back securely. This method ensures smooth soap flow and prevents spills.
What Type Of Soap Works Best In Dispensers?
Liquid dish soap or hand soap with medium thickness works best. Avoid using thick soaps or gels as they may clog the dispenser. Choose a soap that easily pumps for consistent performance.
How Often Should I Refill The Soap Dispenser?
Refill your kitchen sink soap dispenser when the soap level is low. Frequency depends on usage, typically every 2 to 4 weeks. Regular refilling prevents running out and keeps your kitchen hygienic.
Can I Use Homemade Soap In A Dispenser?
Yes, homemade liquid soap can be used if it’s thin enough. Ensure the soap is well mixed and free of particles. Thick or chunky soaps may block the pump mechanism.
Conclusion
Filling a kitchen sink soap dispenser is quick and simple. Just follow the easy steps to avoid spills or mess. Keep your soap dispenser clean and refill it regularly. This helps your kitchen stay neat and soap ready. A well-filled dispenser makes washing dishes easier and faster.
Remember to use the right soap for best results. Now, enjoy a tidy sink area with a working soap dispenser. Small tasks like this save time and keep your kitchen pleasant. Try it today for a smoother dishwashing routine.