
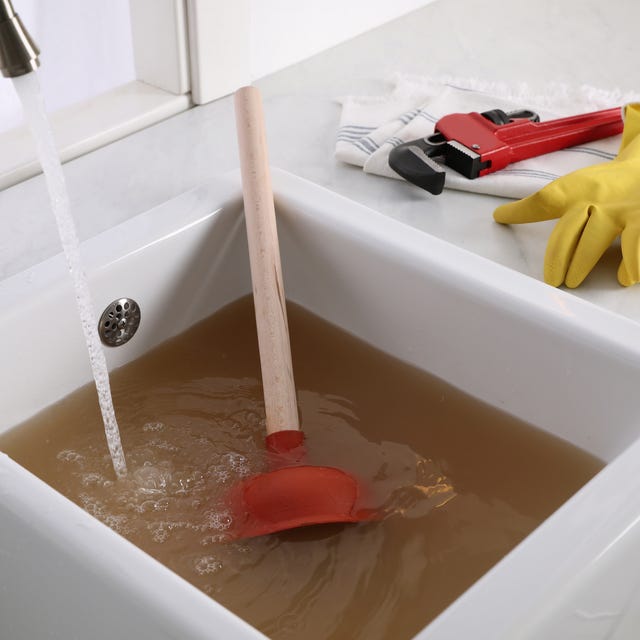
Is your kitchen sink clogged and causing you frustration? You’re not alone, and the good news is you don’t need to call a plumber right away.
With just a simple tool—a plunger—you can often fix the problem yourself quickly and easily. You’ll discover step-by-step how to unblock your kitchen sink using a plunger, saving you time, money, and stress. Keep reading, and you’ll be amazed at how straightforward this solution can be.
Your sink will be draining smoothly again before you know it!

Credit: www.drano.com
Tools Needed
Before you tackle a clogged kitchen sink, gathering the right tools is crucial. Having everything at hand saves time and frustration. It also increases your chances of clearing the blockage effectively.
Choosing The Right Plunger
Not all plungers are made equal. For kitchen sinks, a cup plunger with a flat bottom works best because it creates a tight seal over the drain.
A flange plunger, often used for toilets, won’t fit well in a sink and might waste your effort. Look for a plunger with a sturdy wooden or plastic handle that feels comfortable in your hand.
Have you ever struggled with a flimsy plunger that bends or slips? Picking a solid one can make the difference between quick success and endless frustration.
Additional Supplies
- Rubber gloves:Protect your hands from dirty water and germs.
- Bucket:Useful to catch any water that might splash out during plunging.
- Old towels or rags:Help soak up spills and keep the area clean.
- Flashlight:Handy to inspect the drain if you need to check the blockage visually.
- Drain cleaner (optional):Sometimes combining plunging with a mild, environmentally friendly drain cleaner can improve results.
Have you noticed how having these extras ready makes the job much smoother? Preparing your workspace ensures you won’t be scrambling mid-task.
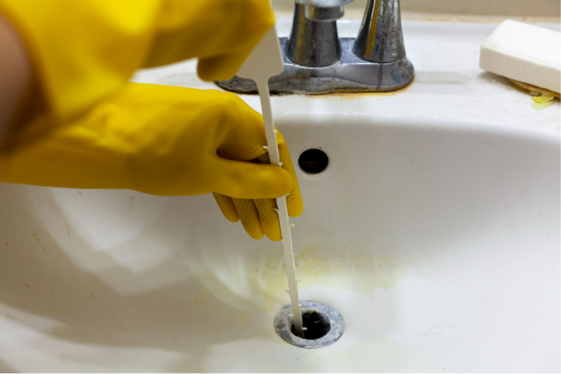
Credit: apollohome.com
Preparing The Sink
Preparing the sink is the first key step before plunging. A clean and clear area helps the plunger work better. Removing excess water ensures the plunger seals tightly. These simple actions make the process smooth and effective.
Clearing The Area
Remove dishes, utensils, and any clutter around the sink. This creates space to work safely and comfortably. Wipe the sink edges and countertop to avoid slips. Keep cleaning supplies handy but out of the way.
Removing Excess Water
Check the water level in the sink basin. Use a small container or cup to scoop out extra water. Leave enough water to cover the plunger cup for a good seal. Too much water can cause splashing during plunging.
Using The Plunger
Place the plunger firmly over the sink drain and push down gently to create suction. Pump the plunger up and down quickly several times to loosen the clog. Check if the water drains smoothly and repeat if needed.
Using a plunger to unblock your kitchen sink can be surprisingly effective if done correctly. Many people overlook the power of this simple tool, but with the right technique, it can save you a call to the plumber. Let’s dive into how you can use a plunger to clear that stubborn sink clog.
Proper Plunger Placement
First, make sure you have the right plunger. A cup plunger, which has a flat rim, works best for sinks. Before plunging, remove any visible debris from the sink. Fill the sink with enough water to cover the plunger's cup. This water acts as a lubricant, enhancing the suction effect. Seal the plunger over the drain completely, ensuring there’s no air escaping.
Effective Plunging Technique
Once the plunger is in place, apply firm and consistent pressure. Push down slowly and then pull up sharply, without breaking the seal. This motion helps dislodge the blockage by creating a push-pull effect on the clog. Repeat this process several times, maintaining a steady rhythm. It might take a few attempts, but persistence pays off. If you notice the water starting to drain, you’re on the right track. Have you ever thought about how much money you save by doing this yourself? Not to mention, the sense of accomplishment is unbeatable.
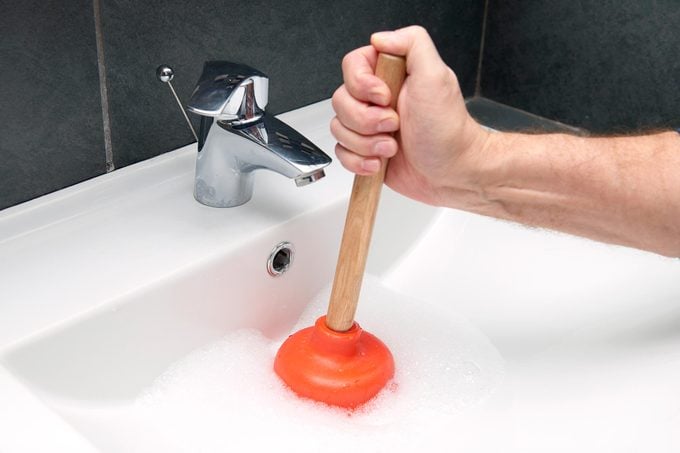
Credit: www.rd.com
Checking Drainage
Checking the drainage is key to knowing if the plunger worked. It helps you see if water moves freely through the sink. This step ensures the clog is cleared or if more work is needed. Watch the water flow carefully to judge the sink's condition.
Testing Water Flow
Run some water into the sink slowly. See how fast it drains down the pipe. If water drains quickly without pooling, the clog is likely gone. If water stays or drains very slowly, the blockage might still be there. Use your eyes and ears for signs of slow drainage, like gurgling sounds or water backup.
Repeating If Necessary
Plunging may need to be done more than once. If water flow is still slow, try plunging again. Each attempt can help break up or move the clog further. Be patient and check the drainage after each try. Repeat until water drains smoothly and freely.
Preventing Future Clogs
Keeping your kitchen sink free from clogs doesn’t end with plunging it clear once. Preventing future blockages saves you time, stress, and sometimes costly repairs. A bit of care and attention can keep your drains flowing smoothly for months or even years.
Regular Maintenance Tips
Make it a habit to flush your sink with hot water at least once a week. This helps dissolve grease and soap buildup before they harden. You can also pour a mixture of baking soda and vinegar down the drain monthly; it naturally cleans and deodorizes without harsh chemicals.
Be mindful about what goes down your drain. Scrape plates into the trash instead of rinsing food scraps into the sink. Using a drain strainer catches hair and larger particles that cause blockages.
Avoiding Common Mistakes
Many people make the mistake of ignoring slow drainage until it becomes a full clog. Why wait for a problem to escalate? Address slow drains promptly by plunging or using a drain snake before calling a plumber.
Another common error is overusing chemical drain cleaners. These can damage your pipes and create more problems over time. Instead, stick to natural remedies or mechanical methods like plunging.
Have you ever poured grease down the sink “just once”? Even small amounts can solidify and cause serious clogs. Always collect grease in a container and throw it in the trash. Your pipes will thank you.
Frequently Asked Questions
How Do I Use A Plunger To Unblock A Kitchen Sink?
Place the plunger over the drain, ensuring a tight seal. Push down and pull up rapidly several times. Repeat until water drains smoothly. This creates suction to loosen the blockage effectively.
What Type Of Plunger Works Best For Kitchen Sinks?
A cup plunger with a flat edge is ideal for kitchen sinks. It fits snugly over the drain, creating strong suction. Avoid flange plungers, which are better for toilets.
Can A Plunger Damage My Kitchen Sink Pipes?
Using a plunger correctly won’t harm your pipes. Avoid excessive force to prevent pipe damage. Gentle, consistent plunging is safe and effective for most clogs.
How Long Should I Plunge To Clear A Kitchen Sink?
Plunge for about 1-2 minutes continuously. If the clog persists, wait a few minutes before trying again. Multiple short attempts are better than one long session.
Conclusion
Unblocking a kitchen sink with a plunger is simple and quick. You only need basic tools and a little patience. Using the right steps helps clear the clog without damage. This method saves time and money compared to calling a plumber.
Keep your sink clean to avoid future blockages. Remember, regular maintenance keeps water flowing smoothly. Try this easy fix before seeking professional help. It works well for most common sink clogs. You can handle this task with confidence and ease.