

Are you wondering how to charge your Kitchen Aid hand mixer quickly and safely? You want to keep your mixer ready to go whenever you need it, without any hassle or confusion.
In this guide, you’ll discover simple steps to charge your mixer properly, so it lasts longer and works better. Keep reading to learn the easy charging tips that will save you time and keep your kitchen running smoothly.

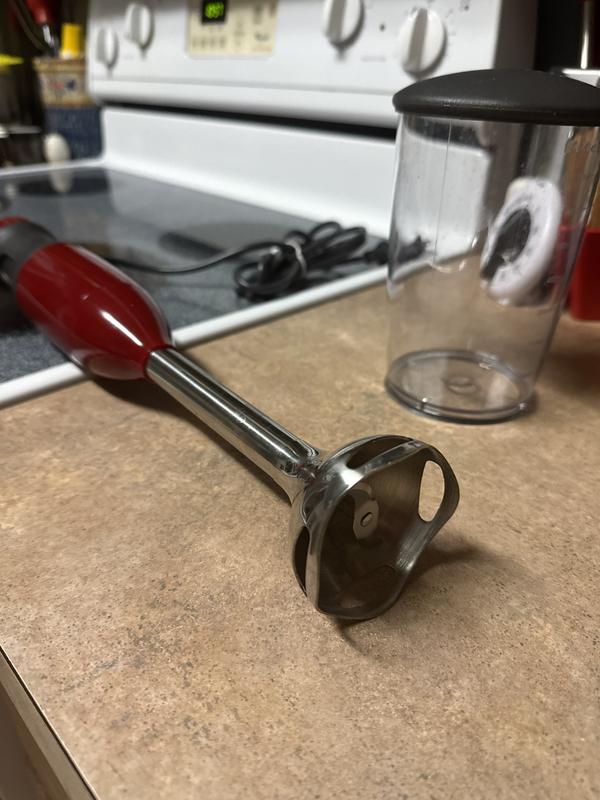
Credit: www.bbcgoodfood.com
Choosing The Right Charger
Choosing the right charger for your Kitchen Aid hand mixer is crucial to ensure efficient charging and to protect the device’s battery life. Using an incompatible charger can lead to slow charging or even damage the internal components. Let’s explore how to pick a charger that matches your mixer’s needs and keeps it running smoothly.
Compatible Chargers For Kitchen Aid Mixers
Kitchen Aid hand mixers usually come with a specific charger designed for their voltage and power requirements. Using the original charger that came with your mixer is the safest bet. If you need a replacement, look for chargers that match the exact voltage and current ratings specified in your mixer’s manual.
Many third-party chargers claim compatibility, but not all deliver the right power output. To avoid guesswork, check the label on your original charger for details like output voltage (e.g., 12V) and current (e.g., 1A). Search for chargers with these exact specs to maintain consistent and safe charging.
Avoiding Damage With Proper Charging Tools
Using the wrong charger can cause your mixer’s battery to overheat, degrade faster, or even fail completely. Have you ever tried charging a device with a charger that feels unusually warm? That’s a warning sign of potential damage.
To protect your mixer, always use chargers with built-in safety features such as overcharge protection and short circuit prevention. Avoid chargers with loose connectors or frayed cables, as these can interrupt the charging process and harm your device.
Think about how much you rely on your hand mixer for daily tasks. Wouldn’t it be frustrating to have it fail because of a cheap charger? Investing in the correct charging tool not only extends your mixer’s life but also saves you from unexpected repair costs.
Preparing Your Mixer For Charging
Preparing your Kitchen Aid hand mixer for charging is a crucial step that many overlook. Taking a few moments to get your mixer ready can improve charging efficiency and extend the life of your appliance. This process involves simple tasks like cleaning and checking the connection points to ensure everything is in perfect order before you plug it in.
Cleaning And Inspecting The Mixer
Start by wiping down your mixer with a dry or slightly damp cloth. Avoid using harsh chemicals that can damage the surface or internal components. Pay special attention to the areas around the charging port and buttons, as dust and residue can interfere with charging.
Check for any visible damage such as cracks or frayed wires. If you spot anything unusual, don’t ignore it—charging a damaged mixer can be unsafe and may worsen the problem. Has your mixer ever stopped charging properly? Often, a quick clean can fix this issue.
Ensuring Proper Connection Points
The connection points between your mixer and charger must be free of debris and corrosion. Use a soft brush or a dry cotton swab to gently clean the charging contacts. This small step can make a big difference in how well your mixer charges.
Make sure the charger fits snugly into the port without forcing it. Loose connections can cause the mixer to charge slowly or not at all. If your charger feels loose, try inspecting both the charger plug and the mixer’s charging port for any bent or damaged pins.
Step-by-step Charging Process
Charging your KitchenAid hand mixer is a straightforward task, but doing it correctly ensures both safety and longevity for your appliance. Understanding the step-by-step charging process will not only save you time but also prevent any unnecessary mishaps. Let's break down each step to ensure your mixer is always ready for your culinary adventures.
Connecting The Charger Safely
Before plugging in your charger, make sure your hands are dry to avoid any risk of electric shock. Locate the charging port on your mixer, usually at the handle's base. Insert the charger plug gently into the port, ensuring it fits snugly without force.
Using an outlet that isn't overloaded with other appliances is crucial for safety. This reduces the risk of short circuits or blown fuses. Always check the cord for any visible damage before connecting to avoid potential hazards.
Monitoring The Charging Indicator
Once connected, your mixer should display a charging indicator light. A steady glow typically indicates that charging is in progress, while a flashing light might signal an issue. If the light doesn't come on, double-check your connections and try a different outlet.
Keeping an eye on this indicator helps you know when the mixer is fully charged. This not only prevents overcharging but also optimizes battery life for extended use.
Estimated Charging Time
Most KitchenAid hand mixers require a couple of hours to reach full charge. Depending on the model, this can range from 2 to 4 hours. Setting a timer can be a helpful reminder to unplug it once charged.
Regular charging sessions should be timed to ensure your mixer is ready when you need it. Avoid leaving it plugged in overnight to maintain the battery's health over time.
By following these steps, charging your KitchenAid hand mixer becomes a breeze. Do you have any tips or experiences to share about using your mixer efficiently? We'd love to hear from you in the comments below!
Tips For Faster Charging
Charging your Kitchen Aid hand mixer quickly saves time and keeps your kitchen tasks smooth. Simple habits can help speed up charging without harming the battery. These tips help you get your mixer ready to use faster.
Optimizing Power Sources
Use the original charger or a power adapter with the right voltage. Chargers with lower power slow charging down. Plug your charger into a wall outlet, not a USB port on a computer. Wall outlets provide more steady power.
Keep the charging port clean and dry. Dust or moisture can block the connection. Avoid using extension cords, as they may reduce power flow. Place the mixer close to the power source to prevent interruptions.
Avoiding Overcharging
Unplug the charger once the battery is full. Overcharging wastes energy and wears out the battery. Use a timer or set an alarm to remind yourself to disconnect. This keeps the battery healthy for a longer time.
Avoid charging overnight or for too long. It does not speed up charging and may damage the battery. Keep track of charging times to maintain good battery life and performance.
Troubleshooting Charging Issues
Charging issues with your Kitchen Aid hand mixer can be frustrating. Sometimes the device may not charge as expected. Troubleshooting these problems early can save time and avoid bigger issues later. Follow simple checks to identify the cause and fix it quickly.
Common Charging Problems
- The charger does not fit properly into the mixer port.
- Power outlet is not supplying electricity.
- Charging cable is damaged or frayed.
- Battery inside the mixer is dead or worn out.
- Indicator light does not turn on during charging.
- Mixer overheats or shuts down while charging.
Clean the charging port gently to remove dust. Try another power outlet to rule out socket issues. Inspect the cable carefully for visible damage. Avoid using a charger not designed for your mixer.
When To Contact Support
Contact support if the mixer still does not charge after basic checks. Persistent problems like no light on the charger or battery failure need expert help. Do not try to open the mixer yourself, as it may void the warranty.
Keep your purchase details ready. Support can guide you through repairs or replacements. Early contact can prevent further damage and ensure safe use of your hand mixer.
Credit: www.kitchenaid.com
Maintaining Battery Health
Maintaining the battery health of your Kitchen Aid hand mixer ensures long-lasting power and better performance. Batteries lose strength over time if not cared for properly. Simple habits can protect your battery and keep your mixer ready for use.
Proper Storage Practices
Store the mixer in a cool, dry place. Avoid extreme temperatures, as heat or cold can damage the battery. Keep the mixer away from direct sunlight and moisture. If you do not use the mixer often, store it with a partial charge rather than fully charged or fully drained. This helps slow battery wear.
Regular Charging Habits
Charge the mixer regularly, even if you don’t use it daily. Avoid letting the battery drain completely before charging. Frequent small charges are better than long periods of no charging. Unplug the charger once the battery is full to prevent overcharging. Consistent charging keeps the battery healthy and ready for your cooking needs.
Credit: www.kitchenaid.com
Frequently Asked Questions
How Do I Charge A Kitchenaid Hand Mixer?
To charge your KitchenAid hand mixer, plug the power cord into the mixer and connect it to a power outlet. Charging typically occurs automatically when plugged in. Ensure the battery is fully charged before use for optimal performance.
How Long Does It Take To Charge The Mixer?
Charging time varies but usually takes about 4 to 6 hours for a full charge. Avoid overcharging to maintain battery health. Check your user manual for specific charging times related to your model.
Can I Use The Mixer While Charging?
No, it is not recommended to use the KitchenAid hand mixer while charging. Using it during charging may harm the battery and reduce its lifespan. Always wait until the mixer is fully charged for safe use.
How To Know When The Mixer Is Fully Charged?
Most KitchenAid hand mixers have an indicator light that shows charging status. A steady or green light typically means the battery is fully charged. Refer to your model's manual for exact indicator details.
Conclusion
Charging your Kitchen Aid hand mixer is simple and quick. Keep the charger clean and plug it into a proper outlet. Charge the mixer fully before using it for best results. Regular charging helps your mixer last longer and work better.
Follow these easy steps to avoid any issues. Now, you can enjoy smooth mixing without interruptions. Simple care makes a big difference in your kitchen tools. Trust the process and keep your mixer ready for every recipe.