
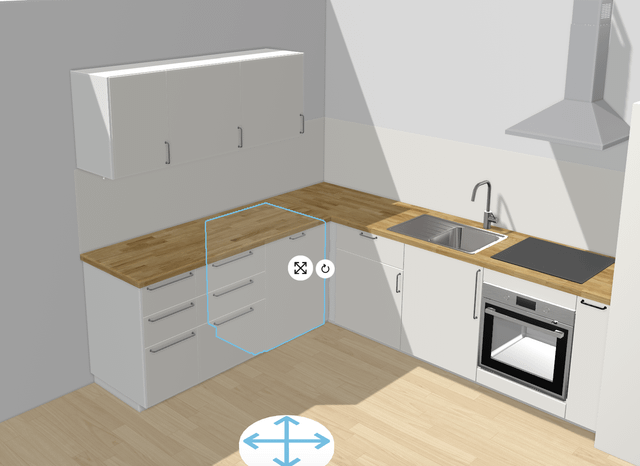
Are you ready to upgrade your kitchen with a sleek, new dishwasher from Ikea? Installing it yourself might sound tricky, but with the right steps, you can do it smoothly and save money.
Imagine the ease of loading your dishes and letting your dishwasher do the hard work, freeing up your time for what really matters. In this guide, you’ll discover simple, clear instructions that make the installation process straightforward—even if you’re not an expert.
Keep reading, and you’ll have your Ikea dishwasher up and running in no time.
Preparing For Installation
Preparing for the installation of a dishwasher in your Ikea kitchen is a crucial phase that sets the foundation for a smooth and efficient process. Taking the time to properly prepare ensures that everything fits perfectly and functions safely. Before you start, focus on measuring, gathering the right tools, and checking your home's connections.
Measuring The Space
Accurate measurements prevent surprises during installation. Use a tape measure to check the width, height, and depth of the space where the dishwasher will go.
Keep in mind that Ikea kitchen cabinets might have slightly different dimensions than standard kitchens, so double-check the gap between your cabinets and the countertop.
Ask yourself: Is there enough clearance for the dishwasher door to open fully without hitting anything? Make sure to measure door swing space as well.
Gathering Tools And Materials
Having all tools and materials ready before you start saves time and frustration. Basic tools include a screwdriver, adjustable wrench, pliers, and a level.
Don't forget items like Teflon tape for sealing water connections, a bucket for draining water, and possibly a drill if you need to make holes.
Consider assembling a checklist to ensure you don’t miss anything. You’ll thank yourself when you don’t have to stop midway to hunt for a tool.
Checking Plumbing And Electrical Connections
Dishwashers need both water supply and electrical power, so inspect these connections carefully before installation.
Look under your sink to find the hot water line; it should have a shutoff valve that works smoothly.
Check the electrical outlet or hardwired connection meets the dishwasher’s requirements. Is it grounded and positioned close enough?
If you spot outdated or damaged wiring or plumbing, now is the time to fix it. This saves headaches and costly repairs later.

Credit: www.reddit.com
Removing The Old Dishwasher
Removing the old dishwasher is the first task before installing a new one in your Ikea kitchen. This process requires careful handling to avoid damage or leaks. Follow clear steps to ensure safety and efficiency.
Turning Off Power And Water
Start by switching off the dishwasher's power supply at the circuit breaker. This prevents any electrical accidents during removal. Next, turn off the water supply valve connected to the dishwasher. Closing this valve stops water flow and avoids leaks when disconnecting hoses.
Disconnecting Hoses And Wires
After shutting off power and water, carefully disconnect the water supply hose from the dishwasher. Use a wrench to loosen the connection without damaging the pipes. Then, detach the drain hose from the sink drain or garbage disposal. Finally, unplug the electrical wires or power cord from the dishwasher. Keep these parts safe for the new installation or disposal.
Removing The Unit From The Cabinet
Check for screws or brackets securing the dishwasher to the cabinet or countertop. Use a screwdriver to remove these fasteners. Gently pull the dishwasher out of its space, supporting its weight to avoid tipping. Place the old unit in a safe area for recycling or removal.
Setting Up The New Dishwasher
Setting up the new dishwasher in your Ikea kitchen requires careful attention. This process ensures the appliance fits perfectly and works efficiently. Follow each step to avoid common installation issues.
Unpacking And Inspecting The Dishwasher
Start by carefully unpacking the dishwasher from its box. Remove all packaging materials and protective films. Check the dishwasher for any dents, scratches, or missing parts. Confirm that the user manual and installation kit are included. Inspect the door, racks, and control panel for damage. Report any defects to the seller immediately to avoid installation delays.
Adjusting The Height And Feet
Place the dishwasher near the installation spot. Use a level to check the floor’s evenness. Adjust the dishwasher’s feet to match the floor height. Turn each foot clockwise or counterclockwise to raise or lower the appliance. Make sure the dishwasher is stable and does not rock. Proper height adjustment helps the door align with your Ikea kitchen cabinets.
Attaching Mounting Brackets
Locate the mounting brackets included in the installation kit. Attach the brackets to the dishwasher’s top or sides as instructed in the manual. Use a screwdriver to secure the brackets tightly. Position the dishwasher inside the cabinet opening. Screw the mounting brackets into the cabinet to hold the dishwasher firmly. This step prevents the dishwasher from moving during operation.
Connecting Plumbing And Electrical
Connecting plumbing and electrical systems ensures the dishwasher works safely and efficiently. Properly linking water supply and power prevents leaks and electrical hazards in an Ikea kitchen setup. Careful installation keeps everything running smoothly without damage or risk.
Installing a dishwasher in an Ikea kitchen is a rewarding DIY project that can save you money and enhance your kitchen’s functionality. However, the key to a successful installation lies in the proper connection of plumbing and electrical components. As you embark on this task, you'll navigate through water supply lines, drain hoses, and electrical wiring, ensuring each connection is secure and efficient.
Installing The Water Supply Line
First, ensure that the water supply is turned off. Locate the water supply valve under the sink, and connect a braided stainless steel water supply line to the valve. Secure the other end to the dishwasher's water inlet valve, making sure all connections are tight to prevent leaks. Use Teflon tape on the threads to enhance the seal. This small step can save you from potential water damage. Always double-check connections by turning the water back on slowly and inspecting for any leaks.
Connecting The Drain Hose
Proper drainage is crucial for your dishwasher’s performance. Attach the drain hose to the dishwasher’s drain outlet, securing it with a clamp. Feed the hose through the cabinetry to connect it to the sink's drain or garbage disposal. Ensure the hose is looped higher than the sink drain to prevent backflow, which can cause water to siphon back into the dishwasher.
Wiring The Electrical Connections
Safety first: turn off the power at the circuit breaker. Open the dishwasher’s electrical junction box, usually located at the bottom front. Connect the house wires to the dishwasher wires, matching the colors: black to black, white to white, and green or bare copper to the ground screw. Use wire nuts to secure the connections, and neatly tuck the wires back into the box before closing it. Isn't it satisfying when everything fits perfectly into place? With your plumbing and electrical connections complete, you’re one step closer to enjoying the convenience of your new Ikea kitchen dishwasher.
Fitting The Dishwasher Into The Cabinet
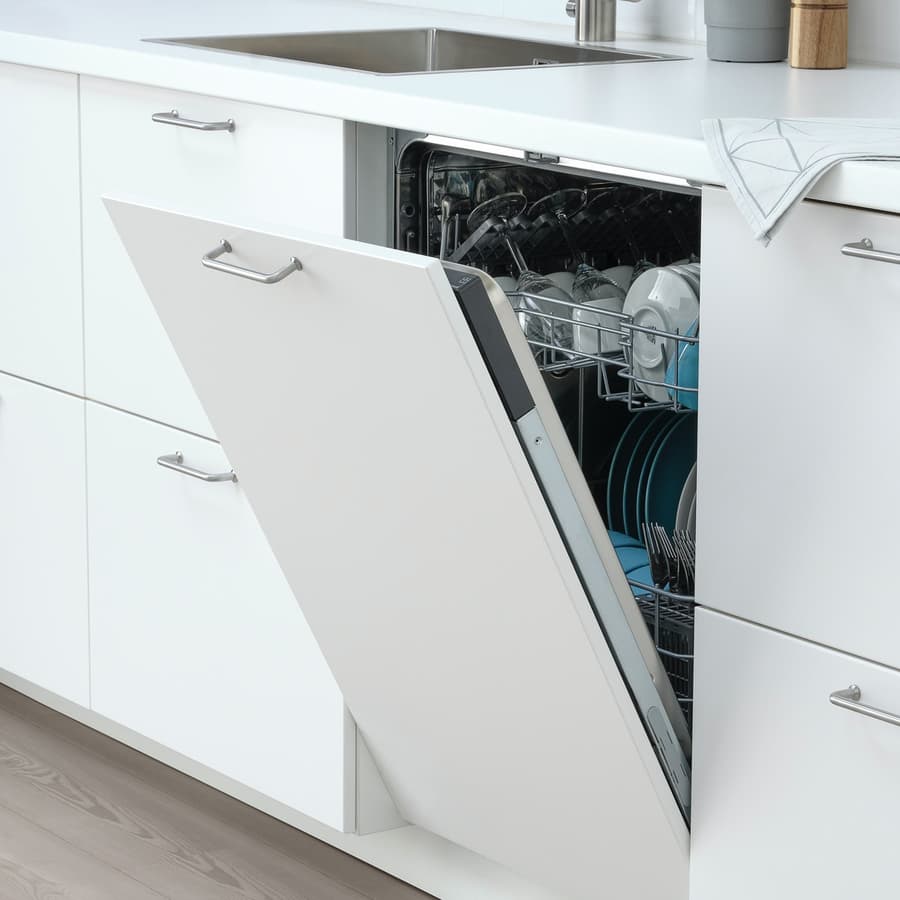
Fitting the dishwasher into your IKEA kitchen cabinet is a crucial step that demands precision and care. This part of the installation ensures the dishwasher fits snugly, operates efficiently, and aligns perfectly with your kitchen design. Taking your time here will save you headaches later and help maintain the sleek look IKEA kitchens are known for.
Sliding The Dishwasher Into Place
Before sliding the dishwasher in, double-check that all connections—water, drain, and power—are ready and unobstructed. Gently push the dishwasher straight into the cabinet opening, keeping an eye on any hoses or cables that might get caught or pinched. If you feel resistance, stop and reassess; forcing the unit can cause damage to both the dishwasher and cabinetry.
Think about the last time you tried to fit something bulky into a tight space—was patience your friend? The same applies here. Smooth, controlled movements prevent scratches and misalignments.
Securing The Unit With Screws
Once the dishwasher is positioned, use screws to firmly attach it to the cabinet frame. IKEA kitchens typically provide pre-drilled holes in the cabinets for this purpose. Secure the dishwasher at multiple points to avoid any wobbling or shifting during use.
Make sure the screws are tight but not over-tightened; stripping the holes can be a costly mistake. You want the dishwasher stable enough to stay put but not so rigid that it stresses the cabinet structure.
Ensuring Proper Alignment
Check the dishwasher’s alignment by closing the door slowly and observing the gaps around it. The unit should sit flush with adjacent cabinets and the countertop edge. Use a level to confirm the dishwasher isn’t tilted forward or backward.
If you notice uneven spacing, adjust the dishwasher’s feet or reposition slightly. Proper alignment isn’t just about looks—it also guarantees the door seals correctly, preventing leaks and noise. Have you ever seen a dishwasher door that sticks or won’t close right? That’s usually a sign of poor alignment.
Credit: www.ikea.com
Testing The Dishwasher
Testing the dishwasher is a key step after installation in your Ikea kitchen. It confirms everything works correctly and avoids future problems. This process ensures water flows properly, the machine powers on, and no leaks occur. Follow each step carefully for a smooth start.
Turning On Water And Power
First, open the water supply valve fully. Check the water line connection to avoid any kinks or blockages. Next, connect the dishwasher to the power outlet securely. Turn on the power switch or circuit breaker linked to the dishwasher. Listen for any unusual sounds when the machine powers up.
Running A Test Cycle
Select a short or quick wash cycle on your dishwasher's control panel. Add a small amount of dishwasher detergent designed for testing. Start the cycle and watch for normal operation signs like water spraying and draining. The test cycle helps check all functions work smoothly together.
Checking For Leaks And Proper Operation
While the dishwasher runs, inspect the water connections closely for any drips. Look under the machine and around hoses for moisture. After the cycle ends, open the door and check inside for leftover water. Ensure dishes feel clean and dry. Fix any leaks or operational issues before regular use.
Final Adjustments And Tips
After installing your dishwasher in an Ikea kitchen, the final adjustments are crucial to ensure everything works perfectly and looks seamless. These small details can make a big difference in both performance and appearance. Taking your time here helps avoid future hassles and keeps your kitchen running smoothly.
Sealing Gaps And Finishing Touches
Check for any gaps between the dishwasher and the surrounding cabinetry. Even tiny spaces can let moisture or dirt sneak in, which might cause damage over time.
Use a high-quality silicone sealant to fill these gaps. It’s easy to apply and creates a waterproof barrier that keeps your kitchen clean and dry.
Double-check that the dishwasher door aligns perfectly with your Ikea cabinets. Adjust the leveling feet if needed to ensure it opens and closes smoothly without scraping.
Maintaining Your Dishwasher
Regular maintenance keeps your dishwasher running efficiently. Clean the filter every few weeks to prevent clogs and odors.
Run a cleaning cycle with dishwasher cleaner once a month. This helps remove mineral buildup and food residues that soap alone can’t handle.
Inspect the spray arms for blockages and wipe down the door seals to stop mold from forming. Have you noticed how a little upkeep saves you from expensive repairs later?
Troubleshooting Common Issues
If your dishwasher doesn’t start, check the power supply and make sure it’s properly plugged in. Sometimes, the problem is as simple as a tripped circuit breaker.
Leaks often come from loose hoses or worn-out seals. Tighten hose clamps and replace any damaged seals to stop water from escaping.
Strange noises might mean something is stuck in the spray arm or the dishwasher isn’t level. Adjust the feet or clear out any debris to restore quiet operation.

Credit: www.reddit.com
Frequently Asked Questions
How Do I Prepare My Ikea Kitchen For Dishwasher Installation?
First, measure the available space to ensure the dishwasher fits. Remove the cabinet door and baseboard. Turn off water and power supply before starting installation. Follow Ikea’s kitchen manual for specific adjustments and use recommended fittings for a secure setup.
What Tools Are Needed To Install A Dishwasher In Ikea Kitchens?
You will need a screwdriver, adjustable wrench, drill, measuring tape, and level. Additionally, have plumber’s tape and wire connectors ready. These tools help in securing the dishwasher, connecting water lines, and ensuring it is level and properly aligned.
Can I Install Any Dishwasher Model In An Ikea Kitchen?
Ikea kitchens support standard dishwasher sizes, but always check dimensions first. Choose a dishwasher that fits the allocated space and matches plumbing and electrical connections. Some models may require additional adapters or trims for a perfect fit.
How Do I Connect The Dishwasher To Water And Drainage?
Connect the dishwasher’s water inlet to the cold water supply using a hose. Attach the drain hose to the sink drain or garbage disposal. Ensure connections are tight and leak-free to prevent water damage and maintain proper drainage.
Conclusion
Installing a dishwasher in your Ikea kitchen is simple and clear. Follow the steps carefully to avoid mistakes. Measure the space well to ensure a good fit. Connect water, drain, and power safely for best results. Take your time and check each part twice.
Your kitchen will feel more convenient and modern. Enjoy clean dishes without extra work every day. A little effort brings big comfort. You can do this!