
Is your Kitchen Aid oven looking dirty or smelling a bit off? Keeping it clean isn’t just about looks—it helps your food taste better and your oven work longer.
But cleaning an oven can feel like a tough job. What if you could make it quick, easy, and even satisfying? In this guide, you’ll discover simple steps to get your Kitchen Aid oven sparkling again without harsh chemicals or hours of scrubbing.
Ready to bring back that fresh, spotless kitchen feeling? Let’s dive in and make your oven shine like new.
Preparing Your Oven
Preparing your KitchenAid oven for cleaning makes the process easier and safer. Taking time to get ready prevents damage and mess. It also helps clean every corner well. Start by knowing what you need, then follow safety steps. Finally, clear the space inside by taking out racks. This preparation sets the stage for effective cleaning and care.
Gathering Cleaning Supplies
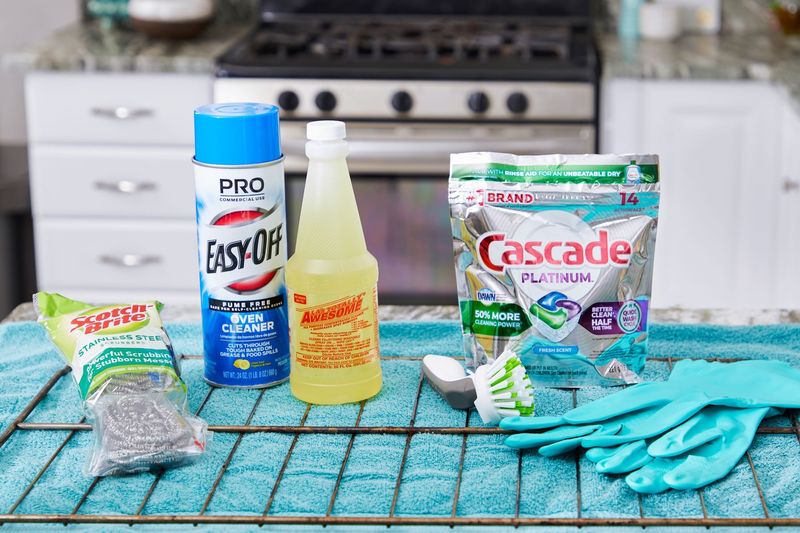
Collect all necessary cleaning tools before starting. Use gentle cleaners safe for KitchenAid ovens. Avoid harsh chemicals that can harm surfaces. Common supplies include:
- Soft cloths or sponges
- Baking soda
- White vinegar
- Spray bottle
- Rubber gloves
- Plastic or silicone scraper
Having these ready saves time and keeps cleaning smooth.
Safety Precautions
Unplug the oven to avoid electric shock. Ensure the oven is cool to prevent burns. Wear gloves to protect your hands from cleaners. Work in a well-ventilated area to avoid inhaling fumes. Keep children and pets away during cleaning. These steps keep you safe and comfortable.
Removing Oven Racks
Take out all oven racks before cleaning inside. Pull racks out slowly to avoid damage. Soak racks in warm, soapy water for easier cleaning. Use a sponge or brush to scrub off grime. Dry racks completely before placing them back. This clears space and helps clean the oven thoroughly.
Credit: www.kitchenaid.com
Cleaning The Oven Interior
Cleaning the oven interior keeps your Kitchen Aid oven working well. Grease and food spills build up over time. Regular cleaning stops smoke and bad smells. It also helps your oven heat evenly.
Choosing The Right Cleaner
Select a cleaner safe for Kitchen Aid ovens. Avoid harsh chemicals that can damage surfaces. Use a mild, non-abrasive cleaner or a natural mix of baking soda and water. Check product labels to ensure no harmful fumes or residues.
Applying The Cleaner
Spray or spread the cleaner evenly inside the oven. Cover all dirty areas, especially corners and racks. Let the cleaner sit for 15 to 20 minutes. This softens grease and baked-on food for easier removal.
Scrubbing Stubborn Stains
Use a soft scrub brush or sponge to clean tough spots. Apply gentle pressure to avoid scratching the oven surface. For very stubborn stains, reapply the cleaner and wait a few more minutes. Avoid metal scouring pads, which can cause damage.
Wiping Down Residue
Wipe away loosened dirt and cleaner with a damp cloth. Rinse the cloth and wipe again to remove all residue. Dry the interior with a clean towel to prevent streaks. Ensure no cleaner remains before using the oven again.
Cleaning Oven Racks
Oven racks can get greasy and dirty over time. Soaking them in warm, soapy water loosens grime. Scrubbing gently with a brush restores their shine without damage.
Cleaning your KitchenAid oven can feel like a daunting task, but giving those oven racks a thorough cleaning can truly transform your cooking experience. Grease and grime build up over time, affecting not just the look of your oven but also its performance. The good news is, cleaning oven racks can be straightforward and, dare I say, even satisfying. Let's break it down into manageable steps.
Soaking Racks
The first step is to soak those racks. Fill your bathtub with warm water and add a few drops of dish soap. You might be tempted to skip this, but soaking softens the grime and makes the later steps much easier. Let the racks sit for at least four hours. If you can, leave them overnight. This gives the soap time to work its magic, loosening stubborn spots.
Scrubbing And Rinsing
After soaking, it's time to scrub. Use a non-abrasive scrubber or an old toothbrush to remove any remaining grime. You don’t need to apply much pressure; just gentle circular motions will do the trick. Remember to rinse thoroughly. Any soap residue left on the racks can give off an unpleasant smell the next time you use the oven. You want them as clean as a whistle!
Drying Tips
Properly drying your racks is crucial to prevent rust. Use a clean, dry towel to wipe them down. Patience is key here—let them air dry completely before placing them back in the oven. Consider placing them in a sunny spot if you can. Sunlight helps evaporate any leftover moisture. Have you ever noticed how satisfying it feels to see those sparkling racks back in your oven, ready for action?
Cleaning The Oven Door
The oven door often shows the most wear and tear from daily cooking. Grease splatters, fingerprints, and baked-on grime can make it look dull and dirty. Taking time to clean the oven door properly not only improves its appearance but also helps maintain the appliance’s function and safety.
Removing Grease And Grime
Start by wiping down the door with a damp cloth to remove loose dirt. For tougher grease, mix a few drops of dish soap with warm water and apply it with a soft sponge. Avoid harsh scrubbing pads that can scratch the surface.
If you notice stubborn spots, apply a paste made from baking soda and water. Let it sit for 15 minutes before gently scrubbing. This method breaks down grease without damaging the door’s finish.
Cleaning Glass Panels
Glass panels can get cloudy from steam and food splatters. Use a glass cleaner or a vinegar-water solution sprayed onto a microfiber cloth—not directly on the glass—to avoid streaks. Wipe the glass gently in circular motions for a clear, streak-free shine.
For baked-on stains, a razor blade scraper held at a 45-degree angle can carefully remove residue. Be cautious not to scratch the glass, and test in a small area first. Clean the edges and corners thoroughly, as grime tends to build up there.
Polishing The Exterior
The exterior of your oven door benefits from a quick polish to restore its shine. Use a stainless steel cleaner or olive oil on a soft cloth to buff smudges and fingerprints. This adds a protective layer and keeps your oven looking new.
Don’t forget the handles—they often get overlooked but can harbor dirt and oils. Wipe them down regularly with a mild cleaner to keep them hygienic and shiny. Polishing these small details can make a big difference in your kitchen’s overall look.
Maintaining Your Oven
Maintaining your Kitchen Aid oven is key to keeping it running efficiently and extending its lifespan. A clean oven not only looks better but also cooks food more evenly and safely. Let’s explore some practical ways you can keep your oven in top shape with simple habits and smart use of its features.
Regular Cleaning Schedule
Set a cleaning routine that fits your cooking habits. If you use your oven daily, aim to wipe spills immediately after it cools down and do a deeper clean every month. For occasional users, a thorough clean every two to three months works well.
Keeping a small cleaning kit nearby, like a soft cloth, gentle cleaner, and a scraper, makes it easy to tackle messes as they happen. Do you notice certain spots get dirty faster? Target those areas more often to avoid tough buildup.
Preventing Future Buildup
One simple trick is to line the bottom of your oven with a reusable oven liner or a sheet of aluminum foil (just make sure it doesn’t block vents). This catches drips and crumbs before they burn onto the surface.
Also, avoid cooking dishes that spill excessively without a cover. Using lids or foil can reduce splatters, saving you from scrubbing later. How often do you check your oven racks and door seals? Keeping these clean stops grime from spreading inside.
Using Self-cleaning Features
Your Kitchen Aid oven likely has a self-cleaning mode that uses high heat to burn off residue. This feature is convenient but should be used carefully — remove racks and large debris first to prevent damage.
Always follow the manufacturer’s instructions and ventilate your kitchen well during the cycle. If the self-clean isn’t enough, a quick manual touch-up afterward can handle any leftover spots. Have you tried combining self-clean with natural cleaners like baking soda for tougher stains?
Credit: decorhint.com

Credit: www.kitchenaid.com
Frequently Asked Questions
How Do I Start Cleaning My Kitchen Aid Oven?
Begin by removing all racks and loose debris. Use a mild cleaner or baking soda paste to scrub the interior. Avoid harsh chemicals to protect the oven’s surface and components.
What Is The Best Cleaner For Kitchen Aid Ovens?
Use a non-abrasive cleaner like baking soda, vinegar, or a commercial oven cleaner safe for Kitchen Aid. Avoid bleach or ammonia-based products to prevent damage.
How Often Should I Clean My Kitchen Aid Oven?
Clean your oven every 3 to 6 months, or after heavy use. Regular cleaning prevents buildup and maintains efficient performance.
Can I Use The Self-cleaning Feature On Kitchen Aid Ovens?
Yes, Kitchen Aid ovens have a self-cleaning mode. Follow the manufacturer’s instructions carefully to avoid smoke or damage during the cycle.
Conclusion
Cleaning your Kitchen Aid oven keeps it working well and looking nice. Regular care stops grime from building up inside. Use gentle cleaners and follow the steps carefully. Take your time and clean every corner. A clean oven helps your food taste better.
Keep your kitchen safe and fresh. Simple cleaning habits save you time later. Enjoy cooking with a spotless oven every day.