

Are you tired of washing dishes by hand in your old kitchen? Installing a dishwasher can save you time and make your daily chores easier.
But how do you fit a modern appliance into an older space? Don’t worry—you don’t need to be a pro to do it yourself. In this guide, you’ll learn simple, step-by-step instructions to install a dishwasher in your old kitchen.
By the end, you’ll have a smooth-running dishwasher that fits perfectly and works like a charm. Keep reading to discover how easy it can be to upgrade your kitchen and enjoy more free time every day.

Credit: www.thisoldhouse.com
Prepare The Area
Preparing the area before installing a dishwasher in an old kitchen is crucial. It helps avoid surprises and ensures a smooth installation process. Taking time to get the space ready saves effort and prevents damage to your kitchen.
Measure Space And Clear Cabinet
Start by measuring the space where you want to place the dishwasher. Use a tape measure to check the width, height, and depth of the cabinet or opening. Remember, dishwashers usually require a standard opening of about 24 inches wide, but older kitchens may have different sizes.
Next, clear out the cabinet or area completely. Remove any shelves, drawers, or items inside. This gives you room to work and prevents damage to stored items. You might find hidden issues like mold or water damage—catching these early saves headaches later.
Turn Off Water And Power
Before touching any plumbing or electrical connections, turn off the water supply to the kitchen. Locate the shutoff valve under the sink and close it. This step stops leaks or flooding during installation.
Also, switch off the power to the kitchen at your home's circuit breaker. Dishwashers need electricity, and working with power on can be dangerous. Double-check by testing the outlet with a voltage tester or plugging in a small appliance.
Have you ever started a project only to get stuck because you didn’t prepare your workspace? Taking these simple precautions makes your dishwasher installation safer and less stressful.
Gather Tools And Materials
Before you begin installing a dishwasher in your old kitchen, gathering the right tools and materials is essential. Having everything on hand saves time and reduces frustration during the process. It also helps you tackle unexpected challenges without scrambling for supplies.
List Essential Tools
Make sure you have the following tools ready:
- Adjustable wrench:For tightening water supply connections.
- Screwdrivers:Both flathead and Phillips for various screws.
- Drill with bits:To create or enlarge holes if necessary.
- Level:To ensure your dishwasher sits perfectly horizontal.
- Teflon tape:To seal threaded plumbing connections.
- Bucket and towels:To catch any water spills during installation.
- Pliers:Useful for gripping and bending wires or pipes.
Double-check your toolbox before starting. Missing even one tool can slow you down and increase stress.
Choose Dishwasher Model
Selecting the right dishwasher for your old kitchen involves more than just style. Measure the available space carefully to ensure the new unit fits without major cabinet modifications. Don’t forget to consider the location of water and electrical hookups.
Think about features that suit your daily needs, such as energy efficiency or noise level. A compact model might work better if your kitchen is small, while a full-size unit offers more capacity. Have you considered how the dishwasher’s door style will blend with your existing kitchen design?
Taking time to choose the right model upfront will save you from costly adjustments later. Remember, the perfect dishwasher fits both your kitchen and lifestyle seamlessly.
Remove Old Fixtures
Remove old fixtures to make space for your new dishwasher. Take out outdated kitchen elements carefully. Disconnect all plumbing and electrical connections before removing them.
Removing old fixtures is a crucial step when installing a dishwasher in an older kitchen. It might seem daunting, but with a bit of patience, you can handle it like a pro. The key is to proceed methodically and ensure you have the right tools at hand.
Disconnect Plumbing
Begin by turning off the water supply to your kitchen. This step is vital to prevent any leaks or floods. Use a wrench to disconnect the water line from the old dishwasher. Have a bucket ready to catch any water that might spill out. Disconnecting the plumbing might reveal some rust or sediment, especially in older kitchens. This is a good opportunity to assess the condition of your pipes.
Take Out Existing Dishwasher
Once the plumbing is disconnected, it's time to remove the old dishwasher. Open the dishwasher door and locate the mounting brackets that secure it to the countertop. Unscrew these brackets carefully. With the brackets removed, gently slide the dishwasher out from its space. Be cautious of any remaining water in the unit. It might be heavier than you expect, so having a friend to help can make this step easier. What surprises might you find hidden behind your old dishwasher? Dust bunnies are common, but you might also find forgotten kitchen gadgets or mismatched socks! Clearing out these discoveries can be oddly satisfying. Removing the old fixtures sets the stage for a fresh start. With a bit of elbow grease, you’re now ready to welcome a modern convenience into your kitchen.

Credit: www.reddit.com
Install Water Supply Line
Installing the water supply line is a key part of fitting a dishwasher in an old kitchen. It ensures the dishwasher receives water safely and without leaks. Take time to prepare the water connection correctly to avoid problems later.
Attach Saddle Valve Or Connector
Find the cold water pipe near the dishwasher’s location. Use a saddle valve or a connector to tap into this pipe. The saddle valve clamps around the pipe and allows water flow to the dishwasher. Tighten the valve securely to prevent leaks. Drill a small hole in the pipe if needed for water flow. Wrap plumber’s tape around the threads to seal connections well. Make sure the valve is off before connecting the water line.
Secure Water Line To Dishwasher
Use a flexible water supply line to connect the valve to the dishwasher inlet. Attach one end of the line to the saddle valve or connector. Attach the other end to the dishwasher’s water inlet valve. Hand-tighten the fittings, then use a wrench for a snug fit. Avoid over-tightening to prevent damage. Secure the water line along the wall or cabinet using clips or brackets. Check for kinks or bends that could block water flow. Turn on the water supply and check all connections for leaks.
Connect Drain Hose
Connecting the drain hose is a key step when installing a dishwasher in an old kitchen. It allows wastewater to flow out safely without causing leaks or clogs. The hose must be attached securely to the sink drain or garbage disposal. Proper hose placement also ensures smooth drainage and prevents backflow.
Attach To Sink Drain Or Garbage Disposal
First, find the dishwasher drain outlet on the sink drain or garbage disposal. Usually, it is a small, raised pipe or a knockout plug on the disposal unit. Remove the knockout plug if present by tapping it out carefully. Fit the drain hose over this outlet. Use a hose clamp to tighten the connection. This keeps the hose firmly attached and stops leaks.
Ensure Proper Hose Placement
Keep the drain hose elevated above the dishwasher's base. This helps prevent dirty water from flowing back into the machine. Avoid sharp bends or kinks in the hose. A smooth, curved path is best. Secure the hose along the cabinet wall with clips or zip ties. Check that the hose slopes downward towards the drain to support good water flow.
Set Up Electrical Connection
Setting up the electrical connection is a crucial part of installing a dishwasher in an old kitchen. It ensures your appliance runs safely and efficiently without tripping breakers or causing hazards. Before diving into wiring, you need to understand your kitchen's existing power setup and how it matches the dishwasher’s requirements.
Check Power Source Compatibility
First, identify the power source near your dishwasher’s spot. Most dishwashers require a dedicated 120-volt, 15- or 20-amp circuit. If your old kitchen lacks this, you might need to add a new circuit from the breaker panel.
Look for a grounded outlet under the sink or nearby cabinet. If you find only a two-prong outlet or none at all, an upgrade is necessary. Safety is key—using an incompatible or shared outlet can cause electrical problems.
Have you checked whether your electrical panel has enough capacity to add a new circuit? If it’s overloaded, consider consulting an electrician. This step might seem small, but it can save you from costly repairs later.
Connect Dishwasher Wiring
Once the power source is confirmed, focus on connecting the dishwasher wiring. Most dishwashers come with a power cord or require hardwiring through a junction box. Choose the method that matches your kitchen setup.
Turn off the main power before handling any wiring to avoid shocks. Connect the dishwasher’s wires to the house wiring by matching colors: black to black (hot), white to white (neutral), and green or bare copper to ground. Use wire nuts to secure connections and wrap them with electrical tape for extra safety.
After wiring, carefully tuck the wires into the junction box and attach the cover plate. Turn the power back on and test the dishwasher to ensure it powers up without tripping breakers. If you notice any flickering lights or smells, shut off power immediately and recheck your connections.
Position Dishwasher
Positioning the dishwasher correctly in an old kitchen is vital for smooth operation. The space might be tight or uneven. Careful placement ensures the appliance fits well and works properly. This step sets the foundation for a successful installation and long-lasting use.
Slide Into Cabinet Space
Gently slide the dishwasher into the cabinet opening. Align the front with the countertop edge. Avoid forcing the unit to prevent damage. Use a helper if the dishwasher is heavy. Check for obstructions like pipes or wiring inside the cabinet. Adjust the position until it fits flush and straight.
Level And Secure Unit
Check the dishwasher’s level using a bubble level tool. Place it on top and side edges. Adjust the front legs by turning them clockwise or counterclockwise. The unit must be perfectly level to avoid leaks and noise. Secure the dishwasher to the cabinet with screws through the mounting brackets. Tighten them firmly but do not over-tighten. Proper leveling and securing keep the dishwasher stable during use.
Test Dishwasher Operation
Testing the dishwasher operation is a vital step after installation. It confirms the machine works correctly and prevents water damage. A thorough test ensures all connections are secure and the appliance runs smoothly.
Careful observation during testing helps catch leaks and electrical issues early. This saves time and costly repairs later. Follow simple steps to verify water flow, power supply, and cleaning cycles.
Turn On Water And Power
Start by turning on the water supply valve. Make sure it opens fully to allow water flow. Next, plug in the dishwasher to the power outlet. Check that the power is on and the control panel lights up.
Listen for sounds indicating the machine is ready. If no lights appear, check the circuit breaker or outlet. Confirm water pressure is stable to avoid poor cleaning performance.
Run Test Cycle For Leaks And Function
Select a short test cycle on the dishwasher control panel. Watch closely for any water leaks around connections or hoses. Inspect the floor under and around the dishwasher for moisture.
Observe the dishwasher during the wash and rinse phases. Ensure water sprays and drains properly without strange noises. After the cycle, check the inside for cleanliness and dryness.
Repeat the test if any problems appear. Fix leaks or electrical faults before regular use. Proper testing guarantees safe and effective dishwasher operation in your old kitchen.
Final Adjustments
Final adjustments are crucial to complete the dishwasher installation. They ensure the appliance fits perfectly and works efficiently. Taking time to seal gaps and tidy up the area improves both function and appearance.
Seal Gaps And Finish Trim
Check for any spaces between the dishwasher and cabinets. Small gaps can cause heat and moisture to escape. Use a waterproof sealant or caulk to close these gaps. This prevents water damage and keeps your kitchen clean.
Attach trim pieces to cover rough edges and gaps. These trims give a polished, built-in look. Use screws or adhesive strips depending on the trim style. Make sure the trim fits snugly without blocking the dishwasher door.
Clean Up Workspace
Remove all tools, packaging, and debris from the installation area. Wipe down surfaces to remove dust and fingerprints. Check the dishwasher’s interior for any leftover materials.
Run a quick wash cycle to test operation and flush out any dirt. Keep the workspace tidy to avoid accidents and maintain kitchen hygiene. A clean area helps your new dishwasher shine and perform well.
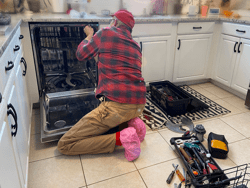
Credit: www.homeserve.com
Frequently Asked Questions
How Do I Prepare My Old Kitchen For Dishwasher Installation?
First, measure available space carefully. Next, turn off water and power supply. Remove old cabinetry if needed. Ensure plumbing and electrical outlets meet dishwasher requirements for smooth installation.
What Plumbing Changes Are Needed For An Old Kitchen Dishwasher?
You may need to add a water supply line and a drain connection. Ensure hoses are compatible and leak-free. Installing a dishwasher requires proper water flow and drainage setup for efficient operation.
Can I Install A Dishwasher Without Professional Help?
Yes, if you have basic plumbing and electrical skills. Follow manufacturer instructions closely. However, complex wiring or plumbing might require a licensed professional to ensure safety and code compliance.
What Electrical Requirements Must My Old Kitchen Meet?
Your dishwasher needs a dedicated 120V, 15-20 amp circuit. Ensure the outlet is grounded and near the installation site. Check local codes to confirm electrical safety standards are met.
Conclusion
Installing a dishwasher in an old kitchen is doable with patience. Measure space carefully and prepare plumbing and electrical connections first. Take your time to follow each step clearly. A good fit saves water and effort in the long run.
Small changes can make old kitchens work like new. Enjoy cleaner dishes and more free time after installation. Keep instructions handy for future reference and simple maintenance. A well-installed dishwasher makes kitchen life easier every day.