
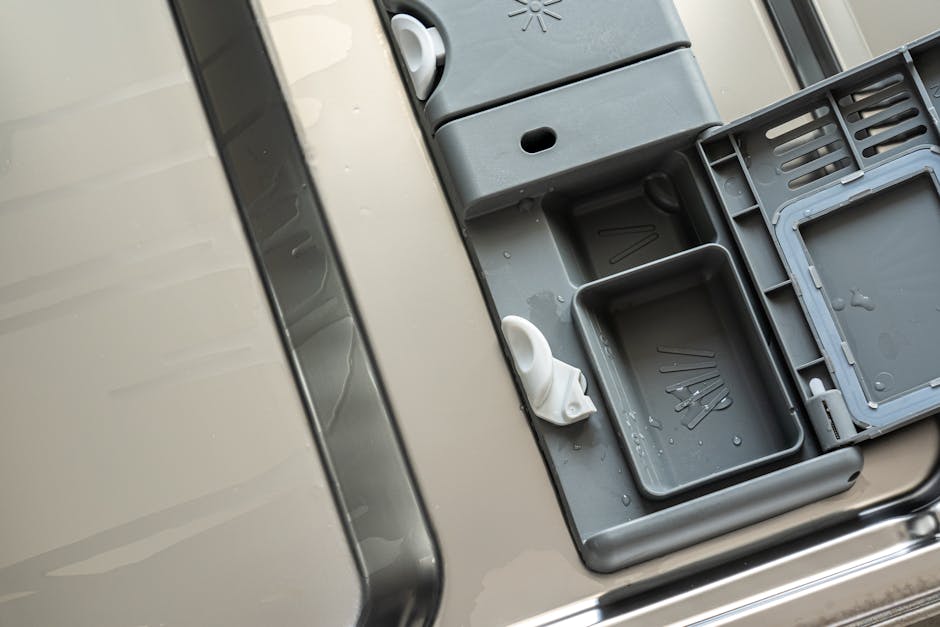
Is your Kitchen Aid dishwasher not cleaning dishes like it used to? The problem might be a clogged filter.
Knowing how to remove your Kitchen Aid dishwasher filter is the first step to keeping your appliance running smoothly. In this guide, you’ll discover simple, clear steps to take out the filter safely and quickly. By following these easy instructions, you’ll save time, avoid costly repairs, and get your dishwasher back to peak performance.
Keep reading to learn exactly what you need to do—your spotless dishes are just a few steps away!
Credit: artech.ae
Locate The Dishwasher Filter
The dishwasher filter is usually located at the bottom inside the dishwasher tub. Remove the lower rack to access and spot the round or rectangular filter easily. Check near the spray arm for a twist-and-lift type filter that traps food particles.
Open The Dishwasher Door
Start by opening the dishwasher door fully. This gives clear access to the bottom of the dishwasher. Make sure the dishwasher is off before opening the door.
Pull down the door gently and look inside. The filter is located at the bottom, near the spray arm.
Find The Filter Assembly
Look for a round or rectangular part at the bottom center. This is the filter assembly. It may have a handle or a twist knob.
The filter keeps food particles from clogging the drain. It usually sits under the lower spray arm.
Remove any racks or trays if they block your view. This will help you see the filter clearly.
Prepare For Filter Removal
Preparing to remove the Kitchen Aid dishwasher filter is important for a smooth process. Taking simple steps first helps avoid damage and makes the task easier. Follow these instructions before handling the filter.
Turn Off The Dishwasher
Make sure the dishwasher is completely off. Unplug it or switch off the power at the circuit breaker. This prevents any accidents while you work on the filter. Safety first.
Clear The Bottom Rack
Remove all dishes and utensils from the bottom rack. This gives you full access to the filter area. It also stops any items from falling inside during removal. Keep the space clear and clean.
Remove The Filter
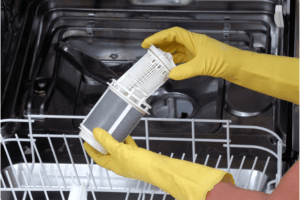
Open the dishwasher door and locate the filter at the bottom. Twist and lift the filter gently to remove it. Clean the filter under running water before placing it back.
Removing the KitchenAid dishwasher filter is a straightforward task, but it plays a crucial role in maintaining your appliance's efficiency. A clean filter ensures your dishes come out sparkling, and your machine operates smoothly. If you've never cleaned your dishwasher filter, you're not alone. Many people overlook this simple but essential maintenance step. Let's dive into the practical steps of removing the filter.
Unlock The Filter
Begin by locating the filter at the bottom of your dishwasher. It's typically circular and positioned around the middle of the dishwasher floor. Gently turn the filter counterclockwise to unlock it. You may hear a slight click indicating it's free to be lifted. Don't force it; if it feels stuck, try gently wiggling it to loosen any debris.
Lift Out The Filter Assembly
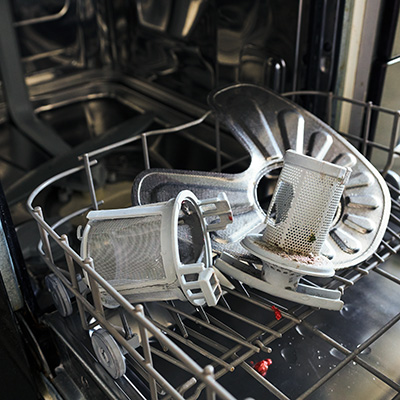
Once unlocked, carefully lift the filter assembly out of its compartment. It may come out as a single piece or in two parts, depending on your dishwasher model. If it separates, note how the pieces fit together for easier reassembly. Remember to rinse the filter under warm water to remove any trapped food particles. You might be surprised at how much debris can accumulate over time. Regular cleaning of your filter not only prolongs the life of your dishwasher but also ensures you don't end up with residue on your freshly cleaned dishes. When was the last time you cleaned yours?
Credit: www.finishdishwashing.ca
Clean The Filter
Cleaning the dishwasher filter is essential for maintaining its performance. A clean filter catches food particles and prevents clogs. Regular cleaning keeps your dishwasher running smoothly and your dishes spotless.
Rinse Under Warm Water
Hold the filter under warm running water. The warm water helps loosen grease and food debris. Avoid using hot water to prevent damage. Rinse until most dirt and particles are gone. This step prepares the filter for deeper cleaning.
Use A Soft Brush To Remove Debris
Take a soft brush, like a toothbrush, to scrub the filter gently. Focus on mesh areas and edges where debris collects. Avoid harsh scrubbing to protect the filter material. Brush in small circles to lift stuck particles. After brushing, rinse the filter again under warm water.
Reinstall The Filter
Reinstalling the Kitchen Aid dishwasher filter correctly is key to keeping your appliance running smoothly. If the filter isn’t placed back properly, it can cause poor cleaning results or even damage the dishwasher over time. Let’s focus on how to position and secure the filter so it works exactly as it should.
Place The Filter Back In Position
Start by aligning the filter with the base of the dishwasher’s filter housing. You’ll notice it fits into a specific spot—don’t force it if it feels stuck. Gently lower the filter into place until it sits flat and flush with the surrounding area.
Pay attention to the shape of the filter; it usually has tabs or grooves that guide you. If you’ve ever tried to fit a puzzle piece the wrong way, you know how important this step is. Getting it right ensures water flows through the filter correctly.
Lock The Filter Securely
Once the filter is positioned, turn the locking mechanism to secure it. Most Kitchen Aid models require a simple twist to the right or left, but check your manual if unsure. This lock keeps the filter from moving during the wash cycle.
If you don’t lock it properly, you might hear unusual noises or find residue left on your dishes. Have you ever ignored a small click and later regretted it? Don’t skip this step; a firm lock guarantees the filter stays put and your dishwasher runs efficiently.

Credit: www.reddit.com
Test The Dishwasher
Testing your Kitchen Aid dishwasher after removing and cleaning the filter is crucial to ensure everything works smoothly. It’s not just about running the machine; it’s about making sure your efforts truly paid off. By carefully observing the dishwasher during a test cycle, you can catch any issues early and avoid future headaches.
Run A Short Cycle
Choose a quick wash cycle to test the dishwasher’s performance. This saves water and time while still giving the machine a good check. Pay attention to any unusual noises or leaks during the run, as these can indicate problems with filter placement or other parts.
Running a short cycle also helps you verify that the filter is correctly seated and the water flows properly. If the dishwasher stops mid-cycle or shows error codes, it’s a sign to double-check the filter installation before proceeding.
Check For Proper Operation
After the cycle ends, open the dishwasher and inspect the dishes and the interior. Are the dishes clean and free of debris? This is the ultimate test of whether the filter is doing its job effectively.
Look for standing water or leftover food particles around the filter area. Such signs mean the filter might be clogged or not installed right. Ask yourself: does the dishwasher run as quietly and efficiently as it did before?
Taking these simple but crucial steps ensures your Kitchen Aid dishwasher continues to perform at its best after you remove and clean the filter. Have you noticed a difference in your dishwasher’s performance after cleaning the filter? Share your experience—it might help others troubleshoot their machines too.
Frequently Asked Questions
How Do I Remove The Kitchen Aid Dishwasher Filter?
To remove the filter, open the dishwasher door and locate the filter at the bottom. Twist the filter counterclockwise and lift it out carefully. Clean it regularly to ensure optimal dishwasher performance.
How Often Should I Clean My Kitchen Aid Dishwasher Filter?
It’s best to clean the filter every 1 to 3 months. Frequent cleaning prevents clogs and keeps your dishwasher running efficiently. If you use the dishwasher heavily, clean the filter more often.
What Tools Do I Need To Remove The Dishwasher Filter?
No special tools are required. You can remove the filter by hand by twisting and lifting it out. If the filter is stuck, a soft brush can help loosen debris before removal.
Can A Dirty Filter Cause Dishwasher Problems?
Yes, a clogged filter can cause poor cleaning and drainage issues. It may lead to unpleasant odors and damage to the dishwasher. Regular filter cleaning helps maintain proper function and extends appliance life.
Conclusion
Cleaning your Kitchen Aid dishwasher filter keeps your dishes fresh and clean. Regular removal prevents clogs and bad smells. Follow the steps carefully to avoid damage. A clean filter helps your dishwasher work well. Take a few minutes to clean it monthly.
Simple care extends the life of your machine. Keep your kitchen running smoothly with this easy task.