

Are your kitchen cabinets looking tired or outdated? You don’t have to replace them to give your kitchen a fresh, new look.
Masking your kitchen cabinets is a simple, cost-effective way to transform your space quickly. In this guide, you’ll discover easy steps and smart tips to cover up imperfections, update the style, and protect your cabinets—all without the hassle of a full renovation.
Ready to see how you can breathe new life into your kitchen? Keep reading, and you’ll learn exactly how to mask your kitchen cabinets like a pro.
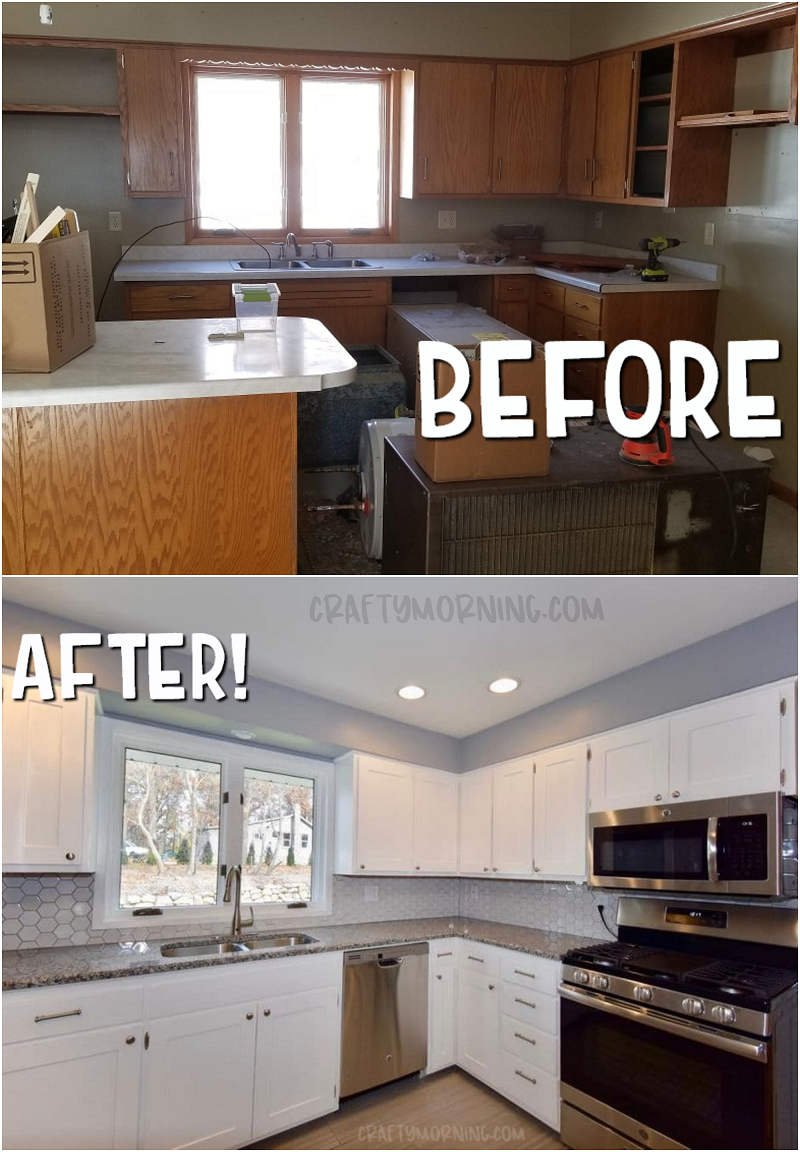
Credit: www.craftymorning.com
Preparing Cabinets For Masking
Preparing your kitchen cabinets for masking is a crucial step that sets the foundation for a smooth and professional finish. Skipping or rushing this phase can lead to paint peeling or uneven surfaces that spoil all your hard work. Taking the time to properly clean, remove hardware, and sand the cabinets ensures the paint adheres well and lasts longer.
Cleaning Surfaces
Start by wiping down all cabinet surfaces with a mixture of warm water and mild detergent. Grease and dirt build up over time and can prevent paint from sticking properly. Use a sponge or cloth and focus on corners and edges where grime tends to hide.
If you encounter stubborn grease spots, try a solution of vinegar and water or a specialized kitchen degreaser. Let the cabinets dry completely before moving on. Have you noticed how much cleaner your cabinets look after a thorough wash? That’s your first sign of good prep work.
Removing Hardware
Take off all knobs, handles, and hinges before masking. This step avoids paint build-up on hardware and helps you reach every nook. Keep screws and small parts organized in labeled containers to avoid losing them.
Removing doors and drawers can make sanding and painting easier, but if that feels like too much, at least remove the hardware. How often do you actually clean behind your cabinet doors? This is a perfect chance to do that without hassle.
Sanding Tips
Lightly sanding your cabinets creates a rough surface for the paint to grip. Use fine-grit sandpaper (around 220 grit) to avoid damaging the wood or laminate. Sand in the direction of the grain for the smoothest result.
Don’t forget to wipe away dust with a tack cloth or damp rag after sanding. Excess dust can cause bubbles or uneven paint layers. Ever tried painting over dusty surfaces? The paint sticks poorly and peels fast—so don’t skip this step.
Choosing The Right Masking Materials
Choosing the right masking materials is key to a clean, professional finish. The right supplies protect surfaces and save time during cleanup. Quality materials also prevent paint bleed and damage to your cabinets.
Picking masking tape and coverings made for painting improves results. The tools you use make the process easier and more precise. Understanding different options helps you prepare your kitchen cabinets properly.
Types Of Masking Tape
- Painter’s Tape:Designed for clean edges, easy to remove without residue.
- Frog Tape:Specially treated to block paint bleed, ideal for sharp lines.
- Drafting Tape:Gentle on surfaces, good for delicate cabinet finishes.
- Standard Masking Tape:Affordable but may leave residue or damage paint.
Protective Coverings
- Plastic Sheeting:Blocks paint splatter on floors and counters.
- Drop Cloths:Reusable fabric covers that absorb spills well.
- Paper Masking:Lightweight and easy to tape around cabinet edges.
- Cardboard Panels:Rigid option for protecting nearby surfaces.
Tools You Need
- Utility Knife:Cuts tape and coverings to exact size.
- Measuring Tape:Ensures precise coverage and alignment.
- Paint Scraper or Putty Knife:Helps smooth tape edges for tight seals.
- Gloves:Protect hands from paint and adhesives.
Step-by-step Masking Process
Masking kitchen cabinets can seem like a daunting task, but breaking it down into manageable steps makes it achievable for anyone. Whether you're preparing for a fresh coat of paint or simply want to protect your cabinets during a DIY project, a well-executed masking process is essential. Let's dive into the step-by-step process that ensures your kitchen cabinets are perfectly protected.
Taping Edges And Corners
Start with high-quality painter’s tape to ensure clean lines and prevent paint bleed. Carefully tape along the edges and corners of your cabinets, making sure to press down firmly. This creates a secure seal, which is crucial for achieving a professional-looking finish.
Don't forget the small details like the inner edges of cabinet doors and drawer faces. These areas often get overlooked, leading to messy paint lines. A little extra time spent here pays off with a polished result.
Covering Glass And Fixtures
If your cabinets have glass doors or intricate fixtures, take extra care in covering them. Use newspaper or craft paper to shield glass surfaces and secure them with tape. This prevents any accidental splatters or smudges during your project.
For cabinet knobs and handles, consider removing them if possible. If not, wrap them tightly in plastic wrap and secure with tape to keep them protected.
Securing Drop Cloths
To safeguard your kitchen floors and countertops, lay down drop cloths beneath your working area. Choose heavy-duty cloths that won't easily shift, protecting against spills and drips.
Secure the cloths around the base of your cabinets with tape to ensure they stay in place. This not only protects your surfaces but also provides a clean area to work, enhancing both safety and efficiency.
What’s your go-to tip for masking cabinets? Sharing your insights might just help someone achieve their best DIY result yet!

Credit: food52.com
Painting Tips For A Smooth Finish
Achieving a smooth finish on your kitchen cabinets can transform the entire look of your space. The right painting approach ensures your work lasts longer and looks professional. Let’s dive into practical painting tips that make your cabinets stand out with a flawless surface.
Selecting Paint And Primer
Choosing the right paint and primer is key to a smooth finish. Opt for a high-quality primer designed for wood or laminate, depending on your cabinet material. This helps the paint stick better and prevents peeling later on.
For paint, pick a semi-gloss or satin finish. These finishes are easier to clean and show fewer brush marks. Avoid flat paints, as they tend to chip and don’t hold up well in kitchen environments.
Applying Paint Evenly
Applying paint evenly is where many DIYers stumble. Use a high-quality brush or a foam roller to apply thin coats. Thick layers lead to drips and uneven drying.
Work in small sections and maintain a wet edge to avoid lap marks. Don’t rush—let each coat dry before applying the next. I once tried to speed up the process, and it cost me extra sanding and touch-ups.
Drying And Curing Times
Patience pays off when it comes to drying and curing times. Allow the paint to dry to the touch before adding another coat—usually a few hours. However, curing can take several days to a week depending on the paint type.
This waiting period might seem long, but it’s essential. Handling cabinets too soon can cause smudges or dents. Think about your schedule and plan your painting project around these natural breaks.
Removing Masking And Final Touches
Removing masking tape and completing the final touches are crucial to a clean kitchen cabinet makeover. This stage ensures sharp paint lines and a professional look. Handle the tape carefully to avoid peeling paint or leaving residue. Final details like touching up mistakes and reinstalling hardware give the cabinets a fresh, polished finish.
Peeling Tape Without Damage
Peel the masking tape slowly at a 45-degree angle. Pulling it back gently helps prevent paint from lifting. Remove tape while the paint is still slightly wet for smooth edges. Avoid pulling tape too fast or at a sharp angle. Clean any leftover adhesive with a soft cloth and mild cleaner.
Touching Up Mistakes
Check cabinets for any paint smudges or missed spots. Use a small brush for precise touch-ups. Match the paint color carefully to blend repairs seamlessly. Lightly sand rough edges before repainting to smooth the surface. Allow touch-ups to dry fully before moving on.
Reinstalling Hardware
Wait until paint is completely dry before reattaching hardware. Use a screwdriver to secure knobs and handles firmly. Check alignment to keep doors and drawers functional. Replace any damaged screws or hardware pieces. Clean hardware to remove dust and fingerprints before reinstalling.

Credit: food52.com
Common Mistakes To Avoid
Masking kitchen cabinets can be tricky without the right care. Many make simple errors that cause paint to bleed or peel. Avoiding these common mistakes helps achieve a clean, professional look. Careful preparation and patience are key to perfect results.
Using The Wrong Tape
Choosing the wrong tape leads to paint leaks and damage. Avoid regular masking tape meant for paper. Use painter’s tape designed for delicate surfaces. It sticks well but removes cleanly without peeling paint. Test a small area before full application.
Skipping Surface Prep
Not cleaning or sanding the cabinets causes poor paint adhesion. Dirt and grease block paint from sticking properly. Wipe surfaces with a degreaser and let dry. Lightly sand to create a rough texture for paint grip. Skipping this step leads to peeling and uneven coverage.
Rushing The Process
Hurrying leads to sloppy edges and visible brush marks. Allow tape to set firmly before painting. Paint thin, even coats and let each dry completely. Removing tape too soon smears paint and ruins sharp lines. Patience ensures smooth, crisp results on your cabinets.
Frequently Asked Questions
How Do You Mask Kitchen Cabinets Before Painting?
Clean the cabinets thoroughly and sand them lightly. Apply painter’s tape around edges to protect surfaces. Use plastic sheets or drop cloths to cover nearby areas. This prevents paint from splattering and keeps your kitchen clean during the process.
What Materials Are Needed To Mask Kitchen Cabinets?
You need painter’s tape, plastic sheeting or drop cloths, cleaning supplies, and sandpaper. These materials protect surfaces and prepare cabinets for painting. Using quality tape ensures sharp paint lines and prevents paint bleed.
Can Masking Kitchen Cabinets Save Time In Renovation?
Yes, masking cabinets speeds up the painting process. It prevents paint splatters and reduces cleanup time. Proper masking allows you to focus on painting without worrying about mess or damage.
How To Ensure Clean Edges When Masking Cabinets?
Apply painter’s tape firmly along cabinet edges and trim. Press down edges to avoid paint seepage. Remove tape immediately after painting while paint is still wet for sharp, clean lines.
Conclusion
Masking kitchen cabinets can give your space a fresh look fast. Use the right tape and paper to protect surfaces well. Take your time to cover edges and corners neatly. This simple step keeps paint off unwanted spots. Clean up any mistakes right away for best results.
Enjoy your updated kitchen with confidence and pride. Small changes make a big difference in your home. Try this easy method and see the impact yourself.