
Are your kitchen tiles looking outdated or damaged? You don’t have to replace them to give your kitchen a fresh new look.
Covering your kitchen tiles is an easy and affordable way to transform your space without the hassle of a full renovation. You’ll discover simple, effective methods to cover your tiles and make your kitchen feel like new again. Keep reading to find out how you can upgrade your kitchen quickly and with minimal effort!
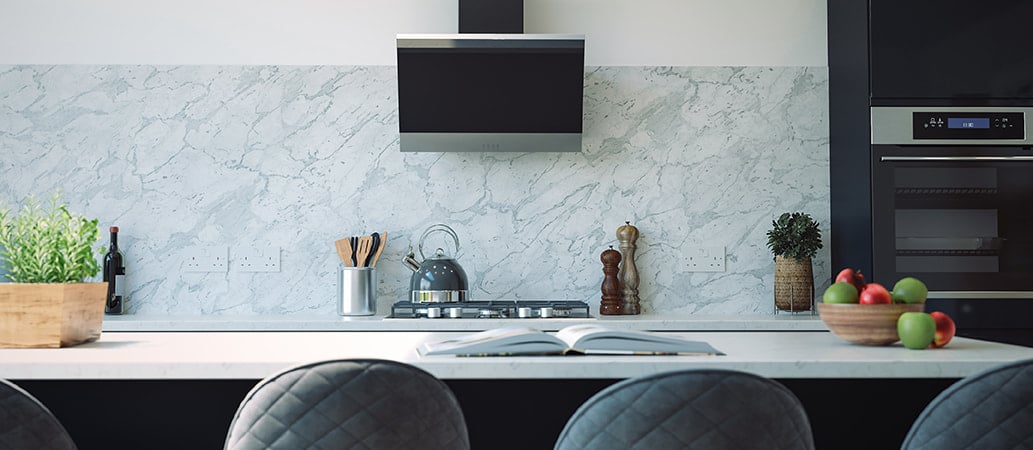
Choosing Tile Covering Options
Choosing the right tile covering option can transform your kitchen quickly. It updates your space without heavy renovations. Each option offers unique benefits and suits different styles. Consider durability, ease of application, and budget before deciding. Here are some popular tile covering ideas to explore.
Peel-and-stick Tiles
Peel-and-stick tiles offer a simple way to refresh your kitchen walls. They come in many colors and patterns. These tiles are easy to install and remove. Ideal for renters or those who want a fast change. They resist water and stains, making them practical for kitchens.
Paint And Stencils
Painting tiles allows for a custom look without replacing them. Use special tile paint for lasting results. Stencils help create patterns and add detail. This method is budget-friendly and creative. Clean the tiles well before starting to ensure paint sticks.
Wallpaper And Decals
Wallpaper designed for kitchens can cover tiles with style. Choose moisture-resistant types to avoid damage. Decals come in many shapes and sizes for flexible design. Both options allow easy changes over time. They add color and personality to your kitchen walls.
Fabric And Washi Tape
Fabric can soften the look of hard tiles. Use fabric glue or Mod Podge to fix it in place. Washi tape offers a quick and colorful solution. It comes in many patterns and is easy to remove. Both options suit small areas or accents for a fresh look.
Credit: www.hgtv.com
Preparing Tiles For Covering
Preparing your kitchen tiles before covering them is crucial for a smooth and lasting finish. Skipping this step can lead to peeling, bubbling, or uneven surfaces that ruin your hard work. Proper preparation ensures that whatever covering you choose—paint, adhesive panels, or decals—adheres well and looks professional.
Cleaning And Drying Tiles
Start by giving your tiles a thorough clean to remove grease, dirt, and grime. Use a strong degreaser or a mixture of warm water and dish soap for effective cleaning. Rinse the tiles well and dry them completely to prevent moisture from getting trapped under your covering.
Have you noticed how even a slight layer of grease can cause paint to bubble up? That’s why this step is non-negotiable. Take your time here; your future self will thank you.
Repairing Damaged Areas
Inspect your tiles for cracks, chips, or loose grout. These damaged spots can cause uneven surfaces and weaken the bond of your covering. Use tile filler or epoxy putty to fix cracks and chips, then smooth the area with a putty knife.
If grout is crumbling, remove the loose parts and refill with fresh grout. This creates a stable and flat base, which is essential for the covering to stick properly. Remember, a few minutes spent repairing now can save hours of frustration later.
Sanding And Priming
Sanding the tile surface lightly with fine-grit sandpaper helps roughen the glossy finish, giving the primer and covering something to grip onto. Don’t skip this step, especially if your tiles have a shiny or glazed surface.
After sanding, apply a high-quality primer designed for tiles. Priming seals the surface and improves adhesion. Wait for the primer to dry fully before moving on—rushing this can cause peeling or bubbling down the line.
Applying Peel-and-stick Tiles
Peel-and-stick tiles offer an easy way to cover kitchen tiles without mess. Simply clean the surface, peel the backing, and press tiles firmly in place. This quick method refreshes your kitchen look with minimal effort.
Applying peel-and-stick tiles in the kitchen offers a quick and easy update. These tiles require no special tools or messy grout. They’re perfect for a fast refresh without professional help. Follow the steps below for a seamless application.
Measuring And Cutting Tiles
Accurate measurements are key to a perfect fit. Use a tape measure to determine the area size. Mark the dimensions on the back of the tiles. Cut the tiles using a utility knife or scissors for precise edges. Always cut tiles slightly larger to ensure full coverage.
Aligning And Sticking Tiles
Start in a corner for the best alignment. Peel the backing off the tile. Carefully place it on the wall, pressing firmly. Use a level to ensure the tile is straight. Continue placing tiles in rows, aligning edges closely. Press each tile to secure it in place.
Sealing Edges
Seal edges for a neat finish. Use a caulk gun to apply silicone sealant along the tile edges. This prevents moisture from seeping behind the tiles. Smooth the sealant with a damp finger or a tool. Allow the sealant to dry completely for a waterproof finish.

Credit: www.reddit.com
Painting Tiles For A Fresh Look
Painting tiles can completely change the feel of your kitchen without the cost and hassle of a full renovation. It gives your space a fresh, modern look while allowing you to express your personal style. You don’t need to rip out tiles to make your kitchen look brand new—sometimes, all it takes is a little paint and creativity.
Choosing The Right Paint
Not all paints stick well to tile surfaces, so picking the right one is crucial. Look for epoxy or enamel paints designed specifically for tiles or high-gloss finishes. These paints resist moisture and wear, which is important in a kitchen environment.
Before painting, clean the tiles thoroughly and lightly sand them to help the paint adhere better. Have you ever tried painting without prepping the surface? It rarely turns out smooth or durable.
Using Stencils For Patterns
If plain painted tiles feel too simple, stencils can add stylish patterns without complicated tile replacement. You can create geometric designs, floral motifs, or even custom shapes that reflect your taste.
Use painter’s tape to hold stencils in place and dab paint lightly with a sponge for clean edges. Stencils give you control and creativity—have you thought about which patterns could brighten up your kitchen walls?
Sealing Painted Surfaces
After painting, sealing your work protects it from chipping and stains. Choose a clear polyurethane or tile-specific sealer for durability. This step locks in your design and makes cleaning easier.
Apply the sealer evenly with a foam brush, and avoid thick layers to prevent bubbling. Skipping this final touch might cost you more time and effort later when the paint starts to peel.
Using Wallpaper And Decals
Using wallpaper and decals is a creative way to cover kitchen tiles and instantly change the room's look. These options allow you to add color, patterns, or even textures without the mess and cost of retiling. Plus, they are often easier to update if your style changes or you want to refresh the space.
Selecting Waterproof Wallpaper
Not all wallpaper is suitable for kitchen use, especially around areas exposed to water and steam. Choose wallpaper labeled as waterproof or vinyl-coated to ensure durability. These types resist moisture and stains, making them perfect for kitchen walls and backsplashes.
Look for easy-to-clean surfaces. You’ll want a wallpaper that you can wipe down quickly after cooking splashes. Have you ever struggled with peeling wallpaper after a spill? Waterproof options prevent that frustration.
Applying Decals Smoothly
Decals are a fantastic way to add personality to your kitchen tiles without covering the entire surface. When applying decals, clean the tiles thoroughly to remove grease and dust. This step helps the decals stick better and last longer.
Use a squeegee or credit card to smooth out air bubbles as you apply each decal. Work slowly and carefully—rushing can cause wrinkles or peeling edges. If you mess up, many decals are repositionable, so don’t hesitate to lift and reapply.
Protecting With Sealants
After wallpaper or decals are in place, protecting them with a clear sealant extends their life. Choose a sealant that is compatible with your wallpaper or decal material and safe for kitchen use. This extra layer guards against moisture, stains, and everyday wear.
Sealants come in spray or brush-on forms. Sprays offer even coverage and are easier to apply in tight spaces. Think about how often you cook and clean—adding a sealant can save you time and hassle down the road.
Credit: www.mineraltiles.com
Creative Fabric And Tape Covers
Creative fabric and tape covers offer a fresh and flexible way to update your kitchen tiles without the mess of traditional renovations. They allow you to express your style with patterns, colors, and textures that can easily be changed whenever you want. Plus, they protect your tiles and can hide imperfections, making your kitchen look vibrant and new.
Choosing Durable Fabrics
Pick fabrics that can handle kitchen conditions like heat, moisture, and frequent cleaning. Look for materials such as oilcloth, vinyl, or laminated cotton because they resist stains and wipe clean easily. Avoid delicate fabrics like silk or linen, which absorb moisture and get damaged quickly.
Think about patterns and colors that complement your kitchen’s theme but also hide dirt. Darker shades or busy prints work well here. Have you ever noticed how some fabrics stay looking fresh longer just because of their texture? That’s worth considering when you shop.
Applying Washi Tape Patterns
Washi tape is a fantastic choice for adding quick and colorful patterns to your tiles. Its gentle adhesive won’t damage surfaces, so you can experiment with stripes, chevrons, or even geometric shapes. Before applying, clean your tiles thoroughly to ensure the tape sticks properly.
Try mixing widths and colors for a custom look. You might even create a border or frame around your tiles for a subtle design touch. Are you ready to play with tape the way you would with paint brushes?
Maintaining Fabric Covers
Keep your fabric covers looking their best by spot cleaning spills immediately with a damp cloth. For deeper cleaning, remove covers if possible and hand wash according to fabric care instructions. Avoid harsh chemicals that can weaken the fabric or fade colors.
Rotate or replace covers periodically to keep your kitchen feeling fresh without much effort. Think about how easy it is to swap out a pillowcase compared to redoing an entire tile backsplash. Doesn’t that make fabric covers sound like a smart choice?
Maintaining Covered Tiles
Maintaining covered tiles keeps your kitchen looking fresh and tidy. Proper care extends the life of the tile covers. Simple habits prevent damage and keep surfaces clean. Routine maintenance saves time and effort over time.
Cleaning Tips
Use a soft cloth or sponge with mild soap. Avoid harsh chemicals that can damage the covers. Wipe spills immediately to prevent stains. Dry the surface with a clean towel to stop water spots. Regular dusting removes dirt and keeps tiles bright.
Avoiding Damage
Do not use abrasive scrubbers that scratch the covers. Avoid placing hot pans directly on the surface. Use cutting boards to protect the covers from knife marks. Handle covers gently during cleaning to avoid peeling. Check edges often to ensure they stay firmly attached.
Refreshing Covers
Replace worn or peeling covers to maintain a neat look. Use adhesive spray or double-sided tape for better hold. Clean the surface before reapplying new covers to remove dust. Consider changing covers to update your kitchen style. Keep extra covers on hand for quick fixes.
Budget-friendly Covering Ideas
Covering kitchen tiles does not have to be expensive. Budget-friendly ideas can transform your space without breaking the bank. Simple choices and smart planning help keep costs low. Even small changes can refresh the kitchen’s look.
Diy Vs Professional Help
Doing the work yourself saves money on labor costs. Many tile covering projects need basic tools and skills. Choose DIY if you enjoy hands-on tasks and have time. Mistakes can happen, so learn before you start.
Hiring a professional ensures a neat and lasting finish. Experts work faster and avoid common errors. This option costs more but saves effort and stress. Balance your budget with your skill level and time.
Sourcing Affordable Materials
Look for budget-friendly materials that still look good. Options include peel-and-stick tiles, vinyl sheets, and paint kits. These products cost less than full tile replacements.
- Buy from discount stores or online sales.
- Check clearance sections for bargains.
- Use leftover or recycled tiles for small areas.
Choosing simple colors and patterns often reduces price. Bulk buying can cut the cost per unit. Compare prices before buying to get the best deal.
Time-saving Techniques
Plan your project to avoid delays and extra costs. Measure the area accurately to buy just enough materials. Prepare the surface well to prevent future repairs.
- Use peel-and-stick tiles for quick application.
- Apply tile paint for a fast refresh.
- Work in small sections to stay organized.
Set aside a few hours on a weekend for the job. Efficient work reduces the chance of mistakes and waste. This keeps your budget on track and your kitchen looking fresh sooner.
Frequently Asked Questions
What Are The Best Materials To Cover Kitchen Tiles?
Popular materials to cover kitchen tiles include peel-and-stick vinyl, beadboard panels, and tile paint. These options are affordable, easy to install, and provide a fresh look without removing tiles. Choose based on durability, style, and maintenance needs for your kitchen.
Can I Paint Over Existing Kitchen Tiles?
Yes, you can paint over kitchen tiles using special tile paint or epoxy paint. Proper surface cleaning and priming are essential for paint adhesion. This method is cost-effective and quick for updating tile color without full replacement.
How Do I Prepare Tiles Before Covering Them?
Clean tiles thoroughly with a degreaser to remove dirt and grease. Sand the surface lightly to improve adhesion. Ensure tiles are dry before applying paint, panels, or adhesive covers for best results and long-lasting coverage.
Is Covering Kitchen Tiles A Cost-effective Renovation?
Covering kitchen tiles is usually cheaper and faster than tile removal and replacement. It refreshes your kitchen’s look with minimal labor and material costs. This option suits budget-conscious homeowners seeking quick kitchen upgrades.
Conclusion
Covering kitchen tiles can refresh your space quickly and affordably. Choose a method that fits your style and skill level. Prep your tiles well for better results and lasting finish. Simple steps can make a big difference in your kitchen’s look.
Enjoy the process and the new feel of your kitchen. Small changes often bring great satisfaction. Start your project with confidence and creativity.