
If you’ve ever stared up at your kitchen fluorescent light cover wondering how to get it off without breaking a sweat—or worse, breaking the cover—you’re not alone. Removing this cover might seem tricky, but with the right steps, you can do it quickly and safely.
Whether you need to clean it, replace the bulb, or upgrade your lighting, knowing how to remove the cover is the first step. Keep reading, and you’ll learn simple, clear instructions that make the whole process easy and stress-free. Your kitchen lighting upgrade starts here!
Tools Needed
Removing a kitchen fluorescent light cover requires just a few simple tools. Having the right tools makes the job quick and safe. These tools help you avoid damage to the cover or fixture.
Most tools needed are common and easy to find. Gather them before starting to save time. Here is a list of essential tools for this task.
Flathead Screwdriver
A flathead screwdriver helps pry open clips or loosen screws. It fits into small gaps to lift the cover gently. Choose a size that fits your light fixture well.
Step Ladder Or Stool
A sturdy ladder or stool allows you to reach the light safely. Make sure it is stable and tall enough to work comfortably. Never stand on unstable surfaces.
Gloves
Wearing gloves protects your hands from sharp edges. It also prevents oils from your skin from getting on the light cover. Use work gloves with good grip.
Soft Cloth
A soft cloth helps clean the light cover after removal. It also cushions the cover when you set it down. Avoid using rough materials that can scratch the plastic.

Credit: www.create-enjoy.com
Safety Precautions
Removing a kitchen fluorescent light cover requires caution. Safety precautions help prevent accidents and injuries during the process. The right steps protect you from electric shock and broken glass. Taking time to prepare ensures a smooth and safe experience.
Turn Off Power At The Circuit Breaker
Switch off the power to the kitchen light at the main circuit breaker. Do not rely on just the wall switch. This step cuts electricity and reduces shock risk. Confirm the light is off by trying to turn it on after switching the breaker.
Use A Stable Ladder Or Step Stool
Use a sturdy ladder or step stool to reach the light cover. Avoid standing on chairs or unstable surfaces. Make sure the ladder is on a flat, dry floor. This prevents falls and keeps you balanced.
Wear Protective Gloves And Safety Glasses
Wear gloves to protect hands from sharp edges or broken glass. Safety glasses shield your eyes from dust or debris. These items reduce the chance of injury during removal.
Handle The Cover Gently
Fluorescent light covers can be fragile. Handle them with care to avoid cracks or breaks. Use both hands to support the cover evenly. Avoid twisting or forcing the cover as it may snap.
Keep The Work Area Clear
Clear the area under the light before starting. Remove any furniture, dishes, or items that could break. A clean workspace allows safe movement and easy access to tools.
Identify The Cover Type
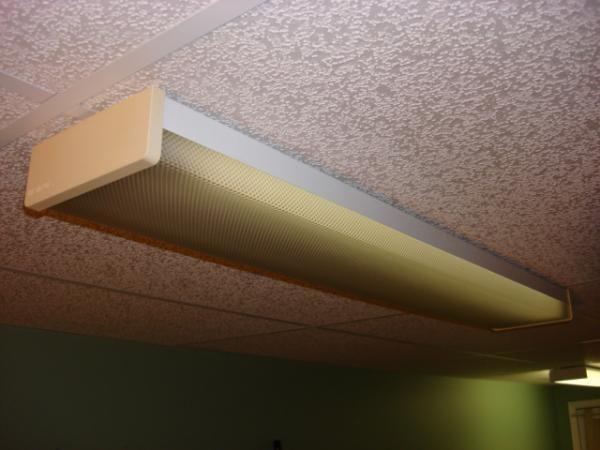
First, check the type of cover on your kitchen fluorescent light. Covers can be snap-on, screw-on, or slide-in, each needing a different removal method. Identifying the cover type helps avoid damage during removal.
Identifying the type of cover on your kitchen fluorescent light is crucial for its safe and easy removal. Each type has its unique characteristics, which means you need to approach them differently. Knowing whether your cover is snap-on, screw-on, or slide-in saves you time and prevents damage.
Snap-on Covers
Snap-on covers are the most user-friendly. They typically have tabs or notches that allow you to remove them with a gentle push or pull. If you're unsure whether your cover is snap-on, try lightly pressing on the sides to see if it loosens. My first encounter with a snap-on cover was surprisingly simple. I hesitated, thinking it required tools, but a gentle nudge was all it took. Have you ever had a task that turned out to be easier than you thought?
Screw-on Covers
Screw-on covers are more secure and require a screwdriver for removal. Look for small screws at the corners or along the edges of the cover. Make sure you have the right screwdriver size to avoid stripping the screws. When I first tackled a screw-on cover, I underestimated the importance of the right tool. Using a mismatched screwdriver was frustrating and time-consuming. Have you checked your toolbox lately for the right tools?
Slide-in Covers
Slide-in covers are designed to fit into grooves on the light fixture. You’ll need to slide them gently in one direction to remove them. Look for any visible tracks or grooves along the fixture to identify this type. The first time I dealt with a slide-in cover, I discovered patience was key. Rushing led to a cracked cover, teaching me to handle these with care. What lessons have you learned the hard way with DIY projects? Understanding the type of cover you’re dealing with not only makes the process smoother but also ensures you handle your fixtures safely and efficiently.
Turn Off The Power
Turning off the power before removing your kitchen fluorescent light cover is crucial for safety. It prevents electric shocks and keeps you safe while handling the fixture. Ignoring this step can lead to serious injuries or damage to your electrical system.
Locate The Correct Circuit Breaker
First, find your home's electrical panel. Look for labels that indicate which breaker controls the kitchen lights. If the breakers aren’t labeled, you might need to switch them off one by one while checking if the kitchen light goes off.
Use The Light Switch As A Quick Check
After switching off the breaker, test the light switch in the kitchen. If the light still turns on, the power might not be fully disconnected. This means you need to double-check the breaker or call an electrician for help.
Use A Voltage Tester For Extra Safety
Before touching the light cover, use a voltage tester to confirm there is no electrical current. This small tool can save you from unexpected shocks. It’s a simple step that adds an important layer of safety.
Why Skip This Step At Your Own Risk?
Have you ever heard stories of people getting shocked while fixing a light? It’s a real danger that can be avoided by just turning off the power. Don’t rush through this step; your safety depends on it.
Removing Snap-on Covers
Removing snap-on fluorescent light covers in your kitchen might seem tricky at first, but it's quite straightforward once you know what to look for. These covers are designed to be secure yet easy to remove for cleaning or replacement. Understanding the clip mechanism is key to avoiding any damage or frustration during the process.
Locate The Clips
Start by examining the edges of the light cover closely. You’ll notice small clips or tabs holding the cover in place. These clips are usually located along the longer sides of the rectangular cover, but sometimes you’ll find them on the shorter ends instead.
Have you ever tried to pull the cover off without finding these clips first? That’s a quick way to crack the cover or hurt yourself. Take your time to feel around gently with your fingers to identify where the clips snap into the fixture.
Apply Gentle Pressure
Once you find the clips, apply gentle pressure directly on or near them. The goal is to release the snaps without forcing the cover too hard. Pressing too much can break the plastic or bend the clips out of shape.
If the cover feels stuck, try pushing one clip at a time instead of all at once. Sometimes a little wiggle helps loosen the cover without any damage. Remember, patience here saves you from having to buy a new cover.
Lift The Cover
After the clips release, carefully lift the cover away from the fixture. Hold the cover with both hands to keep it steady and avoid dropping it. If the cover is large, support it fully to prevent any cracks or breaks.
Does the cover feel heavy or awkward? Take a moment to adjust your grip. Removing it smoothly will make the whole process quicker and less stressful. You’ll also find it easier to clean or replace the cover once it’s fully free.
Removing Screw-on Covers
Removing screw-on fluorescent light covers is a straightforward task. These covers are held in place with screws, making removal simple with basic tools. This section guides you through the process step by step to avoid damage and ensure safety.
Find The Screws
Look closely around the edge of the light cover. Screws are usually located at the corners or along the sides. Sometimes, they may be hidden under a small plastic tab or sticker.
Use a flashlight if needed to see clearly. Make sure you have a secure ladder or step stool to reach the fixture safely.
Use The Screwdriver
Choose the right screwdriver for the screws. Most covers use either a flathead or Phillips screwdriver. Check the screw head shape before starting.
Turn the screwdriver counterclockwise to loosen the screws. Keep the screws in a small container to avoid losing them. Do not force the screws if they feel stuck.
Carefully Detach The Cover
After removing all screws, gently pull the cover away from the fixture. Hold the cover with both hands to prevent dropping it. If it resists, check for any missed screws.
Place the cover on a soft surface to avoid scratches or cracks. Now, the light bulbs and fixture are ready for cleaning or replacement.
Removing Slide-in Covers
Removing slide-in fluorescent light covers in your kitchen can seem tricky if you're not familiar with the design. These covers are built to fit snugly, making the light fixture look seamless and clean. However, with a little know-how, you can easily slide the cover out without causing any damage to the light or yourself.
Find The Edges
First, take a close look at your light cover to locate the edges where it connects to the fixture. These covers usually have a small lip or groove that slides into a track. Running your fingers gently along the perimeter helps you identify where to apply pressure without forcing it.
Have you noticed how some covers feel tighter on one side? That’s often the side where the cover locks in place. Understanding this can save you from accidentally breaking the cover or the fixture.
Slide The Cover Out
Once you’ve found the edges, position your hands on opposite sides of the cover. Slowly and steadily slide it along the track, applying even pressure. Avoid pulling straight down or outward, as this can snap the cover or bend the track.
If it doesn’t budge, try wiggling it gently while sliding. Sometimes, dirt or paint can create extra friction, so a little patience goes a long way here. Ask yourself: Are you sliding parallel to the fixture or pulling at an angle? The right direction matters.
Handle With Care
After the cover is free, hold it securely with both hands to prevent dropping. These covers are often made of fragile plastic or glass, which can crack easily. Setting it on a soft surface like a towel keeps it safe while you work on the bulbs or cleaning.
Have you ever underestimated the fragility of these covers? Treating them carefully not only protects the cover but also saves you from unexpected replacements. Remember, a little care now prevents extra hassle later.

Credit: www.doityourself.com
Cleaning The Cover
Cleaning your kitchen fluorescent light cover is key to maintaining bright, clear lighting. Over time, dust and grime build up, dulling the cover and reducing the light’s effectiveness. Taking a few simple steps to clean it can refresh your kitchen’s ambiance without needing a full replacement.
Choose Cleaning Supplies
Start by gathering gentle cleaning supplies that won’t damage the cover’s surface. Mild dish soap, warm water, a soft cloth or sponge, and a microfiber towel work well. Avoid harsh chemicals or abrasive scrubbers—they can scratch or cloud the plastic.
I once used a strong cleaner on a similar cover and ended up with tiny scratches that caught every bit of dust afterward. Learning from that, I now stick to gentle solutions that clean without harm.
Remove Dust And Grime
First, remove loose dust by wiping the cover with a dry microfiber cloth or using a soft brush. Next, dip your cloth or sponge into soapy water and gently scrub the surface. Pay extra attention to corners and edges where grime tends to gather.
If you find stubborn spots, soak the cover in warm soapy water for 10 minutes before scrubbing again. Does your cover have any yellowing? A little baking soda mixed with water can help lift stains without harsh chemicals.
Dry Thoroughly
After washing, rinse the cover with clean water to remove soap residue. Use a dry microfiber towel to wipe off excess moisture immediately. Leaving the cover damp can cause water spots or streaks that dull the finish.
Give the cover extra time to air dry in a clean, dust-free area before reattaching it. How often do you check your kitchen lighting? Regular cleaning keeps the cover clear and your kitchen bright.
Reinstalling The Cover
Reinstalling the kitchen fluorescent light cover is a simple task that restores your light fixture’s neat look and safety. This process requires careful alignment and secure fitting to avoid damage or loose parts. Follow these steps to put the cover back properly and ensure your light works perfectly.
Align The Cover
Hold the cover close to the fixture. Match the edges of the cover with the frame. Make sure the clips or tabs line up with their slots. Take your time to position it evenly on all sides. This step prevents cracks or breaks during securing.
Secure The Cover
Press the cover gently into place. Push until you hear a click or feel resistance. Check all sides to confirm the cover is firmly attached. Use both hands to avoid dropping it. Avoid forcing the cover as it may crack or warp.
Test The Light
Turn on the light switch to check the fixture. Ensure the cover does not rattle or move. The light should shine evenly through the cover. If the cover feels loose, remove it and try securing it again. Proper testing guarantees safety and good lighting.

Credit: www.youtube.com
Troubleshooting Tips
Begin by turning off the power to avoid shocks. Gently press or slide the cover to release it from the fixture. Use a soft cloth to hold the cover and prevent slipping.
Troubleshooting Tips Encountering issues while attempting to remove your kitchen fluorescent light cover? You're not alone. Many homeowners face similar challenges. Here are some troubleshooting tips to help you tackle the most common problems.
Cover Stuck Or Difficult To Remove
If your light cover seems glued in place, don’t fret. It might just be a little stubborn. Gently wiggle the cover back and forth to loosen it. Use a soft cloth to protect your hands and apply a gentle upward or downward pressure depending on the type of fixture. If the cover still doesn’t budge, consider using a thin plastic card to carefully slide between the cover and the fixture, releasing any suction or grip.
Damaged Covers
A cracked or chipped cover can be a nuisance. You might worry it will shatter during removal. Handle with care by wearing safety gloves. If the damage is extensive, it might be best to replace the cover altogether. Measure the dimensions of your current cover to ensure you purchase the correct size.
Replacing Broken Clips
Broken clips can make removing the cover more challenging. Check the clips before attempting removal. If they're broken, consider replacing them promptly. Many hardware stores sell universal clips that can fit a variety of fixtures. Secure the new clips and test them to ensure they hold the cover snugly. This simple fix can save you future headaches and keep your kitchen well-lit.
Frequently Asked Questions
How Do I Safely Remove A Kitchen Fluorescent Light Cover?
Turn off the power to the light first. Use a step ladder if needed. Gently press or slide the cover to release it. Avoid using excessive force to prevent damage or injury.
What Tools Are Needed To Remove Fluorescent Light Covers?
Usually, no tools are required. Some covers may need a screwdriver to loosen screws. Always check your light fixture type before starting the removal.
How Can I Clean A Fluorescent Light Cover After Removal?
Use a soft cloth with mild soap and water. Avoid abrasive cleaners that can scratch the cover. Dry it thoroughly before reinstalling to prevent moisture damage.
Why Is The Fluorescent Light Cover Hard To Remove?
Covers may be secured tightly or stuck due to dirt. Gently wiggle or press the cover to loosen it. Applying minimal lubricant can help but use cautiously.
Conclusion
Removing a kitchen fluorescent light cover is simple and safe. Start by turning off the power to avoid shocks. Gently press or slide the cover as needed. Keep your hands steady to prevent damage. Clean the cover before putting it back.
Regular care helps your kitchen light stay bright. Small tasks like this save money and time. Try it yourself with confidence and care.