
Are you tired of looking at a worn-out or outdated kitchen countertop? Changing your countertop can completely transform your kitchen’s look and feel.
But the idea of a full replacement might seem costly and time-consuming. What if you could cover your kitchen countertop quickly, easily, and on a budget? You’ll discover simple, practical ways to cover your countertop that save you money and give your kitchen a fresh new style.
Keep reading, and you’ll find the perfect solution to upgrade your space without the hassle.
Choosing The Right Material
Choosing the right material for your kitchen countertop can make a huge difference in how your space looks and functions. It’s not just about picking something that looks good; you need to consider how it fits your lifestyle, budget, and the level of care you’re willing to give. Let’s break down the key factors to help you make a smart choice.
Budget-friendly Options
Not everyone can spend a fortune on countertops, and that’s okay. Materials like laminate, butcher block, and tile offer attractive surfaces without breaking the bank.
- Laminate:Affordable and available in many colors and patterns. It’s easy to clean but can scratch or chip more easily than stone.
- Butcher block:Brings warmth and charm. It requires regular oiling but can be sanded down if damaged.
- Tile:Offers endless design possibilities and heat resistance, but grout lines need upkeep to avoid stains.
Think about how much time you want to spend on maintenance versus upfront costs. Would you prefer to invest less now and possibly replace sooner, or pay more for a longer-lasting surface?
Durability And Maintenance
Durability is key in a busy kitchen. You’ll want a surface that can handle chopping, spills, and heat without constant worry.
| Material | Durability | Maintenance |
|---|---|---|
| Granite | Very durable, scratch and heat resistant | Needs periodic sealing to prevent stains |
| Quartz | Non-porous, highly resistant to stains and scratches | Low maintenance, just regular cleaning |
| Marble | Elegant but softer, prone to scratches and stains | Requires sealing and careful cleaning |
Ask yourself how much effort you’re willing to put into upkeep. Would a surface that needs occasional sealing work better than one needing daily attention?
Aesthetic Considerations
Your countertop sets the tone for your kitchen’s style. Whether you prefer modern, rustic, or classic, the material choice impacts the whole look.
- Granite and quartz:Offer sleek, polished finishes and come in varied patterns.
- Butcher block:Adds a cozy, farmhouse vibe with natural wood tones.
- Concrete:Can be customized with colors and textures for an industrial feel.
How do you want your kitchen to feel when you walk in? Bright and airy, warm and inviting, or bold and edgy? Your countertop can help you achieve that mood.
Preparing Your Countertop Surface
Preparing your countertop surface is the key to a smooth and lasting finish. A clean, even surface helps new materials stick properly. This step prevents peeling, bubbles, and uneven textures later.
Start by removing dirt, grease, and old coatings. Fix any damage to create a flat base. Then, sand and prime the surface to improve adhesion. Proper preparation saves time and effort during the covering process.
Cleaning And Repairing
Remove all items from the countertop. Use a mild cleaner to wipe away grease and grime. Scrub corners and edges carefully for best results.
Check for cracks, chips, or holes. Fill small damages with a suitable filler. Let the filler dry completely before moving on. Sand the repaired spots smooth to match the rest of the surface.
Sanding And Priming Tips
Sand the entire countertop with medium-grit sandpaper. This roughens the surface, helping paint or adhesive stick better. Wipe away dust with a damp cloth after sanding.
Apply a primer designed for your countertop material. Use a brush or roller for even coverage. Allow the primer to dry fully before covering the surface.
Tools You’ll Need
- Cleaner (mild detergent or degreaser)
- Soft cloths or sponges
- Filler for cracks and holes
- Medium-grit sandpaper (120-150 grit)
- Primer suitable for countertop material
- Paintbrush or small roller
- Putty knife for applying filler
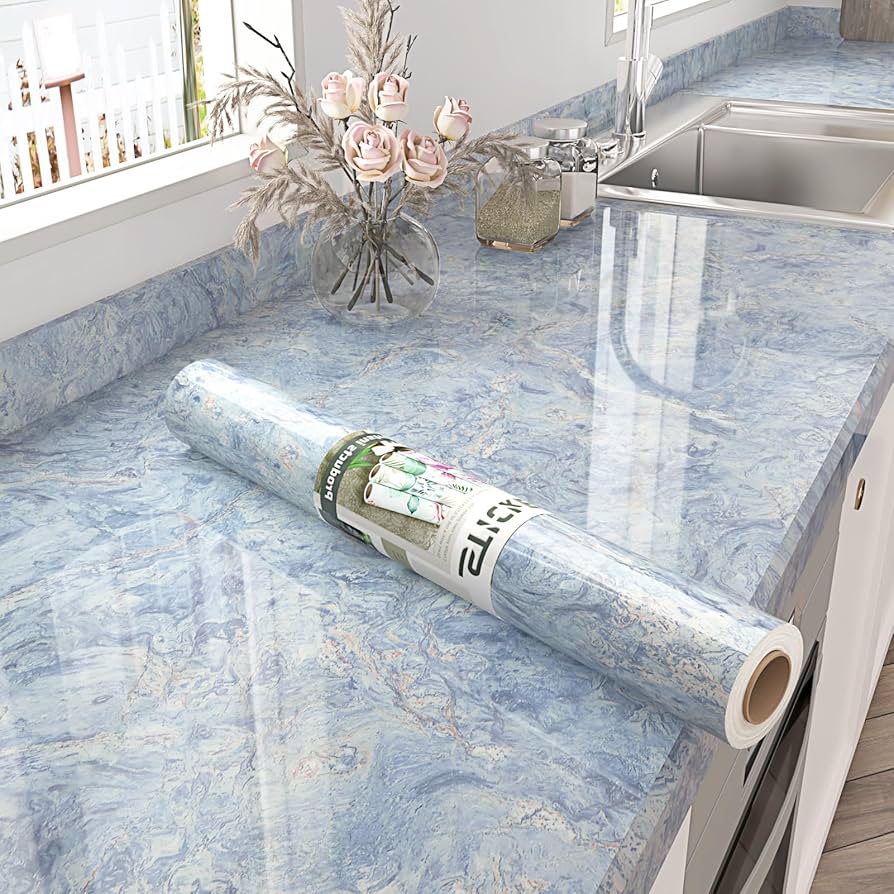
Peel-and-stick Vinyl Coverings
Peel-and-stick vinyl coverings offer a quick and affordable way to update your kitchen countertop without the mess of traditional renovations. These coverings come with an adhesive back, allowing you to apply them directly onto your existing surface. They are a popular choice for renters and DIY enthusiasts who want to refresh their space with minimal effort and cost.
Selecting Patterns And Colors
Choosing the right pattern and color can completely change the vibe of your kitchen. Think about the style you want to create—do you prefer a sleek, modern look with a solid color or a bold pattern that draws attention? Light colors like white or pastel shades can make your kitchen feel bigger, while darker tones add warmth and depth.
Consider materials that mimic natural stone or wood if you want a more sophisticated appearance. Don’t hesitate to order a sample before buying a full roll to see how it looks in your lighting. What kind of atmosphere do you want your kitchen to have when you cook or entertain guests?
Step-by-step Application
- Clean your countertop thoroughly.Remove all grease, dust, and debris to ensure the vinyl sticks properly.
- Measure and cut the vinyl.Use a ruler and sharp scissors or a utility knife to cut pieces slightly larger than your countertop sections.
- Peel back a small section of the adhesive backing.Align the vinyl carefully, then slowly press it down while peeling the backing off.
- Smooth out air bubbles.Use a flat tool like a credit card or squeegee to push bubbles toward the edges as you apply the vinyl.
- Trim excess material.After the vinyl is in place, trim any overhanging edges for a clean finish.
Taking your time during each step can make a huge difference in the final look. Have you ever rushed a project only to regret the outcome later?
Removing And Replacing
One of the biggest advantages of peel-and-stick vinyl is how easy it is to remove. If you want to change your kitchen’s look or if the vinyl starts to wear, simply peel it off. It usually comes away cleanly without damaging the underlying surface.
Before applying a new covering, clean the countertop to remove any leftover adhesive. This ensures your next layer sticks well and looks flawless. How often would you like to refresh your kitchen with new designs?
Painting Your Countertop
Painting your kitchen countertop can give your space a fresh look without the cost of a full renovation. It's a practical way to update worn surfaces and personalize your kitchen. But success depends on choosing the right materials and applying them carefully.
Choosing The Right Paint
Not all paints work well on countertops. You need a paint that can handle frequent use, moisture, and heat. Look for epoxy or acrylic-based paints designed specifically for surfaces exposed to wear and tear.
Consider the color carefully—lighter shades can brighten your kitchen, while darker ones hide stains better. Have you thought about how your paint choice will match your cabinets and backsplash?
Techniques For A Smooth Finish
Preparation is key. Clean the surface thoroughly and sand it lightly to help the paint stick. Use a high-quality brush or foam roller to apply thin, even coats.
Allow each coat to dry completely before adding the next. Patience here prevents bubbles and uneven textures. Are you ready to take your time for a flawless look?
Sealing And Protecting
Once the paint is dry, sealing your countertop protects it from scratches and spills. A clear polyurethane or epoxy topcoat works well for durability.
Apply multiple thin layers, letting each one dry fully. This step extends the life of your paint job and keeps your countertop looking fresh. How much longer will your new countertop stay perfect without this crucial protection?
Using Laminate Sheets
Covering a kitchen countertop with laminate sheets can be a cost-effective solution. These sheets offer a durable surface, resisting stains and scratches. Easy to install, laminate sheets come in various colors and patterns, allowing for a custom look without a hefty price tag.
Transforming your kitchen countertop can be a game-changer, and using laminate sheets is an affordable and stylish option. Laminate offers a variety of patterns and colors, mimicking high-end materials without breaking the bank. With the right tools and a bit of patience, you can achieve a sleek and modern finish that elevates your kitchen space.
Cutting And Fitting Laminate
Start by measuring the dimensions of your countertop. Precision is key. Use a tape measure to ensure you have the correct length and width. Once you have your measurements, mark the laminate sheet accordingly. A fine-toothed saw or a laminate cutter can help achieve clean edges. Always cut slightly larger than necessary to allow for adjustments. Before securing the laminate, position it on the countertop to check the fit. If there are any discrepancies, trim where needed. Remember, a snug fit is crucial for a seamless look.
Adhesive Application Tips
Choosing the right adhesive is vital for durability. Contact cement is a popular choice for laminate sheets. It creates a strong bond and is easy to apply. Apply the adhesive evenly on both the countertop surface and the back of the laminate sheet. Use a brush or roller for even distribution. Allow it to dry until it's tacky; this usually takes about 15 to 20 minutes. Once tacky, carefully place the laminate on the countertop. Start from one edge and press firmly, smoothing out any air bubbles with a roller. Have you ever noticed how a small air bubble can ruin the entire look? Ensure each section is flat and adhered properly.
Trimming And Finishing Edges
Now, focus on the edges. Use a router or a laminate trimmer to remove excess laminate. This ensures a clean and professional finish. Sand the edges lightly with fine-grit sandpaper. This step softens any sharp edges and provides a polished look. Be gentle; the goal is to smooth, not to remove material. Finally, seal the edges with a sealant or edge banding. This not only enhances the look but also protects against moisture. Consider this the final touch that makes your countertop renovation stand out. Is there a better feeling than completing a DIY project that looks store-bought?

Credit: food52.com
Installing Tile Overlays
Installing tile overlays on your kitchen countertop is a smart way to refresh its look without a full replacement. This technique lets you add style and durability with less mess and cost. Before you start, it’s important to understand the choices and care involved to make your new countertop last.
Picking Tile Styles
Your tile choice sets the tone for your kitchen’s vibe. Think about colors and patterns that match your cabinets and backsplash. Glossy tiles brighten the space, while matte ones hide smudges better.
Consider tile size too. Large tiles mean fewer grout lines, which can make cleaning easier. Smaller tiles, like mosaics, offer more design freedom but require more upkeep. Have you thought about mixing tile textures to add depth?
Grouting And Sealing
Grout is the key to holding your tiles together and preventing water damage. Choose a grout color that complements your tiles; it can either blend in or create contrast for a bold look.
Sealing grout is a step you shouldn’t skip. It protects against stains and keeps your countertop looking fresh. Resealing every year or two keeps your surface strong, especially in a busy kitchen.
Maintenance And Cleaning
Keep your tile overlay looking great with simple daily care. Wipe spills quickly to avoid stains, and use a mild cleaner to maintain grout brightness.
Avoid harsh chemicals or abrasive scrubbers that can damage tiles or grout. Instead, use a soft cloth or sponge. Have you noticed how regular care can save you from costly repairs later?
Creative Alternatives
Choosing how to cover your kitchen countertop can transform the entire space without the need for a full renovation. Creative alternatives offer budget-friendly, stylish, and practical solutions that can fit your personality and lifestyle. These options allow you to refresh your kitchen quickly while adding a unique touch that standard materials might lack.
Concrete Overlays
Concrete overlays are an excellent choice if you want a modern, industrial look. They are thin layers of concrete applied directly over your existing countertop, which means less mess and faster results.
You can customize the color and finish to suit your style—smooth and polished or rough and textured. I once applied a concrete overlay in my kitchen, and it instantly made the surface more durable and easy to clean, while giving a chic, urban vibe.
Butcher Block Covers
Butcher block covers add warmth and a natural feel to your kitchen. These wooden surfaces are easy to install and maintain, and they age beautifully over time.
Think about how chopping vegetables on a wooden surface feels different—it’s softer on your knives and adds character. You can also sand and reseal butcher blocks to keep them looking fresh for years.
Reclaimed Wood Panels
Reclaimed wood panels bring history and texture to your countertop. Using old barn wood or pallets creates a rustic, eco-friendly surface with unique grain patterns and imperfections.
This option requires sealing to protect against moisture, but the result is a one-of-a-kind countertop that tells a story. Have you ever noticed how a kitchen with reclaimed wood feels more inviting? It’s because the material adds warmth and personality instantly.

Credit: www.amazon.ca
Common Mistakes To Avoid
Covering a kitchen countertop can refresh your space. Mistakes during the process cause frustration and poor results. Avoid these common errors for a smooth, lasting finish. Pay close attention to each step to protect your investment and keep your kitchen looking great.
Poor Surface Prep
Not cleaning the countertop properly leads to weak adhesion. Dirt, grease, and old coatings block new materials from sticking. Sanding uneven surfaces is necessary to create a smooth base. Skipping these steps causes peeling and uneven texture. Take time to clean and smooth the surface fully before applying coverings.
Skipping Sealing Steps
Sealing prevents moisture from damaging the countertop and materials. Without sealing, water can seep through cracks and cause mold or warping. Some materials require special sealants to protect their finish. Ignoring sealing leads to quicker wear and stains. Always apply the correct sealant after installation and let it dry completely.
Choosing Incompatible Materials
Not all countertop materials work well together. Some adhesives or coverings react poorly with certain surfaces. This causes bubbling, discoloration, or damage over time. Research the compatibility of all materials before starting. Choose products designed for kitchen use and that fit your countertop type. Proper matching ensures durability and a clean look.
Maintaining Your New Countertop
Maintaining your new countertop helps keep it looking fresh and lasting longer. Proper care protects it from damage and wear. Small daily habits make a big difference in preserving its beauty and function.
Daily Cleaning Tips
Use a soft cloth or sponge with mild soap and warm water. Avoid harsh chemicals that can damage the surface. Wipe spills immediately to prevent stains. Dry the countertop after cleaning to stop water spots.
Handling Wear And Tear
Protect the surface from sharp objects by using cutting boards. Avoid placing hot pots or pans directly on the countertop. Use coasters to prevent rings from drinks. Gently buff out minor scratches with a suitable polishing product recommended for your countertop type.
When To Reapply Or Replace
Check the surface regularly for dullness or cracks. Some materials need sealant reapplication every few years to maintain protection. Replace the countertop if damage becomes severe or repairs no longer work. Timely action keeps your kitchen safe and attractive.

Credit: www.amazon.ca
Frequently Asked Questions
What Materials Are Best For Covering Kitchen Countertops?
Popular materials include laminate, granite, quartz, and butcher block. Each offers durability, style, and varying costs. Choose based on budget and kitchen design for best results.
How Do I Prepare My Countertop Before Covering?
Clean the surface thoroughly and repair any damages. Remove debris, grease, and old adhesives to ensure proper adhesion of new coverings.
Can I Cover My Countertop Myself Easily?
Yes, many coverings like laminate and peel-and-stick tiles are DIY-friendly. Follow instructions carefully and use the right tools for a professional finish.
How Long Does Countertop Covering Usually Last?
Durability varies by material; laminate lasts 5-10 years, granite and quartz can last decades. Proper care extends the lifespan significantly.
Conclusion
Covering a kitchen countertop can change your space quickly. Choose the right material to fit your style and budget. Prepare the surface well for the best results. Take your time during installation to avoid mistakes. A fresh countertop can make your kitchen look clean and new.
Small changes can have a big impact. Enjoy your updated kitchen and the new look it brings.