

Are you tired of throwing away kitchen scraps every day? What if you could turn those leftovers into rich, healthy soil for your garden?
Composting your kitchen scraps is easier than you think, and it can transform your garden while reducing waste. You’ll discover simple steps to start composting right now, even if you’ve never done it before. Ready to give your garden a natural boost and make your waste disappear?
Let’s dive in and make composting a part of your daily routine.

Credit: gracefulgardens.com
Benefits Of Composting Kitchen Scraps
Composting kitchen scraps offers a range of benefits that can transform your garden and reduce waste at the same time. By turning food leftovers into nutrient-rich soil, you create a natural cycle that supports healthy plant growth. Composting is not just about waste management; it’s a simple way to improve your garden’s productivity and sustainability.
Improves Soil Health
Adding compost made from kitchen scraps enriches your soil with essential nutrients like nitrogen, phosphorus, and potassium. These nutrients help plants grow stronger and resist pests naturally. I noticed my tomato plants produce more fruit and fewer diseases after just one season of using homemade compost.
Reduces Household Waste
Composting kitchen scraps cuts down the amount of garbage you send to the landfill. Food waste makes up a significant portion of household trash, so this small change can have a big impact. Have you ever thought about how much food you throw away each week? Composting helps you keep that waste out of the trash bin.
Saves Money On Fertilizers
Using compost reduces the need to buy chemical fertilizers or soil amendments. This saves money and protects the environment from harmful runoff. In my experience, switching to compost lowered my garden expenses noticeably while improving plant health.
Supports Beneficial Microorganisms
Compost encourages the growth of helpful bacteria and fungi in the soil. These microorganisms break down organic matter and make nutrients available to plants. A healthy soil ecosystem means your garden can thrive with less effort from you.
Helps Retain Moisture
Compost increases the soil’s ability to hold water, which means you don’t need to water your plants as often. This is especially useful during dry periods or in areas with water restrictions. Have you seen how dry your garden soil gets between waterings? Compost can make a real difference.
Choosing The Right Composting Spot
Choosing the right spot for your compost pile can make all the difference in how quickly and efficiently your kitchen scraps turn into rich soil. The location affects moisture levels, temperature, and how easy it is for you to add scraps regularly. Picking a good spot means less hassle and more success in your composting journey.
Consider Sunlight And Shade
Too much sun can dry out your compost, slowing down the breakdown process. Too much shade can keep it cold and soggy. Aim for a spot that gets some morning sun but also some shade during the hottest part of the day. This balance helps maintain the right temperature and moisture for decomposition.
Check For Good Drainage
Standing water can drown your compost and cause bad odors. Look for a place where water doesn’t pool after rain. If your garden soil tends to hold water, consider placing your compost on a bed of wood chips or gravel to improve drainage.
Make It Easy To Access
You’ll be adding kitchen scraps often, so pick a spot close to your kitchen or garden path. If you have to carry scraps a long way, you might lose motivation. Accessibility also helps you turn the pile regularly, which speeds up composting.
Think About Neighbors And Pests
Compost piles can attract critters if not managed well. Place your compost bin away from property lines or areas frequented by pets and children. Use a covered bin or mesh to keep pests out while still letting air flow.
Consider Space And Size
Your compost pile needs enough room to grow but not so much it takes over your garden. A 3x3 feet area is ideal for most home gardeners. If space is tight, consider a compact compost bin or worm composting system.
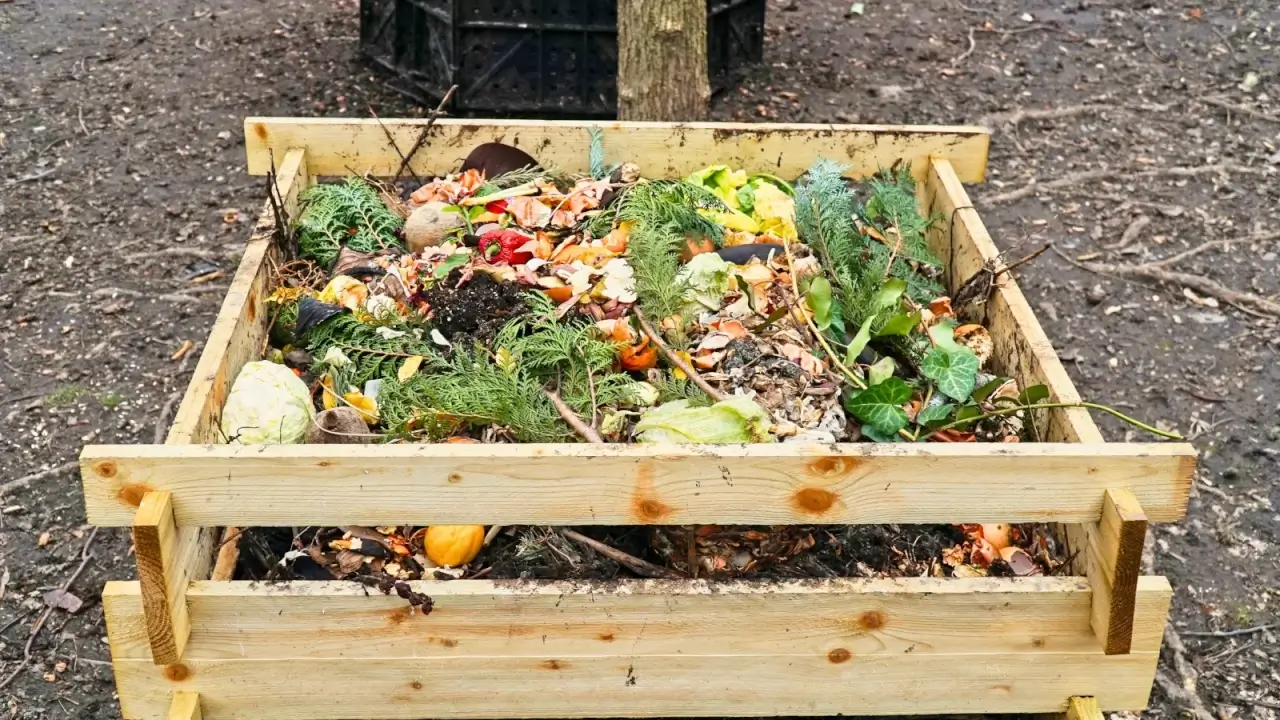
Types Of Kitchen Scraps To Compost
Composting kitchen scraps is a simple way to reduce waste and enrich garden soil. Not all kitchen scraps are suitable for composting. Knowing which scraps to compost helps create healthy, nutrient-rich compost faster. Some scraps break down quickly, while others take longer or attract pests. Choosing the right materials ensures a balanced compost pile and a thriving garden.
Vegetable And Fruit Peels
- Carrot tops and peels
- Potato skins
- Apple cores and peels
- Banana peels
- Onion skins
These scraps are rich in nutrients and break down quickly. Avoid citrus peels in large amounts as they can slow composting.
Coffee Grounds And Tea Leaves
- Used coffee grounds
- Tea leaves and bags (paper, no plastic)
These scraps add nitrogen to the compost. They also improve soil structure and help retain moisture.
Eggshells
- Crushed eggshells
Eggshells add calcium to the compost. Crush them to speed up decomposition and prevent attracting pests.
Bread And Grains
- Stale bread
- Cooked rice and pasta
These scraps compost well but in small amounts. Avoid moldy bread to prevent unwanted smells.
Small Amounts Of Dairy And Meat Scraps
- Cheese scraps
- Cooked meat bits
Use sparingly to avoid pests and odors. Best for compost bins with good airflow and balance.
Credit: modernfarmer.com
Materials To Avoid In Compost
Not all kitchen scraps belong in your compost pile. Some materials can harm the composting process or attract pests. Knowing what to avoid helps you create healthier compost and a happier garden.
Meat, Dairy, And Oily Foods
Meat scraps, cheese, butter, and other dairy products break down slowly and can smell bad. They often attract rodents and unwanted animals. Avoid adding these to your compost to keep your garden clean and pest-free.
Diseased Plants And Weeds
Adding diseased leaves or plants can spread infections in your garden. Weeds that have gone to seed may sprout again in your compost. Be selective and skip these materials to protect your plants.
Plastic, Glass, And Metal
Non-organic materials like plastic wrappers, glass shards, or metal pieces do not decompose. They contaminate your compost and can damage your tools. Always remove any packaging or foreign objects before composting.
Pet Waste
Dog or cat feces can carry harmful bacteria and parasites. This makes your compost unsafe for garden use. Keep pet waste out of your compost bin to protect your plants and family.
Large Branches And Thick Wood
Thick wood and large branches take a very long time to break down. They can slow the composting process and create imbalance. Chop or avoid adding these to keep your compost turning smoothly.
Have you ever tossed something in your compost only to regret it later? Paying attention to what you exclude is just as important as what you add. It’s the key to turning kitchen scraps into rich, healthy soil for your garden.
Setting Up Your Compost Bin
Setting up your compost bin is the first big step in turning your kitchen scraps into rich, garden-ready soil. The right setup can make composting easier and less smelly, which means you'll be more likely to keep it going. Let’s look at how to choose and prepare the perfect spot and container for your compost.
Choosing The Right Location For Your Compost Bin
Pick a spot in your garden that’s easy to reach but not in the way of daily activities. A shaded area can help keep the compost from drying out too fast. Do you have a spot that drains well? Compost likes moisture, but standing water will slow down the process and cause odors.
Selecting The Best Compost Bin Type
You can buy a compost bin or build your own. Plastic bins are great if you want to keep pests out and maintain heat. Open piles or wire mesh bins allow more airflow, which speeds up decomposition but can attract animals. Think about your space and how much effort you want to put into turning the compost.
Preparing Your Compost Bin For Use
Start by placing a layer of coarse materials like small branches or straw at the bottom of your bin. This helps with airflow and drainage. Then, alternate layers of greens (like vegetable scraps) and browns (like dry leaves or paper). This balance is key—too much green can make it slimy, too much brown slows down the process.
Keeping Your Compost Bin Maintained
Turn your compost regularly to add oxygen, which speeds up decomposition and reduces smell. If it feels dry, add a bit of water; if it’s soggy, add more dry materials. How often you turn depends on your bin size and how fast you want compost. Try to check it weekly and adjust as needed.
Layering Kitchen Scraps And Browns
Layer kitchen scraps with dry brown materials like leaves or paper to balance moisture and air. This mix helps speed up decomposition and reduces odor. Regular layering creates rich compost for a healthy garden.
Layering kitchen scraps and browns is a critical aspect of creating a successful compost pile. It's not just about tossing everything in a heap and hoping for the best. The secret lies in the balance and order of layering the materials to create a nutrient-rich compost for your garden. This process involves alternating layers of green (nitrogen-rich) materials like kitchen scraps with brown (carbon-rich) materials such as dried leaves or shredded paper. This method not only speeds up the composting process but also reduces odor and pest problems.
Understanding The Role Of Browns
Browns are your compost pile's structure. They provide the carbon necessary for energy in the composting process. Think of them as the framework that keeps your compost pile from becoming a smelly, soggy mess. Items like dried leaves, straw, and shredded cardboard are ideal. These materials help to aerate the pile, allowing oxygen to flow and microorganisms to thrive.
Why Layering Matters
Layering isn’t just for cakes! In composting, it’s the way to ensure even decomposition and a healthy pile. By alternating layers of kitchen scraps and browns, you regulate moisture and temperature, creating the perfect environment for breakdown. Without proper layering, your compost might become too wet or too dry, slowing the decomposition process.
How To Layer Kitchen Scraps
Start with a layer of browns at the bottom. This provides drainage and aeration. Add a layer of kitchen scraps, spreading them evenly. Cover this with another layer of browns. Aim for layers that are about 2-3 inches thick. Continue alternating until your pile is complete.
Maintaining The Right Balance
Achieving the right balance of greens to browns is key. A good rule of thumb is to use two parts browns to one part greens. This ratio helps maintain an optimal environment for microorganisms. If your pile smells or attracts pests, you might need more browns. Remember, consistency is more important than perfection in your composting journey.
Tips For Effective Layering
- Chop materials: Smaller pieces break down faster. - Mix as you go: Lightly mix layers to encourage interaction. - Monitor moisture: Your pile should be as damp as a wrung-out sponge. - Turn regularly: Every few weeks, turn your pile to introduce air. Have you tried layering your compost yet? What changes did you notice in your garden soil? Engaging with your compost pile is like having a conversation with nature—each layer adds a new dimension to your soil's fertility.
Maintaining Moisture And Aeration
Maintaining the right balance of moisture and aeration is key to successful composting of kitchen scraps. Too much water turns your pile into a soggy mess that smells bad, while too little slows down decomposition. Likewise, without enough air, the microorganisms working to break down your waste can’t breathe, stalling the process.
Checking And Adjusting Moisture Levels
Think of your compost like a wrung-out sponge—it should feel damp but not dripping. If it’s too dry, add a bit of water using a spray bottle or watering can to moisten the pile evenly. On the other hand, if you notice water pooling or a foul odor, it’s a sign you need to add dry materials like shredded paper or dry leaves.
Turning Your Compost To Improve Aeration
Regularly turning your compost pile introduces fresh air, which helps speed up decomposition and prevents unpleasant smells. Use a garden fork or compost aerator to mix the scraps and fluff the materials every few days. This simple step can make a big difference by giving oxygen to the helpful microbes inside.
Layering Materials For Better Airflow
Creating layers of different materials helps maintain airflow and moisture balance naturally. Try alternating kitchen scraps with dry, bulky items like straw, cardboard, or wood chips. These layers create small air pockets that keep your compost healthy and active.

Credit: www.youtube.com
Turning The Compost For Faster Decomposition
Turning your compost pile is key to speeding up the decomposition process. It helps mix air into the pile, which is essential for the tiny organisms breaking down the kitchen scraps. Without enough oxygen, the compost can become smelly and slow to break down.
Regular turning balances moisture and temperature inside the pile. This creates a better environment for bacteria and fungi to work quickly. Turning also helps break up clumps and spreads out fresh scraps evenly.
How Often To Turn Your Compost
Turn your compost every few days for fast results. A good schedule is once or twice a week. If the pile is small or dry, turn more often to add air and moisture.
Tools To Use For Turning Compost
- Pitchfork: Great for lifting and mixing large piles.
- Shovel: Useful for flipping and moving compost layers.
- Compost aerator tool: Designed to poke holes and add air.
Signs Your Compost Needs Turning
- Strong, unpleasant odors coming from the pile.
- Compost feels damp and compacted.
- Slow breakdown of kitchen scraps after several weeks.
Tips For Effective Compost Turning
- Turn the pile on a dry, cool day for best results.
- Wear gloves to protect your hands from debris.
- Mix the outer layers into the center to balance heat.
Signs Compost Is Ready To Use
Compost is ready when it looks dark, crumbly, and smells earthy. No large food pieces or bad odors should remain. It feels warm and breaks apart easily, showing it’s full of nutrients for your garden.
Composting kitchen scraps transforms waste into rich, garden-ready soil. But how do you know when your compost is ready to use? Recognizing the signs is crucial for effective gardening. Let's explore these indicators.
Appearance And Texture
Finished compost looks dark and crumbly. It should resemble rich soil. The texture is fine and smooth. Large chunks of food or plant material should not be visible.
Earthy Smell
A fresh, earthy smell is a key sign. It should not smell rotten or sour. A pleasant, soil-like aroma means your compost is mature.
Temperature Stabilization
Finished compost is cool to the touch. During decomposition, compost heats up. Once the process completes, the temperature matches the surrounding air.
Volume Reduction
Compost piles shrink as materials break down. Expect a volume reduction of up to 50%. This means the decomposition process is complete.
Presence Of Earthworms
Earthworms indicate healthy, finished compost. These creatures thrive in nutrient-rich environments. If you see them, your compost is ready for the garden.
- Appearance: Dark and crumbly.
- Smell: Earthy, not sour.
- Temperature: Cool to the touch.
- Volume: Reduced significantly.
- Earthworms: Present and active.
These signs guide you to perfect compost use. Happy gardening!
Using Compost To Enrich Garden Soil
Using compost to enrich garden soil transforms your garden into a thriving ecosystem. Compost adds essential nutrients naturally, improving soil texture and water retention. It also supports beneficial microbes, which help plants grow stronger and resist pests.
Understanding The Nutrient Boost From Compost
Compost is packed with nutrients like nitrogen, phosphorus, and potassium—all vital for plant health. Unlike chemical fertilizers, these nutrients release slowly, feeding your plants over time. This steady supply reduces the risk of nutrient burn and keeps your garden balanced.
How Compost Improves Soil Structure
Adding compost helps sandy soils hold water and clay soils drain better. It creates a crumbly texture that allows roots to breathe and expand easily. Have you noticed how compacted soil can stunt plant growth? Compost breaks that compaction and opens up space for roots.
Using Compost As Mulch Around Plants
Spreading a layer of compost around your plants acts as mulch. It suppresses weeds, retains moisture, and slowly feeds the soil beneath. This approach cuts down on watering and weeding time, giving you more freedom to enjoy your garden.
Mixing Compost Into Garden Beds
Before planting, mix compost into the top 6 to 12 inches of soil. This ensures nutrients are close to the roots where plants can access them easily. Try blending one part compost with two parts soil for a rich planting mix that supports healthy growth.
Timing Your Compost Application
Applying compost in early spring or fall prepares your soil for the growing season. This timing allows nutrients to integrate fully before plants need them most. Ever wondered why some gardens flourish after the first rain? Compost helps soil absorb and hold that moisture better.
Troubleshooting Common Compost Issues
Composting kitchen scraps can sometimes bring challenges. Identifying and fixing common issues helps keep your compost healthy. Troubleshooting makes the process smoother and faster. Here are frequent problems and easy solutions to keep your compost in top shape.
Why Does My Compost Smell Bad?
A bad smell usually means too much moisture or lack of air. Wet scraps create a sour, rotten odor. To fix this, add dry materials like leaves or shredded paper. Turn the pile to let air in and dry it out.
Why Is My Compost Not Breaking Down?
Slow decomposition often happens when the pile is too dry or lacks nitrogen. Kitchen scraps provide nitrogen, but you need brown materials for balance. Water the pile if dry. Mix green and brown scraps well to speed up decay.
What Causes Flies In My Compost?
Flies appear when scraps are exposed or too wet. Cover food scraps with a layer of brown material. Avoid adding meat or oily foods. Keep the compost covered and turn it regularly to reduce flies.
Why Is My Compost Too Dry?
Dry compost slows down the process. Kitchen scraps add moisture, but dry materials can absorb too much water. Spray water lightly when turning the pile. The compost should feel like a damp sponge, not wet or dry.
How To Deal With Pests In Compost?
Animals may dig into compost for food. Use a closed bin or cover the pile with a sturdy lid. Avoid adding meat, dairy, or oily scraps that attract pests. Keep compost away from your house walls.
Frequently Asked Questions
What Kitchen Scraps Can I Compost In My Garden?
You can compost fruit and vegetable peels, coffee grounds, eggshells, and small amounts of bread. Avoid meat, dairy, and oily foods as they attract pests and slow decomposition.
How Do I Start Composting Kitchen Scraps At Home?
Collect scraps in a container, then add them to your compost bin or pile. Mix with brown materials like leaves or paper for balance and aerate regularly to speed up decomposition.
How Long Does It Take To Compost Kitchen Scraps?
Composting kitchen scraps typically takes 2 to 6 months, depending on conditions like temperature, moisture, and aeration. Regular turning and proper balance of green and brown materials speed up the process.
Can I Compost Citrus Peels And Onion Scraps?
Yes, you can compost citrus peels and onion scraps in small amounts. Too many can slow composting or affect pH balance, so add them sparingly and mix well with other materials.
Conclusion
Composting kitchen scraps helps your garden grow healthy plants. It reduces waste and saves money on fertilizers. Just collect scraps, mix them with dry materials, and turn the pile often. Watch how kitchen scraps turn into rich soil over time.
Everyone can try composting at home. Start small, be patient, and enjoy the benefits. Your garden will thank you with greener leaves and better fruits. Composting is simple, good for nature, and fun to do. Give it a try and see the difference yourself.