

Have you ever wondered if you can bake clay right in your kitchen oven? If you enjoy crafting or want to try your hand at making beautiful clay creations, this question might be on your mind.
The good news is, you don’t need a special kiln to bring your clay projects to life. But before you start, it’s important to know what works and what doesn’t. Keep reading, and you’ll discover everything you need to bake clay safely and successfully at home—turning your ideas into lasting art without any surprises.
Types Of Clay Suitable For Oven Baking
Not all clays are designed to be baked in a kitchen oven. Choosing the right type of clay ensures your project cures properly without damaging your oven or the clay itself. Understanding which clays can safely handle oven temperatures can save you from frustration and wasted materials.
Polymer Clay Varieties
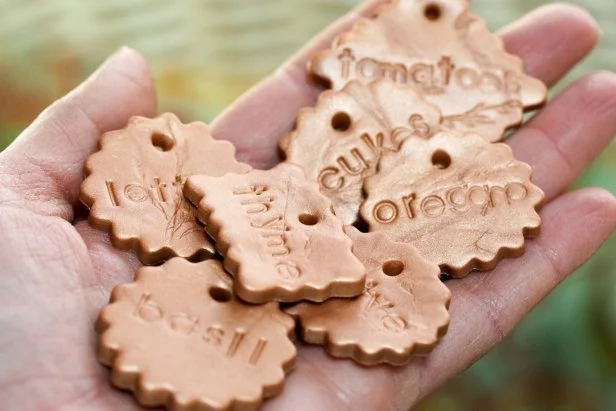
Polymer clay is the most popular choice for oven baking at home. Brands like Sculpey, Fimo, and Premo offer clays that harden when baked at temperatures usually between 230°F and 275°F (110°C to 135°C).
These clays come in various textures and finishes, from soft and flexible to firm and translucent. You can create detailed models, jewelry, or even small sculptures with them.
Have you tried blending different polymer clays to get unique colors or effects? It’s a fun way to personalize your work before baking.
Air-dry Clay Differences
Air-dry clays do not require baking. They harden by absorbing moisture from the air over several hours or days. Attempting to bake air-dry clay can cause cracking or burning.
These clays are excellent for quick projects or when you don’t want to use an oven. However, they won’t achieve the same durability as polymer clays after baking.
Ask yourself if your project needs to be strong or flexible. If yes, air-dry clay might not be the best choice for oven baking.
Avoiding Non-oven Clays
Some clays, like traditional ceramic or oil-based clays, are not safe for kitchen ovens. Ceramics require high-temperature kilns, and oil-based clays never harden through baking.
Using these clays in your oven could release harmful fumes or damage your oven. Always check the manufacturer’s instructions before attempting to bake any clay.
What safety steps do you take before baking clay? Verifying the clay type can protect both your health and your kitchen.
Credit: www.hgtv.com
Preparing Your Kitchen Oven
Preparing your kitchen oven is key before baking clay projects. Proper setup protects your oven and ensures even baking. Taking simple steps helps avoid damage and keeps your clay work perfect. Follow these tips for a smooth baking experience.
Cleaning Before Use
Start with a clean oven. Remove food crumbs and grease. Wipe the interior with a damp cloth. Avoid strong chemicals to prevent fumes. Clean racks and trays too. A clean space stops odors mixing with your clay.
Setting The Right Temperature
Check your clay package for baking instructions. Set the oven temperature carefully. Most clay bakes between 230°F and 275°F (110°C to 135°C). Avoid higher heat to prevent burning. Use the oven’s bake setting, not broil or convection.
Using Oven Thermometers
Oven dials can be inaccurate. Place an oven thermometer inside to check real heat. Adjust temperature based on thermometer reading. This helps keep clay safe from overheating. Consistent heat leads to better baking results.
Safety Precautions While Baking Clay
Baking clay in your kitchen oven can be a rewarding experience, but it comes with important safety considerations. Ignoring these precautions can risk your health and contaminate your food. Understanding and following simple safety measures will help you enjoy your craft without worry.
Ventilation Importance
Good ventilation is crucial when baking clay. Some clays release fumes that may irritate your lungs or cause headaches. Opening windows or using a fan helps keep fresh air flowing and reduces any harmful buildup.
Have you ever noticed a strange smell after baking clay? That’s a sign your space needs better airflow. Even if the clay packaging doesn’t warn you, don’t skip ventilation—your lungs will thank you.
Avoiding Food Contamination
Keep your clay baking separate from food preparation. Residue from clay or its fumes can easily contaminate food surfaces and dishes. Avoid placing clay items on baking sheets or trays used for cooking meals.
Think about this: would you want your cookies to taste like plastic or chemicals? Neither would I. Use a dedicated baking surface covered with parchment paper or foil that you don’t use for food.
Using Separate Baking Tools
Designate specific tools and utensils for your clay projects. Using the same spatulas or trays for both clay and food can transfer harmful substances. This simple step prevents accidental ingestion of clay particles.
Keeping separate tools also helps you stay organized and focused on your creative process. A small investment in extra baking sheets or silicone mats saves you from potential health risks. What tools can you set aside today to create a safe crafting zone?

Credit: xtrema.com
Proper Baking Techniques
Baking clay in your kitchen oven is a simple process. Yet, mastering proper techniques ensures your creations come out just right. From selecting the right temperature to cooling with care, each step matters. Follow these guidelines to achieve perfect results with your clay projects.
Recommended Baking Times
Every type of clay has its own baking time. Check the packaging for specific instructions. As a general rule, polymer clay often bakes at 275°F for 15-30 minutes. Air-dry clay isn't suitable for baking; it hardens by exposure to air. Make sure your oven is preheated to the right temperature before placing the clay inside.
Monitoring The Clay During Baking
Keep an eye on your clay while it bakes. Use an oven thermometer to ensure accuracy. Avoid opening the oven door frequently as it can affect temperature stability. If clay appears to darken, reduce the heat slightly. Ensure proper ventilation in your kitchen to manage any potential fumes.
Cooling And Handling
After baking, let the clay cool in the oven. Turn off the oven and leave the door ajar. This gradual cooling prevents cracks or warping. Once cool, handle the clay gently. Test a small piece to ensure it is fully hardened. Proper handling ensures your clay pieces maintain their intended shape and durability.
Common Mistakes To Avoid
Knowing the common mistakes to avoid can save your clay project from ruining your kitchen and your patience. Many beginners jump into baking clay without understanding the risks involved, leading to frustration and wasted materials. Let’s look at key errors that you can easily avoid to get the best results.
Overheating And Burning Clay
One of the biggest pitfalls is setting the oven temperature too high. Clay usually requires a low, steady heat, often around 265°F to 275°F (130°C), depending on the brand. If you crank up the heat, your clay can burn, crack, or even emit a bad smell that lingers in your kitchen.
Have you ever left a clay piece in the oven a few minutes longer than recommended? I have, and the result was a brittle, unusable mess. Use an oven thermometer to double-check the temperature, since many home ovens run hotter than their setting.
Using Toxic Clays
Not all clays are safe for baking in a kitchen oven. Some clays release harmful fumes when heated, which can be dangerous in a small, enclosed space like your home. Always verify that the clay you buy is non-toxic and specifically labeled for oven baking.
Ask yourself: Is this product meant for indoor use? If the label is unclear or missing, avoid using it in your kitchen. Your health and safety should always come first.
Ignoring Manufacturer Instructions
Each type of clay has its own baking guidelines, including temperature, time, and preparation tips. Ignoring these can lead to underbaked or overbaked pieces, ruining your work. Manufacturers design instructions based on the specific clay’s composition, so following them is crucial.
Have you ever tried to speed up baking time by increasing the temperature? It rarely works. Instead, take a moment to read the instructions carefully before you start. It’s a small step that leads to big improvements in your final piece.
Alternative Baking Methods
If you’re thinking about baking clay at home but worry about using a regular kitchen oven, there are some alternative options that might work better for your project. These methods can offer more control, save energy, or simply fit better with your available tools.
Using Toaster Ovens
Toaster ovens can be a handy alternative for baking small clay pieces. They heat up quickly and often have more precise temperature control than large kitchen ovens.
Because of their size, toaster ovens use less energy and heat up your space less. Just be sure to monitor the temperature closely since many toaster ovens don’t maintain a consistent heat for long periods.
Have you tried baking clay in a toaster oven yet? It’s perfect for small crafts, but larger projects might need more heat and space.
Microwave Limitations
Microwaves might seem like a quick fix for baking clay, but they come with significant limitations. They heat unevenly and can cause some clays to crack or not cure properly.
Additionally, microwaves don’t reach the steady, controlled temperatures that most clay baking processes require. Attempting to use a microwave might ruin your project and waste your materials.
Before you try the microwave, ask yourself if the convenience outweighs the risk of damaging your clay piece.
Professional Kiln Options
For serious clay artists, professional kilns provide the best results. Kilns are designed specifically to handle the high and consistent temperatures clay needs to harden properly.
They offer adjustable settings for different types of clay and firing schedules. Renting time at a local art studio or community center with kiln access can be a cost-effective way to get professional-quality results.
Consider whether investing in kiln access could elevate your work and save you frustration with home baking methods.

Credit: www.doodlepippin.co.uk
Frequently Asked Questions
Can I Use A Regular Oven To Bake Clay?
Yes, you can bake polymer clay in a regular kitchen oven. Ensure the temperature matches the clay's instructions. Avoid using a microwave or toaster oven for even baking and safety.
What Temperature Is Safe For Baking Clay At Home?
Most polymer clays bake safely at 265°F to 275°F (129°C to 135°C). Always follow the specific clay brand’s recommended temperature to prevent burning or underbaking.
How Long Should I Bake Clay In My Kitchen Oven?
Baking time usually ranges from 15 to 30 minutes per 1/4 inch of thickness. Check your clay’s packaging for exact times to avoid overbaking or cracking.
Can Baking Clay In A Kitchen Oven Cause Fumes?
Polymer clay may release mild fumes if overheated. Use good ventilation and avoid exceeding recommended temperatures to keep your kitchen safe and odor-free.
Conclusion
Baking clay in a kitchen oven can be done safely with care. Always check the clay type and follow temperature guidelines. Avoid high heat to prevent smoke or damage. Use a dedicated baking tray and ventilate the room well. Never bake food and clay together.
Small projects work best in home ovens. With proper steps, you can enjoy crafting without worry. Try it slowly and watch your clay harden nicely. Crafting at home can be fun and rewarding. Keep safety first, and your creations will last.