
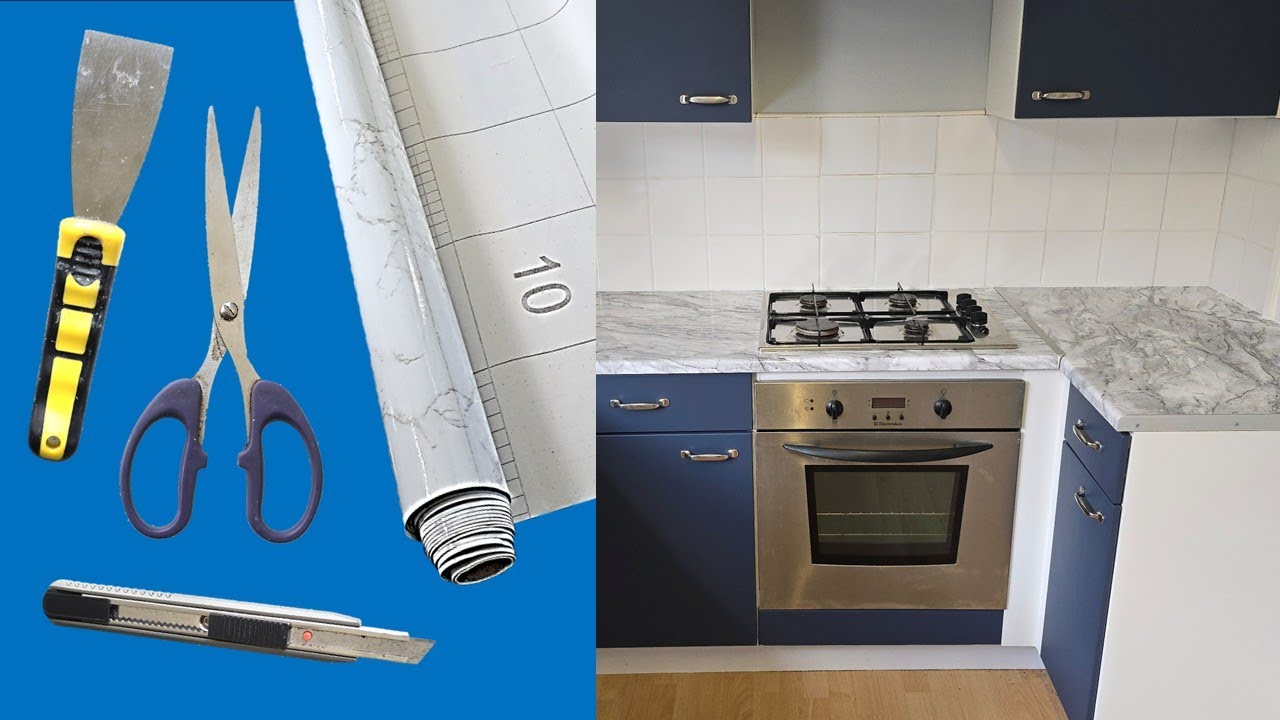
How to Cover a Kitchen Worktop. Is your kitchen worktop looking worn out or outdated? You don’t have to replace the entire surface to give your kitchen a fresh, new look.
Covering your kitchen worktop can be an easy and affordable way to transform your space without the mess and cost of a full renovation. You’ll discover simple, effective methods to cover your worktop and make it look brand new. Whether you want a or a long-lasting upgrade, you’ll find the right solution for your kitchen here.
Keep reading to unlock the secrets to a stunning worktop makeover you’ll love!

Credit: handycrowd.com
Choosing The Right Materials
Choosing the right materials for covering your kitchen worktop can make a huge difference in both style and durability. You want something that fits your daily needs but also complements your kitchen’s look. Think about how much time you spend cooking, cleaning, and entertaining—your worktop material should keep up with your lifestyle.
Laminate Options
Laminate worktops are budget-friendly and come in countless colors and patterns. They can mimic the look of wood, stone, or even metal without the high price. If you’ve ever spilled coffee or chopped veggies without a cutting board, you’ll appreciate how easy laminate is to wipe clean.
However, be aware that laminate can scratch or chip if you’re not careful. Using cutting boards and avoiding hot pans directly on the surface can extend its life significantly.
Tile Choices
Tiles offer a creative way to customize your worktop with endless colors and designs. Ceramic and porcelain tiles resist heat and stains well, making them practical for active kitchens. You can even create patterns or mix textures for a truly unique surface.
Keep in mind, grout lines between tiles can collect dirt and require regular cleaning. If you don’t mind a bit of upkeep, tile worktops can be both beautiful and functional.
Wood Finishes
Wood adds warmth and character to any kitchen. Whether you prefer oak, maple, or walnut, a wooden worktop can be sanded and refinished to look fresh over time. It’s perfect if you enjoy a rustic or farmhouse vibe.
Wood needs more care, like oiling to prevent drying and cracking. But if you love the natural feel under your hands and the sound of a chopping knife on wood, it’s worth the effort.
Stone Alternatives
Natural stone like granite or quartz is a classic choice for durability and elegance. These surfaces handle heat, scratches, and spills better than most materials. Quartz, in particular, is low-maintenance and comes in a wide range of colors and patterns.
Stone can be expensive, but it usually lasts for decades, making it a smart long-term investment. Ask yourself if your kitchen use justifies the cost and upkeep of stone worktops before deciding.

Credit: granite-and-quartz-worktops.co.uk
Preparing The Worktop Surface
Preparing your kitchen worktop surface properly is crucial before covering it. A well-prepared surface ensures that whatever covering you choose will stick well and last longer. Neglecting this step can lead to peeling, bubbling, or uneven finishes that spoil the look and durability.
Cleaning And Sanding
Start by thoroughly cleaning the worktop to remove grease, dirt, and old residues. Use warm soapy water or a gentle degreaser and wipe it down with a clean cloth. Any leftover grime can stop the new covering from sticking properly.
Next, sand the surface lightly with fine-grit sandpaper. This creates a slightly rough texture that helps the adhesive grip better. Don’t rush here; an uneven sanding job can leave patches where the cover won’t adhere.
Repairing Damage
Inspect your worktop closely for scratches, chips, or cracks. These imperfections will show through your new covering if left untreated. Fill small holes or cracks with a suitable wood filler or epoxy and smooth it out with sandpaper once dry.
For deeper damage, consider replacing sections or reinforcing the surface. How much effort you put in now decides the final look and lifespan of your kitchen worktop cover.
Priming For Adhesion
Applying a primer is often overlooked but essential for ensuring your covering sticks well. Choose a primer compatible with both your worktop material and the covering type. It acts as a bonding layer, improving adhesion and preventing peeling.
Use a brush or roller to apply an even coat of primer and allow it to dry completely. Skipping this step can lead to your hard work unraveling sooner than expected—would you want your kitchen redo to last only a few months?
Simple Covering Techniques
Simple covering techniques transform old kitchen worktops quickly and affordably. They offer fresh looks without costly replacements. These methods suit different styles and skill levels. Each option improves the surface’s durability and appeal.
Applying Contact Paper
Contact paper is a thin adhesive film. It comes in many colors and patterns. This option is easy to apply and remove. Start by cleaning the worktop surface thoroughly. Cut the paper to fit the area. Peel off the backing slowly while pressing the paper down. Smooth out air bubbles with a flat tool or cloth. Contact paper resists stains but avoid sharp knives on it.
Using Peel-and-stick Tiles
Peel-and-stick tiles offer a modern and durable look. They are simple to install without grout or special tools. Clean the worktop well before application. Plan your tile layout for a neat finish. Peel the backing off each tile carefully. Press tiles firmly to ensure adhesion. Tiles come in various materials like vinyl or stone-look. They resist water and heat better than paper.
Painting With Durable Coatings
Painting a worktop requires special durable coatings. Use paint designed for kitchen surfaces. Start by sanding the worktop to create a smooth base. Clean dust and grease off completely. Apply a primer for better paint grip. Use a brush or roller to apply paint evenly. Allow drying time between coats. Finish with a clear sealant to protect the paint. This method offers a custom color and long-lasting finish.
Advanced Covering Methods
Advanced covering methods offer durable and stylish options for kitchen worktops. These techniques improve both the look and lifespan of your surface. They require some skill but deliver a professional finish. Choose the method that fits your kitchen style and budget.
Installing Laminate Sheets
Laminate sheets provide a smooth, easy-to-clean surface. Start by measuring the worktop accurately. Cut the laminate to size using a sharp blade or saw. Apply contact adhesive evenly on both the worktop and laminate. Wait a few minutes before joining them together. Press firmly to remove air bubbles. Trim excess edges with a router or sharp knife.
Laying Ceramic Tiles
Ceramic tiles add color and texture to your kitchen. Clean the worktop surface before starting. Spread tile adhesive evenly with a notched trowel. Place tiles carefully, maintaining even gaps. Use tile spacers for consistent spacing. After adhesive dries, apply grout between tiles. Wipe off excess grout with a damp sponge. Seal grout lines to prevent stains and water damage.
Fitting Wooden Panels
Wooden panels create a warm, natural look. Choose moisture-resistant wood for durability. Sand the worktop surface smooth before fitting panels. Use strong wood glue or screws to secure panels in place. Fill gaps and holes with wood filler. Sand again to smooth out imperfections. Finish with a protective sealant to guard against spills and heat.
Tools And Supplies Needed
Covering a kitchen worktop requires more than just the right materials; having the proper tools and supplies can make the entire process smoother and more precise. Without the right equipment, you risk uneven cuts, poor adhesion, or even damage to your surfaces. Are you ready to gather everything you need to get the job done right?
Cutting Tools
Precise cutting is essential for a neat finish. A sharp utility knife or a fine-toothed saw will help you trim materials like laminate or wood accurately. For curved edges or detailed cuts, consider using a jigsaw or a coping saw to maintain control and prevent splintering.
Keep extra blades on hand; dull blades can ruin your worktop material and make cutting harder. Have a straight edge or metal ruler ready to guide your cuts and keep them straight. Have you ever tried cutting without a guide? The results can be frustrating.
Adhesives And Sealants
Choosing the right adhesive is key to ensuring your covering sticks firmly and lasts long. Contact adhesive or construction glue works well for laminates and thin coverings. For heavier materials, a strong epoxy or silicone-based adhesive might be necessary.
Don’t forget sealants to protect the edges and prevent water damage. A clear silicone sealant around joints and seams provides a waterproof barrier and keeps your worktop looking polished. What’s worse than spending hours covering a worktop, only to have water seep in and cause swelling?
Measuring And Marking
Accurate measurements prevent costly mistakes. Use a tape measure to get exact dimensions of your worktop, including any cutouts for sinks or stoves. Mark your cutting lines clearly with a pencil or fine-tip marker for visibility without being too harsh.
A combination square can help check right angles, ensuring your covering fits perfectly in corners. Remember, double-checking measurements saves time and materials. Have you ever measured twice and cut once? It’s a simple step that makes a huge difference.
Maintenance And Care Tips
Covering a kitchen worktop protects it from stains and scratches. Clean the surface well before applying any cover. Regularly check for damage and replace coverings as needed to keep your worktop looking fresh.
Maintaining and caring for a kitchen worktop extends its life. With proper care, a worktop stays beautiful and functional. Here are some practical tips for upkeep.
Cleaning Methods
Regular cleaning keeps your worktop spotless. Use a mild detergent mixed with warm water. Avoid abrasive cleaners that can scratch surfaces. For stubborn stains, use baking soda with water. Apply, let sit, then gently scrub. Remember to dry surfaces after cleaning to prevent water spots.
Preventing Damage
Protect your worktop from heat and scratches. Use trivets for hot pans and cutting boards for chopping. Avoid dragging heavy items across the surface. Quickly wipe away spills, especially acidic ones. Citrus and vinegar can etch surfaces if left too long.
Refinishing And Touch-ups
Refinishing restores a worktop's shine. For wooden surfaces, use a high-quality oil or sealant. Apply thin layers and let each dry fully. For laminate, consider a touch-up kit for minor damage. Always follow product instructions for best results. Regular touch-ups keep worktops looking new.
Budget-friendly Ideas
Covering a kitchen worktop does not have to be expensive. Many budget-friendly options offer great style and protection. These ideas help refresh your kitchen without spending much money. Simple materials and creative touches can make a big difference.
Repurposing Materials
Old tiles, wooden pallets, and leftover laminate sheets can give new life to a kitchen worktop. Using what you already have saves money and reduces waste. Cut or arrange these materials to fit your surface.
- Use ceramic tiles for a colorful, durable cover.
- Sand and seal wooden boards for a rustic look.
- Apply leftover laminate for a smooth finish.
These options add charm and character. They also protect the worktop from scratches and stains.
Diy Decor Enhancements
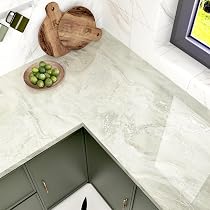
Simple DIY projects can enhance your kitchen worktop on a budget. Painting, stenciling, or applying contact paper are easy ways to update the surface. Choose colors and patterns that match your kitchen’s style.
- Use waterproof paint for a fresh, clean look.
- Stencil patterns add personality without much effort.
- Contact paper offers quick changes and easy removal.
These small upgrades brighten your kitchen and keep costs low. They also allow personal creativity to shine through.
Credit: www.amazon.co.uk
Frequently Asked Questions
What Materials Are Best To Cover A Kitchen Worktop?
Popular materials include laminate, wood veneer, vinyl, and tiles. Each offers durability and style to fit your kitchen design. Choose based on budget, ease of installation, and maintenance needs for the best results.
How Do I Prepare My Kitchen Worktop For Covering?
Clean the surface thoroughly and remove any grease or debris. Sand the worktop lightly for better adhesive grip. Ensure the surface is dry and smooth before applying any covering material.
Can I Cover A Kitchen Worktop Myself?
Yes, many materials like vinyl or laminate are DIY-friendly. Follow manufacturer instructions carefully. Take precise measurements and use proper tools for a neat finish. DIY saves costs but requires patience and attention to detail.
How Long Does It Take To Cover A Kitchen Worktop?
Covering typically takes a few hours to a day depending on material. Simple vinyl or laminate may take less time. Tiling or wood veneer could require longer due to drying or sealing times.
Conclusion
Covering a kitchen worktop can improve your space quickly. Choose materials that suit your style and budget. Measure carefully to avoid mistakes. Take your time during installation for best results. A fresh worktop can make your kitchen feel new. Enjoy cooking and spending time in your refreshed kitchen.
Small changes can make a big difference. Start your project with confidence and patience. Your kitchen deserves a neat and clean work surface.