
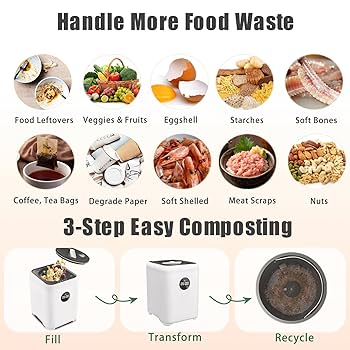
Are you tired of throwing away your kitchen scraps every day? What if you could turn those leftovers into something valuable for your garden and the environment?
Composting kitchen scraps is an easy, rewarding way to reduce waste and create rich soil for your plants. You’ll discover simple steps to start composting right in your own home. By the end, you’ll feel confident to transform your food waste into nutrient-packed compost.
Ready to make a positive change that benefits you and the planet? Let’s dive in!
Benefits Of Composting
Composting kitchen scraps offers many benefits. It helps the environment, improves gardens, and cuts down waste. These advantages make composting a smart choice for every home.
Environmental Impact
Composting reduces the amount of trash sent to landfills. It lowers greenhouse gas emissions from rotting food. Compost adds nutrients back to the soil, boosting its health naturally. This process supports a cleaner, greener planet.
Gardening Advantages
Using compost enriches garden soil with essential nutrients. It improves soil texture and moisture retention. Plants grow stronger and healthier with compost. It reduces the need for chemical fertilizers, making gardens safer.
Waste Reduction
Composting turns kitchen scraps into valuable material. It reduces household garbage by recycling food waste. Less waste means fewer trips to the trash bin. This simple habit helps conserve landfill space and resources.
Choosing A Composting Method
Choosing the right composting method can make a big difference in how much you enjoy the process and stick with it. Your space, lifestyle, and the type of scraps you generate influence which option fits best. Let’s look at some popular ways to turn your kitchen waste into nutrient-rich compost.
Indoor Composting
Indoor composting is perfect if you don’t have access to a yard or want to compost year-round. You can use small bins or containers with tight lids to keep odors and pests away.
Many people use a compost pail with a charcoal filter, which helps control smells. Just add your kitchen scraps like fruit peels, coffee grounds, and vegetable leftovers regularly.
Ask yourself: Do you cook enough to fill a small bin consistently? This method works best when you generate moderate scraps and want a low-maintenance setup.
Outdoor Composting
If you have garden space, outdoor composting offers more room and faster results. You can pile your scraps in a compost bin or heap in a corner of your yard.
Make sure to balance green materials (like food scraps) with brown materials (like dry leaves or shredded paper) to speed up decomposition. Turning the pile every week helps keep it aerated and prevents bad odors.
Consider your climate—cold winters slow down composting, so you might need to adjust your routine or cover the pile. Does your yard get enough sunlight to warm the compost? Sunlight helps activate the microbes that break down your scraps.
Vermicomposting
Vermicomposting uses worms to break down kitchen waste quickly and efficiently. This method is great for indoor use and produces rich worm castings that plants love.
You’ll need a worm bin, which can fit under your sink or in a small corner. Red wigglers are the best worms for this job, and they can handle most fruit and vegetable scraps.
Keep the worm bin moist but not soggy, and avoid adding meat or dairy, which can harm the worms. If you want a hands-on composting experience that also feeds your houseplants, vermicomposting might be your best choice.
Setting Up Your Compost Bin
Choose a dry, shady spot for your compost bin. Collect kitchen scraps like fruit peels and vegetable bits. Turn the pile often to help it break down faster.
Setting up your compost bin is the first step toward reducing kitchen waste. It ensures a sustainable environment and healthy garden soil. This task is simple and rewarding.
Selecting The Right Container
Choosing the right container is crucial for effective composting. Look for a bin with good airflow. It should have a lid to keep pests away. A sturdy material like plastic or wood works best. Consider the size based on your kitchen waste. A small family might need a 5-gallon bin. Larger families may require a 10-gallon bin. Make sure it fits in your chosen space.
Ideal Location
Place your compost bin in a convenient spot. It should be easily accessible from the kitchen. A spot with partial sunlight is ideal. Sunlight helps speed up the composting process. Avoid placing it near windows or doors to prevent odors. Ensure the ground is flat and stable. This prevents the bin from tipping over. Keep it near a water source for easy moisture control.
Essential Tools
Having the right tools makes composting easier. A small pitchfork or shovel is useful for turning the compost. It helps mix the materials and speeds up decomposition. You may also need a spray bottle. It helps maintain the right moisture level. A thermometer is handy to monitor the compost temperature. Keep a small bucket in the kitchen for collecting scraps. These tools simplify the composting process. They ensure your compost is healthy and efficient.

Credit: purevergreen.com
Kitchen Scraps To Compost
Kitchen scraps are perfect materials for composting. They break down quickly and add valuable nutrients to your compost pile. Using these scraps reduces waste and creates rich soil for your plants. Knowing which kitchen scraps to compost helps you maintain a healthy compost system.
Vegetable And Fruit Peels
Vegetable and fruit peels are excellent for composting. They decompose fast and enrich the compost with nutrients. Examples include:
- Potato peels
- Carrot tops and peels
- Apple cores and peels
- Banana skins
- Onion skins
These scraps add moisture and carbon to your compost. Chop large pieces to speed up decomposition.
Coffee Grounds And Tea Bags
Coffee grounds are a great source of nitrogen for compost. They help balance carbon-rich materials. Used tea bags also work well, but check if they are made from compostable materials. Avoid plastic tea bags, as they do not break down.
- Use fresh or dried coffee grounds
- Remove staples from tea bags
- Mix with other compost materials
Avoiding Harmful Items
Not all kitchen scraps belong in compost. Avoid adding:
- Meat and fish scraps
- Dairy products
- Oily or greasy foods
- Diseased plants or weeds
- Pet waste
These items attract pests or cause odors. They also slow down the composting process. Stick to plant-based scraps for best results.
Balancing Green And Brown Materials
Balancing green and brown materials in your compost pile is essential for creating rich, healthy compost. Greens provide nitrogen, which fuels the microbes breaking down the organic matter. Browns supply carbon, giving structure and helping to keep the pile aerated.
Finding the right balance can feel tricky, but it’s key to avoiding bad smells and speeding up decomposition. Have you ever noticed your compost smelling like ammonia or getting soggy? That often means your mix is off. Let’s break down what greens and browns really are, and how to keep them balanced.
What Are Greens?
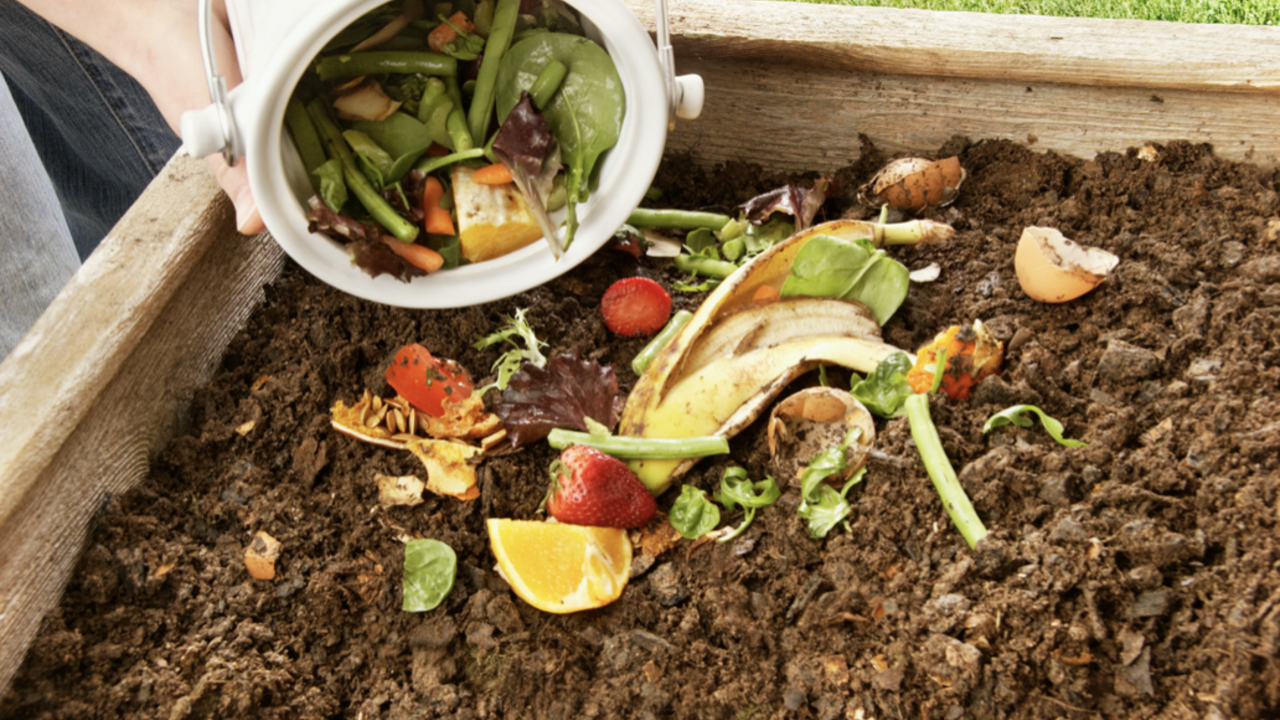
Greens are wet, nitrogen-rich materials that help microbes grow fast. Think kitchen scraps like vegetable peels, fruit waste, coffee grounds, and fresh grass clippings. These materials break down quickly and add moisture to your compost.
Be careful not to add meat, dairy, or oily foods here—they attract pests and cause odors. You can also include garden waste like green leaves or spent flowers. The fresher and moister the green material, the more nitrogen it contains.
What Are Browns?
Browns are dry, carbon-rich materials that balance out the nitrogen from greens. Common browns include dry leaves, shredded paper, cardboard, straw, and wood chips. They help absorb excess moisture and provide air pockets for oxygen.
Without enough browns, your compost can become slimy and smelly. Too many browns, however, slow down decomposition because microbes need nitrogen to thrive. Browns often come from materials that look dry and crumbly.
Maintaining The Right Mix
A good rule of thumb is to aim for about three parts browns to one part greens by volume. This ratio keeps your compost moist but not soggy and prevents odors. If your compost smells bad, add more browns. If it seems dry and slow to break down, add more greens.
Turn the pile regularly to mix greens and browns evenly and introduce oxygen. You can also keep a small bin nearby to layer kitchen scraps with dry leaves or shredded paper right away. This habit helps maintain balance and speeds up the composting process.
Have you tried adding newspaper or coffee filters to your compost? These easy-to-find browns often slip under the radar but can make a big difference. What green and brown materials do you have on hand right now?
Credit: extension.msstate.edu
Maintaining Your Compost
Maintaining your compost is key to turning kitchen scraps into rich soil. Proper care speeds up decomposition and prevents problems. Regular attention keeps the pile healthy and active.
Turning The Pile
Turning the compost pile mixes air into the scraps. This helps microbes break down material faster. Use a garden fork or shovel to lift and turn the pile. Aim to turn it every 1 to 2 weeks. This prevents bad smells and keeps the compost moist inside.
Monitoring Moisture
Compost should feel like a wrung-out sponge—damp but not soggy. Too much water causes bad odors and slows decomposition. Too little water stops the process. Check moisture by squeezing the compost. Add water if it feels dry. Add dry materials like shredded paper if it is too wet.
Managing Odors
Good compost smells earthy, not rotten. Bad smells mean something is wrong. Often, odors come from too much wet material or poor airflow. Add dry brown materials like leaves or cardboard. Turn the pile to bring in fresh air. Avoid adding meat or dairy scraps to keep odors low.
Harvesting Finished Compost
Harvesting finished compost is an exciting part of composting kitchen scraps. It marks the moment your waste turns into rich, natural soil. This process helps your garden grow strong and healthy without chemicals.
Recognizing Ready Compost
Finished compost looks dark and crumbly. It has a rich, earthy smell, not sour or rotten. You won’t see any food pieces or large debris inside. The texture feels soft and moist, like damp soil.
Check the temperature of the compost pile. It should be cool, not warm or hot. This means the composting process is complete. If the pile still feels warm, give it more time to break down.
How To Use Compost In Your Garden
Use compost to improve garden soil. Mix it into flower beds and vegetable patches to add nutrients. Spread a thin layer on top of the soil to help retain moisture.
Compost works well as mulch. It protects plants from extreme temperatures and weeds. You can also use it in pots and containers for houseplants.
- Mix compost with garden soil before planting.
- Sprinkle a layer around plants for extra nutrients.
- Add compost to seed-starting mix for better growth.

Credit: food52.com
Troubleshooting Common Issues
Troubleshooting common composting issues helps keep your kitchen scraps turning into rich soil. Some problems may slow down the process or create unwanted smells. Simple fixes can restore balance quickly. Understanding these issues makes composting easier and more enjoyable.
Dealing With Pests
Pests like flies, rodents, or ants can invade compost piles. Keep scraps covered with dry leaves or shredded paper. Use a bin with a secure lid to block pests. Avoid adding meat, dairy, or oily foods that attract animals. Turning the compost regularly also disturbs pests and keeps them away.
Fixing Slow Decomposition
Slow composting often means the pile lacks air, moisture, or the right mix of materials. Turn the pile to add oxygen. Add water if the pile feels dry, but do not soak it. Balance green scraps (vegetables, fruit) with brown scraps (paper, dry leaves). Smaller pieces break down faster, so chop large scraps before adding them.
Preventing Foul Smells
Bad smells come from too much moisture or too many greens. Add dry brown materials to absorb excess water. Mix the pile to improve airflow and reduce odor. Avoid adding cooked or oily foods that cause smells. Keeping the compost aerobic helps stop foul odors and keeps the process healthy.
Frequently Asked Questions
What Kitchen Scraps Can I Compost At Home?
You can compost fruit and vegetable peels, coffee grounds, eggshells, and tea bags. Avoid meat, dairy, and oily foods to prevent odors and pests.
How Do I Start A Compost Bin For Kitchen Scraps?
Choose a bin with good airflow. Add equal parts of green (kitchen scraps) and brown (dry leaves) materials. Turn regularly to speed decomposition.
How Long Does Kitchen Scrap Compost Take To Decompose?
Kitchen scrap compost usually takes 2 to 3 months. Proper aeration and moisture speed up the process. Finished compost is dark and crumbly.
Can Composting Kitchen Scraps Reduce Household Waste?
Yes, composting kitchen scraps can reduce household waste by up to 30%. It lowers landfill trash and creates nutrient-rich soil for plants.
Conclusion
Starting composting kitchen scraps helps reduce waste and enrich soil. It saves money and supports a healthy garden. Small steps make a big difference over time. Keep adding scraps and turn the pile regularly. Watch your compost break down into rich, dark soil.
Everyone can join in and make the earth healthier. Begin today and enjoy the simple rewards of composting. It’s easy, good for nature, and feels great. Why not try it?