
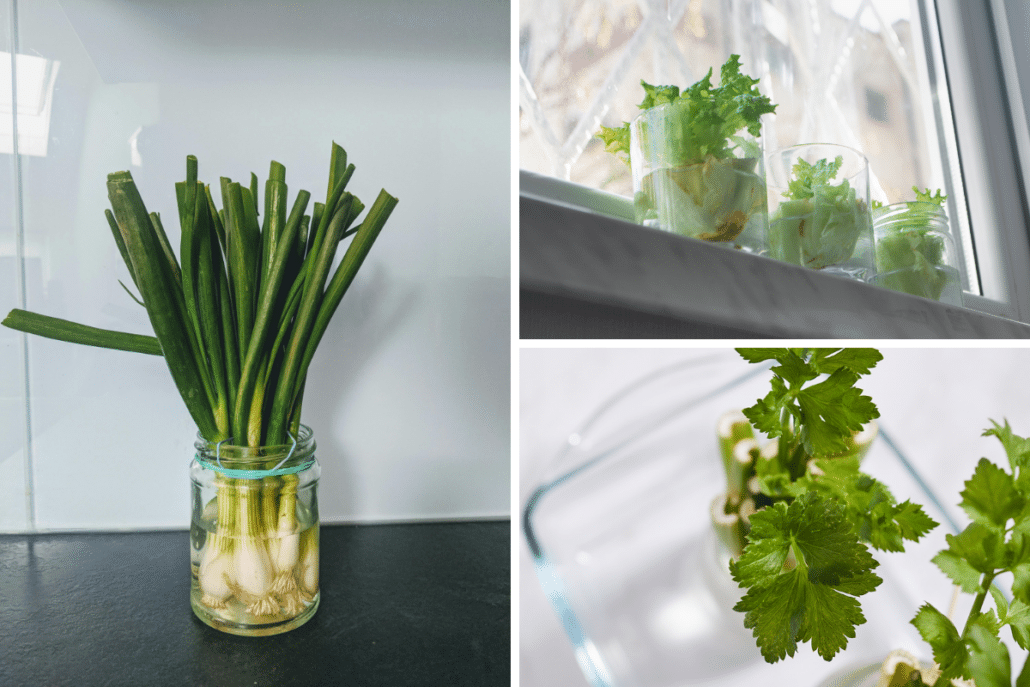
Have you ever wondered if those leftover kitchen scraps could do more than just fill your trash bin? What if you could turn peelings, stems, and seeds into fresh herbs, veggies, or even new plants right in your home?
Growing kitchen scraps is easier than you think, and it can save you money while reducing waste. You’ll discover simple, practical steps to transform your everyday food leftovers into a thriving mini garden. Ready to see your scraps come to life?
Let’s dive in!
Choosing Kitchen Scraps
Choosing the right kitchen scraps to grow is an essential first step in turning your food waste into fresh produce. Not all scraps regrow well, and some might even harm your plants or soil. By selecting scraps carefully, you set yourself up for a successful and rewarding growing experience.
Best Scraps For Regrowth
Some kitchen scraps regrow quickly and easily, making them perfect for beginners. Green onions, for example, can regrow from just the white root ends if you place them in water. Lettuce and celery bases also sprout new leaves with minimal effort.
Other great options include:
- Carrot tops – grow fresh greens for salads
- Garlic cloves – sprout new shoots for cooking
- Potato eyes – develop into full plants
These scraps save money and reduce waste while providing a steady supply of fresh ingredients. Have you ever noticed how a simple green onion can keep growing on your windowsill?
Avoiding Harmful Waste
Not all scraps are safe for regrowth. Avoid scraps from spoiled or moldy vegetables, as they can introduce harmful bacteria or fungi into your growing space. Also, citrus peels and onion skins generally don’t regrow well and may attract pests.
Steer clear of scraps treated with pesticides or wax coatings. These chemicals might harm your plants or soil health. Instead, choose organic scraps whenever possible to ensure the best results.
Are you paying attention to what might be hidden in your scraps before planting? Small choices can make a big difference in your garden’s success.
Preparing Scraps For Planting
Preparing your kitchen scraps for planting is a crucial step that sets the stage for healthy growth. Proper preparation helps prevent mold and rot, ensuring your plants get the best start. Let’s break down how to clean and cut your scraps effectively, then look at how you can use water or soil to encourage new roots.
Cleaning And Cutting Tips
First, always rinse your scraps under cool water to remove any dirt, pesticides, or leftover food. Clean scraps reduce the risk of bacterial growth, which can spoil your planting efforts.
Next, cut your scraps into manageable pieces. For example, trimming green onion roots to about 1-2 inches makes them easier to handle and encourages faster root growth.
- Remove damaged or soft parts to avoid mold
- Keep the base or root end intact for better regrowth
- Use a sharp knife to make clean cuts, reducing damage
Have you noticed how some scraps sprout faster when trimmed neatly? That’s because clean cuts help the plant focus energy on new growth instead of healing wounds.
Using Water Or Soil Methods
You can choose between water or soil to regrow your scraps, and each has its own benefits. Water lets you watch roots grow, making it perfect for beginners or kids.
Place your scraps—like celery bases or lettuce stems—in a shallow bowl of water. Change the water every couple of days to keep it fresh and avoid bad smells.
- Use clear containers to monitor root progress
- Keep the water level just enough to cover the base
- Move the container to a sunny spot but avoid direct harsh sunlight
On the other hand, planting scraps directly in soil encourages stronger, faster growth in the long run. Soil provides nutrients and stability that water alone can’t offer.
Simply press the base of your scrap into moist potting soil, about an inch deep. Keep the soil damp but not soaked, and watch new shoots appear within days.
Which method sounds more enjoyable for you—watching roots in water or tending to soil? Trying both might give you a better feel for what works in your space.
Planting Techniques
Growing kitchen scraps is a simple way to create fresh plants at home. Using the right planting techniques helps these scraps grow strong and healthy. Proper care in planting gives your scraps a better chance to sprout and thrive. Focus on the right containers, soil, light, and temperature to support growth.
Containers And Soil Selection
Choose containers with good drainage holes to prevent water buildup. Small pots or recycled containers work well for scraps. Fill containers with loose, well-draining soil. Avoid heavy or compacted soil that holds too much water.
- Use potting mix with organic matter for nutrients.
- Add sand or perlite for better drainage.
- Keep soil moist but not soggy to avoid root rot.
Light And Temperature Needs
Place plants where they get plenty of indirect sunlight. Most kitchen scraps grow best in bright, filtered light. Avoid direct, harsh sunlight that can burn tender leaves.
Maintain a warm temperature between 65°F and 75°F (18°C to 24°C). Cooler temperatures slow growth and can cause damage. Keep scraps away from cold drafts and heating vents for steady growth.

Credit: www.youtube.com
Care And Maintenance
Growing plants from kitchen scraps is simple but needs regular care. Proper attention helps scraps turn into healthy plants. This section explains how to keep your plants thriving through watering, natural fertilizing, and pest control.
Watering Schedules
Water is crucial for growing kitchen scraps. Check the soil moisture every day. Water the plants when the top inch feels dry. Avoid overwatering; soggy soil harms roots. Use a spray bottle for gentle watering. Morning watering is best to reduce evaporation.
Fertilizing Naturally
Kitchen scraps provide nutrients but sometimes need a boost. Use compost made from leftover vegetables, coffee grounds, and eggshells. Apply compost around the base of the plants once a month. Liquid fertilizers from diluted compost tea work well too. Avoid chemical fertilizers to keep plants safe and organic.
Pest Control
Pests can damage growing scraps quickly. Inspect plants regularly for signs of bugs or holes. Use natural pest repellents like neem oil or garlic spray. Attract helpful insects such as ladybugs to your garden. Remove damaged leaves to stop pests from spreading.
Common Challenges
Growing kitchen scraps into new plants is an exciting and sustainable way to cultivate your own food. However, it comes with its own set of challenges. Understanding these common obstacles can help you overcome them and ensure successful growth.
Troubleshooting Growth Issues
Sometimes, your kitchen scraps might not sprout as expected. This could be due to insufficient light, poor soil, or incorrect watering. Make sure your scraps get enough sunlight; placing them near a sunny windowsill can make a huge difference.
Check the soil's quality and moisture. Scraps need nutrient-rich soil and consistent watering, but don't overdo it. An easy way to ensure you're watering correctly is to touch the soil—if it feels dry, add water; if moist, wait a day or two.
Preventing Mold And Rot
Mold and rot are common issues that can quickly ruin your efforts. To prevent this, ensure your scraps have good air circulation. Avoid placing them too close together, as this can trap moisture and encourage mold growth.
If you notice mold, act fast by removing the affected part and ensuring the remaining plant is dry. Using containers with drainage holes can help excess water escape, reducing the risk of rot. Remember, it's about balance; your plants should be moist, not soggy.
Have you faced any of these challenges while growing your kitchen scraps? Share your experiences and tips in the comments below. Your insights could help someone else succeed!

Credit: shopping.yahoo.com
Creative Uses For Grown Plants
Growing plants from kitchen scraps brings new life to your home and meals. These plants offer fresh ingredients and a chance to enjoy gardening indoors or outdoors. Creative uses for grown plants make your efforts rewarding and practical. Discover how to harvest, cook, and share your plants for the best results.
Harvesting Tips
Pick leaves or stems early in the morning for best freshness. Use clean scissors to avoid damaging plants. Harvest regularly to encourage new growth. Focus on outer leaves first and leave the center intact. Avoid cutting more than one-third of the plant at once.
Incorporating Into Meals
Add fresh greens to salads for crisp texture and flavor. Use herbs to enhance soups, sauces, and dressings. Blend leaves into smoothies for extra nutrients. Garnish cooked dishes with chopped stems or leaves. Try simple recipes that highlight your fresh-grown plants.
Sharing And Gifting Plants
Pass cuttings or small pots to friends and family. Share your gardening success and inspire others. Package plants in recycled containers for eco-friendly gifts. Write simple care instructions to help recipients grow plants easily. Celebrate community and nature through shared plants.
:strip_icc()/bhg-basil-plant-water-jar_3vLUuqCn45Z8ICCfzM4Xd8-b20a09155a464cbba3c96ce609810ebb.jpg)
Credit: www.bhg.com
Frequently Asked Questions
What Kitchen Scraps Can You Grow At Home?
You can grow green onions, garlic, lettuce, and celery from scraps. Many vegetable ends regrow when placed in water or soil. This method saves money and reduces waste. It’s an easy way to produce fresh greens right in your kitchen.
How Do You Regrow Kitchen Scraps Indoors?
Place scraps like green onion roots in a glass of water. Keep them on a sunny windowsill and change water every few days. Once roots develop, plant them in soil. This indoor method encourages healthy growth and fresh herbs year-round.
Can Kitchen Scraps Grow In Soil Directly?
Yes, many scraps like potato eyes or carrot tops grow well in soil. Plant them in pots or garden beds, water regularly, and ensure sunlight. Soil provides nutrients that water alone cannot, leading to stronger plants and better yields.
How Long Does It Take For Scraps To Regrow?
Most kitchen scraps show growth within 1-2 weeks. Green onions and lettuce regrow quickly, while root vegetables may take longer. Patience and proper care, like adequate light and water, speed up the regrowth process effectively.
Conclusion
Growing plants from kitchen scraps saves money and reduces waste. It also brings fresh greens right to your home. With simple steps, anyone can start this easy gardening habit. Watch roots grow, leaves sprout, and enjoy the process. Small efforts make a big difference in your garden.
Give it a try and see the results yourself. Gardening can be fun and rewarding for all ages. Start today and grow your own healthy food from scraps.