
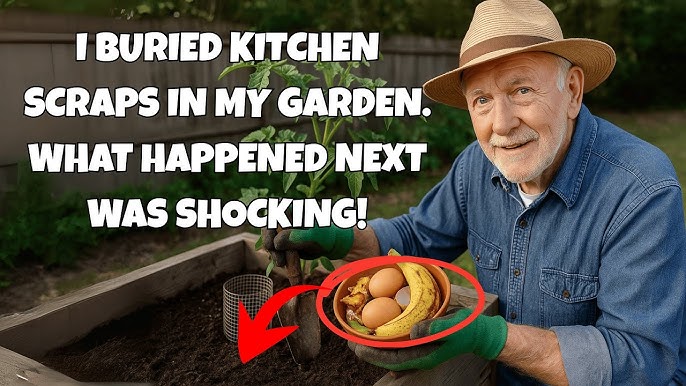
Have you ever wondered if you can simply bury your kitchen scraps right in your garden? It sounds like a smart, natural way to reduce waste and nourish your plants.
But is it really safe and effective? You might be surprised by what actually happens beneath the soil when you do this. Keep reading to discover the best way to turn your kitchen leftovers into garden gold—and avoid common mistakes that could harm your plants or attract pests.
Your garden will thank you!
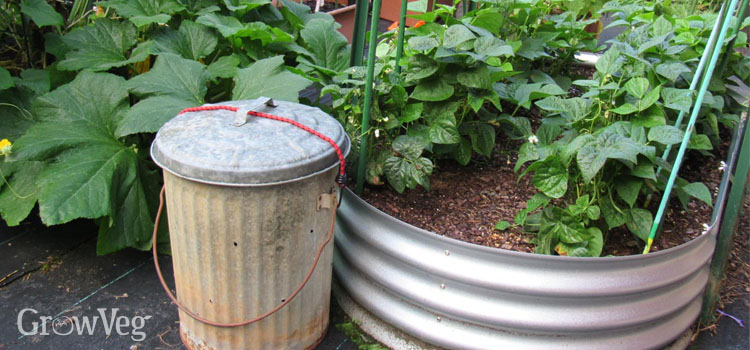
Credit: www.growveg.com
Benefits Of Burying Kitchen Scraps
Burying kitchen scraps in your garden offers several benefits for both your plants and the environment. It is a simple way to recycle food waste and improve soil health naturally. This practice helps maintain a healthy garden ecosystem while reducing waste sent to landfills.
Nutrient Boost For Soil
Kitchen scraps add valuable nutrients directly into the soil. As they break down, they release nitrogen, phosphorus, and potassium. These are essential elements that plants need to grow strong and healthy. This natural fertilization helps your garden thrive without chemical fertilizers.
Reducing Household Waste
Burying scraps cuts down the amount of trash your household produces. Food waste is a large part of what goes to landfills. Recycling these scraps in your garden lowers your carbon footprint. It also saves money on garbage bags and waste collection.
Encouraging Microbial Activity
The buried scraps feed helpful microorganisms in the soil. These microbes break down organic matter and improve soil structure. Active microbial life helps roots absorb nutrients better. It also supports a balanced ecosystem that protects plants from diseases.
Best Kitchen Scraps To Bury
Burying kitchen scraps in your garden helps enrich the soil naturally. Choosing the right scraps ensures healthy plants and less pest attraction. Some scraps break down faster and add key nutrients to the soil. Others improve soil texture and support beneficial microbes. Here are the best kitchen scraps to bury for a thriving garden.
Vegetable And Fruit Peels
Vegetable and fruit peels are excellent for the garden. They decompose quickly, releasing nutrients like potassium and phosphorus. Peels from potatoes, carrots, apples, and bananas work well. Avoid citrus peels in large amounts as they can alter soil pH. Chop peels into small pieces to help them break down faster.
Coffee Grounds And Tea Leaves
Coffee grounds add nitrogen to the soil, improving plant growth. Tea leaves also provide nutrients and help soil retain moisture. Spread coffee grounds and tea leaves thinly to avoid compacting the soil. Used coffee filters and tea bags (without staples) can be buried too. These scraps support earthworms and beneficial microbes.
Eggshells And Nut Shells
Eggshells add calcium, which strengthens plant cell walls. Crush eggshells before burying for quicker decomposition. Nut shells are harder and take longer to break down. Use crushed nut shells to improve soil aeration and drainage. Avoid shells with mold or salt residue to keep plants safe.
Scraps To Avoid Burying
Certain kitchen scraps like meat, dairy, and oily foods should never be buried in your garden. These can attract pests and cause bad odors. Stick to plant-based scraps for safer, cleaner composting in your soil.
Burying kitchen scraps in your garden is a fantastic way to enrich your soil naturally. However, not all scraps are garden-friendly. Certain items can attract pests, introduce diseases, or hinder plant growth. Being selective about what you bury can make all the difference in your garden's health.
Meat And Dairy Products
Meat and dairy products can be a magnet for unwanted pests like raccoons and rodents. These scraps decompose slowly, creating unpleasant odors in the process. They can also harbor harmful bacteria, which can spread to your plants and soil.
Oily And Processed Foods
Oils and processed foods can create a barrier in the soil, affecting its structure and drainage. This can prevent water and nutrients from reaching plant roots. Additionally, processed foods often contain preservatives and additives that are not beneficial for soil health.
Diseased Plant Material
Plant material with diseases or pests should never be buried. Burying these can spread the disease to healthy plants, compromising your entire garden. Always inspect your plant waste before deciding to bury it, ensuring it’s free from any signs of infection or infestation. By avoiding these types of scraps, you can maintain a healthy and thriving garden environment. What surprising items have you found to be beneficial or harmful in your garden soil?
How To Bury Scraps Properly
Burying kitchen scraps in your garden can be a fantastic way to enrich the soil and reduce waste. However, doing it properly makes all the difference between a thriving garden and one with pests or unpleasant smells. Here’s how you can handle your scraps in a way that benefits your plants and keeps your garden healthy.
Choosing The Right Spot
Pick a location in your garden that isn’t too close to plant roots or high-traffic areas. You want the scraps to break down without disturbing your plants or attracting unwanted animals. A spot with good drainage helps prevent waterlogging and odor issues.
Consider rotating spots regularly. This avoids nutrient overload in one area and helps spread the benefits evenly. Have you noticed how some parts of your garden grow better? This technique could be why.
Depth And Layering Techniques
Dig a hole at least 6 to 12 inches deep to bury your scraps. This depth keeps them away from pests and helps microbes break down the material faster. Shallow burial can invite flies and rodents.
Layering scraps with soil or garden waste speeds up decomposition and controls smell. Alternate between scraps and a layer of soil about 2 inches thick. This acts like a natural barrier and keeps your garden tidy.
Timing And Frequency
Don’t dump all your scraps at once. Bury them in small batches every week or two to maintain balance in your soil. Overloading one spot can cause unpleasant smells and slow decomposition.
Think about your garden’s needs and seasons. Adding scraps during active growing seasons gives plants a nutrient boost. During dormant times, slow down to avoid excess nutrients that might harm your soil’s health.
Alternatives To Direct Burial
Burying kitchen scraps directly in your garden might seem like the easiest way to recycle waste, but it can attract pests and cause uneven decomposition. Luckily, there are smarter alternatives that improve soil health and keep your garden thriving without unwanted critters. These methods turn your scraps into rich nutrients more efficiently and safely.
Composting Basics
Composting is a simple way to transform kitchen scraps into nutrient-rich soil. You just need a bin or a pile where you add a mix of green materials like vegetable peels and brown materials such as dry leaves or paper. Keep the pile moist and turn it regularly to speed up decomposition.
Have you ever noticed how compost can smell earthy and fresh instead of rotten? That’s because proper balance and airflow prevent bad odors and pests. Plus, composting reduces the volume of waste by up to 50%, giving you more space in your trash bin.
Using Worm Bins
Worm bins, or vermicomposting, use special worms to break down food scraps quickly. These worms eat your scraps and produce castings, which are powerful natural fertilizers. A worm bin fits easily under a kitchen sink or on a balcony, making it perfect for small spaces.
Setting up a worm bin is easier than you think. Just add shredded paper, kitchen scraps, and worms, then keep the bin moist and dark. Have you tried feeding your worms coffee grounds or fruit peels? They love these, and your plants will thank you for the rich worm castings.
Trench Composting
If you want to recycle scraps directly in your garden without pests, trench composting is a great option. Dig a trench about 12 inches deep, add your kitchen scraps, then cover them with soil. This hides the scraps from animals and lets them break down slowly in place.
One advantage of trench composting is that it enriches the soil right where your plants grow. You can rotate trenches each season to keep your garden healthy and productive. Have you thought about how this method could save you time and effort while feeding your garden naturally?

Credit: selfsufficientme.com
Troubleshooting Common Issues
Dealing with kitchen scraps in your garden can be rewarding but sometimes tricky. You might face issues like pests, bad smells, or even soil problems. Understanding how to troubleshoot these common issues will keep your garden healthy and thriving.
Dealing With Pests
Pests are often attracted to buried kitchen scraps, especially if you bury them too close to the surface. To keep unwanted visitors away, try burying scraps at least 8-12 inches deep. This depth discourages animals like raccoons, rats, and flies from digging them up.
Adding a layer of soil mixed with dry leaves or straw can also help mask the scent. If pests persist, consider using natural deterrents such as chili powder or diatomaceous earth around the area. Have you noticed certain pests returning repeatedly? Adjusting where and how you bury scraps might be the key.
Avoiding Odors
Unpleasant smells often come from scraps that don’t decompose properly or are buried too shallowly. To avoid odors, chop your kitchen scraps into smaller pieces before burying them; this speeds up decomposition and reduces smell. Mixing in carbon-rich materials like shredded newspaper or dry leaves balances moisture and cuts down on stench.
Also, avoid burying meat, dairy, or oily foods as they tend to produce strong odors and attract pests. Keeping a dedicated spot and rotating your burying areas prevents buildup and keeps your garden fresh. What’s your experience with garden smells—have you found a trick that works well?
Preventing Soil Imbalance
Burying large amounts of kitchen scraps in one place can throw off your soil’s nutrient balance. Scraps high in nitrogen, like vegetable peels, need to be balanced with carbon-rich materials to avoid “burning” your plants or slowing their growth. Consider mixing scraps with garden compost or mulch before burying.
Test your soil regularly to monitor pH and nutrient levels. If you see signs like yellowing leaves or poor growth, it might be time to adjust how much and what type of scraps you add. Have you ever noticed strange changes in your plants after adding kitchen waste? Small tweaks can make a big difference.
Tips For Maintaining Healthy Soil
Keeping your garden soil healthy is key to growing strong, productive plants. Soil that is rich and well-balanced supports roots, holds nutrients, and retains moisture effectively. Here are some practical tips to help you maintain soil that your plants will love.
Crop Rotation Benefits
Changing the types of plants you grow in the same spot each season prevents nutrient depletion. Different crops use and return different nutrients, so rotating them keeps soil fertile naturally.
If you plant tomatoes in one area this year, try beans or leafy greens there next year. This breaks pest and disease cycles, reducing the need for chemical treatments.
Have you noticed how some plants seem to struggle in the same spot year after year? Crop rotation can solve that problem by giving your soil a chance to recover.
Mulching Strategies
Adding mulch to your garden helps regulate soil temperature and retains moisture. Organic mulches, like straw or shredded leaves, also break down over time, feeding your soil with nutrients.
Be sure to keep mulch a few inches away from plant stems to prevent rot. Applying a 2-3 inch layer around your plants can reduce weeds and protect soil from erosion.
Try mixing green (fresh grass clippings) and brown (dry leaves) mulches to balance nitrogen and carbon. This mix helps maintain a healthy soil environment.
Regular Soil Testing
Testing your soil every year or two gives you clear insight into its nutrient levels and pH balance. Knowing this helps you add exactly what your soil needs without guessing.
Many garden centers offer affordable soil testing kits, or you can send samples to a local extension service. Use the results to adjust fertilizer and lime applications accurately.
Have you ever wondered why some plants thrive while others struggle nearby? Soil testing might reveal hidden imbalances affecting their growth.

Credit: www.youtube.com
Frequently Asked Questions
Can I Bury All Kitchen Scraps In My Garden?
No, avoid burying meat, dairy, and oily foods. These attract pests and cause odors. Stick to vegetable peels, fruit scraps, coffee grounds, and eggshells for safe burying.
How Deep Should I Bury Kitchen Scraps In Soil?
Bury scraps at least 6 to 8 inches deep. This depth prevents pests and allows faster decomposition. Cover the area with soil to minimize odors and keep animals away.
Will Burying Scraps Improve My Garden Soil?
Yes, buried scraps enrich soil with nutrients and organic matter. They help improve soil structure, moisture retention, and support beneficial microbes. This promotes healthier plant growth over time.
Can Burying Kitchen Scraps Harm My Plants?
No, if done correctly, it won’t harm plants. Avoid burying scraps too close to roots. Properly decomposed scraps release nutrients slowly, benefiting your garden without causing damage.
Conclusion
Burying kitchen scraps in your garden can help enrich the soil. It adds nutrients and supports plant growth naturally. Avoid burying meat or oily foods to keep pests away. Turn the soil regularly to speed up decomposition. This simple habit can reduce waste and improve your garden's health.
Try it and see how your plants respond. A small effort brings big benefits to your garden and the environment.