
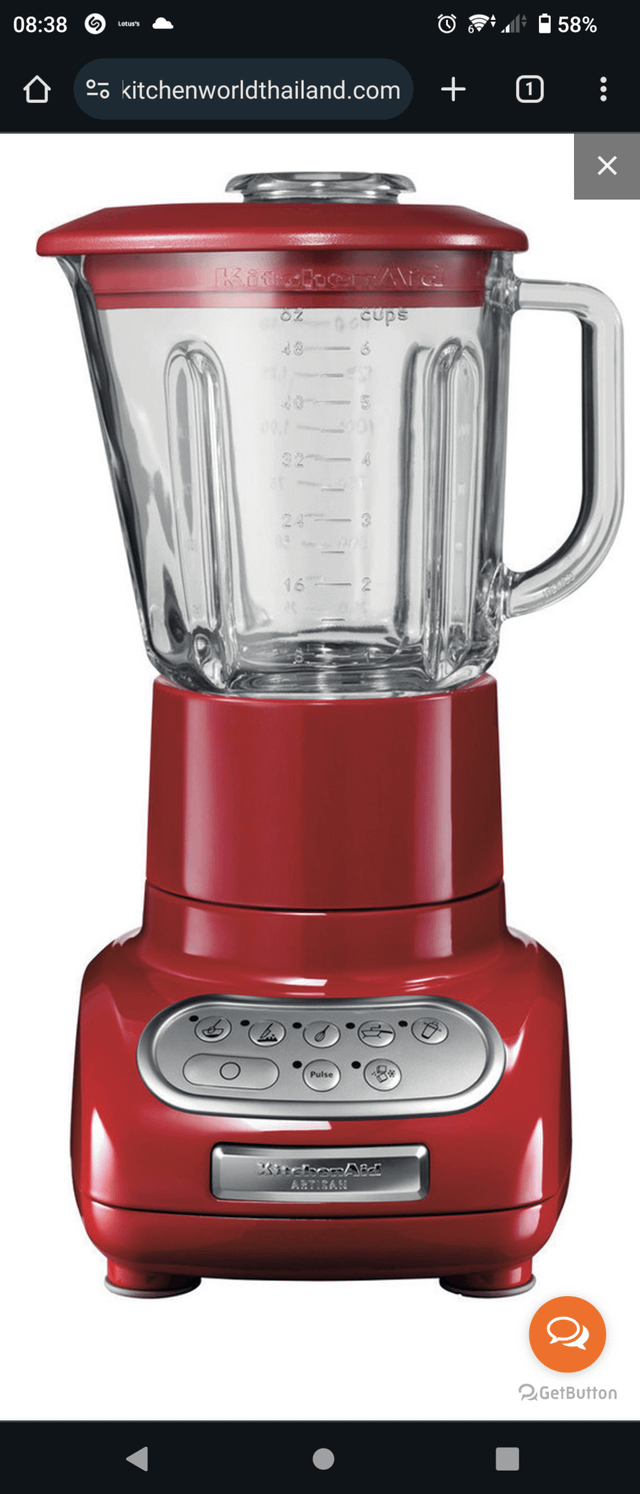
Have you ever wondered if your KitchenAid blender can do more than just smoothies and soups? What if it could also grind your coffee beans, spices, or nuts?
Imagine saving time and money by using one appliance for multiple tasks in your kitchen. But before you start tossing ingredients in, you need to know if it’s safe and effective. You’ll discover the truth about using your KitchenAid blender for grinding and how to get the best results without damaging your appliance.
Keep reading to unlock the full potential of your blender!
Kitchenaid Blender Basics
Understanding the basics of your KitchenAid blender is essential before trying to use it for grinding tasks. Knowing what makes this appliance tick helps you decide if it’s the right tool for your grinding needs. Let’s break down the core components that define its performance and capabilities.
Key Features
The KitchenAid blender stands out with its versatile settings and durable build. It usually offers multiple speed options, allowing you to control how fine or coarse you want your blend. Some models come with preset programs for smoothies, ice crushing, and even pureeing, which can be handy depending on your grinding goals.
Its easy-to-clean design and sturdy pitcher material also make it a practical choice for daily kitchen use. Have you ever struggled to clean a blender after grinding nuts or spices? KitchenAid’s design often minimizes that hassle, which can save you time and effort.
Motor Power
The motor power of a KitchenAid blender varies across models but typically ranges from 450 to 1200 watts. Higher wattage means the blender can handle tougher ingredients without overheating or stalling. If you're thinking about grinding hard items like coffee beans or seeds, you’ll want to make sure your model has enough power to do the job efficiently.
Keep in mind, even a powerful motor doesn’t guarantee perfect grinding results if the blades and container aren’t designed for that purpose. Do you know how much power your blender has? It’s worth checking before using it for grinding tasks.
Blade Design
The blade design in KitchenAid blenders is crafted mainly for blending and pureeing. The blades are often sharp and angled to create a vortex that pulls ingredients down towards the blades. This works great for smoothies or soups but might not be ideal for grinding dry or tough ingredients finely.
Some blenders have removable blades, which can be swapped for grinding-specific blades if available. Otherwise, the standard blades might struggle with achieving a consistent grind size. Have you noticed uneven textures when you tried grinding something in your blender? That could be due to the blade design not matching the task.

Credit: www.kitchenaid.com
Grinding Capabilities
Grinding is one of the tasks many people wonder if their Kitchen Aid blender can handle. While primarily designed for blending and pureeing, Kitchen Aid blenders do offer some grinding abilities. Understanding these capabilities helps you decide if your blender can replace a dedicated grinder or if you need additional tools.
Types Of Ingredients
Kitchen Aid blenders can grind various dry and wet ingredients, but their efficiency depends on the type. You can grind coffee beans, nuts, and seeds into coarse or fine particles. Soft ingredients like herbs and spices also break down well, but very hard items like whole grains may be tougher to process evenly.
Have you tried grinding small batches of spices or nuts in your blender? You might notice it works best when you pulse rather than run it continuously. This technique prevents overheating and uneven texture.
Texture Control
Your Kitchen Aid blender offers some control over texture by adjusting speed and blending time. Short pulses create a coarse grind, while longer blending produces finer results. This gives you flexibility depending on whether you want crunchy nut pieces or smooth nut butter.
Keep in mind that stopping and scraping down the sides helps maintain consistent texture. Do you prefer a chunky or smooth finish? Experimenting with speed and duration can help you find your perfect grind.
Limitations
Despite its versatility, the Kitchen Aid blender has limits when it comes to grinding. It may struggle with very hard or large quantities of dry ingredients. Overworking the motor can lead to overheating or damage, so avoid grinding large amounts in one go.
Also, the blade design is optimized for blending liquids, so it may not achieve the same fine powder as a dedicated coffee grinder or spice mill. If you need precise or very fine grinding regularly, a specialized grinder might be worth the investment.
Grinding Techniques
Grinding with your Kitchen Aid blender can be straightforward if you use the right techniques. Mastering these techniques helps you get the perfect texture without overheating the motor or ending up with uneven particles. Let’s explore some practical tips to make the most out of your blender’s grinding ability.
Pulse Method
The pulse method is your best friend for grinding small batches of spices or nuts. Instead of running the blender continuously, use short bursts of power. This prevents overheating and gives you more control over the consistency.
Try pulsing for about 2 to 3 seconds, then pause to check the texture. Repeat until you reach the desired grind. This approach also avoids turning your ingredients into powder too quickly.
Speed Settings
Your Kitchen Aid blender offers multiple speed settings, but not all are ideal for grinding. Low to medium speeds work best to break down tough ingredients without overheating the blades.
High speed can create too much heat, which may alter the flavor of spices or oils in nuts. Experiment with the speed dial, starting low and gradually increasing as needed. This helps you find the perfect balance between efficiency and preserving flavor.
Batch Size Tips
The size of your batch greatly affects grinding quality. Too much in the jar can overload the blades, while too little might not blend evenly.
- Fill your blender jar about halfway for best results.
- For small amounts, consider grinding in multiple batches.
- Make sure ingredients are dry to avoid clumping.
Have you noticed how a crowded jar slows down your blender? Adjusting batch size can be a simple fix to improve texture and protect your appliance.
Best Practices For Grinding
Grinding with your Kitchen Aid blender can be a game changer for your kitchen tasks. But to get the best results and keep your appliance in good shape, certain practices are key. Let’s look at some practical tips that ensure smooth grinding without damaging your blender or compromising your ingredients.
Prepping Ingredients
Cut ingredients into smaller, uniform pieces before grinding. This helps the blender blades work efficiently and prevents uneven textures. Dry ingredients like nuts or spices should be completely dry to avoid clumping or sticking inside the jar.
Think about what you’re grinding—harder items like coffee beans may need a quick pulse rather than long blending. Have you ever tried grinding something too large and ended up with chunks instead of a fine powder? Avoid that by prepping well.
Avoiding Overheating
Blenders can overheat if run for too long. To protect your Kitchen Aid motor, blend in short bursts rather than one long session. Give the blender a break after 20-30 seconds of continuous use to cool down.
Overheating not only risks the motor but can also affect the flavor of your ingredients. Ever noticed a burnt smell after grinding? That’s a sign you pushed your blender too hard. Pay attention to these signals to extend your blender's life.
Cleaning After Use
Grinding often leaves residues that can be tough to clean if left too long. Rinse the blender jar immediately after use with warm water to prevent particles from sticking. For stubborn bits, add warm water and a drop of dish soap, then pulse to clean hard-to-reach areas.
Don’t forget to dry the jar thoroughly before storing to avoid mold or odors. Have you experienced lingering smells from spices or coffee beans? Proper cleaning after grinding helps keep your blender fresh and ready for the next use.
Comparing Kitchenaid Blender To Other Grinders
When you think of grinding, your first thought might not be a blender. Yet, the KitchenAid Blender may surprise you with its versatility. How does it stack up against traditional grinders? Let's delve into the specifics and see how it compares to other common kitchen appliances.
Blender Vs Food Processor
Food processors are often hailed for their ability to chop, slice, and dice with precision. However, a KitchenAid Blender offers a unique edge with its powerful motor and ability to create silky smooth textures. Imagine blending a creamy soup or smoothie without worrying about uneven chunks.
While food processors excel at handling dry ingredients and tougher cuts, blenders bring finesse to liquids and softer foods. Think about your favorite hummus – the blender can whip it to a perfectly smooth consistency. Have you ever tried that with a food processor?
Blender Vs Coffee Grinder
Coffee grinders are specialized tools designed for one task – grinding coffee beans. But what if you're out of a coffee grinder? Your KitchenAid Blender might just save the day. Its ability to handle hard substances means you can achieve a similar grind for your morning brew.
However, consistency is key in coffee grinding. A blender may not provide the same uniformity a dedicated coffee grinder offers. Yet, for those moments when you need a quick solution, your blender is a viable alternative.
Performance And Efficiency
When it comes to performance, the KitchenAid Blender stands out with its robust design and high-speed settings. This ensures efficient grinding, whether you're tackling soft fruits or hard nuts. Have you ever noticed how quickly it transforms whole fruits into a smooth puree?
Efficiency is not just about speed but also convenience. With easy-to-clean parts and versatile settings, the blender saves you time and effort in the kitchen. Isn't it satisfying to have a single appliance that can handle multiple tasks with ease?
The KitchenAid Blender may not replace every specialized grinder in your kitchen, but its versatility and power make it a worthy contender. How will you use yours to make your kitchen tasks easier?

Credit: www.kitchenaid.com
Common Issues And Troubleshooting
Using a Kitchen Aid blender to grind ingredients can be convenient, but it sometimes leads to common issues that affect performance. Recognizing these problems early helps you troubleshoot effectively and get the best results without damaging your appliance. Let’s look at some typical challenges and how you can handle them.
Blade Dulling
Grinding hard ingredients like nuts or seeds regularly can dull the blades of your Kitchen Aid blender. Dull blades reduce efficiency, making grinding take longer or leaving chunks unprocessed.
If you notice your blender struggling or not producing a smooth grind, check the blades closely. You might need to sharpen them or replace the blade assembly to maintain optimal performance.
Have you ever ignored blade maintenance only to find your blender barely working? That experience often teaches the importance of regular care.
Motor Strain
Grinding dense or large quantities can put extra strain on the motor. Overheating or unusual noises are signs your blender is working too hard.
To avoid motor strain, try grinding in smaller batches and use the pulse function to give the motor breaks. This approach helps your blender last longer and prevents costly repairs.
Consider: Are you pushing your blender beyond its limits? Adjusting your technique might save you trouble down the line.
Uneven Grinding
Uneven grinding happens when ingredients are not processed uniformly, leaving you with a mix of fine powder and large chunks. This can be frustrating, especially when recipes demand consistency.
To fix this, pause the blender occasionally and stir the contents. Adding a small amount of liquid or using the pulse mode can also promote even grinding.
Have you noticed clumps sticking to the sides? Scraping down the container during grinding can help achieve the texture you want.
Recommended Accessories
Using a Kitchen Aid blender for grinding tasks can be easier with the right accessories. These tools help improve performance and protect your blender. They make grinding spices, nuts, or coffee beans more efficient and consistent.
Choosing suitable accessories extends the blender’s life and enhances results. Here are some key recommended accessories to consider for grinding.
Grinding Attachments
Grinding attachments fit directly onto your Kitchen Aid blender. They are designed to handle hard ingredients like seeds and grains. These attachments usually have stronger blades and smaller jars.
They help achieve finer and more even grinding. Many grinding attachments come with lids to prevent spills. Using these can save time and reduce wear on the main blender jar.
Additional Blades
Extra blades come in handy for different grinding needs. Some blades are sharper or have different shapes for specific textures. For example, flat blades work well for dry grinding, while cross blades suit wet ingredients.
Having a set of blades lets you switch based on the ingredient. It also keeps your blender versatile and ready for any recipe.
Storage Solutions
Proper storage keeps your accessories organized and clean. Many storage options include cases or racks that fit all parts together. This prevents loss and damage, especially for small pieces like blades and lids.
Keeping accessories in one place saves time and keeps your kitchen tidy. Look for compact storage that fits your kitchen space easily.

Credit: www.kitchenaid.com
Frequently Asked Questions
Can A Kitchen Aid Blender Grind Coffee Beans?
Yes, a Kitchen Aid blender can grind coffee beans. Use short pulses to avoid overheating. Avoid over-grinding to prevent a powdery texture. It’s best for coarse grinding rather than fine espresso powder.
Is It Safe To Grind Spices In A Kitchen Aid Blender?
Grinding spices in a Kitchen Aid blender is safe. Use small batches and pulse to control texture. Avoid grinding oily spices for long to protect blades. It’s ideal for larger, dried spices like peppercorns or coriander.
Can Kitchen Aid Blender Handle Nuts Grinding?
Yes, Kitchen Aid blenders can grind nuts efficiently. Use pulse mode to prevent nuts from turning into butter. Grinding in short bursts helps achieve the desired consistency. Avoid over-processing to protect the motor and blades.
Will Grinding Grains Damage My Kitchen Aid Blender?
Grinding grains occasionally in a Kitchen Aid blender is fine. Use short pulses to avoid overheating the motor. Avoid grinding very hard grains for long periods. Regular cleaning after use will help maintain blender performance.
Conclusion
Kitchen Aid blenders can grind many ingredients well. They work best with small, dry items like nuts or spices. Avoid grinding very hard or oily foods to protect the blades. Always use short pulses to control texture. Cleaning after grinding is simple and quick.
This blender offers good versatility in the kitchen. It saves time by handling multiple tasks. Consider your needs before using it for grinding. Overall, a Kitchen Aid blender can be a handy tool for light grinding jobs.