
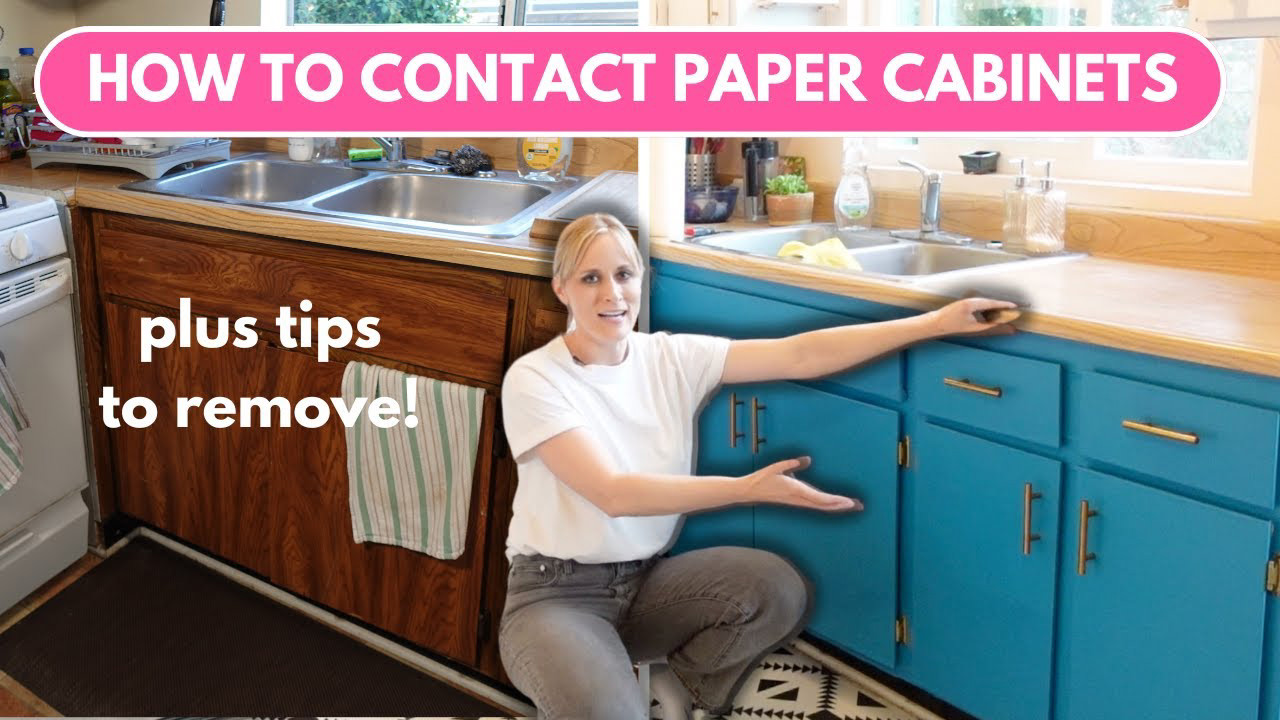
Are you tired of your old kitchen cabinets but don’t want to spend a fortune on a full remodel? What if you could give your cabinets a fresh, stylish look without sanding, painting, or hiring a professional?
Covering kitchen cabinets with contact paper might be the simple solution you’ve been searching for. You’ll discover how this easy, affordable trick can transform your kitchen quickly—and whether it’s the right choice for your space. Keep reading to find out everything you need to know before you start peeling and sticking!
Benefits Of Using Contact Paper
Using contact paper on your kitchen cabinets offers several practical benefits that make it a smart choice for many homeowners. It’s a simple way to refresh your space without a full renovation. Plus, it gives you the freedom to experiment with styles and finishes that suit your taste and budget.
Cost-effective Cabinet Makeover
Contact paper is an affordable option compared to replacing or repainting cabinets. You avoid the expense of professional labor and costly materials. Many people find they can update their kitchen look for a fraction of the price by using contact paper.
If you’re on a tight budget but want a fresh style, this method lets you stretch your dollars further. Have you thought about how much you could save by skipping a full remodel?
Variety Of Designs And Finishes
Contact paper comes in countless patterns, colors, and textures. Whether you want a sleek marble look, rustic wood grain, or a bold geometric print, there’s an option for you. This variety means you can match your kitchen’s vibe or completely change it.
Many people discover styles they wouldn’t have tried otherwise because it’s easy to switch out contact paper. What new look would you try if you knew it was easy to change back?
Easy To Apply And Remove
Applying contact paper is straightforward and doesn’t require special skills. You can do it yourself with basic tools like a squeegee or credit card to smooth out bubbles. The peel-and-stick format saves time and effort.
When it’s time for a change or if you want to return cabinets to their original state, removal is just as simple. This flexibility lets you experiment without fear of permanent damage. Have you ever wished you could try a new style risk-free?

Credit: www.amazon.com
Choosing The Right Contact Paper
Choosing the right contact paper is key to a successful kitchen cabinet makeover. The perfect contact paper should be durable, easy to clean, and fit your kitchen’s look. Picking the wrong type can lead to peeling, bubbling, or damage from heat and moisture.
Understanding the different materials and features helps you pick contact paper that lasts and looks great.
Material Types And Durability
Contact paper comes in various materials. Vinyl is the most common and lasts long. It resists scratches and is easy to clean.
Other types include fabric-backed and textured papers. These add style but may not be as durable. Choose based on how much use your cabinets get and what finish you want.
Waterproof And Heat-resistant Options
Kitchens get hot and wet. Contact paper that is waterproof prevents damage from spills and steam. Look for labels that say “waterproof” or “moisture-resistant.”
Heat resistance is important near stoves or ovens. Some contact papers can handle heat up to a certain temperature. Avoid paper that warps or melts with heat.
Matching Your Kitchen Style
Contact paper comes in many colors and patterns. Choose a design that matches your kitchen’s style. For a modern look, go with sleek solids or metallic finishes.
Rustic kitchens pair well with wood grain or stone patterns. Bright colors or bold prints add personality to simple spaces.
Think about your cabinets’ shape and size. Large patterns suit big cabinets, while small prints work well on smaller doors.
Preparing Cabinets For Application
Clean the cabinet surface thoroughly to remove dirt and grease. Smooth any rough spots by sanding lightly for better contact paper adhesion. Ensure the surface is dry before applying the contact paper for a neat finish.
Preparing your kitchen cabinets for contact paper is crucial. A well-prepared surface ensures smooth application and long-lasting results. Follow these steps to get your cabinets ready.
Cleaning And Degreasing Surfaces
Start by cleaning the cabinet surfaces thoroughly. Use a mild detergent mixed with warm water. This removes dust and grime. Focus on areas with heavy grease. A vinegar solution can help with stubborn spots. Rinse with clean water and dry completely. A dry surface is essential for good adhesion.
Sanding And Smoothing Imperfections
Inspect your cabinets for any imperfections. Sand the surface gently using fine-grit sandpaper. This removes old paint or uneven spots. Sanding creates a smooth base for the contact paper. Wipe the dust with a damp cloth. Ensure the surface is dry before proceeding.
Removing Hardware And Fixtures
Take off all cabinet handles and knobs. Removing hardware prevents gaps and bubbles. Use a screwdriver to gently unscrew them. Keep all screws and parts in a safe place. This step simplifies the application process. Reinstall the hardware after applying the contact paper.

Credit: www.familyhandyman.com
Step-by-step Application Process
Covering your kitchen cabinets with contact paper can completely refresh their look without the cost of a full remodel. The key to a smooth, professional finish lies in following a careful application process. Take your time and focus on each stage to avoid wrinkles and bubbles that can ruin the appearance.
Measuring And Cutting Contact Paper
Start by measuring the exact dimensions of your cabinet doors and drawers. Write down the height and width for each piece separately since sizes may vary slightly. Cut the contact paper a little larger than your measurements to give yourself room to work and trim later.
Use a ruler and sharp scissors or a craft knife to make straight cuts. If you have multiple cabinets, label each piece of contact paper to match its corresponding door or drawer. Accurate measuring and cutting prevent wasted material and make the next steps easier.
Peeling And Positioning
Peel the backing off the contact paper slowly, exposing just a small section at first. Align the exposed sticky part with the top edge of your cabinet surface. Hold the paper taut and gradually peel away the rest of the backing as you smooth the paper down.
Work in small sections to keep control and avoid the paper sticking in the wrong place. If you mess up, gently peel it back and reposition before pressing firmly. This step requires patience but sets the foundation for a flawless finish.
Smoothing Out Bubbles And Wrinkles
Use a plastic squeegee or a credit card wrapped in a soft cloth to press the contact paper onto the cabinet. Start from the center and push outward toward the edges to remove any trapped air. This technique helps you spot and smooth out bubbles and wrinkles quickly.
If you find stubborn bubbles, gently lift the paper near the spot and reapply while pressing out the air. Taking your time here makes your cabinets look professionally wrapped rather than DIY.
Trimming Excess Material
Once the contact paper is smoothly applied, trim the excess around the edges with a sharp craft knife or scissors. Use a straight edge to guide your cuts for clean lines. Be careful not to cut into the cabinet surface itself.
Check your work from different angles to ensure all edges are neat and the paper is firmly stuck down. Proper trimming prevents peeling over time and gives your cabinets a crisp, finished look.
Tips For Long-lasting Results
Keeping your contact paper looking fresh and intact on kitchen cabinets takes more than just a smooth application. Small habits and timely care can make a big difference in how long your cabinets stay stylish and protected. Let’s look at some practical tips that help your contact paper resist damage and keep your kitchen looking great.
Avoiding Moisture And Heat Damage
Contact paper doesn’t like water or heat. Avoid placing it near sinks or stoves where steam and splashes are common. If your cabinets are close to these areas, try to use splash guards or keep a cloth handy to wipe off moisture immediately.
Think about the type of contact paper you choose. Some are waterproof and heat-resistant, which can handle kitchen conditions better. Would you rather replace your cabinet covers every few months, or invest in a better product upfront?
Regular Cleaning And Maintenance
Dust and grease buildup can wear down the adhesive and dull the surface. Use a soft, damp cloth to gently clean your cabinets weekly. Avoid harsh cleaners or abrasive sponges that can scratch or peel the paper.
Spot test any cleaner on a hidden area before applying it widely. Regular maintenance doesn’t just keep your cabinets clean—it prolongs the life of your contact paper.
Repairing Minor Peels And Tears
Small rips or lifted edges don’t mean failure. Keep some extra contact paper handy for quick fixes. Cut a piece slightly larger than the damaged area, then trim carefully after applying for a seamless patch.
If edges start to peel, press them down firmly with a plastic card or your fingernail. Quick repairs prevent bigger problems and save you the hassle of redoing entire sections.
Common Mistakes To Avoid
Covering kitchen cabinets with contact paper can transform your space quickly and affordably. However, many people make avoidable mistakes that lead to peeling, bubbles, and an uneven finish. Knowing what to watch out for helps you get smooth, lasting results that look professional.
Skipping Surface Preparation
One of the biggest errors is applying contact paper to a dirty or rough surface. Dust, grease, and old paint chips prevent the adhesive from sticking properly. Take time to clean your cabinets thoroughly with a mild cleaner and dry them completely before you start.
Sanding glossy or uneven surfaces lightly can also help the contact paper grip better. Have you ever tried to stick a sticker on a dusty window? The same principle applies here—clean surfaces create a stronger bond and reduce bubbling.
Rushing The Application
Applying contact paper too quickly often causes wrinkles and air bubbles. If you hurry, you might not notice these imperfections until it’s too late to fix them easily. Use a slow, steady hand and peel back the backing paper gradually as you smooth the contact paper down.
Use a flat edge, like a credit card or a squeegee, to press out bubbles and creases as you go. Taking your time makes a huge difference in the final look and durability. Would you rather spend an extra 10 minutes now or redo the whole cabinet later?
Using Low-quality Contact Paper
Choosing cheap contact paper might save money upfront but can cost more in the long run. Low-quality materials tend to peel, fade, or tear easily, especially in a kitchen environment with moisture and heat. Look for thicker, vinyl-based contact paper designed for durability and easy cleaning.
High-quality contact paper often has a stronger adhesive and a smoother finish, making your cabinets look more polished. Think about it this way: would you invest in a temporary fix or something that lasts? Your choice of material impacts both appearance and longevity.
Alternatives To Contact Paper For Cabinets
If you're thinking about updating your kitchen cabinets but want to skip the hassle of contact paper, there are several other ways to refresh their look. Alternatives to contact paper can offer more durability, customization, and sometimes an even easier application process. Let’s dive into some practical options that might suit your style and skill level better.
Painting And Staining
Painting or staining your cabinets can completely change the feel of your kitchen. You get to choose the exact color or finish you want, making it truly your own. Plus, a fresh coat of paint or stain can protect the wood and extend your cabinets' life.
Before you start, make sure to clean and sand the surfaces well for better adhesion. Are you ready to experiment with bold colors or a rustic wood look? This option allows you to be creative and add value to your home.
Installing New Cabinet Doors
Sometimes, replacing just the doors can give your cabinets a brand-new look without replacing the entire structure. You can find doors in a variety of styles, from modern to classic, that fit your existing cabinet boxes. This is perfect if your cabinet frames are still in good shape but the doors look worn out.
This approach can be surprisingly affordable and less time-consuming than a full remodel. Have you checked if your cabinet sizes match standard door dimensions? Custom doors are also an option if you want something unique.
Using Peel-and-stick Vinyl Wraps
Peel-and-stick vinyl wraps are a step up from basic contact paper in terms of quality and finish. They come in many textures, including wood grain, marble, and metallic, giving your cabinets a stylish upgrade. These wraps are also easy to apply and remove, making them great for renters or those who like frequent changes.
Vinyl wraps tend to be more durable and water-resistant than contact paper, which is helpful in a kitchen environment. Could this be the low-commitment makeover your cabinets need? It’s a quick fix that still looks polished.

Credit: dundeedeco.com
Removing Contact Paper Safely
Removing contact paper from kitchen cabinets requires care to avoid damage. A gentle approach helps keep cabinet surfaces smooth and intact. Use the right tools and techniques to peel off the paper safely. Patience is key to a clean removal without scratches or residue.
Peeling Techniques
Start by lifting a corner of the contact paper slowly. Pull the paper back at a low angle to reduce stress on the cabinet surface. Avoid quick or harsh movements to prevent tearing or peeling the cabinet finish. Use your fingers or a plastic scraper to help lift stubborn edges gently.
Using Heat And Solvents
Apply mild heat with a hairdryer to soften the adhesive. Hold the dryer a few inches away and move it evenly over the paper. Heat makes peeling easier and reduces residue. For sticky spots, use a small amount of rubbing alcohol or adhesive remover. Test solvents on a small area first to check for damage.
Cleaning Residue From Cabinets
After removing the paper, some glue may remain on the surface. Use a soft cloth with warm soapy water to wipe away residue. For tougher spots, apply a bit of vinegar or rubbing alcohol on a cloth. Avoid harsh scrubbing to protect cabinet finishes. Finish by drying the surface with a clean towel.
Frequently Asked Questions
Can You Cover Kitchen Cabinets With Contact Paper?
Yes, you can cover kitchen cabinets with contact paper. It’s a budget-friendly way to update their look quickly. Ensure the surface is clean and smooth before application for the best results. Contact paper is easy to apply and remove without damage.
How Durable Is Contact Paper On Kitchen Cabinets?
Contact paper is moderately durable on kitchen cabinets. It resists minor scratches and moisture but can peel over time. Avoid excessive heat or water exposure to extend its lifespan. For long-lasting results, choose high-quality contact paper designed for kitchen use.
Will Contact Paper Stick To Painted Kitchen Cabinets?
Contact paper sticks well to painted kitchen cabinets if the paint is smooth and fully cured. Avoid textured or glossy surfaces for better adhesion. Clean the surface thoroughly before applying contact paper to prevent peeling and bubbles.
Can Contact Paper Withstand Kitchen Moisture And Heat?
Contact paper can handle some moisture and mild heat but is not fully waterproof or heat-resistant. Avoid placing it near stoves or sinks where it may peel. Use contact paper as a decorative option rather than a protective layer.
Conclusion
Covering kitchen cabinets with contact paper offers a quick and affordable update. It hides old surfaces and adds new style without much effort. Choose a quality paper and clean cabinets well before applying. Take time to smooth out bubbles for the best look.
This method suits renters and DIY lovers who want change fast. With care, contact paper can last long and keep cabinets looking fresh. A simple step that can brighten your kitchen space today.