
Thinking about giving your kitchen a fresh new look without spending a fortune? You might be wondering if you can paint your kitchen cabinets with just a brush.
The idea sounds simple, but you probably have questions. Will it look smooth? How long will it take? Is it worth the effort? This article will guide you step-by-step, so you can confidently transform your cabinets and make your kitchen shine.
Keep reading to discover the easy tips and tricks that will help you get professional results with just a brush in your hand.
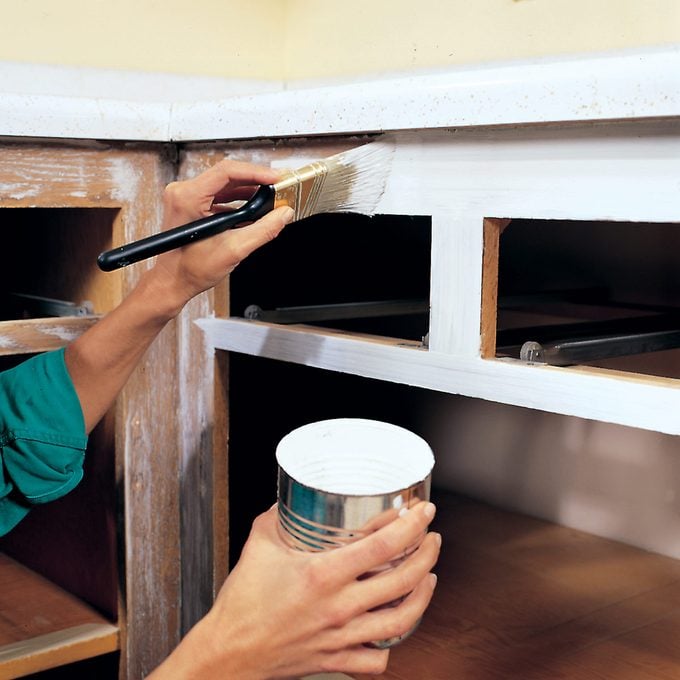
Credit: www.familyhandyman.com
Choosing The Right Brush
Choosing the right brush can make all the difference when painting kitchen cabinets. The brush you pick affects the finish, the ease of application, and how much time you spend fixing mistakes. Understanding the types, materials, and sizes available will help you find the perfect tool for your project.
Types Of Brushes For Cabinets
Not all brushes are created equal, especially for cabinet painting. You’ll find:
- Flat brushes:Great for large, flat surfaces, giving smooth, even coverage.
- Angled brushes:Designed for precision around edges and corners.
- Foam brushes:Useful for avoiding brush marks but may not hold up well with thicker paints.
Which type fits your cabinet’s shape and detail? Angled brushes often give better control around moldings.
Brush Materials And Their Effects
The material of your brush’s bristles impacts how paint is applied. Natural bristles work best with oil-based paints, providing a smooth finish. Synthetic bristles, often nylon or polyester, are more versatile and ideal for water-based paints.
Have you noticed how natural bristles tend to absorb paint unevenly? Synthetic brushes offer more consistency and easier cleanup, especially if you’re using latex paint.
Size Matters: Selecting Brush Dimensions
Choosing the right brush size is crucial. Smaller brushes, like 1 to 2 inches, help with intricate details and tight spots. Larger brushes, 3 to 4 inches, speed up work on broad, flat cabinet doors.
Consider your cabinet’s size and detail level. Do you prefer working quickly or focusing on precision? Often, having both sizes on hand offers the best results.
Preparing Cabinets For Painting
Cleaning and sanding cabinets well creates a smooth surface for painting. Using a brush allows detailed work on edges and corners, ensuring even coverage. Proper prep helps paint stick better and last longer.
Preparing cabinets for painting is essential for a professional look. Proper preparation ensures the paint adheres well and lasts longer. This process involves cleaning, sanding, and removing hardware.
Cleaning And Degreasing Surfaces
Begin by cleaning cabinet surfaces thoroughly. Use a mild detergent mixed with water. Wipe the surfaces with a soft cloth or sponge. Ensure all grease and dirt are removed. For stubborn stains, use a degreaser. Rinse with clean water and dry completely. This step is crucial for a smooth paint application.
Sanding Techniques For Smooth Finish
Sanding creates a smooth base for painting. Use medium-grit sandpaper to sand the surfaces. Focus on removing the top layer of finish. Ensure all areas are evenly sanded. Switch to fine-grit sandpaper for a smoother finish. Wipe away any dust with a damp cloth. This prevents imperfections in the final paint job.
Removing Hardware And Hinges
Take off all cabinet hardware and hinges. Use a screwdriver to remove screws carefully. Store screws and hardware in labeled bags. This prevents losing small pieces. Removing hardware ensures a clean paint job. It also allows easy access to all cabinet areas.
Selecting The Best Paint
Selecting the best paint is key to achieving beautiful kitchen cabinets. The right paint not only enhances the look but also lasts longer. It must resist stains, scratches, and moisture. Choosing paint involves understanding types, finishes, and durability. This helps create a smooth and lasting finish using a brush.
Types Of Paint Suitable For Cabinets
Cabinets need paint that sticks well and cleans easily. Here are common types:
- Latex Paint:Water-based, dries fast, and has low odor.
- Oil-Based Paint:Smooth finish, durable, but takes longer to dry.
- Acrylic Paint:Flexible and resists cracking over time.
Latex paint is popular for DIY projects. Oil-based paint offers a harder finish but needs good ventilation.
Choosing The Right Finish
Finish affects appearance and maintenance. Options include:
- Matte:No shine, hides imperfections well.
- Satin:Slight shine, easy to clean.
- Semi-Gloss:Shiny, very durable, perfect for kitchens.
- Glossy:High shine, shows every detail.
Satin and semi-gloss finishes balance beauty and practicality. Glossy finishes need careful preparation.
Paint Durability Considerations
Kitchen cabinets face moisture, heat, and frequent use. Durable paint must resist:
- Scratches and chips
- Stains and spills
- Fading from sunlight
- Peeling and cracking
Choosing paint with high durability saves time and effort later. Look for paints labeled for cabinets or trim for best results.

Credit: www.youtube.com
Painting Techniques Using A Brush
Painting kitchen cabinets with a brush can give you great control and a smooth finish, but it requires the right techniques. Using a brush effectively means understanding how to apply paint evenly, avoid marks, and manage drying times. Let’s break down these key aspects to help you achieve a professional look.
Proper Brush Strokes For Even Coverage
Start by loading your brush with a moderate amount of paint—too much can cause drips, too little means you’ll need extra coats. Use long, smooth strokes that follow the wood grain or the cabinet’s surface direction. Try to keep your brush strokes consistent in length and pressure to avoid uneven patches.
Working on smaller sections can make it easier to maintain control and coverage. Have you noticed how short, choppy strokes often leave a textured finish? That’s why flowing strokes matter.
Avoiding Brush Marks
Brush marks are one of the biggest challenges when painting cabinets with a brush. To minimize them, use a high-quality synthetic brush designed for the type of paint you’re using. Hold the brush at a slight angle and don’t press too hard—let the brush do the work.
Sometimes, lightly sanding between coats with fine-grit sandpaper can smooth out any raised brush strokes. Have you tried “tipping off” the paint? This means lightly running the brush over the wet paint in one direction to smooth the surface before it dries.
Layering And Drying Times
Applying multiple thin layers is better than one thick layer. Thin coats dry faster and reduce the chance of drips or uneven surfaces. Make sure each layer is completely dry before adding the next—this can take anywhere from 2 to 6 hours depending on paint type and humidity.
Patience here pays off. Think about your last painting project—did rushing cause uneven color or sticky patches? Waiting for proper drying time makes your cabinets look sharp and professional.
Common Mistakes To Avoid
Painting kitchen cabinets with a brush can deliver great results. Still, many make simple mistakes that hurt the final look. Avoiding these common errors saves time and effort. Focus on key areas to get a smooth, lasting finish.
Overloading The Brush
Too much paint on the brush causes drips and uneven layers. It creates thick patches that take longer to dry. Dip the brush lightly and tap off excess paint. Work with thin, even strokes for a clean coat.
Skipping Preparation Steps
Skipping sanding or cleaning leads to poor paint adhesion. Dust, grease, and old finish block the paint from sticking. Always clean cabinets with a degreaser and sand surfaces lightly. Proper prep ensures the paint holds and looks smooth.
Rushing Between Coats
Not waiting for paint to dry causes smudges and peeling. Each layer must dry fully before applying the next. Follow the paint’s recommended drying time. Patience helps achieve a strong, professional finish that lasts.
Maintaining Painted Cabinets
Maintaining painted kitchen cabinets keeps them looking fresh and bright. Proper care helps the paint last longer. It also protects cabinets from damage and wear. Simple habits prevent costly repairs and repainting. Small efforts go a long way in preserving your work.
Cleaning Tips To Preserve Finish
Use a soft cloth or sponge for cleaning. Avoid abrasive scrubbers that can scratch paint. Mix mild soap with warm water for best results. Wipe gently to remove dirt and grease. Dry cabinets with a clean, dry cloth afterward. Clean spills quickly to prevent stains. Regular dusting helps maintain a smooth finish.
Touching Up Scratches And Chips
Keep leftover paint for quick touch-ups. Use a small brush to fix scratches carefully. Lightly sand rough edges before applying paint. Match the paint color closely for a seamless look. Allow the paint to dry fully before use. Touch-ups prevent damage from spreading further. Regular checks help spot damage early.
When To Repaint
Repaint cabinets when paint peels or fades significantly. Check for cracks or deep chips in the surface. If cleaning no longer restores the shine, consider repainting. A fresh coat renews the cabinet’s appearance. Choose durable paint designed for kitchen use. Repainting extends the life of your cabinets.
Alternatives To Brushing
Painting kitchen cabinets with a brush is common, but it’s not the only way to get a smooth, professional finish. Alternatives like rollers and sprayers can save time and might offer a different texture or coverage. Considering these options can help you decide what works best for your project and skill level.
Using Rollers Or Sprayers
Rollers are great for covering large, flat surfaces quickly. They help reduce brush marks and create a more even coat. Small foam rollers, in particular, are handy for cabinets because they fit into corners and tight spaces better than bigger rollers.
Sprayers, on the other hand, can deliver a very smooth finish without any brush or roller marks. They are perfect if you want a sleek, factory-like look. However, spraying requires more preparation, like masking off areas to avoid overspray, and you’ll need to work in a well-ventilated space or outdoors.
Pros And Cons Compared To Brushes
| Tool | Pros | Cons |
|---|---|---|
| Brush |
|
|
| Roller |
|
|
| Sprayer |
|
|
Have you tried using a roller or sprayer on your cabinets before? You might find that combining these tools with a brush for detail work gives you the best results. Think about your kitchen’s layout and your comfort with each tool before deciding.

Credit: www.youtube.com
Frequently Asked Questions
Can You Paint Kitchen Cabinets With A Brush?
Yes, you can paint kitchen cabinets with a brush. It offers control and precision, especially on detailed areas. Use a high-quality brush for a smooth finish and apply thin, even coats to avoid streaks and brush marks.
What Type Of Brush Is Best For Cabinet Painting?
A synthetic bristle brush is best for painting cabinets. It holds and distributes paint evenly. Choose a 2 to 2. 5-inch angled brush for better control on edges and corners. This ensures a clean, professional-looking finish.
How Many Coats Are Needed When Brushing Cabinets?
Typically, two to three coats of paint are needed. Apply the first coat thinly and let it dry completely. Sand lightly between coats for a smooth surface and better adhesion of the next layer.
Is Brushing Cabinets Better Than Spraying?
Brushing is better for small projects and detailed work. It reduces paint waste and overspray. Spraying is faster for large areas but requires more prep and cleanup. Choose brushing for precision and ease.
Conclusion
Painting kitchen cabinets with a brush is simple and effective. It lets you control the paint better on small areas. A good brush helps you reach corners and edges easily. Take your time and apply thin coats for a smooth finish.
Clean your brush well after use to keep it in good shape. This method saves money and gives your kitchen a fresh look. Try it yourself for a neat and personal touch to your cabinets.