
Are you tired of cluttered countertops and messy soap bottles around your kitchen sink? Adding a soap dispenser right next to your faucet can make your daily chores easier and your kitchen look cleaner.
But you might be wondering, “Is it hard to install one myself? ” The good news is, it’s simpler than you think. In this guide, you’ll discover step-by-step how to add a soap dispenser to your kitchen sink quickly and without hassle.
Keep reading, and you’ll be enjoying a neat, convenient setup in no time!
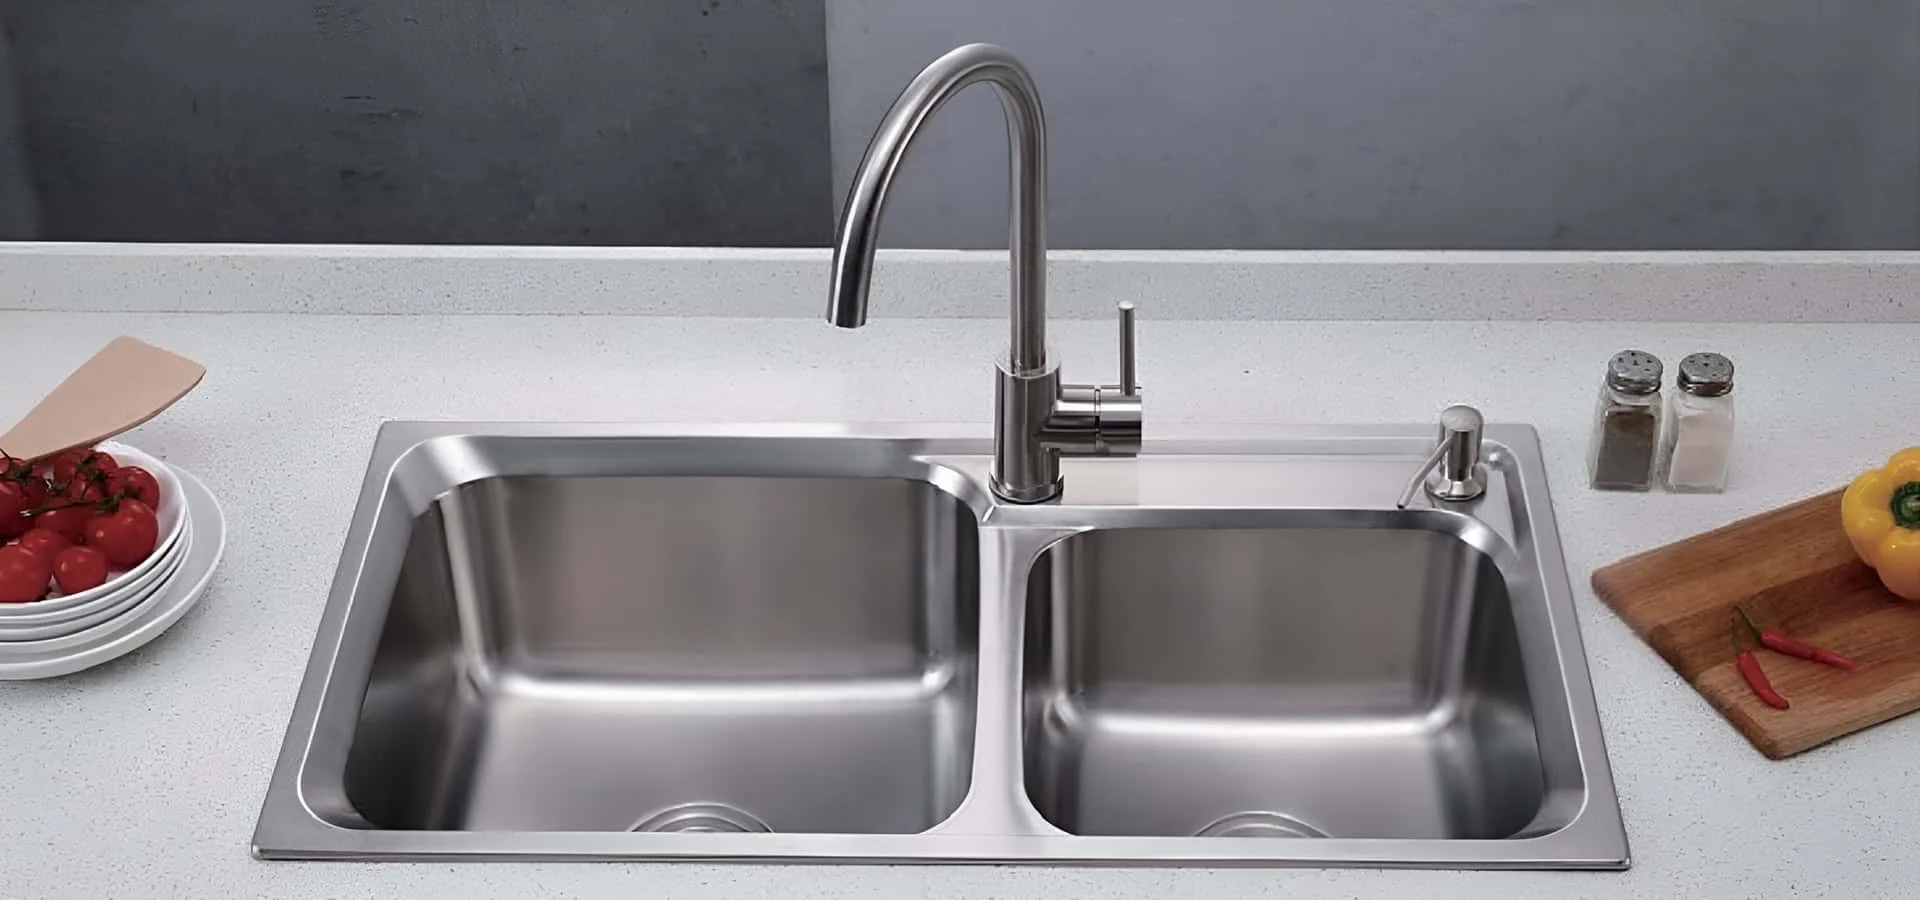
Credit: www.vevor.com
Choosing The Right Soap Dispenser
Choosing the right soap dispenser enhances both function and style in your kitchen. It is important to consider how the dispenser fits your daily needs and kitchen design. The perfect soap dispenser blends convenience with a look that complements your sink area.
Types Of Soap Dispensers
Soap dispensers come in several types to suit different preferences. Manual pumps require pressing down to release soap. Touchless dispensers use sensors for a hands-free experience. Built-in dispensers install directly into the sink or countertop. Freestanding models sit on the counter and can be moved easily.
Material And Finish Options
Materials affect durability and appearance. Stainless steel offers strength and a modern look. Plastic models are lightweight and budget-friendly. Brass or bronze adds a classic touch. Finishes like matte, polished, or brushed change the style and feel. Choose a finish that matches your faucet and kitchen decor.
Size And Capacity Considerations
Size impacts how much soap the dispenser holds and its fit near the sink. Larger capacity means fewer refills but takes more space. Smaller dispensers save space but need frequent refills. Check the size of your sink area before selecting a dispenser. Balance capacity with available space for the best choice.
Gathering Necessary Tools And Materials
Before you begin adding a soap dispenser to your kitchen sink, gathering the right tools and materials is crucial. Having everything at hand makes the process smoother and prevents frustrating interruptions. It also helps you avoid unnecessary trips to the hardware store midway through your project.
Tools Required
- Adjustable wrench:Essential for tightening nuts and fittings under the sink.
- Phillips and flathead screwdrivers:Useful for securing mounting brackets or loosening screws.
- Drill with hole saw bit:Needed if your sink doesn’t have a pre-drilled hole for the dispenser.
- Measuring tape:Helps you measure the thickness of your sink and placement of the dispenser.
- Utility knife:Handy for trimming tubing or cleaning up edges.
- Bucket or towel:To catch any water drips when disconnecting plumbing.
Do you have these tools already? If not, borrowing from a neighbor or friend can be a quick fix. It’s surprising how much easier the job feels when you’re fully prepared.
Additional Supplies
- Soap dispenser kit:Includes the pump, reservoir bottle, and mounting hardware.
- Plumber’s tape (Teflon tape):Ensures a watertight seal on threaded connections.
- Silicone sealant:Optional but helps prevent leaks around the dispenser base.
- Cleaning cloth:To wipe away spills and keep the workspace tidy.
Choosing a soap dispenser that fits your sink’s style and hole size matters. Have you checked whether your sink has an existing hole or if you’ll need to drill one? This small detail can change what materials and tools you need next.
Preparing Your Kitchen Sink
Preparing your kitchen sink properly is key to adding a soap dispenser that works smoothly and looks great. Taking time to plan where and how you install the dispenser prevents future hassles like leaks or awkward placements. This preparation ensures your kitchen stays functional and stylish.
Selecting The Installation Spot
Look closely at your sink area and countertop. You want a spot close enough to the faucet for easy reach but not so close that it crowds your workspace. Think about how you use your sink daily—where would grabbing soap feel natural and quick?
Many sinks have a pre-drilled hole for accessories like soap dispensers or sprayers. If yours doesn’t, check if your countertop material allows drilling without damage. Avoid spots near drawers or cabinets underneath to keep plumbing access clear.
Cleaning And Clearing The Area
Before you install, clear the chosen spot completely. Remove any soap scum, dirt, or grease that might prevent a good seal or cause slipping. A clean surface helps the dispenser stay firmly in place and prevents mold buildup later.
Also, clear out the cabinet under the sink. You’ll need room to work and access the plumbing connections. This can be a good time to tidy up—less clutter means fewer chances of knocking things over during installation.

Credit: www.aliexpress.com
Drilling The Hole
Drill a hole in the sink or countertop to fit the soap dispenser. Measure carefully to avoid damaging pipes or wires underneath. Use a drill bit sized for the dispenser’s base for a clean fit.
Adding a soap dispenser to your kitchen sink can bring both convenience and style. One of the crucial steps in this DIY project is drilling the hole. It might sound daunting, but with the right guidance, it's entirely doable. Let's break down the process to ensure you drill accurately and safely, transforming your kitchen sink without the need for professional help.
Measuring And Marking
Accurate measurements are key to a successful installation. Start by determining the ideal location for the soap dispenser. Generally, it should be within easy reach from your faucet but not obstructing other sink features. Use a measuring tape to find the exact spot, ensuring it aligns with the dispenser's specifications. Mark this location with a non-permanent marker to avoid any permanent marks on your sink.
Safe Drilling Techniques
Safety should be your top priority when drilling. Use a drill bit that matches the material of your sink, whether it's stainless steel, porcelain, or another material. Before you start, wear safety goggles to protect your eyes from debris. Secure the area around the drilling spot to prevent the drill from slipping, which could cause damage to your sink. Apply gentle pressure as you drill, allowing the tool to do the work without forcing it. This approach reduces the risk of cracking or chipping your sink. Drilling a hole might seem intimidating, but with careful preparation and a steady hand, it can be a straightforward task. Have you ever thought about how much easier kitchen chores could be with a built-in soap dispenser? Now's your chance to find out!
Installing The Soap Dispenser
Installing the soap dispenser to your kitchen sink is simpler than you might think. It requires a bit of patience and attention to detail, but the results are worth it. Having a built-in soap dispenser keeps your countertop tidy and your soap easily accessible, making kitchen tasks smoother.
Assembling The Parts
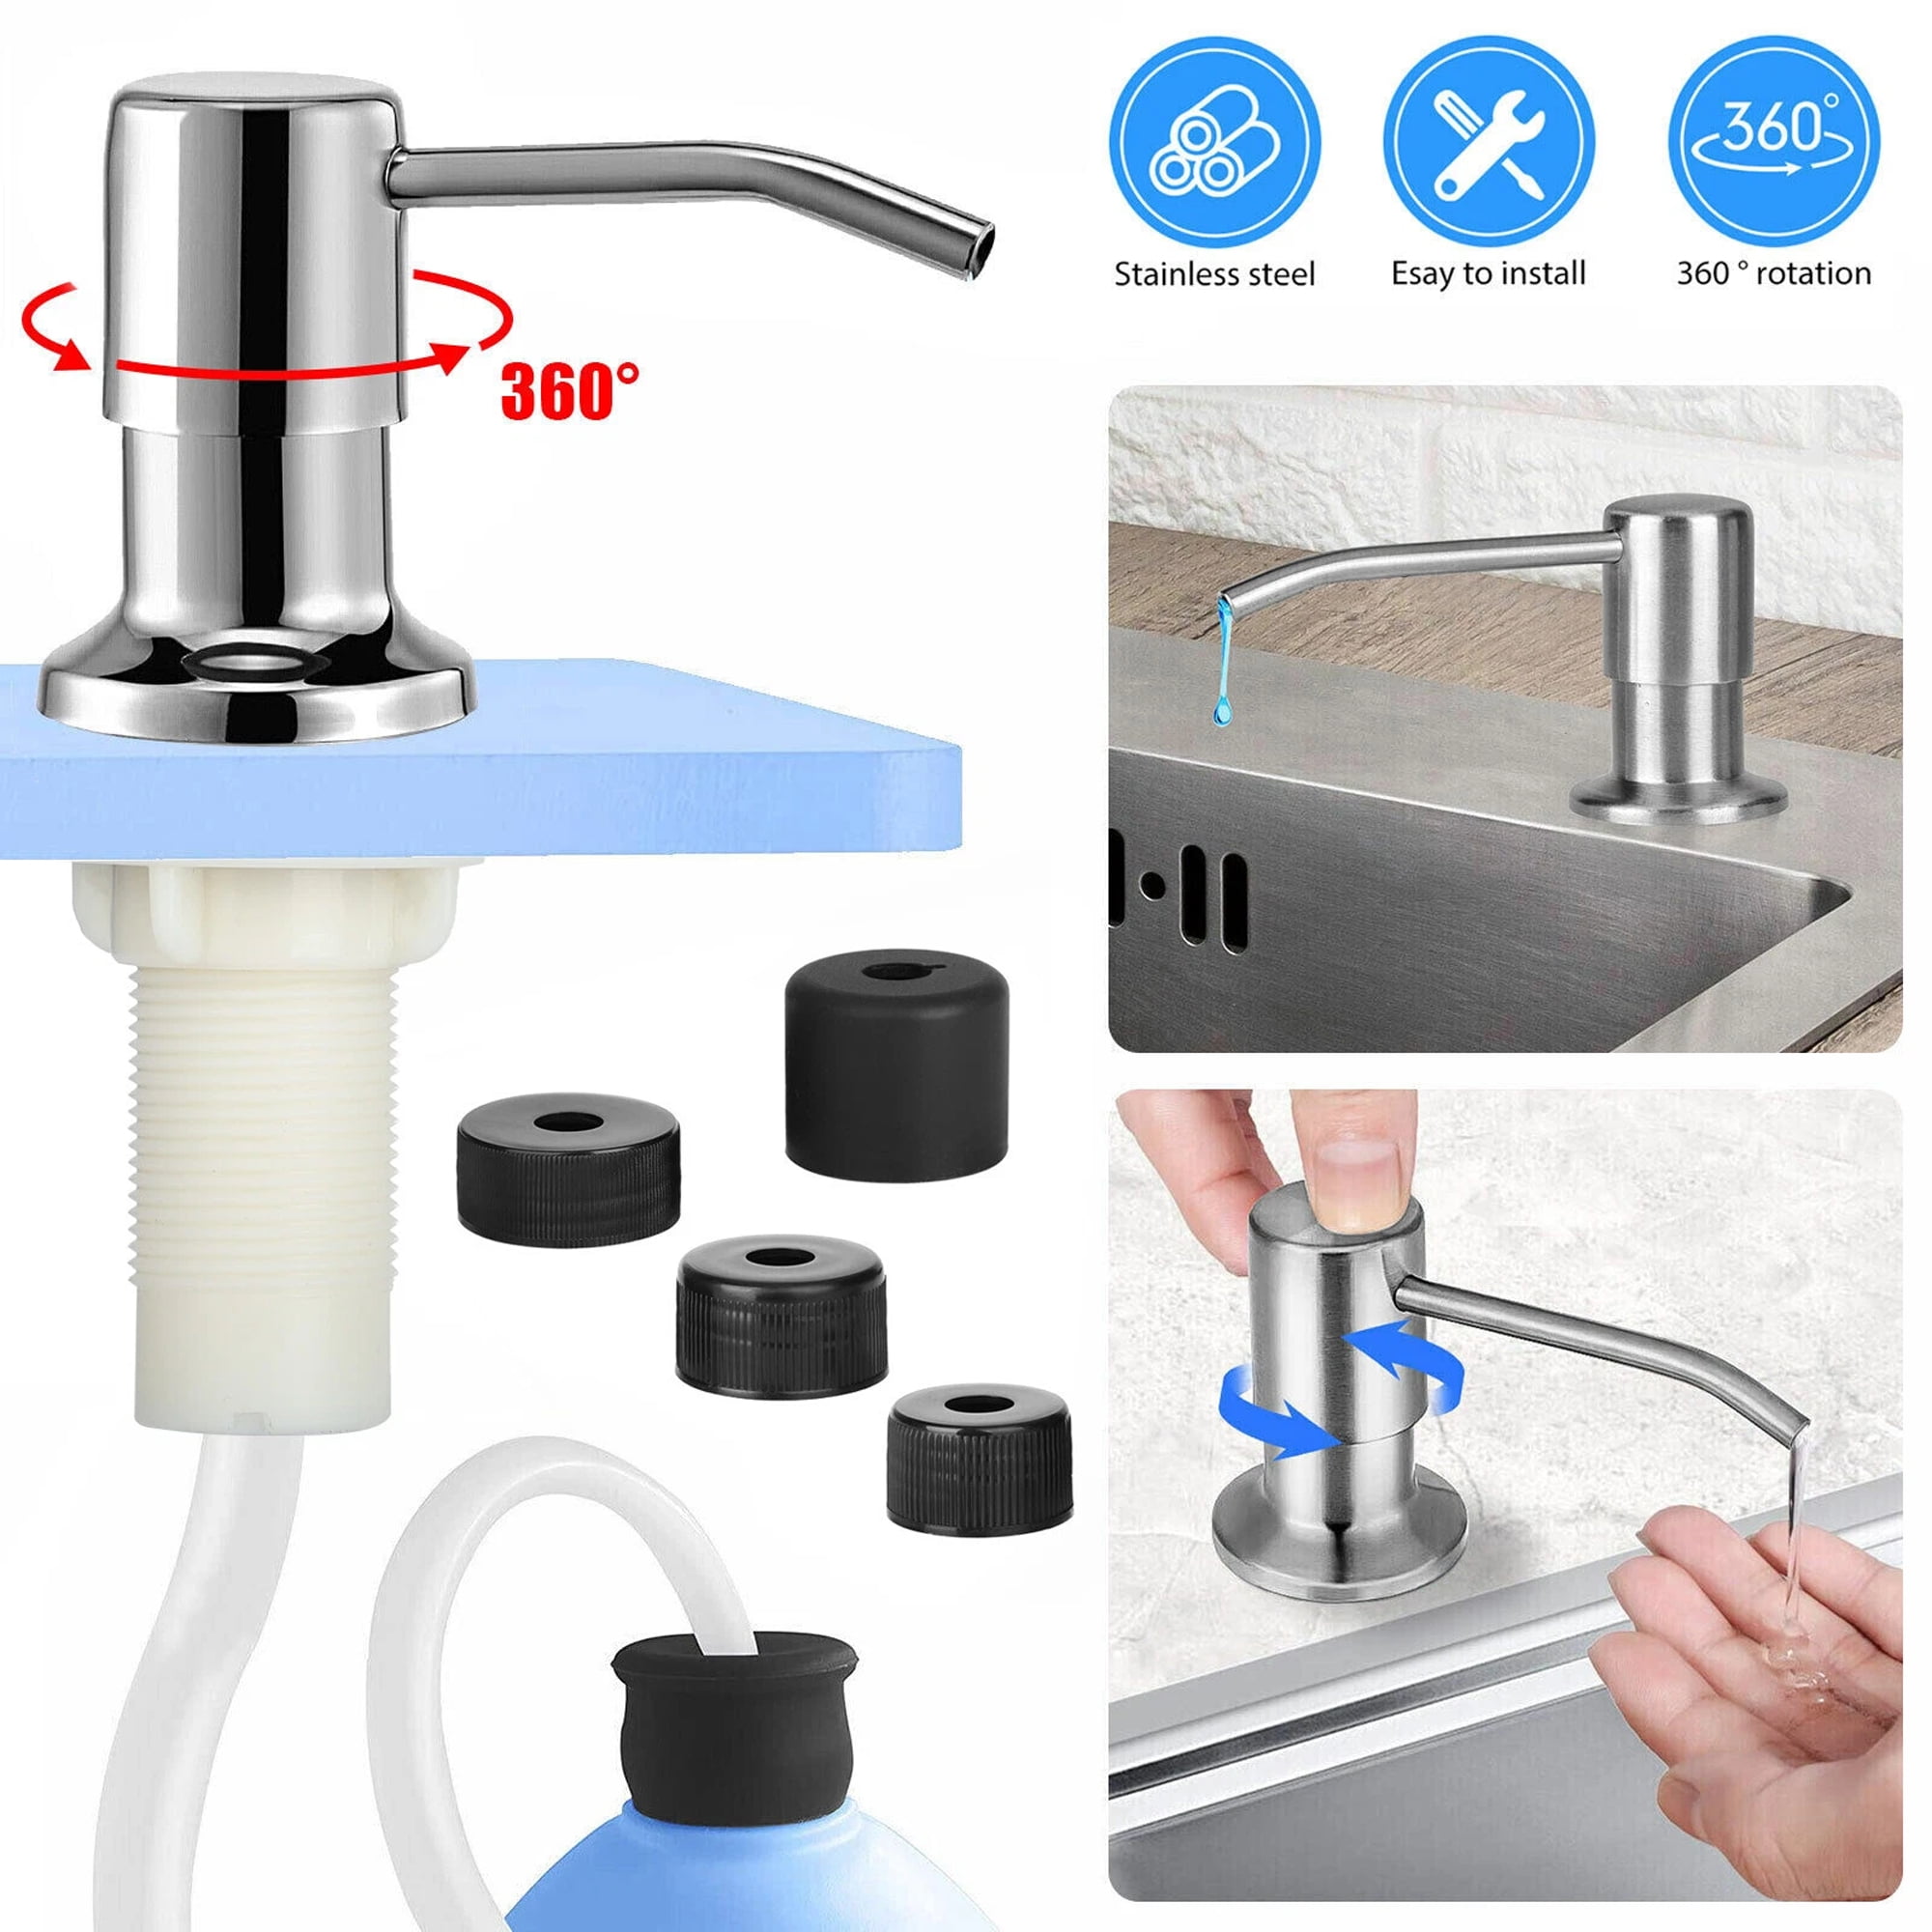
Start by gathering all the components included with your soap dispenser. Typically, you'll have a pump head, a soap bottle, a mounting nut, and a connecting tube.
First, attach the pump head to the soap bottle by screwing it on tightly. Make sure the pump mechanism moves freely when pressed.
Next, connect the tube to the bottom of the pump head. This tube will carry soap from the bottle to the dispenser nozzle.
Securing The Dispenser To The Sink
Locate the pre-drilled hole on your sink or faucet deck where the dispenser will be installed. If there isn't one, you may need to drill a hole, but be cautious to avoid damaging the sink surface.
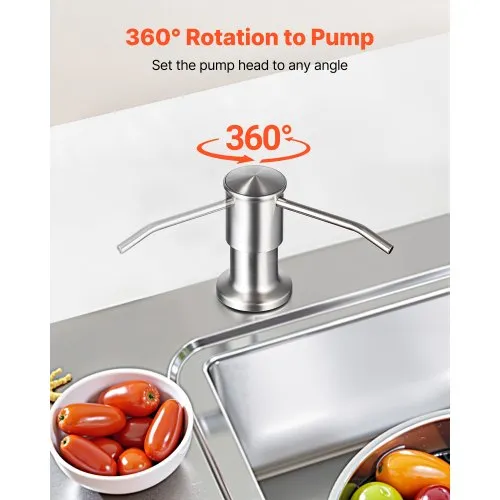
Insert the pump head through the hole from above the sink. Underneath, slide the mounting nut onto the threaded part of the pump and tighten it by hand. Use a wrench for a snug fit but avoid over-tightening to prevent damage.
After securing, fill the soap bottle with your preferred liquid soap. Pump the dispenser a few times to prime it. Does your soap flow smoothly now? If not, check the tube connection for kinks or loose fittings.
Connecting The Soap Reservoir
Connecting the soap reservoir is a crucial step in installing a soap dispenser. This part holds the liquid soap and delivers it through the pump. Proper connection ensures smooth soap flow and prevents leaks. Follow simple steps to attach and test the reservoir for best results.
Attaching The Bottle
Start by aligning the soap reservoir bottle under the sink hole. Insert the bottle’s neck into the designated slot on the dispenser pump. Twist the bottle clockwise until it feels secure. Avoid overtightening to prevent damage. Make sure the bottle is stable and upright to avoid spills.
Filling And Testing
Fill the bottle with liquid soap using a funnel to avoid mess. Do not overfill; leave some space for air. Press the pump a few times to prime it. Soap should flow smoothly from the dispenser. If soap does not come out, check for blockages or loose connections.
Maintenance Tips
Keeping your soap dispenser in top shape ensures it works smoothly every time you need it. Maintenance is simple but often overlooked, leading to clogs or leaks. A little care can save you from frustrating repairs and keep your kitchen sink area tidy.
Cleaning The Dispenser
Soap dispensers can build up residue from soap and hard water. Regular cleaning prevents blockages and keeps the pump working well.
- Remove the pump from the bottle and soak it in warm water mixed with a little vinegar.
- Use a small brush or toothpick to clear out any dried soap in the pump nozzle.
- Rinse thoroughly and let it dry completely before reassembling.
Have you noticed your dispenser getting sticky or slow? Cleaning it this way often fixes the problem without needing replacement parts.
Refilling And Troubleshooting
Refilling your soap dispenser regularly stops it from running dry, which can cause air bubbles and pump failure. Always use the right type of soap, ideally liquid hand soap or dish soap with a smooth consistency.
- Fill the dispenser slowly to avoid spills and overflows.
- If the pump feels stiff or doesn’t dispense soap, try pumping it a few times with warm water to clear the line.
- Check for cracks in the bottle or loose parts that might cause leaks.
Ever struggled with a dispenser that just won’t work? Sometimes, simply tightening the pump or refilling properly solves the issue. What small maintenance step will you try first to keep your dispenser hassle-free?
Credit: www.walmart.com
Frequently Asked Questions
How Do I Install A Soap Dispenser On My Kitchen Sink?
First, select a suitable spot near the faucet. Drill a hole if needed. Insert the dispenser and secure it underneath with the mounting nut. Connect the pump tube to the soap bottle. Fill with soap and test the dispenser.
What Tools Are Needed To Add A Soap Dispenser?
You will need a drill, drill bit, adjustable wrench, and screwdriver. A soap dispenser kit usually includes a pump, bottle, and mounting hardware. Having a towel handy helps clean up spills during installation.
Can I Install A Soap Dispenser Without Drilling?
If your sink has an unused hole, you can use it for the dispenser. Otherwise, drilling is required. Some adhesive models exist but may not be secure or durable. Drilling ensures a stable and long-lasting installation.
How Do I Refill The Kitchen Sink Soap Dispenser?
Simply lift the pump head and pour liquid soap into the bottle below. Avoid overfilling to prevent leaks. Refill when the dispenser pump starts to deliver less soap. Regular refills keep the dispenser functional and convenient.
Conclusion
Adding a soap dispenser to your kitchen sink is simple and useful. It keeps your countertop tidy and soap close. You save space and reduce mess. The steps are easy to follow, even for beginners. Just take your time and be careful with tools.
Soon, your kitchen will look neater and work better. Try this small change for a cleaner, more organized sink area. It makes washing hands and dishes much easier every day.