

If you own a KitchenAid stand mixer, you know how powerful and versatile it can be. But did you know that adjusting your mixer properly can make your baking and cooking even easier?
Whether your mixer is making strange noises, splattering ingredients, or just not working as smoothly as it should, a few simple tweaks can fix these issues fast. In this guide, you’ll learn exactly how to adjust your KitchenAid stand mixer step-by-step, so it runs like new every time you use it.
Keep reading and unlock the full potential of your mixer today!
Mixer Components
Understanding the components of your KitchenAid stand mixer is essential for proper adjustment and optimal performance. Each part plays a role in how the mixer operates and how you can customize it for different tasks. Knowing these components helps you troubleshoot issues and make the most out of your appliance.
Main Parts Overview
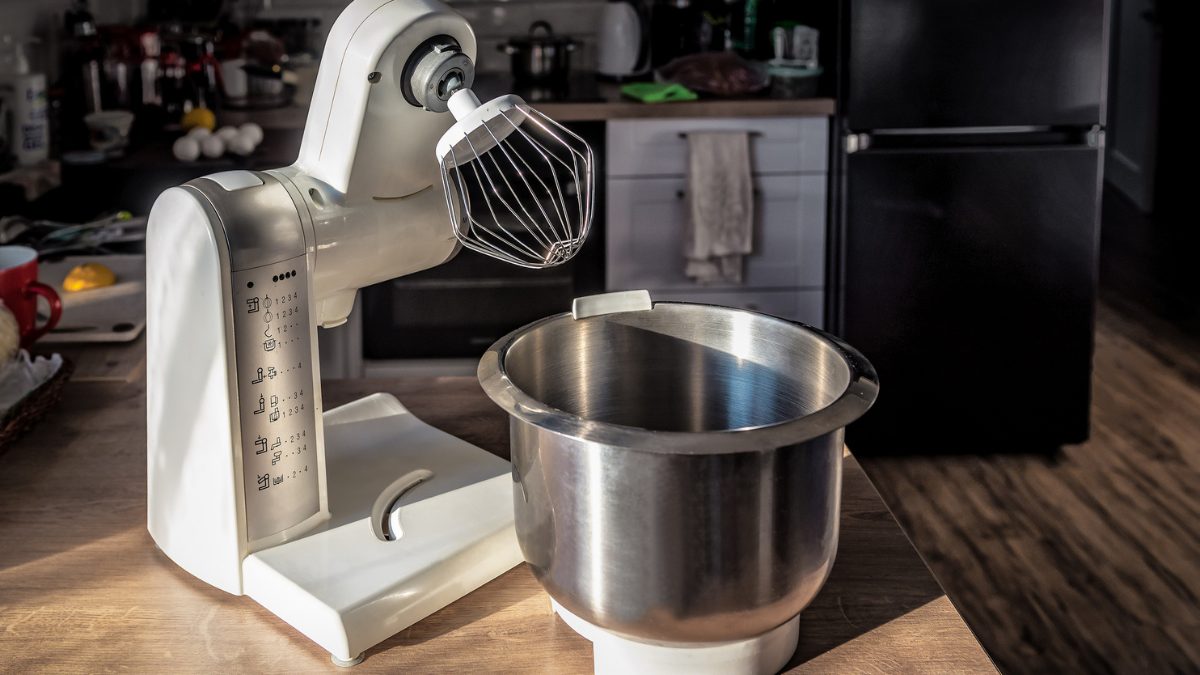
Your KitchenAid stand mixer consists of several key parts that you’ll interact with regularly. The motor housing is the main body where all the power comes from. Attached to it is the mixing head, which holds the attachments and moves during mixing.
Below the head, you’ll find the mixing bowl, which locks into the base to stay stable. The base itself supports the mixer and often has rubber feet to prevent slipping. A speed control lever lets you adjust how fast the mixing head turns, giving you control over your recipe’s texture.
Have you noticed how the tilt-head or bowl-lift design affects your mixing experience? The tilt-head lifts the whole top section, making it easier to add ingredients or change attachments. The bowl-lift design raises and lowers the bowl, providing a sturdy setup for heavier doughs.
Attachment Types
Attachments are what make your mixer versatile. Each one is designed for a specific task, and knowing which to use can save you time and improve your results.
- Flat Beater:Ideal for mixing cake batter, cookie dough, and mashed potatoes. It handles most everyday mixing tasks.
- Wire Whip:Perfect for whipping cream, egg whites, and airy mixtures. It incorporates air quickly to create light textures.
- Dough Hook:Designed for kneading bread and pizza dough. It saves your hands from tiring out during long kneading sessions.
Beyond these, KitchenAid offers specialty attachments like pasta rollers, meat grinders, and spiralizers that connect to the power hub. Are you using your mixer just for basic mixing, or have you tried expanding its capabilities with these extras?
Knowing these parts and attachments will help you adjust your mixer confidently. This knowledge not only improves your cooking but also extends the life of your appliance.
;)
Credit: www.cookist.com
Setting Up The Mixer
Setting up your Kitchen Aid stand mixer correctly is key to smooth baking and cooking. This process ensures the mixer works efficiently and safely. Follow simple steps to prepare your mixer for any recipe.
Securing The Bowl
Place the mixing bowl on the mixer base. Turn the bowl slightly to the right. This locks the bowl into place. Make sure it feels firm and does not wobble. A secured bowl keeps ingredients inside and prevents spills during mixing.
Attaching The Beater
Choose the right beater for your task. Align the beater’s shaft with the mixer's attachment hub. Push the beater up and twist it to lock. You will hear a click sound when it is secure. Check the beater is tight before turning the mixer on.
Adjusting The Mixer Head
Adjusting the mixer head ensures it fits snugly and works smoothly. Loosen the locking lever, move the head, then tighten it firmly. Proper adjustment prevents wobbling and improves mixing performance.
Adjusting the mixer head on a KitchenAid stand mixer ensures consistent performance. This process might seem complex. But, it's simple with the right guidance. Whether you own a tilt-head or bowl-lift model, proper alignment is key. It helps in mixing ingredients evenly. Let's explore how to adjust each model effectively.
Tilt-head Models
Tilt-head models are popular for home kitchens. Adjusting their mixer head is straightforward. First, unplug the mixer for safety. Next, tilt the head back. Locate the adjustment screw near the hinge. A small screwdriver is necessary. Turn the screw clockwise to lower the head. Turn counterclockwise to raise it. Ensure the beater doesn't hit the bowl. Check the clearance using a dime. The dime should move slightly when the beater is on.
Bowl-lift Models
Bowl-lift models are often used in professional settings. Adjusting these requires a different approach. Begin by unplugging the mixer. Lower the bowl to its resting position. Locate the adjustment screw on the mixer’s neck. Use a flathead screwdriver for this task. Turn the screw clockwise to raise the bowl. Turn counterclockwise to lower it. Check the clearance with a dime. The dime should move slightly without getting stuck. This ensures the mixer head is properly aligned.
Speed Settings Guide
The speed settings on your KitchenAid stand mixer control how fast the attachments move. Choosing the correct speed helps mix ingredients evenly and prevents damage. This guide explains how to use the speed settings for better results.
Choosing The Right Speed
Different recipes need different speeds. Low speeds work well for mixing dry ingredients or starting to combine. Medium speeds suit cream, batters, and doughs. High speeds are for whipping or beating air into mixtures.
- Speed 1-2: Stir or mix gently without splashing.
- Speed 3-4: Blend batters and doughs smoothly.
- Speed 5-6: Whip creams and egg whites.
- Speed 7-10: Beat fast for fluffy textures.
Adjust the speed gradually to avoid splatters and messes.
Avoiding Overmixing
Overmixing can ruin your recipe. It causes dough to become tough and batters to deflate. Watch the texture closely as you mix. Stop once ingredients look combined and smooth.
- Mix only until ingredients are just blended.
- Use slower speeds for delicate mixtures.
- Pause often to check the consistency.
- Follow recipe times but trust your eyes too.
Proper speed control keeps your dishes light and fresh.
Troubleshooting Common Issues
Facing issues with your Kitchen Aid stand mixer can be frustrating, especially when you're in the middle of a recipe. Troubleshooting common problems helps you save time and avoid unnecessary repairs. Let’s look at some typical issues and how you can fix them quickly to get your mixer back in perfect working order.
Mixer Not Mixing Properly
If your mixer isn’t mixing ingredients evenly or seems to miss some parts of the bowl, the problem could be related to the beater height. Check if the beater is set too low or too high. Adjust the beater height by loosening the adjustment screw and moving the beater up or down until it just brushes the bottom of the bowl without scraping.
Sometimes, the mixing bowl itself isn’t seated properly. Make sure it’s locked firmly in place. A poorly seated bowl can cause the beater to miss spots and reduce mixing efficiency.
Noisy Operation
Has your mixer suddenly started making louder or strange noises? This could be a sign that the internal gears need lubrication or there’s debris caught inside. Turn off and unplug the mixer before checking inside the head for any foreign objects.
Another cause of noise could be worn-out gears. If the noise persists after cleaning, it might be time to contact a professional or consider replacing parts. Listening carefully to when the noise occurs can help identify if the problem is with the motor or attachments.
Attachment Fit Problems
Attachments that won’t fit or stay secure can interrupt your mixing process. Ensure you’re using compatible attachments designed specifically for your mixer model. Sometimes, residue buildup around the attachment hub can prevent a snug fit.
Clean the attachment hub regularly and inspect the locking mechanism. If you feel the attachment is loose, try tightening the hub’s locking lever or screw. If the problem continues, check for any worn or damaged parts that might need replacement.

Credit: www.kitchenaid.ca
Maintenance Tips
Keeping your Kitchen Aid stand mixer in top shape requires regular maintenance. This not only extends its lifespan but also ensures it runs smoothly every time you bake. Let’s dive into some practical tips that you can easily apply to maintain your mixer.
Cleaning The Mixer
After every use, wipe down the exterior with a damp cloth to remove flour, batter, or grease. Avoid using harsh chemicals that could damage the finish. For the attachments, soak them in warm, soapy water and scrub gently to remove any stuck-on food.
Don’t forget the bowl—you can usually wash it in the dishwasher, but check your model’s instructions first. Cleaning immediately after use prevents buildup that can be tough to remove later. Have you noticed how much easier mixing is with a spotless bowl?
Lubricating Moving Parts
Lubrication keeps the mixer’s gears working quietly and efficiently. Use food-grade grease specifically made for kitchen appliances, as other types can be unsafe or damage parts. Apply sparingly to the moving joints and internal gears if you’re comfortable opening the mixer housing.
If you’re unsure about handling lubrication yourself, consider scheduling a professional tune-up every couple of years. How often you use your mixer can guide this schedule—heavy users might need more frequent attention. Proper lubrication can prevent that annoying squeaking and prolong your mixer's performance.

Credit: www.cakesandmore.in
Frequently Asked Questions
How Do I Tilt The Kitchen Aid Mixer Head?
To tilt the mixer head, unlock the tilt-lever on the side. Lift the head gently upward until it locks in place. This provides easy access to the bowl and attachments for cleaning or changing.
How To Adjust Kitchen Aid Mixer Speed Settings?
Turn the speed control knob to select the desired speed. Start low to avoid splattering, then increase gradually. Always adjust speed while the mixer is running for smooth operation.
What Is The Correct Bowl Height Adjustment?
Adjust the bowl so the beater just touches the bottom without scraping. Use the adjustment knob under the mixer head to raise or lower the bowl for optimal mixing.
How To Replace Kitchen Aid Mixer Attachments Properly?
Lift the mixer head, align the attachment shaft, and push it up firmly. Twist slightly if needed to lock it in place. Always ensure the mixer is off before changing attachments.
Conclusion
Adjusting your Kitchen Aid stand mixer is simple and quick. A well-set mixer works better and lasts longer. Always check the settings before each use. Small tweaks can improve your mixing results. Keep your mixer clean and well-maintained too. Practice adjusting it a few times to feel confident.
Enjoy baking and cooking with your perfectly tuned mixer!