

Are you dreaming of a kitchen island that not only looks great but also makes your daily chores easier? Imagine having a dishwasher built right into your island, saving space and keeping your kitchen tidy.
Building a kitchen island with a dishwasher might sound complicated, but with the right steps, you can do it yourself and transform your cooking space. You’ll discover simple, clear instructions to create a stylish, functional island that fits your needs perfectly.
Keep reading, and you’ll soon enjoy a kitchen that works smarter for you.

Credit: www.cribbsstyle.com
Planning Your Kitchen Island
Planning your kitchen island with a dishwasher is a crucial step. It ensures the island fits perfectly in your kitchen space. Good planning saves time and avoids costly mistakes. You need to think about location, size, and style before starting the build. This section guides you through key points for successful planning.
Choosing The Right Location
Select a spot that allows easy access to plumbing and electrical outlets. The island should not block main walkways. It must fit well with your kitchen’s flow. Think about how you use your kitchen daily. Place the dishwasher near the sink for easy loading and unloading. Make sure there is enough space to open the dishwasher door fully.
Measuring Space And Dimensions
Measure your kitchen area carefully. Consider the space for walking around the island. Leave at least 36 inches of clearance on all sides. Measure the dishwasher’s size before planning the cabinet space. The island’s height should match your kitchen counters for comfort. Record these dimensions to avoid surprises during installation.
Selecting Materials And Style
Choose materials that are durable and water-resistant near the dishwasher. Common choices include hardwood, plywood, and laminate. Match the island’s style with your kitchen’s design. Think about colors, textures, and finishes that blend well. Consider easy-to-clean surfaces to keep your kitchen looking fresh. Your island should be both functional and attractive.
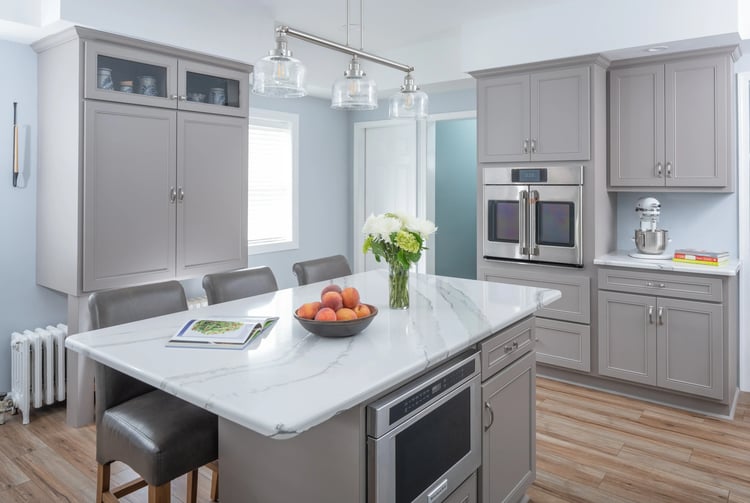
Credit: blog.kitchenmagic.com
Preparing For Dishwasher Installation
Preparing for dishwasher installation in your kitchen island requires careful planning and attention to detail. You want to ensure the dishwasher fits seamlessly into your design while functioning perfectly. Taking the time to prepare properly can save you from costly mistakes and frustrating delays.
Choosing A Suitable Dishwasher
Not all dishwashers are created equal, especially when built into a kitchen island. You need to pick a model that fits the available space and matches the island’s design. Consider the dishwasher’s dimensions, door swing direction, and noise level.
Think about your daily routine. Do you prefer a quiet appliance that won’t disturb conversations or TV time? Or is capacity your top priority because you cook and entertain often? These questions help narrow down your choices to the right model for your lifestyle.
Ensuring Plumbing And Electrical Access
Dishwashers need both water supply and electrical power, so your island must have easy access to these connections. Check that plumbing lines can reach the dishwasher location without major reconstruction.
Also, verify if you have a dedicated electrical outlet that meets the dishwasher’s power requirements. This step is crucial because running new water or electrical lines after the island is built can be costly and complicated.
Have you measured the distance from your main water line and electrical panel to the island? This can influence the ease of installation and your budget.
Gathering Necessary Tools And Supplies
Before you start, make sure you have all the tools and materials needed for installation. This typically includes a drill, adjustable wrench, screwdriver set, plumber’s tape, and electrical testers.
Don’t forget safety gear like gloves and goggles. Having everything ready prevents interruptions and helps maintain focus during the installation.
Creating a checklist of supplies tailored to your specific dishwasher model can streamline the process and keep you organized. What tools do you already have, and which ones do you need to buy or borrow?
Building The Island Frame
Begin by measuring the space to fit the island frame perfectly. Use sturdy wood to build a strong base that can hold the dishwasher safely. Secure all corners tightly to ensure stability and durability.
Building the Island Frame Creating a kitchen island with a dishwasher is both practical and stylish. The island frame serves as the foundation, ensuring durability and functionality. Start with a solid plan, considering space, dimensions, and materials. With the right tools and a clear vision, you can build an efficient kitchen island frame.
Constructing The Base Structure
Begin by selecting quality materials like wood or metal for the base. Measure the space where the island will go, ensuring you leave room for movement. Cut the materials to size, following your design. Assemble the base, using screws to secure the joints tightly. The base must be level and sturdy.
Adding Support For Countertops
Countertops require strong support. Add cross beams to the base for extra strength. Use brackets at corners for stability. Ensure the top surface is even, checking with a level tool. This prevents any issues when adding the countertop. Choose materials that match your kitchen’s style.
Creating Openings For The Dishwasher
The dishwasher needs a precise opening in the island. Measure the dishwasher's dimensions carefully. Mark these on the frame where the appliance will fit. Cut the opening slightly larger for easy installation. Ensure there’s enough space for plumbing and electrical connections. This step is crucial for a seamless fit.
Installing The Dishwasher
Installing the dishwasher into your kitchen island is a crucial step that demands precision and patience. It’s not just about sliding it into place; you need to ensure it fits perfectly, connects safely, and stays secure during everyday use.
Positioning The Dishwasher
Start by measuring the space where the dishwasher will sit. Make sure there’s enough clearance around the unit for the door to open fully without hitting cabinets or island edges.
Place the dishwasher carefully, checking if the front edge aligns with your island’s countertop. You want it to look seamless, not like an afterthought.
Ask yourself: Is there enough room behind the dishwasher for hoses and wires? Leaving a bit of wiggle space makes installation easier and future maintenance less of a hassle.
Connecting Plumbing And Electrical Lines
Before hooking up, turn off the water supply and power to avoid accidents. Connect the water inlet hose to the dishwasher and the drainage hose to the sink drain or garbage disposal.
Use plumber’s tape on threaded connections to prevent leaks. Don’t rush these connections; even a small drip can cause long-term damage.
Next, connect the dishwasher to the electrical outlet. Most dishwashers require a dedicated 120-volt circuit. Double-check your electrical work or hire a professional if you’re unsure.
Securing The Appliance In Place
Once connected, secure the dishwasher to the underside of the countertop or the side of the cabinet using mounting brackets. This prevents it from tipping forward when you open the door.
Check the dishwasher’s level using a spirit level. Adjust the feet to ensure it sits evenly—uneven placement can cause noise and poor drainage.
Try opening and closing the door multiple times. Does it move smoothly without wobbling? If not, tighten the brackets or adjust the leveling feet until it feels stable.
Finishing Touches
Finishing touches bring your kitchen island to life. They make the space functional and beautiful. These final steps help protect your investment and create a cohesive look.
Installing Countertops
Choose a countertop material that fits your kitchen style and budget. Popular options include granite, quartz, and butcher block. Measure carefully to ensure a perfect fit. Secure the countertop with strong adhesive and brackets. Check for level placement to avoid any uneven surfaces.
Adding Cabinets And Storage
Use cabinets to hide the dishwasher and create extra storage space. Select cabinet doors that match your kitchen decor. Install shelves or drawers inside for organized storage. Attach handles or knobs for easy access. Make sure all doors open smoothly without obstruction.
Painting And Sealing Surfaces
Paint the island to match or complement your kitchen colors. Use a durable paint that resists moisture and stains. Apply at least two coats for full coverage. Seal wooden surfaces with a clear finish to protect from spills. Let everything dry completely before use to avoid damage.
Testing And Maintenance Tips
Testing and maintaining your kitchen island’s dishwasher is essential to ensure it runs smoothly and lasts longer. Proper care prevents costly repairs and keeps your kitchen efficient. Let’s look at some practical tips to keep your dishwasher in top shape.
Running Initial Dishwasher Test
Once your dishwasher is installed in the kitchen island, start with a quick test run. Use the shortest cycle with no dishes inside to check for leaks or unusual noises. Pay close attention to how water drains and whether the dishwasher seals properly.
If you notice water pooling or strange sounds, don’t ignore them. These could indicate installation issues or faulty parts. Testing early saves you from bigger problems down the line.
Regular Cleaning And Upkeep
Keep your dishwasher clean by removing food debris and wiping down seals regularly. This prevents clogs and keeps the door closing tightly. Run a cleaning cycle with dishwasher cleaner or vinegar once a month to eliminate buildup.
Check the filters and spray arms often. Clear any blockages to maintain good water flow. Simple upkeep extends your dishwasher’s lifespan and improves performance.
Troubleshooting Common Issues
Is your dishwasher not draining or leaving spots on dishes? These are common problems you can fix yourself. Start by cleaning the drain and checking the spray arms for clogs.
If the dishwasher won’t start, ensure it’s properly plugged in and the door latch is secure. Sometimes, resetting the appliance by turning off power for a few minutes can fix minor glitches.
What other small problems have you faced with your dishwasher? Sharing your experience can help others avoid the same frustrations.

Credit: www.youtube.com
Frequently Asked Questions
What Materials Are Needed To Build A Kitchen Island With Dishwasher?
You need plywood, screws, wood glue, countertop material, plumbing supplies, and a dishwasher. Proper tools include a drill, saw, and measuring tape. Quality materials ensure durability and a professional finish.
How Do You Install Plumbing For A Dishwasher In An Island?
Install water supply and drain lines inside the island base. Connect to existing kitchen plumbing with proper fittings. Ensure accessible shut-off valves for maintenance and leak prevention.
Can I Add Electrical Outlets To My Kitchen Island?
Yes, adding electrical outlets is essential for convenience. Hire a licensed electrician to install outlets meeting code requirements safely. Plan outlet placement before building for easy access.
What Size Dishwasher Fits Best In A Kitchen Island?
Standard dishwashers are 24 inches wide, fitting most islands. Measure available space and allow clearance for door opening. Compact models are available for smaller islands or tight spaces.
Conclusion
Building a kitchen island with a dishwasher adds great value. It saves space and makes cleaning easier. Follow steps carefully and take your time. Measure twice and cut once for best results. Choose materials that fit your kitchen style. Test the dishwasher connection before finishing.
Enjoy a more functional and stylish kitchen space. Simple projects can bring big changes. Ready to start your kitchen upgrade?