
Is your kitchen sink soap dispenser leaking, empty, or just not working right? Changing it might sound tricky, but you can do it yourself quickly and easily.
Imagine saving money and avoiding a plumber’s visit by handling this simple fix on your own. In this guide, you’ll find clear, step-by-step instructions that anyone can follow. Keep reading, and you’ll have your soap dispenser replaced in no time—making your kitchen cleaner and more convenient without any hassle.

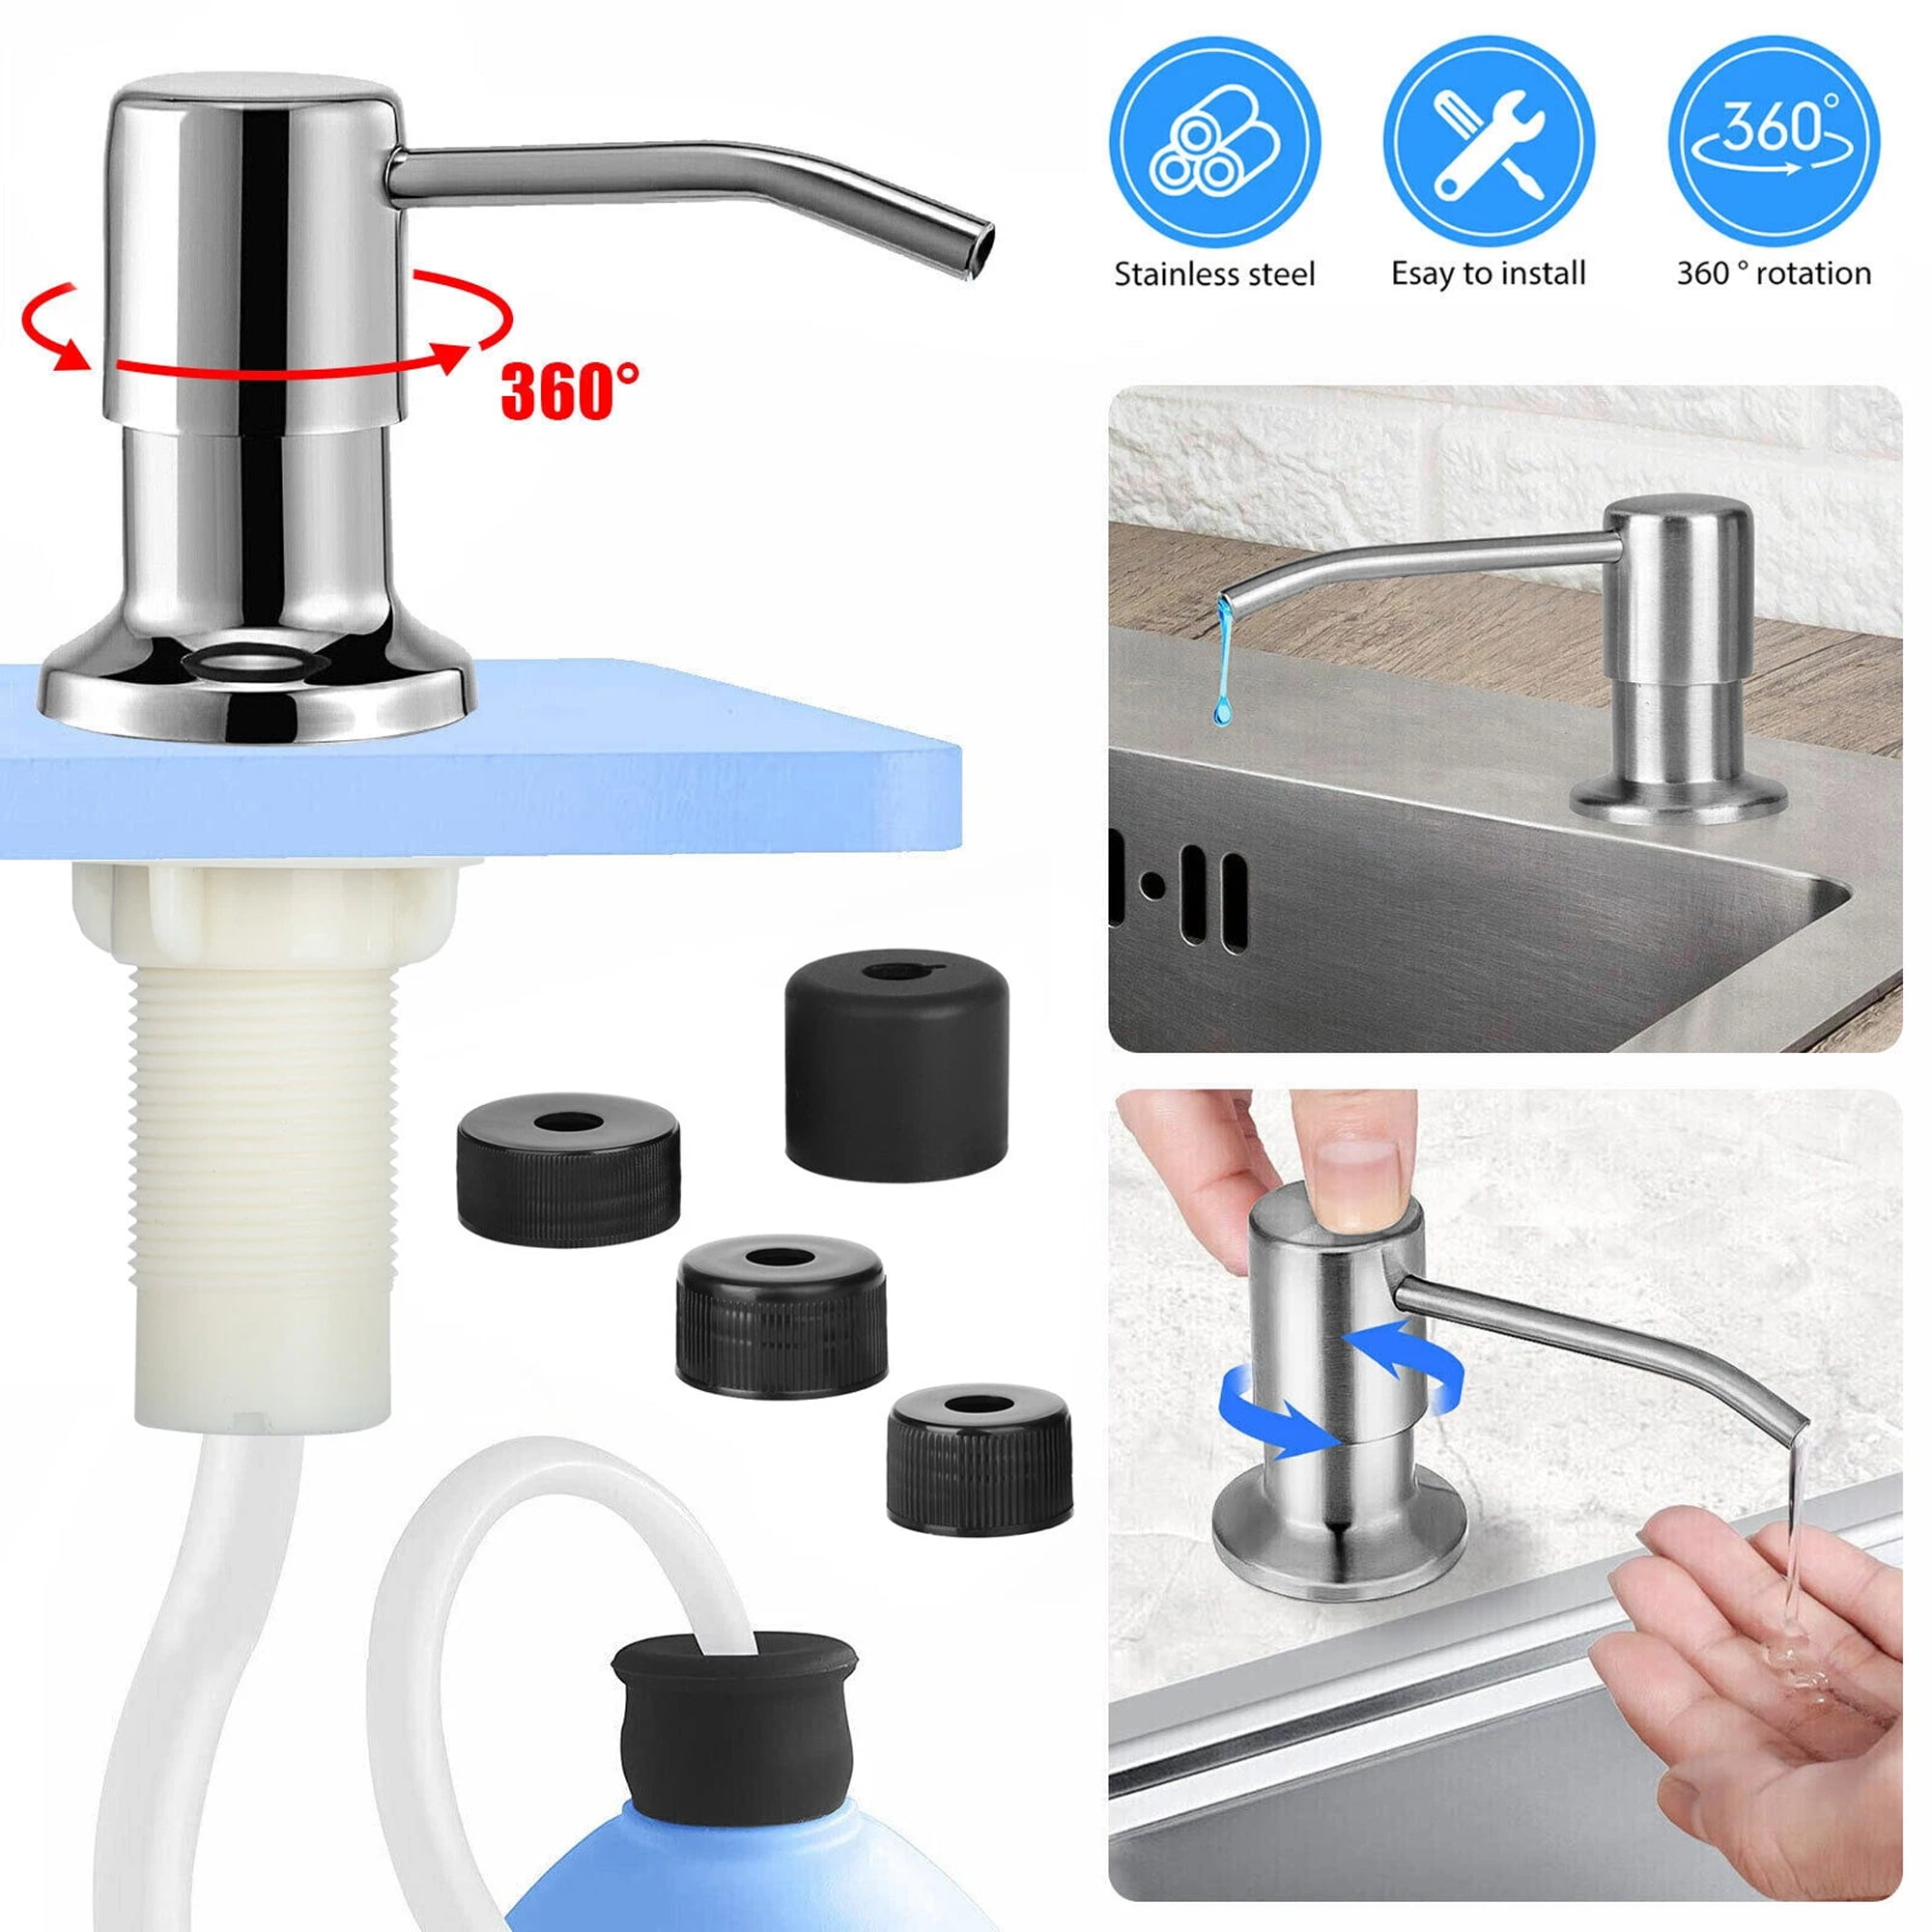
Credit: www.amazon.com
Tools And Materials Needed
Before you begin changing the soap dispenser on your kitchen sink, gathering the right tools and materials can make the process smooth and hassle-free. Having everything at hand saves you from multiple trips and frustration. It also helps you avoid damaging your sink or plumbing.
Think about the last time you started a project without the proper tools. Did it slow you down or cause extra work? This simple preparation can save you time and effort.
Essential Tools For Replacing A Soap Dispenser
- Adjustable Wrench:Ideal for loosening and tightening nuts under the sink without damaging them.
- Screwdriver:A flathead or Phillips screwdriver might be needed to remove mounting screws or clips.
- Pliers:Useful for gripping and twisting stubborn parts or connectors.
- Bucket or Small Bowl:To catch any water drips while disconnecting the dispenser.
- Towel or Rag:Helps keep the area dry and clean during the swap.
Materials You Will Need
- New Soap Dispenser:Choose one compatible with your sink style and soap type.
- Plumber’s Tape (Teflon Tape):Ensures a tight, leak-free seal on threaded connections.
- Soap Refill:Pick your favorite liquid soap to fill the new dispenser once installed.
Optional Extras That Can Help
- Flashlight:Lighting under the sink can be dim; a flashlight helps you see clearly.
- Utility Knife:To clean around the dispenser hole or trim parts if necessary.
- Gloves:Protect your hands from grime or sharp edges during the swap.
Do you have all these ready? If not, taking a quick inventory now will keep your project on track. What’s the one tool you think you can’t do without for this job?
Prepare The Area
Preparing the area before changing your kitchen sink soap dispenser is crucial for a smooth and mess-free job. Taking a few moments to organize your space helps prevent accidents and makes each step easier to manage. Have you ever started a project only to realize halfway through that you forgot an essential tool? Avoid that frustration by setting up right from the start.
Clear The Sink And Surrounding Countertop
Remove any dishes, sponges, or cleaning supplies around the sink. This gives you enough room to work without knocking things over. A clean, clutter-free surface also reduces the chance of soap or water spilling onto other items.
Gather Necessary Tools And Replacement Parts
Collect everything you need before you begin, such as a wrench, screwdrivers, and the new soap dispenser. Having these items within reach saves time and keeps your focus on the task. Missing a small part like a mounting nut can slow you down unexpectedly.
Place Towels Or A Bucket Under The Sink
Leaks can happen when disconnecting the dispenser, so place a towel or a small bucket underneath. This simple step protects your cabinet from water damage. Think about how much easier cleanup is when you’re prepared for spills.
Turn Off The Water Supply
Even though soap dispensers usually don’t connect to water lines, turning off the water supply is a safe precaution. It prevents any accidental leaks or drips while you work. Have you ever had water surprise you in the middle of a repair?
Switch Off Garbage Disposal If Present
If your sink has a garbage disposal unit, turn it off before working under the sink. This prevents it from accidentally turning on while you’re handling tools and parts. Safety first keeps your hands intact and your nerves calm.
Remove The Old Soap Dispenser
Begin by turning off the water supply beneath the sink. Loosen and remove the old soap dispenser carefully from its base. Clean the area thoroughly before installing the new dispenser.
Removing an old soap dispenser from your kitchen sink might seem tricky. But with the right steps, it's a breeze. This guide will help you remove your old soap dispenser. Follow these simple steps for a hassle-free experience.
Turn Off The Water Supply
Before starting, ensure safety. Turn off the water supply under the sink. This step prevents any water spills. Locate the shut-off valve and turn it clockwise. This stops water from flowing to the sink. Double-check to ensure the water is off completely.
Disconnect The Pump And Bottle
Next, disconnect the pump from the dispenser. Firmly grasp the pump and twist it counterclockwise. Remove it from the top of the sink. Now, look under the sink. Find the bottle attached to the dispenser. Unscrew the bottle and set it aside. Be gentle to avoid damage.
Unscrew The Dispenser From The Sink
With the pump and bottle removed, focus on the dispenser. Reach under the sink. Locate the mounting nut holding the dispenser in place. Use a wrench to unscrew the nut counterclockwise. Once loose, pull the dispenser up and out. Now, the old dispenser is removed. You’re ready for the next steps.
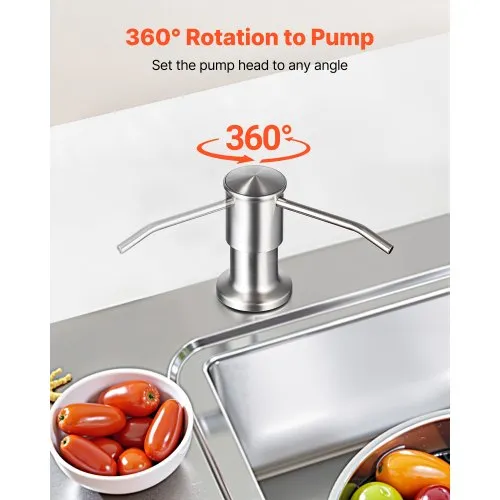
Credit: www.vevor.com
Install The New Soap Dispenser
Installing a new soap dispenser on your kitchen sink is a straightforward task that can give your sink a fresh, functional upgrade. The process involves fitting the dispenser into the sink hole, securing it firmly underneath, and then attaching the soap bottle and pump. Paying attention to each step ensures your new dispenser works smoothly and stays in place.
Insert The Dispenser Into The Sink Hole
Start by placing the soap dispenser's neck through the sink hole from above. Make sure the dispenser’s top is flush with the sink surface to avoid any wobbles. If your sink hole has any debris or old sealant, clean it out first to create a smooth fit.
Have you noticed how a loose dispenser can cause spills? Taking a moment here to align it perfectly will save you frustration later.
Secure The Dispenser Underneath
Under the sink, slide the mounting nut onto the dispenser’s threaded shank. Tighten it by hand, then use a wrench or pliers for a snug fit. Avoid over-tightening, which can crack your sink or damage the dispenser.
If your dispenser came with a rubber gasket, place it between the sink and the mounting nut. This helps prevent water leaks and keeps the dispenser stable. Checking for any movement after tightening is key—give the dispenser a gentle shake to ensure it’s firmly anchored.
Attach The Soap Bottle And Pump
Screw the soap bottle onto the dispenser’s threaded bottom under the sink. Make sure it’s tight enough to prevent leaks but easy to remove for refilling. Attach the pump mechanism to the dispenser’s neck above the sink, pressing it down firmly until it clicks into place.
Before filling the bottle, pump a few times to prime the dispenser. This step helps you avoid dry pumps and ensures soap flows smoothly from the start. Have you ever struggled with a pump that didn’t work right away? This little trick can save you that hassle.
Test The New Dispenser
Testing the new soap dispenser is a crucial step to ensure it works smoothly and efficiently. You want to confirm that the dispenser pumps soap without leaks or jams. Skipping this step might mean wasting time fixing issues later.
Check For Proper Soap Flow
Start by pressing the pump several times. Is the soap coming out steadily with each push? If the soap flow feels weak or uneven, it could indicate a clogged nozzle or air trapped inside.
Try pumping a few more times to clear any air bubbles. If the problem persists, make sure the soap container is properly attached and not empty.
Look For Leaks Around The Base
Inspect the area where the dispenser mounts to the sink. Any dripping or pooling water means the seal isn’t tight. Tighten the mounting nut beneath the sink if needed.
Leaks can cause water damage to your cabinet over time. Catching them early saves you from bigger headaches.
Test The Soap Refill Process
Refill the dispenser with soap to check how easy the top opens and closes. Can you refill without spilling? Does the pump still work right after refilling?
Think about your usual soap type—thick or thin—and test if the dispenser handles it well. This prevents surprises during daily use.
Ensure Comfortable Pump Action
Press the dispenser pump several times to feel the resistance. It should be smooth and not too hard or too soft. An awkward pump can make handwashing frustrating.
If the pump feels stiff, try lubricating the mechanism slightly or repositioning the dispenser. You want a dispenser that feels natural every time you use it.

Credit: www.yahoo.com
Maintenance Tips
Maintaining your kitchen sink soap dispenser is key to keeping it working smoothly and looking good. Simple upkeep can prevent clogs and leaks, saving you time and frustration. Let’s look at some straightforward tips that you can easily add to your routine.
Clean The Nozzle Regularly
Soap residue can build up around the nozzle, causing it to clog. Wipe the nozzle with a damp cloth once a week to keep it clear. If the soap is thick, soak the nozzle in warm water for a few minutes before wiping.
Use The Right Soap
Not all soaps are made the same. Thick or gel-based soaps can clog the dispenser more easily. Choose a liquid soap designed for dispensers to ensure smooth flow.
Check For Leaks
Leaks can waste soap and cause messes under your sink. Inspect the dispenser and connections monthly for any drips or moisture. Tighten any loose parts to keep everything sealed.
Refill Carefully
Overfilling the dispenser can cause soap to spill and clog the pump. Pour slowly and stop when you see the soap near the top. This helps avoid mess and keeps the dispenser working well.
Flush The Dispenser Occasionally
Soap can dry inside the pump and block it. Remove the dispenser and flush it with warm water every few months. This simple step clears out dried soap and extends the life of your dispenser.
Have you noticed your soap dispenser slowing down or leaking? A little regular care can make a big difference in how well it works and how long it lasts.
Frequently Asked Questions
How Do I Remove The Old Soap Dispenser?
To remove the old soap dispenser, first disconnect the soap bottle underneath the sink. Then, unscrew the mounting nut by hand or with pliers. Lift the dispenser out from the top of the sink. Clean the area before installing the new one.
What Tools Are Needed To Change A Soap Dispenser?
You typically need adjustable pliers, a screwdriver, and a new soap dispenser. Sometimes, a wrench may help loosen tight nuts. Having a towel handy can catch any soap drips. These basic tools make the replacement quick and hassle-free.
How Do I Install A New Soap Dispenser Properly?
Insert the new dispenser through the sink hole from above. Secure it underneath with the mounting nut. Attach the soap bottle to the dispenser tube. Tighten connections to avoid leaks. Fill the bottle with soap and pump a few times to prime it.
Can I Replace The Soap Dispenser Without Professional Help?
Yes, replacing a soap dispenser is a simple DIY task. It requires minimal tools and about 10-15 minutes. Follow step-by-step instructions to avoid mistakes. This saves money and ensures your kitchen stays functional quickly.
Conclusion
Changing your kitchen sink soap dispenser is simple and quick. Just follow the steps carefully to avoid leaks or damage. Choose a dispenser that fits your sink and needs. Remember to tighten all parts securely. Test the dispenser to ensure it works well.
A small fix can improve your kitchen’s function. No need to call a plumber for this task. Enjoy a neat and easy soap dispenser every day.