
Your kitchen brush works hard every day to keep your space clean, but when was the last time you cleaned it? If you’re like most people, it’s easy to forget that your brush can harbor germs and bacteria.
Cleaning your kitchen brush is simple and quick, yet it makes a huge difference in keeping your kitchen truly hygienic. You’ll discover easy steps to refresh your brush and protect your family’s health. Keep reading—your kitchen will thank you!
Choose The Right Cleaning Method
Choosing the right cleaning method keeps your kitchen brush effective and safe. Different methods target various types of dirt and bacteria. Use the method that fits your brush’s material and level of dirt. Regular cleaning stops germs from spreading in your kitchen.
Soaking In Warm Soapy Water
Soaking the brush in warm soapy water loosens stuck food and grease. Use mild dish soap and warm water for best results. Let the brush soak for 15 to 30 minutes. After soaking, rinse thoroughly under running water. This method is gentle and works well for daily cleaning.
Using Vinegar For Disinfection
Vinegar is a natural disinfectant that kills many bacteria. Mix equal parts of white vinegar and water in a container. Soak the brush for about 30 minutes. Vinegar removes odors and helps kill germs without harsh chemicals. Rinse well before using the brush again.
Applying Baking Soda For Deep Cleaning
Baking soda breaks down tough stains and grime on the brush. Sprinkle baking soda on the bristles and scrub gently with a toothbrush. For a stronger clean, make a paste with water and baking soda. Leave it on the brush for 10 minutes before rinsing. This method refreshes the brush deeply and removes buildup.

Credit: www.reddit.com
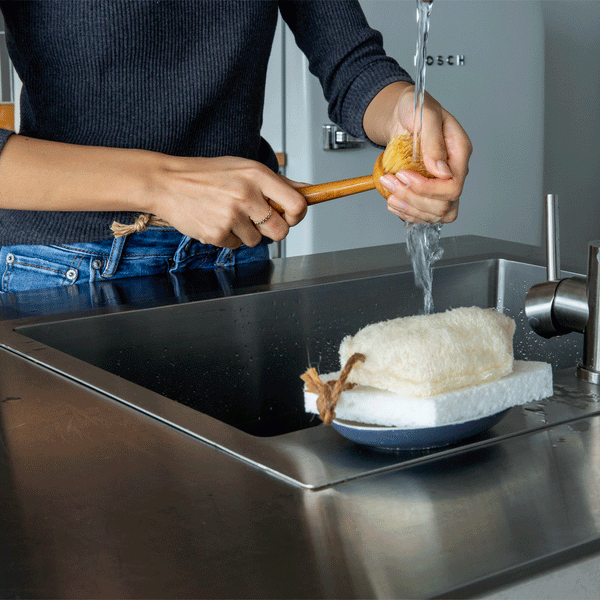
Step-by-step Cleaning Process
Keeping your kitchen brush clean is essential for maintaining hygiene and extending its lifespan. The cleaning process is straightforward and doesn’t require special tools. Let’s walk through the steps that will leave your brush fresh and ready for the next use.
Remove Loose Debris
Start by tapping your kitchen brush against the sink or trash can to shake off any loose food particles. You might be surprised how much gunk falls out with just a few shakes.
Next, use your fingers or a comb to pull out trapped crumbs or hair caught in the bristles. This simple step prevents buildup and makes the next cleaning stages more effective.
Scrub Bristles Thoroughly
Fill a bowl with warm water and add a few drops of dish soap. Soak the brush bristles in this mixture for about 10 minutes to loosen grease and grime.
After soaking, scrub the bristles using your fingers or an old toothbrush, focusing on the base where dirt tends to accumulate. Pay attention here; a quick scrub can drastically improve cleanliness.
If your brush has stubborn stains, sprinkle some baking soda on the bristles before scrubbing. The mild abrasive helps lift dirt without damaging the brush.
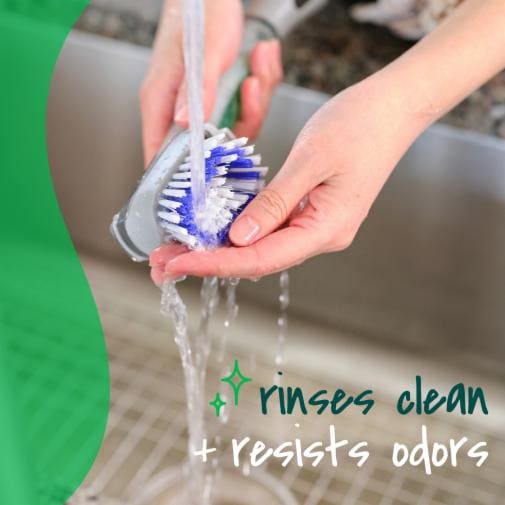
Rinse And Dry Properly
Rinse the brush under warm running water to wash away soap and loosened dirt. Make sure no soap residue remains because leftover soap can attract more dirt.
Shake off excess water and allow the brush to air dry completely before storing it. Placing it bristle-side down on a clean towel or hanging it can speed up drying and prevent bacteria growth.
Have you noticed a difference in your brush’s performance after a thorough clean? Regular maintenance like this can save you from replacing brushes too often and keeps your kitchen safer.
Preventing Bacteria Build-up
Bacteria love damp, dirty kitchen brushes. If you don’t clean your brush regularly, it can become a breeding ground for germs that might contaminate your dishes or surfaces. Preventing bacteria build-up isn’t just about hygiene; it’s about keeping your kitchen safe and fresh.
Regular Cleaning Schedule
Set a clear cleaning routine for your kitchen brush. After every use, rinse it thoroughly with hot water to remove food particles and soap residue.
Once or twice a week, soak the brush in a mixture of hot water and white vinegar for about 15 minutes. This simple step kills most bacteria and keeps the bristles fresh.
Have you noticed how quickly your brush smells if left unattended? That odor is a sign bacteria are multiplying. Address it before it gets out of hand.
Proper Storage Tips
Where you store your kitchen brush matters a lot. Avoid leaving it sitting in a wet sink or closed containers where moisture gets trapped.
Instead, keep your brush in a holder that allows air to circulate freely around the bristles. This helps the brush dry faster and reduces bacterial growth.
Try hanging it or placing it bristle-side up in a dish rack. You’ll find that your brush lasts longer and stays cleaner.

Credit: www.mrsiga.com
When To Replace Your Kitchen Brush
A kitchen brush should be cleaned regularly to remove food and bacteria. Replace it if bristles are worn or smell bad. Keeping it fresh helps maintain a healthy kitchen.
Knowing when to replace your kitchen brush is as crucial as knowing how to clean it. An old, worn-out brush can harbor bacteria and decrease cleaning efficiency. But how do you determine the right time to say goodbye to your trusted kitchen companion?
Signs Of Wear And Tear
Your kitchen brush will give you subtle hints that it’s time for a replacement. Look out for frayed or bent bristles, as they indicate the brush is no longer effective. A change in color or an unpleasant odor can also signal that your brush has reached the end of its lifespan. Is the handle cracked or broken? This can make the brush uncomfortable to use and less efficient. If you notice any of these signs, it's time for a new brush.
Maintaining Brush Hygiene
Regular cleaning of your brush can extend its life. Rinse the bristles thoroughly after each use to remove food particles and prevent the build-up of bacteria. Once a week, soak your brush in a mixture of hot water and vinegar to sanitize it. Store your brush in a dry place to prevent mold and mildew. Hanging it up allows it to air dry completely and helps maintain its shape. Do you remember the last time you replaced your kitchen brush? Keeping an eye on these signs can ensure your kitchen stays clean and your meals safe.
Credit: www.scotch-brite.com
Frequently Asked Questions
How Often Should I Clean My Kitchen Brush?
You should clean your kitchen brush at least once a week. Regular cleaning prevents bacteria buildup and keeps it hygienic. If you use it heavily, clean it more often to maintain its effectiveness and safety.
What Is The Best Way To Clean A Kitchen Brush?
Soak the brush in warm, soapy water for 10-15 minutes. Scrub the bristles gently with a clean sponge, then rinse thoroughly. Air dry it completely before the next use to avoid mold and bacteria growth.
Can I Clean A Kitchen Brush In The Dishwasher?
Yes, most kitchen brushes are dishwasher safe. Place the brush on the top rack and run a normal cycle. This method sanitizes the brush effectively and saves time, but check the manufacturer’s instructions first.
How Do I Remove Tough Grease From A Kitchen Brush?
Use a mixture of baking soda and vinegar to tackle tough grease. Apply it to the brush, let it sit for 10 minutes, then scrub and rinse well. This natural method breaks down grease without harsh chemicals.
Conclusion
Cleaning your kitchen brush keeps it fresh and lasts longer. Regular washing stops germs from building up. Use hot water and soap for best results. Let the brush dry fully before the next use. A clean brush helps keep your kitchen safe.
Small steps make a big difference in hygiene. Stay consistent to enjoy a cleaner kitchen every day.