
Are your Kitchen Aid oven racks covered in stubborn grease and burnt-on food? Cleaning them can seem like a tough, time-consuming chore.
But what if you could make your racks look brand new with just a few simple steps? In this guide, you’ll discover easy, effective ways to get your oven racks sparkling clean without harsh chemicals or endless scrubbing. Keep reading—your kitchen will thank you, and you’ll enjoy cooking on racks that look and feel fresh every time.

Credit: food52.com
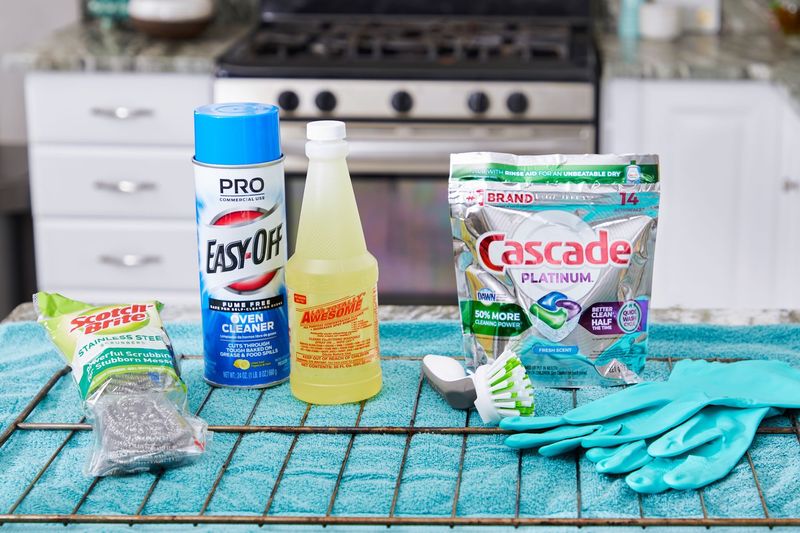
Gather Cleaning Supplies
Gathering the right cleaning supplies is the first step to clean Kitchen Aid oven racks effectively. Having everything ready makes the task easier and faster. Use tools and agents that protect your racks and ensure a thorough clean.
Essential Tools
- Soft scrub brush or sponge
- Old toothbrush for corners
- Large basin or bathtub for soaking
- Rubber gloves to protect hands
- Microfiber cloth for drying
- Plastic scraper for stuck-on grime
Safe Cleaning Agents
- Baking soda – gentle and natural
- White vinegar – cuts grease well
- Mild dish soap for everyday dirt
- Non-abrasive oven cleaner, if needed
- Warm water to help loosen stains
Remove Oven Racks Safely
Removing oven racks safely is crucial to avoid injury and damage. Oven racks can become very hot after cooking. Handling them carefully keeps you safe and protects the racks from bending or scratching.
Cooling And Handling
Let the oven racks cool completely before touching. Use oven mitts or thick gloves to protect your hands. Pull the racks out slowly and steadily. Avoid sudden movements that might cause the racks to slip.
Avoiding Damage
Do not force the racks out if they feel stuck. Gently wiggle the racks to loosen them. Avoid using sharp tools that can scratch the oven or racks. Place the racks on a soft surface to prevent dents or bends.
Soak Racks For Deep Cleaning
Soak racks in warm, soapy water to loosen grease and grime. Use a soft brush to scrub gently and rinse well for a clean finish. This method helps maintain Kitchen Aid oven racks without damage.
To achieve sparkling clean Kitchen Aid oven racks, soaking is essential. This process removes stubborn grime and baked-on grease. By immersing the racks in a cleaning solution, the dirt softens. This makes scrubbing easier and faster. Here's how to soak them effectively.
Choosing The Right Container
Select a container large enough for the racks. A bathtub or large sink works well. Ensure the container allows complete submersion of the racks. Avoid using plastic bins that can't withstand hot water.
Soaking Duration Tips
Allow the racks to soak for at least four hours. For tough stains, overnight soaking is ideal. Use hot water with a mix of dish soap or baking soda. This helps break down grease and food particles efficiently.

Credit: food52.com
Scrub Away Stubborn Residue
Scrubbing away stubborn residue from Kitchen Aid oven racks can be tough. Old grease, burnt food, and grime cling tightly. A good scrub helps restore racks to clean and shiny condition. The right tools and techniques make this job easier and faster. Focus on careful scrubbing to avoid damaging the racks while removing tough buildup.
Using Brushes And Sponges
Choose brushes with firm bristles for heavy grime. Nylon or plastic brushes work well without scratching metal. Avoid metal brushes that can harm rack surfaces. Use sponges with rough sides to scrub gently but firmly. Soft sponges help clean delicate spots and corners. Combine both tools to reach every area of the rack.
- Firm nylon brush for thick residue
- Rough sponge side for stubborn spots
- Soft sponge for delicate cleaning
- Scrub corners and joints carefully
Effective Scrubbing Techniques
Start scrubbing with circular motions to loosen dirt. Apply moderate pressure to avoid bending racks. Work on small sections to clean evenly. Soak racks briefly in warm soapy water before scrubbing. This softens stuck-on food and grease. Rinse racks well after scrubbing to remove all soap and debris. Dry racks fully to prevent rust and stains.
Rinse And Dry Racks
Rinsing and drying your Kitchen Aid oven racks is a key step in keeping them clean and in good shape. Proper rinsing removes leftover soap and grime, while thorough drying prevents rust and damage. Taking time with these steps extends the life of your racks and keeps them looking fresh.
Thorough Rinsing Methods
Use warm water to rinse the racks well. Warm water helps break down any soap or grease left behind. Rinse each part of the rack carefully, including corners and joints. Avoid using high-pressure water that could bend the racks.
For stubborn soap residue, try these tips:
- Use a soft sponge or cloth to wipe while rinsing.
- Rinse under a gentle stream of water for a few minutes.
- Shake the rack gently to remove trapped water and soap.
Drying Tips To Prevent Rust
Dry the racks fully before placing them back in the oven. Moisture causes rust and can damage the metal. Use a clean towel to pat the racks dry. Focus on drying joints and crevices where water collects.
Let the racks air dry completely by standing them upright. This allows air to reach all surfaces. Avoid stacking wet racks, as trapped moisture leads to rust. Store racks in a dry area away from humidity.
Alternative Cleaning Methods
Cleaning your Kitchen Aid oven racks doesn’t have to involve harsh chemicals or tedious scrubbing. Alternative cleaning methods offer effective, gentle ways to restore shine and remove grime. These options use common household items and simple techniques that save you time and effort.
Using Baking Soda And Vinegar
Sprinkle a generous amount of baking soda over your oven racks. Then, spray or pour white vinegar on top. The mixture will fizz, breaking down grease and burnt-on food.
Let it sit for about 15-20 minutes. Afterward, use a sponge or a soft brush to scrub the racks. Rinse thoroughly with warm water to remove any residue.
This combo is great because it’s non-toxic and safe for your racks’ finish. Have you ever noticed how some cleaning solutions leave a strange smell? Baking soda and vinegar won’t do that.
Dishwasher Cleaning Option
Did you know your oven racks might fit in your dishwasher? Place them on the bottom rack and run a normal cycle. The dishwasher’s hot water and detergent can loosen grime effectively.
Before loading, check if your racks have any plastic parts that could melt. Also, avoid overcrowding to ensure each rack gets cleaned properly.
This method saves you from scrubbing and uses your dishwasher’s power. Isn’t it satisfying when a simple button press does the job for you?
Prevent Future Build-up
Preventing future build-up on Kitchen Aid oven racks keeps them cleaner longer. Clean racks make cooking easier and improve oven performance. Simple habits help avoid tough stains and grease. This saves time and effort in cleaning later.
Regular Maintenance Tips
- Wipe racks with a damp cloth after each use.
- Use mild soap and warm water for quick cleaning.
- Soak racks in vinegar and water monthly to remove light grime.
- Dry racks completely to stop rust and stains.
- Check racks often for spills or food particles.
Protective Measures During Cooking
- Place a baking sheet under dishes to catch drips.
- Line racks with aluminum foil for easy clean-up.
- Avoid placing foil directly on heating elements.
- Use oven-safe pans to prevent spills and splatters.
- Clean spills immediately after the oven cools down.

Credit: www.kitchenaid.ca
Frequently Asked Questions
How Do I Remove Kitchen Aid Oven Racks Safely?
To remove Kitchen Aid oven racks, wait until the oven cools completely. Grip the rack firmly, pull straight out, and lift slightly to detach. Avoid forcing the rack to prevent damage or injury.
What’s The Best Cleaning Method For Kitchen Aid Oven Racks?
The best method is soaking racks in warm, soapy water for 30 minutes. Scrub gently with a non-abrasive sponge or brush. Rinse thoroughly and dry before placing back in the oven.
Can I Use Baking Soda To Clean Oven Racks?
Yes, baking soda is effective. Make a paste with baking soda and water, apply to racks, and let sit for 20 minutes. Scrub gently, rinse, and dry. It removes grease and grime naturally.
How Often Should I Clean Kitchen Aid Oven Racks?
Clean your oven racks every 3 to 6 months, or when visibly dirty. Regular cleaning prevents buildup and maintains oven efficiency. More frequent cleaning is needed with heavy use.
Conclusion
Cleaning Kitchen Aid oven racks is simple and saves time. Use common household items like baking soda and vinegar. Let the racks soak to loosen dirt and grease. Scrub gently to avoid damage. Dry racks fully before placing them back.
Regular cleaning keeps your oven working well. It also helps your food cook evenly. Try this easy method for a fresh kitchen. Your oven racks will look clean and last longer. Give your kitchen a quick, effective refresh today.