
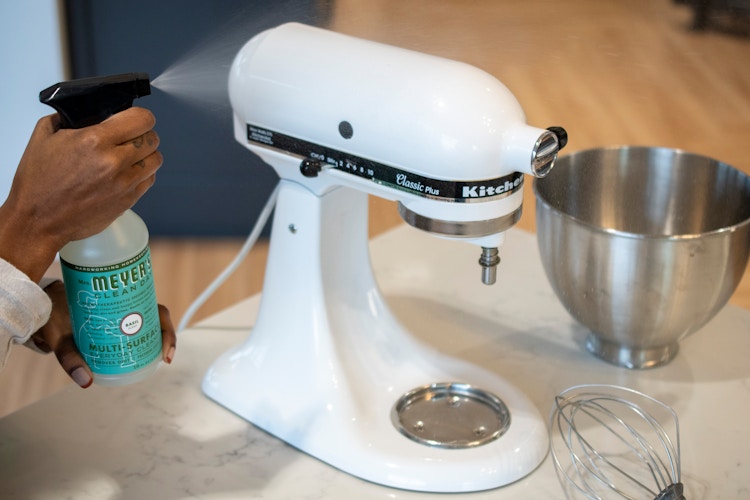
Your KitchenAid stand mixer is a powerful helper in the kitchen, but keeping it clean can sometimes feel like a hassle. If you want your mixer to work smoothly and last for years, knowing how to clean it properly is key.
In this guide, you’ll discover simple, step-by-step tips to make cleaning your stand mixer quick and easy. By the time you finish reading, you’ll feel confident maintaining your mixer like a pro—saving time and avoiding damage. Ready to keep your KitchenAid in perfect shape?
Let’s dive in.
Credit: www.kitchenaid.ca
Gather Cleaning Supplies
Gathering the right cleaning supplies makes the process easier and more efficient. It ensures your Kitchen Aid stand mixer stays in great shape. Prepare all items before you start cleaning. This saves time and keeps the task organized.
Essential Cleaning Tools
- Soft microfiber cloths for wiping surfaces
- Non-abrasive sponge to avoid scratches
- Small brush for hard-to-reach areas
- Dish soap with gentle formula
- Warm water for rinsing and cleaning
Safe Cleaning Products
- Mild dish detergent to remove grease
- Baking soda for gentle scrubbing
- White vinegar to tackle tough stains
- Isopropyl alcohol for disinfecting parts
- Avoid harsh chemicals or bleach
Additional Supplies For Deep Cleaning
- Toothpicks or cotton swabs for crevices
- Soft-bristle toothbrush for detailed cleaning
- Plastic scraper to remove stuck debris
- Dish towel for drying parts thoroughly
Unplug And Disassemble Mixer
Before you start cleaning your KitchenAid stand mixer, the first and most important step is to unplug and disassemble it properly. This ensures your safety and makes the cleaning process easier. Handling electrical appliances while plugged in can be dangerous, so always disconnect the power source first.
Unplug The Mixer Safely
Always unplug your KitchenAid mixer from the wall outlet before cleaning. This simple action prevents any accidental starts that could cause injury or damage. It also protects the internal electrical components from moisture during cleaning.
Remove The Attachments
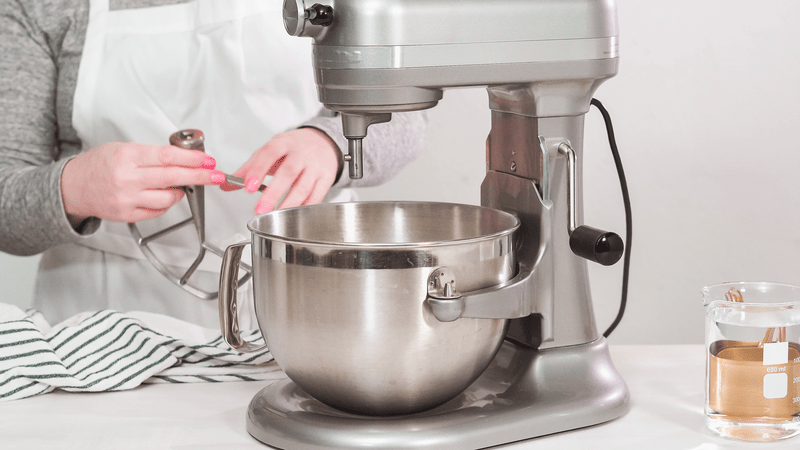
Detach all the accessories like the beater, whisk, or dough hook. These parts are usually easy to remove by twisting or pulling gently. Cleaning them separately helps you reach every corner and keeps the attachments in good condition.
Detach The Mixing Bowl
Take off the mixing bowl by turning it counterclockwise and lifting it out. This step frees the mixer base for thorough cleaning and allows you to wash the bowl separately. You’ll find it much easier to clean the entire setup this way.
Separate The Head From The Base (if Applicable)
Some KitchenAid models allow you to tilt or remove the mixer head for better access. Check your manual to see if your model supports this. This makes cleaning the hard-to-reach spots simpler and more effective.
Clean Removable Attachments
Detach the mixer attachments carefully and wash them with warm, soapy water. Dry thoroughly before reattaching to prevent rust and ensure longevity.
Cleaning the removable attachments of your KitchenAid stand mixer is essential to maintain its efficiency and longevity. These attachments, such as the dough hook, whisk, and paddle, often come into contact with sticky and greasy ingredients. A thorough cleaning not only ensures hygiene but also keeps your mixer running smoothly for years to come.
Soak And Scrub Attachments
Begin by removing all attachments from your mixer. Place them in a sink filled with warm, soapy water. Let them soak for about 15 minutes to loosen any dried-on dough or batter. Use a soft sponge or brush to gently scrub each attachment. Pay special attention to any grooves or crevices where food particles might hide. For stubborn residues, a toothbrush can be particularly effective.
Dry Attachments Thoroughly
After scrubbing, rinse each attachment under clean running water. Ensure all soap residue is removed as it can corrode the metal over time. Dry the attachments immediately with a soft cloth or towel. Leaving them to air dry might seem convenient, but moisture can lead to rust, especially on metal parts. Store your clean and dry attachments in a safe, dry place. This not only keeps them ready for the next baking session but also extends their life. Have you ever wondered how a small change in your cleaning routine could make a significant difference in your mixer’s performance? By dedicating just a few extra minutes to these steps, you can ensure your KitchenAid stand mixer continues to be your reliable kitchen companion.
Wipe Down Mixer Body
Keeping your KitchenAid stand mixer clean is essential not just for hygiene but also to maintain its sleek look and long-term performance. Wiping down the mixer body regularly removes splatters, dust, and grease that accumulate during baking sessions. This simple step prevents stubborn stains and keeps your mixer looking as good as new.
Use Mild Detergent
Choose a mild detergent mixed with warm water to clean your mixer’s body gently. Harsh chemicals can damage the finish or fade the color over time. Dampen a soft cloth with the detergent solution and wipe the surface carefully, paying attention to areas around knobs and buttons.
Have you noticed how a simple wipe with the right cleaner can make your mixer instantly more inviting to use? That’s because grime dulls its appearance and can even affect your mood in the kitchen. A quick clean with mild detergent restores that fresh, polished look effortlessly.
Avoid Water In Motor Area
Water and electric parts don’t mix well, especially around the motor housing of your mixer. Be cautious not to let moisture seep into the motor area to avoid damage or electrical faults. Use a slightly damp cloth rather than a dripping wet one and never submerge the mixer body in water.
Imagine how frustrating it would be to face a malfunction just because water got inside. It’s a simple mistake to avoid by focusing your cleaning on the exterior surfaces only. Protecting the motor area ensures your mixer runs smoothly for years to come.
Clean Mixer Head And Beater Shaft
Cleaning the mixer head and beater shaft of your Kitchen Aid stand mixer is key to keeping it running smoothly and hygienic. These parts often collect batter, dough, and other ingredients that can build up and affect performance. Taking the time to clean them properly will extend the life of your mixer and prevent unwanted odors or contamination.
Remove The Beater And Detach The Mixer Head
Start by unplugging your mixer for safety. Then, unlock and remove the beater from the shaft by twisting it counterclockwise. If your model allows, tilt the mixer head back or detach it entirely to reach all the nooks and crannies.
Clean The Mixer Head Exterior
Use a damp cloth with mild dish soap to wipe down the mixer head’s exterior. Avoid soaking this part or using harsh chemicals, as the motor and electrical components are inside. Pay attention to vents and crevices where dust and flour can gather.
Soak And Scrub The Beater Shaft
Fill a bowl with warm, soapy water and soak the beater shaft and beaters for 10 to 15 minutes. This loosens any stuck-on batter or grease. After soaking, scrub gently with a soft brush or sponge to avoid scratching the metal.
Dry And Reassemble Carefully
Dry the beater shaft and mixer head thoroughly with a clean towel or let them air dry completely. Moisture left inside can cause rust or damage. Once dry, reattach the beater and mixer head securely before using your mixer again.
Have You Noticed Any Unusual Noises?
While cleaning, listen closely for any grinding or rattling sounds from the mixer head. These noises might indicate buildup inside or wear on the shaft, signaling it’s time for professional maintenance. Don’t ignore these signs—you want your mixer performing perfectly every time.
Credit: www.homeserve.com
Remove Stubborn Stains
Stubborn stains on your Kitchen Aid stand mixer can be frustrating, especially when they seem impossible to remove with just a quick wipe. These marks often come from dried batter, grease splatters, or even food coloring. Tackling these stains effectively keeps your mixer looking new and ensures hygiene in your kitchen.
Use Baking Soda Paste
Baking soda is a gentle abrasive that can lift tough stains without scratching your mixer's surface. To make a paste, mix baking soda with a little water until you get a spreadable consistency.
Apply the paste directly on the stained areas and let it sit for about 15 minutes. Afterward, use a soft cloth or sponge to scrub the stain gently in circular motions.
You might be surprised how this simple mixture can erase even the most persistent grime. Have you ever tried baking soda on other kitchen appliances? It’s often a game-changer.
Apply Vinegar Solution
Vinegar is excellent for breaking down grease and mineral deposits that cause discoloration on your mixer. Mix equal parts white vinegar and water in a spray bottle.
Spray the solution onto the stained spots and let it sit for 10 minutes to loosen the residue. Then, wipe it off with a clean cloth, and if needed, repeat the process.
If you notice a strong smell, don’t worry—it fades quickly and is worth the fresh, clean surface you’ll get. Have you noticed stubborn stains often reappear after using just water? Vinegar might be the extra boost your cleaning routine needs.
Reassemble And Store Mixer
After cleaning your Kitchen Aid stand mixer, reassembling and storing it properly keeps it in great shape. Proper reassembly ensures all parts fit well and work smoothly next time you use it. Safe storage helps protect the mixer from dust and damage.
Attach The Bowl And Mixing Attachments
Place the clean bowl back on the mixer base. Align the bowl's locking tabs with the base slots. Turn the bowl until it locks into place. Attach the mixing tool by pushing it onto the mixer’s hub. Twist slightly to secure it firmly.
Check For Any Loose Parts
Ensure all parts are snug and secure. Wiggle the bowl and attachments gently. If anything feels loose, tighten or reattach it. This prevents damage and keeps the mixer ready for use.
Clean The Exterior Before Storing
Wipe the mixer’s outer surface with a damp cloth. Remove any residue or spills. Dry the surface with a soft towel. This keeps your mixer looking new and clean.
Choose The Best Storage Spot
Store the mixer in a dry, cool place. Avoid areas with high humidity or direct sunlight. Keep it on a sturdy shelf or countertop. Cover the mixer with a dust cover or cloth for extra protection.
Store Attachments Separately
Keep extra attachments in a clean container. Label the container for easy access. Store it near the mixer for convenience. This keeps your workspace organized and tidy.
Maintenance Tips For Longevity
Maintaining your Kitchen Aid stand mixer properly can extend its life and keep it running smoothly for years. Small daily habits and mindful storage choices have a big impact on performance. Let’s look at practical tips that ensure your mixer stays a reliable kitchen companion.
Regular Cleaning Schedule
Cleaning your mixer regularly prevents buildup that can affect its function. After each use, wipe down the exterior with a damp cloth to remove splatters and flour dust. Avoid harsh chemicals that might damage the finish.
Take a closer look at attachments and the mixing bowl. Wash them with warm, soapy water immediately after use to prevent dried-on residue. Dishwasher-safe parts should be placed carefully to avoid damage.
Once a month, unplug your mixer and clean the head and tilt mechanism gently with a soft brush. This prevents crumbs and dust from getting inside, which can cause wear over time. Have you noticed how neglected corners often harbor the most grime?
Proper Storage Practices
Where and how you store your mixer matters. Keep it covered with a dust cover or clean towel when not in use to protect it from dust and kitchen grease. This simple step reduces cleaning time and keeps your mixer looking new.
Store attachments in a dedicated container or drawer to avoid losing them and to prevent damage. Avoid placing heavy items on top of the mixer, as this can misalign parts or scratch the surface.
Consider the placement on your countertop or in your cabinet. Is it in a spot where it’s easy to access but safe from accidental spills or knocks? Thoughtful storage can make your mixer last longer and your kitchen workflow smoother.

Credit: www.youtube.com
Frequently Asked Questions
How Do I Clean A Kitchen Aid Stand Mixer Bowl?
To clean the bowl, remove it from the mixer. Wash with warm, soapy water using a soft sponge. Avoid abrasive cleaners to keep the finish intact. Dry thoroughly before reattaching to prevent rust or residue buildup.
Can I Put Kitchen Aid Mixer Parts In The Dishwasher?
Yes, most removable parts like the bowl, beater, whisk, and dough hook are dishwasher safe. Place them on the top rack only. Avoid washing the mixer base in the dishwasher to prevent damage.
How Often Should I Clean My Kitchen Aid Stand Mixer?
Clean the mixer after every use to maintain hygiene and performance. Wipe the base with a damp cloth and wash attachments immediately. Regular cleaning prevents buildup and extends the mixer’s lifespan.
What Is The Best Way To Clean Stuck Dough Off Attachments?
Soak attachments in warm, soapy water for 10-15 minutes. Use a soft brush or sponge to gently remove dough. Avoid metal scrubbers to prevent scratching the attachment’s surface.
Conclusion
Cleaning your Kitchen Aid stand mixer keeps it working well and lasting long. Regular care stops food buildup and prevents odors. Use gentle soap, warm water, and a soft cloth. Remove attachments to clean them separately and dry completely. Wipe the mixer’s body carefully to avoid damage.
A clean mixer means better cooking and easier use every time. Simple steps make cleaning fast and stress-free. Keep your mixer shiny and ready for your next recipe. Trust these tips to maintain your mixer with little effort.