
Have you ever looked at your kitchen cabinets and noticed those annoying holes that ruin their smooth look? Maybe you tried to ignore them, but they keep catching your eye every time you walk in.
You don’t have to live with those imperfections or spend a fortune replacing your cabinets. What if you could fix those holes quickly and easily, making your kitchen look fresh and neat again? You’ll discover simple, effective ways to cover holes in your kitchen cabinets—methods anyone can do, even if you’re not a DIY expert.
Keep reading, and you’ll have your cabinets looking flawless in no time.
Assessing The Damage
Before you dive into fixing holes in your kitchen cabinets, it’s important to take a close look at the damage. Understanding exactly what you’re dealing with helps you choose the right repair method and materials. You might find that some holes are easy fixes, while others require more careful attention.
Types Of Holes In Cabinets
Holes in kitchen cabinets can vary widely in size and cause. You might come across:
- Small nail or screw holes:These are minor and often the easiest to repair.
- Chip or gouge holes:Caused by accidental bumps or scrapes, these can be shallow or deep.
- Burn holes or water damage:These require more careful treatment because they can weaken the wood.
- Large holes or missing pieces:These often need filler and possibly patching with new wood.
Take a moment to feel around the damaged area. Does the wood feel soft or crumbly? That could signal deeper issues you should address first.
Materials Needed For Repairs
Knowing what tools and materials you need before starting saves time and frustration. Here’s a basic list for common repairs:
| Material | Purpose |
|---|---|
| Wood filler or putty | Filling small to medium holes and cracks |
| Sandpaper (various grits) | Smoothing repaired areas for a seamless finish |
| Putty knife | Applying filler evenly |
| Primer and paint or stain | Matching the cabinet’s finish after repair |
| Wood patch or replacement piece | For larger holes where filler isn’t enough |
Have you ever started a repair only to realize you didn’t have the right supplies? Avoid that by gathering everything ahead of time. What’s the one tool you think you can’t live without during a cabinet repair?

Credit: plankhardware.com
Quick Fixes For Small Holes
Small holes in kitchen cabinets are common and easy to fix. Quick fixes restore the look without much work. These solutions save time and money while keeping cabinets neat.
Using Wood Filler
Wood filler is perfect for small holes in wooden cabinets. Choose a color close to your cabinet finish. Apply the filler with a putty knife, pressing it into the hole. Smooth the surface and let it dry completely. Once dry, sand the area lightly for a smooth finish. Paint or stain over the filler to match the cabinet color.
Applying Putty Or Caulk
Putty or caulk works well for tiny holes and cracks. Select a paintable type for best results. Use a small tool or your finger to press it into the hole. Wipe away extra material before it dries. Let it cure as per instructions. After curing, paint over the patch to blend it with the cabinet surface.
Repairing Larger Holes
Larger holes in kitchen cabinets need sturdy filling to hold well. Use wood filler or a patch to cover the hole smoothly. Sand the area after drying for a clean, even surface ready for painting or staining.
Repairing larger holes in your kitchen cabinets can seem daunting, but with the right techniques, it becomes a manageable task. Tackling these bigger gaps requires sturdy materials and a bit of patience. Let's dive into two effective methods to achieve a seamless repair.
Patching With Wood Veneer
Wood veneer is a thin slice of wood that can provide a smooth and authentic finish to your cabinets. Start by cleaning the area around the hole to ensure the veneer adheres properly. Cut the veneer slightly larger than the hole, then apply a wood adhesive to its backside. Carefully press the veneer over the hole and hold it in place until it sets. After the adhesive dries, sand the edges gently for a seamless blend. You can then stain or paint the veneer to match your cabinet's existing color.
Using Epoxy For Strong Repairs
Epoxy is another robust solution for fixing larger holes. It’s ideal for structural repairs, offering a durable bond that withstands everyday kitchen activities. Begin by mixing the epoxy as per the instructions on the package. Apply the mixture to the hole, slightly overfilling it to ensure complete coverage. Once the epoxy hardens, sand it down until it’s flush with the cabinet surface. A coat of paint or varnish can help it blend with the rest of your cabinetry. Have you ever thought about how these simple repairs can extend the life of your kitchen cabinets? By investing a bit of time and effort, you can save money and maintain the aesthetic appeal of your kitchen. Which method will you try first?
Covering Holes With Decorative Solutions
Covering holes in kitchen cabinets doesn’t have to be a dull repair job. Decorative solutions can transform those imperfections into stylish accents that enhance your kitchen’s look. These ideas let you fix the problem while adding personality and charm to your space.
Adding Cabinet Hardware
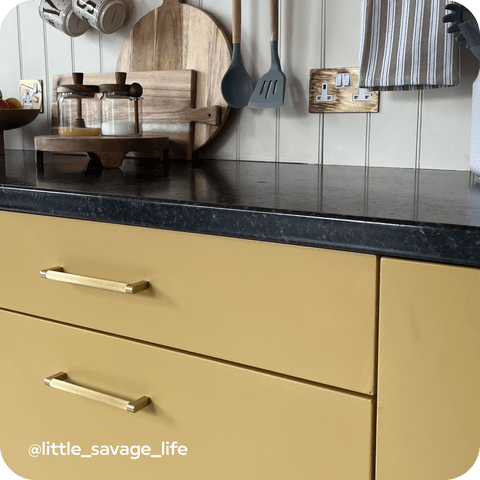
One simple way to cover holes is by adding new cabinet hardware like knobs or handles. Choose pieces that are larger or have interesting shapes to completely hide the damaged area. This not only covers the hole but also updates the cabinet’s style.
Think about mixing metals or trying bold colors to create a focal point. Have you ever noticed how a unique handle can change the whole vibe of a cabinet door? It’s an easy upgrade that solves a problem and refreshes your kitchen’s look.
Using Stickers Or Decals
Stickers and decals offer a quick, affordable way to cover small holes while adding decorative flair. You can find designs that match your kitchen’s theme, from floral patterns to geometric shapes.
Apply the decal directly over the hole to mask it instantly. Plus, if you want to switch styles later, decals are easy to remove without damaging the surface. Have you tried using decals to personalize your space yet? This could be your chance to experiment with colors and textures without committing to paint or hardware changes.
Painting And Finishing Touches
Painting and finishing touches are vital for a flawless cabinet repair. They help hide patches and blend the fixed area with the rest of the cabinet. Proper painting also protects the surface from damage and wear. Taking care with these final steps ensures a smooth and polished look that lasts.
Matching Paint Colors
Choose paint that closely matches the cabinet color. Test small areas before painting to check the color match. Use paint samples or bring a cabinet chip to the store for better accuracy. Matching colors perfectly avoids noticeable spots and keeps the cabinet uniform.
Consider the cabinet’s finish type—glossy, matte, or satin. Select paint with the same finish for a seamless look. Mixing finishes can make repairs stand out. Use thin coats of paint and build up slowly for even coverage.
Sanding And Sealing
Sand the repaired area lightly after the paint dries. Use fine-grit sandpaper to smooth the surface without removing paint. Sanding removes bumps and creates a clean finish. Wipe away dust with a soft cloth before sealing.
Apply a clear sealer or varnish to protect the paint. Choose a sealer that matches the cabinet’s original finish. Sealers guard against moisture and stains. Allow the sealer to dry fully for best results.
Credit: www.hgtv.com
Preventing Future Damage
Preventing future damage to kitchen cabinets helps keep them looking fresh and sturdy. Small holes and scratches can become bigger problems over time. Taking simple steps can protect your cabinets from wear and tear. Good habits and regular care extend the life of your kitchen furniture.
Proper Cabinet Use
Handle cabinets gently to avoid dents and holes. Avoid slamming doors or drawers. Use cabinet handles or knobs instead of pulling on edges. Store heavy items on lower shelves to reduce stress. Keep sharp objects away from cabinet surfaces. Use liners inside cabinets to protect the wood from spills and scratches.
Regular Maintenance Tips
- Clean cabinets regularly with a soft cloth and mild cleaner.
- Check for loose hinges and tighten screws as needed.
- Touch up small scratches or holes with matching wood filler or paint.
- Keep cabinets dry to prevent swelling and warping.
- Apply a protective finish or sealant every year.
- Inspect cabinets for signs of pests or mold early.

Credit: www.familyhandyman.com
Frequently Asked Questions
How Can I Fill Small Holes In Kitchen Cabinets?
Use wood filler or putty to fill small holes. Apply with a putty knife, let dry, then sand smooth. Finish by painting or staining to match the cabinet color. This method is quick, easy, and effective for minor repairs.
What Materials Cover Large Holes In Kitchen Cabinets?
For large holes, use wood patches, plywood inserts, or replacement panels. Cut the patch to size, glue or screw it in place, then sand and paint. This provides a sturdy, durable fix that blends well with existing cabinets.
Can I Use Paint To Hide Holes In Cabinets?
Paint alone won't hide holes but can camouflage minor imperfections. Fill holes first with wood filler, sand smooth, then paint. Choose matching paint for a seamless look. This method improves appearance but is best for small to medium holes.
How Do I Prevent Damage Causing Holes In Cabinets?
Avoid using sharp tools near cabinet surfaces. Handle doors gently to prevent dents and holes. Regularly inspect and repair minor damage promptly. Proper care extends cabinet life and reduces the need for extensive repairs.
Conclusion
Fixing holes in kitchen cabinets can be simple and quick. Use the right materials like wood filler or patches. Sand and paint for a smooth, clean look. Small repairs can make cabinets look new again. Save money by doing it yourself at home.
Keep your kitchen neat and fresh with these tips. A little effort goes a long way in home care. Try these easy steps and enjoy your updated cabinets.