
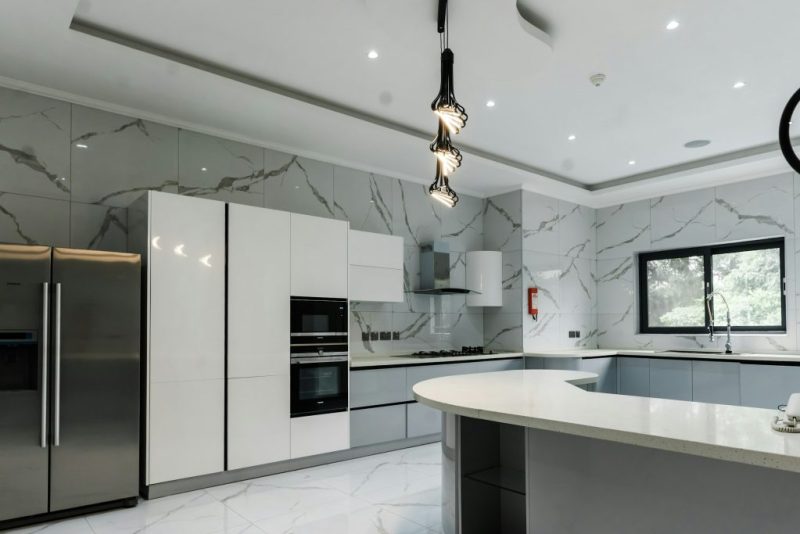
Are your kitchen cabinets looking tired or outdated? You don’t have to spend a fortune on a full renovation to give them a fresh new look.
Covering your kitchen cabinets with vinyl is a simple, affordable way to transform your space quickly. Imagine having stylish, modern cabinets that brighten your kitchen without the mess or hassle of repainting or replacing. In this guide, you’ll discover easy steps to achieve a sleek finish that lasts.
Ready to see how vinyl can change your kitchen for the better? Keep reading—you’re just minutes away from a stunning upgrade.
Preparing Your Cabinets
Preparing your cabinets is a crucial part of covering them with vinyl. Proper preparation ensures the vinyl sticks well and lasts longer. It also helps avoid bubbles and wrinkles during application. Take your time to complete this step carefully for the best results.
Cleaning The Surface
Start by cleaning the cabinet surfaces thoroughly. Use warm water mixed with mild soap. Wipe down all areas with a soft cloth or sponge. Remove grease, dirt, and dust completely. Let the cabinets dry fully before moving on.
Removing Hardware
Remove all handles, knobs, and hinges from the cabinet doors. This makes it easier to apply vinyl smoothly. Keep the hardware in a safe place to avoid losing pieces. Removing them also prevents damage during the process.
Sanding For Adhesion
Lightly sand the cabinet surfaces using fine-grit sandpaper. Sanding helps the vinyl stick better by roughening smooth areas. Focus on glossy or shiny surfaces. After sanding, wipe away dust with a clean cloth. Make sure the surface feels smooth but not slick.

Credit: www.kitchenrestoration.co.uk
Choosing The Right Vinyl
Choosing the right vinyl for your kitchen cabinets is a crucial step that can make or break the entire makeover. The vinyl you pick should not only look good but also withstand kitchen conditions like heat, moisture, and frequent cleaning. Taking the time to understand your options helps you avoid costly mistakes and ensures your cabinets stay beautiful for years.
Types Of Vinyl Wraps
Not all vinyl wraps are created equal. There are several types designed for different levels of durability and finish.
- Matte vinyl:Offers a smooth, non-reflective surface that hides fingerprints well. Perfect if you want a subtle, modern look.
- Glossy vinyl:Shiny and reflective, this type brightens up your kitchen but can show smudges more easily.
- Textured vinyl:Mimics materials like wood grain or leather, adding depth and a tactile feel to your cabinets.
- Heat-resistant vinyl:Essential if your cabinets are near the stove or oven, as it withstands high temperatures without warping.
Choosing the right type depends on your kitchen’s environment and your design goals. Have you checked how close your cabinets are to heat sources?
Colors And Patterns
Color selection can completely change your kitchen’s vibe. Think about the mood you want to create—bright colors energize, while neutrals soothe.
Patterns add personality and can hide wear better than solid colors. Stripes, wood grains, or even subtle metallic finishes can make your cabinets stand out.
Before deciding, lay out some vinyl samples against your countertop and walls. Notice how lighting affects the appearance throughout the day. What color makes you feel most comfortable in your kitchen?
Measuring For Accurate Purchase
Accurate measurements save you from buying too much or too little vinyl, which can be frustrating and expensive.
Measure each cabinet door and drawer front separately. Write down width and height, then calculate the total square footage you need.
Remember to add at least 10% extra to cover mistakes and wrapping edges. Have you double-checked your numbers before heading to buy?
Tools And Materials Needed
Essential tools include a utility knife, measuring tape, and a squeegee for smooth application. Materials needed are adhesive vinyl sheets, cleaning supplies, and a roller to ensure a strong bond. Proper preparation helps achieve a neat, lasting finish on kitchen cabinets.
Transforming your kitchen cabinets with vinyl is a fantastic way to give them a fresh, stylish look without breaking the bank. But before you dive into this DIY project, it's crucial to gather all the necessary tools and materials. Having everything you need at your fingertips ensures a smooth and enjoyable process, leaving you with results you'll love.
Essential Tools
To start, you'll need a few basic tools that might already be in your toolbox. A utility knife with a sharp blade is indispensable for cutting the vinyl to the right size. A tape measure will help you ensure precise measurements, which is critical to avoid wasting materials. You'll also need a squeegee or a plastic scraper to smooth out the vinyl and eliminate air bubbles. This step is key in achieving a professional-looking finish. Keep a hairdryer or heat gun handy as well, as applying heat helps the vinyl adhere better and smooth out any wrinkles.
Additional Supplies
Beyond the basic tools, there are a few additional supplies that can make your project easier. Cleaning supplies such as a degreaser are essential to prepare the cabinets and ensure the vinyl sticks properly. You don’t want any grime or dust to interfere with the adhesion. Consider using masking tape to outline areas where you don’t want the vinyl to stick, such as hinges or handles. This will make the application process cleaner and more precise. A pencil or chalk can be useful for marking cutting lines on the vinyl. Lastly, have some sandpaper on hand. If your cabinet surfaces are not perfectly smooth, a quick sanding can help create an even base for the vinyl. This can make a significant difference in the final appearance. Are you ready to transform your kitchen cabinets with confidence? Gathering these tools and materials in advance ensures you're prepared for every step, leaving you to enjoy the creative process.

Credit: www.kitchenrestoration.co.uk
Cutting And Applying Vinyl
Cutting and applying vinyl to your kitchen cabinets can seem tricky, but breaking it down into clear steps makes the process manageable and even enjoyable. The key is precision in measuring, careful handling when peeling, and patience while smoothing out bubbles. These actions ensure a neat, professional-looking finish that transforms your cabinets without a full remodel.
Measuring And Cutting Vinyl
Start by measuring each cabinet door or drawer front carefully. Use a tape measure and note down the exact width and height.
Remember to add an extra inch on all sides to give yourself some wiggle room for trimming later. Cutting the vinyl slightly larger than needed helps avoid mistakes.
Lay the vinyl on a flat surface and use a sharp utility knife or scissors to cut along your measurements. Straight cuts make aligning the vinyl easier during application.
Peeling And Positioning
Peeling the backing off the vinyl slowly is crucial to avoid stretching or tearing it. Begin at one corner and gently pull the paper away.
Hold the vinyl near the edge and align it with the top edge of the cabinet door or drawer. Take your time to position it correctly before sticking it down.
Ask yourself: Is the vinyl straight and covering the entire surface? If not, peel it back carefully and adjust. It’s easier to reposition early on than after full adhesion.
Smoothing Out Bubbles
Once the vinyl is in place, use a squeegee or a credit card wrapped in a soft cloth to smooth out air bubbles.
Start from the center and push outward toward the edges. This technique helps move trapped air and creates a seamless finish.
If bubbles persist, gently lift the vinyl near the bubble and reapply, smoothing as you go. Small bubbles often disappear over time, but larger ones need immediate attention for a flawless look.
Trimming And Finishing Touches
Trimming and finishing touches bring your vinyl-covered kitchen cabinets to life. Clean edges and smooth corners make the vinyl look neat and professional. This stage ensures the vinyl fits perfectly around cabinet edges and hardware. Proper finishing prevents peeling and keeps the cover lasting longer.
Using A Utility Knife
A sharp utility knife trims excess vinyl with precision. Hold the vinyl tight and cut slowly along cabinet edges. Use a straight edge or ruler to guide your cut. Change the blade if it becomes dull for clean lines. Avoid cutting too deep to protect the cabinet surface underneath.
Sealing Edges
Sealing edges keeps the vinyl from lifting or curling. Use a clear adhesive or vinyl edge sealer on trimmed sides. Apply gently with a small brush or cloth. Press edges firmly to bond the vinyl with the cabinet. Let the seal dry fully before using the cabinets.
Reattaching Hardware
Remove hardware before covering cabinets to avoid damage. After the vinyl is trimmed and sealed, reattach knobs, handles, and hinges. Use original screws or replacements if needed. Tighten screws carefully to avoid tearing the vinyl. Check all hardware for secure fit and smooth operation.
Tips For Long-lasting Results
Applying vinyl to kitchen cabinets can refresh your space instantly. Lasting results depend on proper care and attention. Small efforts keep the vinyl looking new and vibrant for years.
Avoiding Moisture Damage
Moisture can cause vinyl to peel or bubble. Prevent water from sitting on the surface. Wipe spills immediately with a dry cloth. Use a vent fan to reduce kitchen humidity. Avoid placing vinyl near sinks or dishwashers without protection.
Cleaning And Maintenance
Clean vinyl with gentle, non-abrasive products. Use a soft cloth or sponge with warm water. Mild soap works well for stubborn stains. Avoid harsh chemicals that can damage the vinyl. Regular cleaning prevents dirt buildup and keeps the surface smooth.
Handling Repairs
Small tears or bubbles can be fixed easily. Use a heat gun or hairdryer to soften the vinyl. Press bubbles out from the center to the edges. For cuts, use vinyl repair kits or matching patches. Quick repairs stop damage from spreading further.
Common Mistakes To Avoid
Covering kitchen cabinets with vinyl is a smart way to refresh your space. Avoiding common mistakes makes the process smoother and the results better. These mistakes often cause bubbles, peeling, or uneven surfaces. Knowing what to avoid can save time and effort.
Skipping Surface Prep
Cleaning the cabinet surface is crucial. Dirt, grease, or old paint can stop vinyl from sticking well. Sanding rough spots creates a smooth base. Without proper prep, vinyl may peel quickly. Take time to clean and sand before applying vinyl.
Using Low-quality Vinyl
Cheap vinyl often looks dull and wears out fast. It may tear or bubble easily during application. Investing in good quality vinyl gives a better finish. Durable vinyl lasts longer and resists heat and moisture. Choose vinyl designed for cabinets or furniture.
Rushing The Application
Applying vinyl too fast causes wrinkles and trapped air. Work slowly and press down firmly. Use a squeegee or soft cloth to smooth out bubbles. Take breaks if needed to avoid mistakes. Patience ensures a neat, lasting finish on your cabinets.

Credit: kitchenmakeovers.co.uk
Frequently Asked Questions
How Do I Prepare Cabinets For Vinyl Covering?
Clean and sand cabinet surfaces to remove grease and rough spots. Ensure they are dry before applying vinyl for better adhesion.
What Type Of Vinyl Is Best For Cabinets?
Choose high-quality, self-adhesive vinyl with a matte or glossy finish. It should be durable and easy to clean for kitchen use.
Can Vinyl Covering Damage Cabinets?
Vinyl generally doesn't damage cabinets if removed carefully. Use heat and gentle peeling to avoid paint or surface damage.
How Long Does Vinyl Covering On Cabinets Last?
With proper application and care, vinyl can last 5 to 7 years on cabinets. Avoid excessive moisture to extend its lifespan.
Conclusion
Covering kitchen cabinets with vinyl is a simple and cost-effective way to update your space. You can change colors and patterns without major work. The process takes a little patience but offers great results. Vinyl protects your cabinets and looks fresh for a long time.
Try this method to refresh your kitchen without spending much. Enjoy a new look that fits your style and budget. Small changes can make a big difference. Give your kitchen a fresh feel today.