
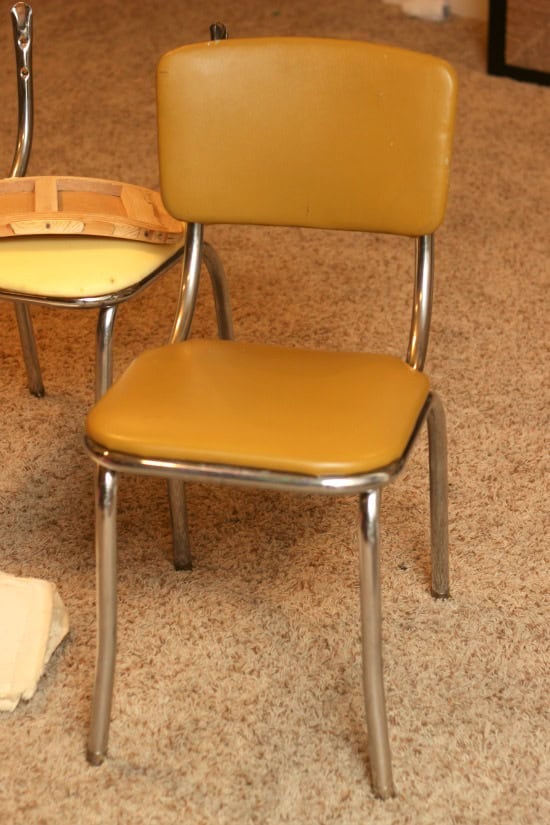
Are your kitchen chairs looking worn out or outdated? Covering them with vinyl is a simple and affordable way to give your kitchen a fresh, stylish look.
Imagine transforming your chairs in just a few easy steps, making them both durable and easy to clean. In this guide, you’ll learn exactly how to cover your kitchen chairs with vinyl, saving money while adding a personal touch to your space.
Ready to upgrade your chairs and impress everyone who visits? Let’s dive in!
Credit: gluesticksblog.com
Choosing The Right Vinyl
Choosing the right vinyl is crucial for covering your kitchen chairs. The right material affects not only the look but also the comfort and longevity of your chairs. Understanding the options available helps you make a choice that fits your style and daily use.
Types Of Vinyl For Chairs
Vinyl comes in different types, each suited for various needs. Look for marine-grade vinyl if you want strong water resistance and durability. Standard vinyl works well for everyday use, but it might wear out faster in busy kitchens.
Some vinyl has a textured surface that mimics leather, adding a touch of elegance. Others have a smooth finish that’s easy to clean and maintain. Consider how often you’ll use the chairs and what kind of spills or stains you might face.
Color And Pattern Selection
Choosing the right color and pattern can transform your kitchen’s vibe. Solid colors offer a clean, timeless look, while patterns bring personality and charm. Think about your kitchen’s overall style—do you want the chairs to stand out or blend in?
Light colors can brighten the room but may show stains more easily. Darker shades hide dirt but can make the space feel smaller. Don’t be afraid to experiment with bold prints if you want a unique touch.
Durability And Maintenance
Your vinyl choice should match your lifestyle and maintenance preferences. Some vinyl fabrics resist scratches and stains better, making them ideal for homes with kids or pets. Others might require special cleaners or conditioners to stay in good shape.
Ask yourself how much time you want to spend cleaning. Vinyl that wipes clean with a damp cloth saves effort. Also, check if the vinyl can handle exposure to sunlight without fading if your kitchen gets a lot of natural light.
Preparing Your Chairs
Preparing your kitchen chairs is the first step to a smooth vinyl covering process. This stage ensures the chairs are clean, sturdy, and ready for new material. Proper preparation saves time and improves the final look of your project.
Cleaning And Removing Old Covers
Start by wiping down the chairs with a damp cloth to remove dust and dirt. Use mild soap if needed. Carefully remove any old covers or fabric using a flat tool to lift staples or tacks. Take your time to avoid damaging the chair surface underneath.
Inspecting Chair Frames
Check each chair frame for damage or loose joints. Tighten any screws or bolts to ensure stability. Look for cracks or broken parts that may need repair. Strong frames provide a better base for vinyl and increase chair durability.
Gathering Tools And Materials
Collect all necessary tools before starting the vinyl cover. Common items include:
- Staple gun with staples
- Scissors or utility knife
- Measuring tape
- Vinyl fabric
- Screwdriver
- Cleaning cloths
- Spray adhesive (optional)
Having everything ready keeps your work organized and efficient.
Measuring And Cutting Vinyl
Measure each chair part carefully to ensure the vinyl fits perfectly. Cut the vinyl slightly larger than the measurements for easy handling and wrapping.
Measuring and cutting vinyl for your kitchen chairs is crucial. Precise measurements ensure a snug fit. Proper cutting prevents waste and ensures durability. These steps are key for a smooth vinyl covering process.
Taking Accurate Measurements
To start, measure each chair precisely. Use a flexible tape measure. Measure the width and length of the seat. Note these dimensions. For chairs with backs, measure their height and width as well. Write these numbers down clearly.
Marking The Vinyl
Lay the vinyl flat on a clean surface. Transfer your measurements to the vinyl. Use a pencil or fabric chalk for marking. Draw straight lines with a ruler. This helps avoid mistakes. Check your marks twice to ensure accuracy.
Cutting Techniques
Use sharp scissors or a rotary cutter. Follow the marked lines carefully. Cut slowly to maintain control. Keep the edges smooth and even. Cutting accurately saves material and time. Your vinyl pieces are now ready for covering.
Attaching Vinyl To Chairs
Attaching vinyl to kitchen chairs requires patience and precision. The goal is to create a smooth, tight finish that lasts through daily use. How you secure the vinyl can make all the difference in durability and appearance.
Using Adhesives And Staples
Adhesives provide a clean, invisible hold that works well for flat surfaces. Use a spray adhesive designed for vinyl to avoid any damage. Apply a thin, even layer on both the chair and the vinyl, then press firmly together.
Staples offer a stronger grip, especially around the chair’s frame. Choose a staple gun with fine, corrosion-resistant staples to avoid rust stains. Place staples every few inches, making sure they’re flush and don’t tear the vinyl.
- Start stapling from the center of each side, moving towards the corners.
- Pull the vinyl taut before each staple to reduce wrinkles.
- Remove staples carefully if you need to reposition the vinyl.
Stretching And Securing Fabric
Vinyl doesn’t stretch much, so work carefully to avoid overstretching. Pull the vinyl gently but firmly to remove any slack. This helps prevent sagging over time.
Keep the tension even on all sides to avoid puckering. Ask yourself, is the vinyl smooth and tight? If not, loosen the staples or adhesive and adjust accordingly.
Once satisfied, add extra staples or adhesive in areas that might loosen with use. This extra step ensures your vinyl will stay secure through many meals and gatherings.
Handling Corners And Edges
Corners can be tricky since vinyl is stiff and can bunch up. Cut small slits or notches in the vinyl near corners to help it fold neatly without bulk. Be careful not to cut too much, or you’ll weaken the material.
Fold the vinyl edges neatly underneath the chair seat. Use a combination of staples and adhesive to hold these folds in place. This prevents fraying and keeps the vinyl looking tidy.
Check edges for sharp folds or gaps. Smooth any bumps with your fingers or a soft tool, ensuring the vinyl lays flat and comfortable to sit on.
Adding Finishing Touches
Adding finishing touches to your vinyl-covered kitchen chairs ensures a neat and lasting look. These steps help protect the vinyl and keep your chairs looking fresh. Taking time with details makes a big difference in the final result.
Trimming Excess Material
Trim the extra vinyl carefully with sharp scissors. Leave a small margin near the edges to avoid cutting too close. Cut slowly for clean, straight lines. Avoid jagged edges to prevent peeling later.
Sealing Seams
Use vinyl adhesive or fabric glue to seal all seams securely. Press edges together firmly and wipe off any glue spills. This step stops water and dirt from entering under the vinyl. Smooth seams create a polished, professional appearance.
Caring For Your Covered Chairs
Clean vinyl gently with a soft cloth and mild soap. Avoid harsh chemicals that can damage the material. Wipe spills immediately to prevent stains. Keep chairs out of direct sunlight to stop fading and cracking.
Credit: gluesticksblog.com
Troubleshooting Common Issues
Covering kitchen chairs with vinyl can sometimes lead to small problems. These issues are common and easy to fix with the right approach. Knowing how to handle wrinkles, loose vinyl, or tears helps keep your chairs looking fresh and new. This section guides you through simple fixes for these common challenges.
Dealing With Wrinkles
Wrinkles appear when vinyl is not stretched evenly. Use a heat gun or hairdryer on low heat to soften the vinyl. Gently pull the vinyl taut while heating to smooth out wrinkles. Avoid overheating as it can damage the material. Work slowly and keep the heat moving.
Fixing Loose Vinyl
Loose vinyl does not stick well to the chair surface. Remove the vinyl carefully and clean the chair frame. Apply a strong spray adhesive or vinyl glue evenly. Press the vinyl firmly in place and smooth it out with a roller or flat tool. Let it dry fully before using the chair.
Repairing Tears And Holes
Tears or holes can happen during installation or regular use. Use a vinyl repair kit with patches and adhesive. Cut a patch slightly larger than the damaged area. Apply glue to both the patch and chair surface. Press the patch firmly over the tear and smooth out any bubbles. Allow it to dry completely before sitting.
Styling Tips With Vinyl Chairs
Styling vinyl-covered kitchen chairs can refresh your space and add personality. Vinyl offers easy care and durability, perfect for busy kitchens. Its variety of colors and textures lets you customize your chairs to match your style. Here are simple tips to make your vinyl chairs stand out and fit your kitchen decor beautifully.
Matching Vinyl With Kitchen Decor
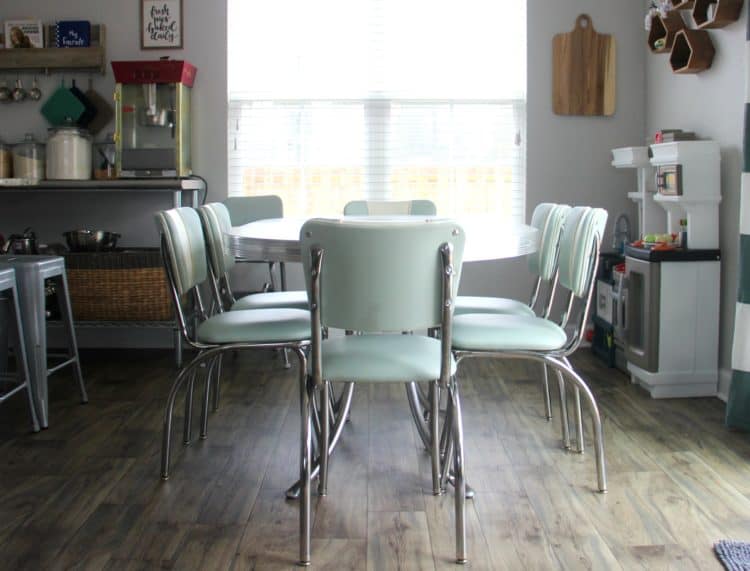
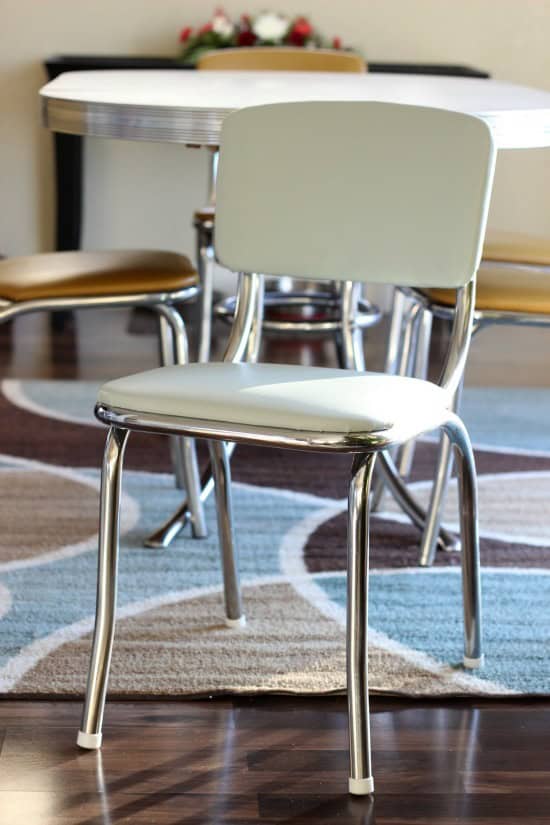
Choose vinyl colors that complement your kitchen walls and cabinets. Neutral tones like beige, gray, or white blend well with most styles. Bright colors, such as red or blue, create a lively focal point. Consider the finish too: matte vinyl feels modern, while glossy vinyl adds shine. Matching vinyl to kitchen accents like rugs or curtains ties the room together.
Using Vinyl For Seasonal Updates
Change vinyl chair covers to match the seasons. Warm colors like orange and brown bring cozy autumn vibes. Light pastels refresh the space for spring and summer. Darker tones work well for winter months. Using removable vinyl covers or slipcovers makes seasonal updates simple and budget-friendly. This keeps your kitchen looking fresh all year.
Mixing And Matching Patterns
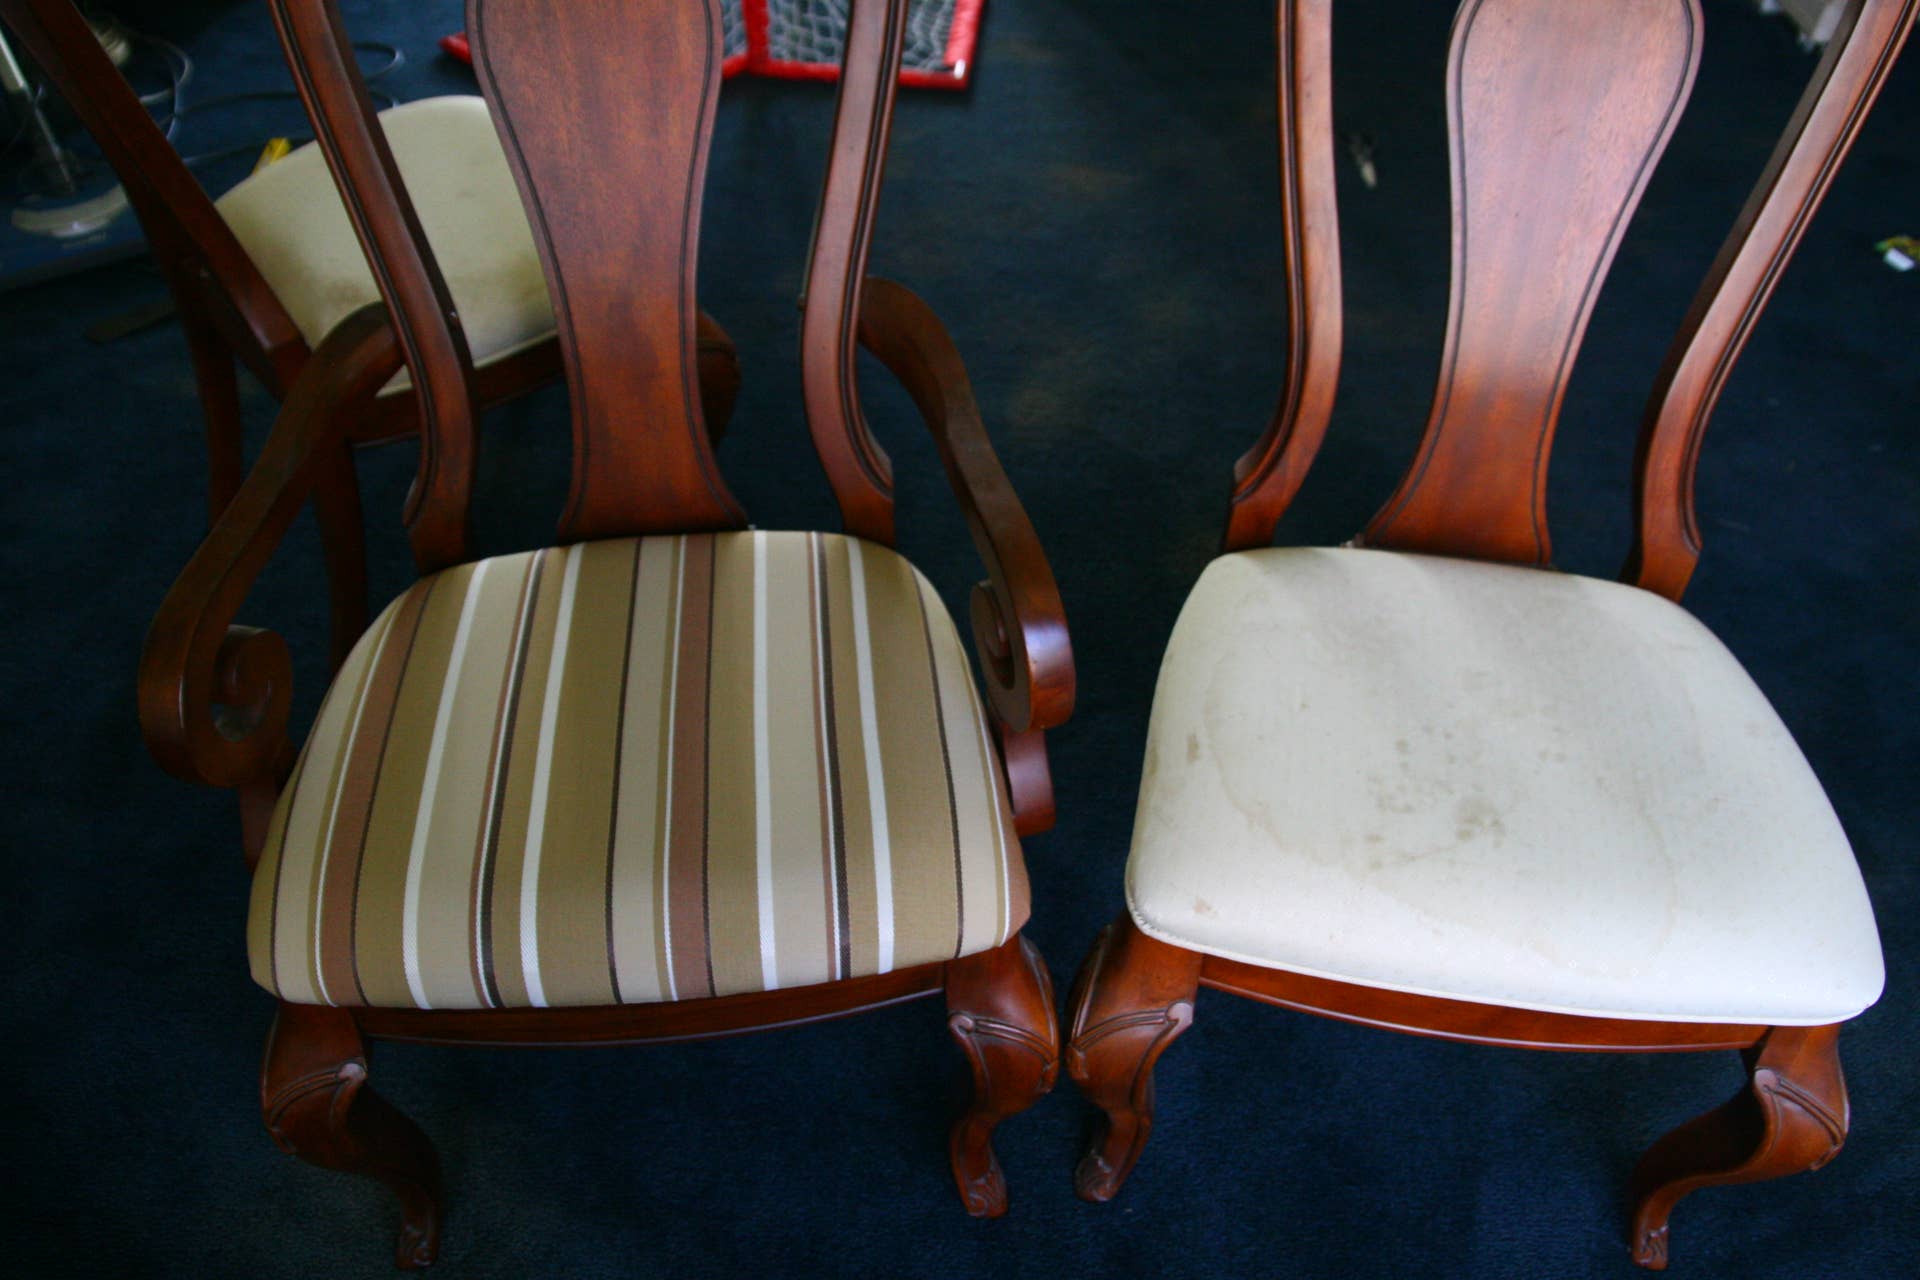
Mix plain vinyl with patterned covers for visual interest. Stripes or polka dots add fun without overwhelming the space. Use patterns that pick up colors from your kitchen decor. Balance bold patterns with solid colors to avoid clutter. Try different textures, like smooth vinyl with a textured finish, for a stylish mix. This approach creates a unique, inviting look.
Credit: dengarden.com
Frequently Asked Questions
How Do I Prepare Kitchen Chairs For Vinyl Covering?
Clean the chairs thoroughly and remove old fabric or cushions. Sand rough surfaces and wipe dust. This ensures vinyl adheres smoothly and lasts longer.
What Type Of Vinyl Is Best For Kitchen Chairs?
Choose durable, waterproof vinyl designed for furniture. Look for stain-resistant, easy-to-clean vinyl to handle kitchen spills and daily use effectively.
Can I Cover Kitchen Chairs With Vinyl Myself?
Yes, with basic tools and patience, you can DIY. Follow step-by-step instructions for cutting, stapling, and smoothing vinyl for a professional look.
How Do I Maintain Vinyl-covered Kitchen Chairs?
Wipe vinyl regularly with mild soap and water. Avoid harsh chemicals and sharp objects to prevent damage and keep vinyl looking new.
Conclusion
Covering kitchen chairs with vinyl is simple and cost-effective. Vinyl protects chairs from spills and stains. It also gives your kitchen a fresh, new look. You only need a few tools to start. Take your time to measure and cut carefully.
Press the vinyl firmly for a smooth finish. Clean the surface well before applying vinyl. With patience, your chairs will look great and last longer. Try this easy update to refresh your kitchen space today.