
Are your kitchen cupboards looking tired or outdated? You don’t have to replace them to give your kitchen a fresh, new look.
Learning how to cover kitchen cupboards is a simple and affordable way to transform your space. Imagine walking into a kitchen that feels brighter, cleaner, and more stylish—all without the mess and cost of a full renovation. You’ll discover easy steps and smart tips that make covering your cupboards quick and stress-free.
Ready to unlock the potential hidden behind those doors? Let’s dive in and make your kitchen shine like never before.
Choosing The Right Materials
Choosing the right materials for covering kitchen cupboards affects durability and style. The material must handle humidity, heat, and frequent cleaning. It also sets the tone for your kitchen’s look. Consider ease of application and maintenance before deciding.
Paint Types And Finishes
Paint is a popular choice for cupboard makeovers. Acrylic latex paint offers good durability and easy cleanup. Oil-based paint provides a smooth, hard finish but takes longer to dry. Satin and semi-gloss finishes resist moisture and stains better than flat paint. Choose paint that suits your kitchen’s humidity and traffic level.
Adhesive Vinyl Options
Adhesive vinyl is a budget-friendly way to update cupboards. It comes in many colors and patterns. This material is water-resistant and easy to wipe clean. Vinyl can mimic wood or metal finishes, adding style without high cost. Ensure the cupboard surface is smooth for best adhesion.
Peel-and-stick Wallpaper
Peel-and-stick wallpaper offers quick transformation with minimal effort. It is available in various designs to match any décor. This wallpaper is easy to apply and remove without damage. Choose a vinyl-based type for better moisture resistance. It works well on flat cupboard surfaces.
Wood Veneer Sheets
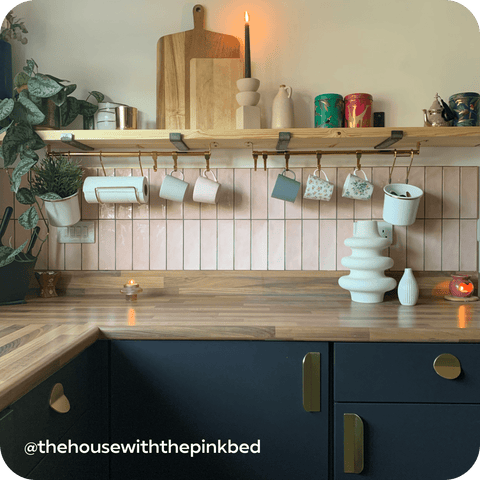
Wood veneer sheets add natural warmth and texture. These thin wood layers adhere to cupboard surfaces for a genuine wood look. Veneers require careful installation to avoid bubbles or peeling. They need sealing to protect against moisture and stains. Choose veneer types that match your kitchen style and maintenance preference.
Credit: www.hgtv.com
Preparing Cupboards For Covering
Preparing cupboards for covering is a key step to ensure a smooth and lasting finish. Proper preparation helps the new covering stick well and look great. It involves cleaning, sanding, removing hardware, and fixing any damage. Taking time on these tasks saves effort later.
Cleaning And Sanding Surfaces
Start by cleaning all cupboard surfaces thoroughly. Use a mild detergent and warm water to remove grease and dirt. Dry the surfaces completely before moving on. Next, sand the cupboards lightly with fine-grit sandpaper. This creates a rough texture for better adhesion. Wipe away dust with a damp cloth after sanding.
Removing Hardware
Remove all handles, knobs, and hinges from the cupboards. Keep the screws and hardware in a safe place. Removing hardware makes covering easier and prevents damage. It also allows for a cleaner finish around edges and corners.
Repairing Damages
Check cupboards for scratches, dents, or holes. Fill small holes and cracks with wood filler. Let the filler dry fully before sanding it smooth. Replace or glue any loose or broken parts. Repairing damages creates a flat surface for covering and improves the cupboard’s look.
Painting Cupboards
Cover kitchen cupboards by sanding surfaces to remove old paint or gloss. Apply primer for better paint grip, then paint with even strokes for a smooth finish. Allow each layer to dry fully before adding the next.
Painting your kitchen cupboards can dramatically transform the look and feel of your space without the expense of a full remodel. A fresh coat of paint can breathe new life into tired, old cabinetry, making your kitchen a more inviting place to cook, dine, and gather. With the right techniques and a bit of patience, painting your cupboards can be a rewarding DIY project that adds value to your home.
Priming Tips
Priming is a crucial step you should never skip. It ensures better paint adhesion and durability. Before you start, clean your cupboards thoroughly to remove grease and dirt. Then, apply a high-quality primer suitable for your cupboard material. An oil-based primer works well on wood, while a bonding primer might be better for laminate surfaces. The primer should dry completely before you move on to painting. This step can prevent peeling and chipping down the road.
Brush Vs. Spray Techniques
Choosing between a brush and spray technique can significantly affect the final look. A brush offers control and is excellent for detailed areas, but it may leave brush marks if not done carefully. On the other hand, spraying gives a smooth, even finish with less effort. However, it requires more preparation, like masking off areas to avoid overspray. If you're after a factory-like finish, spraying is the way to go. But if you prefer a more hands-on approach, a brush can be just as effective.
Drying And Curing Times
Patience is key when it comes to drying and curing times. Each layer of paint should dry thoroughly before applying the next. Drying times can vary based on the type of paint and environmental conditions, but generally, allow at least 24 hours. Once all the layers are applied, the curing process begins, taking up to a few weeks. This is when the paint hardens fully. You might be tempted to use your cupboards immediately, but waiting ensures long-lasting results. Have you ever rushed this step and ended up with smudges? It’s a lesson learned the hard way for many DIY enthusiasts.
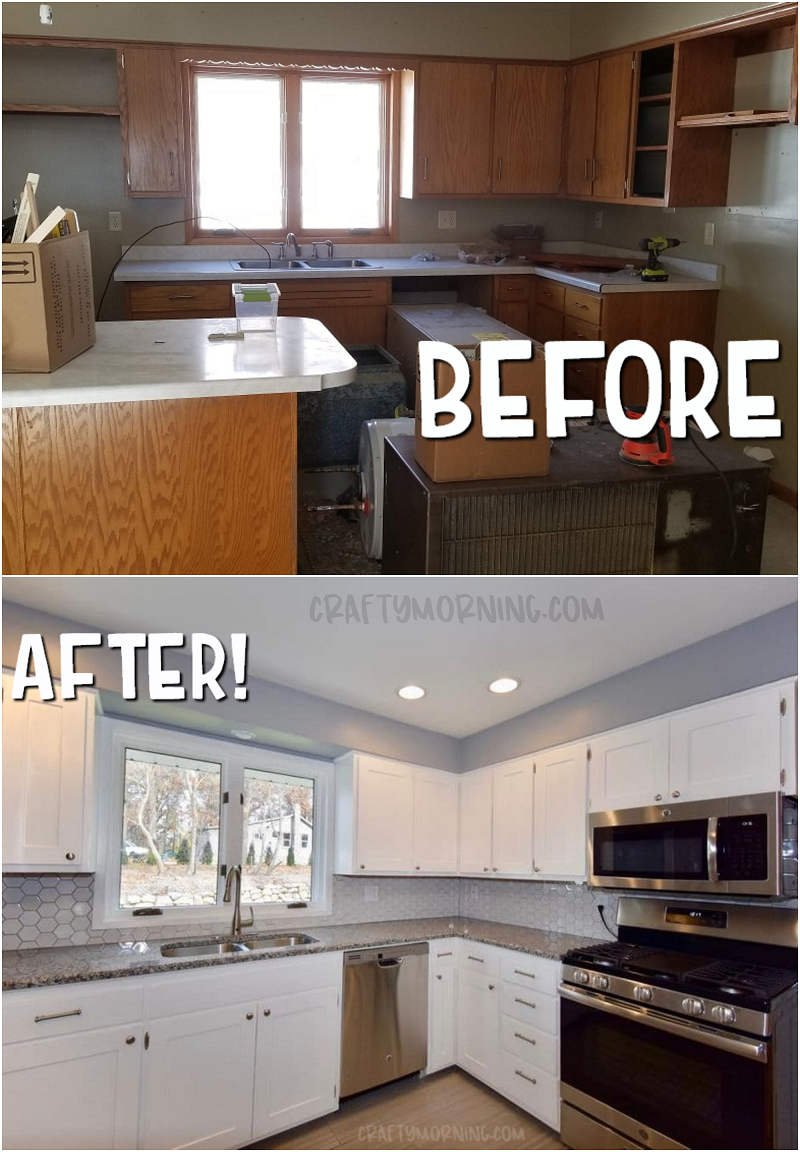
Credit: www.craftymorning.com
Applying Vinyl And Wallpaper
Covering kitchen cupboards with vinyl or wallpaper can transform your space without the mess of paint or costly replacements. Both materials offer a quick way to refresh your kitchen’s look, but success depends on careful application. Paying attention to measurement, smoothing, and trimming can make your cupboards look professionally done.
Measuring And Cutting
Start by measuring each cupboard door precisely. Use a tape measure to get the height and width, then add an extra inch on all sides to allow for adjustments.
Cut the vinyl or wallpaper carefully using a sharp utility knife or scissors. Straight, clean cuts reduce the chance of peeling later and help the material fit snugly around edges and handles.
Smoothing And Adhesion
After positioning the material on the cupboard, smooth it out to avoid bubbles and wrinkles. Use a plastic scraper or a credit card wrapped in a soft cloth for this step.
Work from the center outwards to push air out and improve adhesion. If you notice any air pockets, gently lift the material and reapply, smoothing again to ensure a firm bond.
Trimming Edges
Once the vinyl or wallpaper is fully adhered, trim the excess material around edges and corners. Use a sharp blade for precise cuts to avoid ragged edges.
Pay special attention to corners and areas near handles where material can lift or peel over time. Clean up any small tears or rough spots with a touch of adhesive to keep the finish neat and lasting.
Adding Decorative Elements
Adding decorative elements to your kitchen cupboards can completely change the look and feel of your space. It’s a simple way to inject personality and style without a full renovation. Think about the details that catch your eye and how small touches can make a big difference.
Installing Molding And Trim
Molding and trim add depth and character to plain cupboard doors. You can choose from crown molding, beadboard trim, or even picture frame molding to create a custom look.
Installing these is easier than you might think. Cut the pieces to size, paint or stain them to match your cupboards, then attach with wood glue and finishing nails. The result is a high-end feel that makes your cupboards stand out.
Have you ever noticed how a simple frame around a cupboard door makes it look more like furniture? This technique turns basic cabinetry into a focal point.
Using Stencils And Patterns
Stencils let you add creative designs without needing advanced painting skills. Choose geometric shapes, floral patterns, or even custom motifs that reflect your style.
Apply the stencil with painter’s tape and use a sponge or stencil brush to dab paint gently. This prevents smudging and keeps lines crisp. You can stencil just one door for a subtle accent or cover all for a bold statement.
Think about which colors and patterns complement your existing kitchen décor. Would a soft pastel pattern brighten the space, or would a dark, intricate design add sophistication?
Attaching New Hardware
New knobs and handles can refresh your cupboards instantly. There’s a huge variety available—from sleek modern pulls to vintage-inspired knobs.
Measure your current hardware placement before buying new pieces to avoid extra drilling. If you want to mix and match, keep a consistent metal finish to maintain cohesion.
Imagine how a set of brass handles can add warmth or how matte black pulls create a bold contrast. Hardware is one of the easiest upgrades with a big visual payoff.

Credit: www.familyhandyman.com
Maintaining Fresh Cupboards
Keeping your kitchen cupboards looking fresh is more than just a one-time effort—it requires regular care and attention. Fresh cupboards brighten up your kitchen and make your cooking space inviting. By maintaining cleanliness and addressing minor issues early, you can extend the life and appeal of your cupboards.
Cleaning Tips
Use a soft cloth and mild soap to wipe down your cupboards weekly. Avoid harsh chemicals that can strip paint or damage finishes. For stubborn grease, a mixture of warm water and vinegar works well without harming surfaces.
Don’t forget to clean handles and edges where dirt tends to build up. These areas often get overlooked but affect the overall look. How often do you pay attention to these small spots?
Touch-up Techniques
Small scratches or chips can make cupboards look worn out fast. Keep a matching paint or wood stain handy for quick fixes. Dab on the touch-up with a small brush and let it dry thoroughly before using the cupboard again.
If your cupboard doors have dents, use wood filler to smooth them out before painting. This simple step can make a big difference in appearance. Have you ever ignored small damages only to regret it later?
Preventing Damage
Protect your cupboards by using liners inside shelves to prevent stains and scratches. Avoid placing wet or hot items directly on the surface. Using coasters or trays can save you from costly repairs down the road.
Regularly check for loose hinges or handles and tighten them promptly. Preventing damage is easier than fixing it. What small habits can you change today to keep your cupboards in top shape?
Frequently Asked Questions
What Materials Are Best For Covering Kitchen Cupboards?
Popular materials include vinyl wrap, contact paper, paint, and laminate. Each offers durability, style, and ease of application. Choose based on budget, kitchen moisture, and design preference for long-lasting results.
How Do I Prepare Kitchen Cupboards Before Covering?
Clean surfaces thoroughly to remove grease and dirt. Sand lightly for better adhesion. Remove hardware and protect hinges to ensure smooth application and professional finish.
Can I Cover Kitchen Cupboards Myself Or Hire A Professional?
Covering cupboards is a doable DIY project with basic tools. Professionals guarantee perfect finish and durability but at higher cost. Choose based on your skill level and desired outcome.
How Long Does Covering Kitchen Cupboards Usually Take?
Time depends on cupboard number and chosen method. Simple vinyl wraps can take a few hours. Painting or laminating may require days due to drying and curing times.
Conclusion
Covering kitchen cupboards can change your kitchen's look fast. Choose the right materials and colors for your style. Measure carefully before you start to avoid mistakes. Take your time with each step for best results. Small details make a big difference in the end.
Enjoy a fresh, new kitchen space that feels bright. This simple project can add value to your home. Try it yourself and see how easy it can be.