

Are your kitchen tiles looking old, cracked, or just plain boring? You don’t have to spend a fortune or go through a full renovation to give your kitchen a fresh new look.
Imagine transforming your space quickly and easily, making it feel cleaner, brighter, and more inviting. In this guide, you’ll discover simple and effective ways to cover your kitchen tiles, saving time, money, and stress. Whether you want a bold change or just a subtle upgrade, you’ll find practical tips that anyone can follow.
Keep reading, and you’ll see how easy it is to breathe new life into your kitchen today.
Choosing The Right Tile Covering
Choosing the right tile covering can transform your kitchen quickly and affordably. It’s not just about hiding old tiles but about enhancing your kitchen’s personality and functionality. Your choice should fit your style, budget, and the level of effort you want to invest.
Peel-and-stick Tiles
Peel-and-stick tiles offer a simple and mess-free way to update your kitchen tiles. They come in a variety of designs, from classic subway tiles to bold patterns, allowing you to customize your space easily.
Because they’re easy to install, you can handle the project yourself without special tools. Just make sure your existing tiles are clean and dry for the best adhesion. Have you considered how much time you can save with this quick solution?
Paint Options
Painting your kitchen tiles is a cost-effective way to breathe new life into old surfaces. Special tile paint is designed to stick well and resist moisture, making it ideal for kitchen use.
Before painting, clean the tiles thoroughly and use a primer to help the paint last longer. You can choose from glossy finishes for a modern look or matte for a subtler style. What colors excite you enough to see your kitchen in a whole new light?
Tile Overlays
Tile overlays are thin panels or sheets that go directly over your existing tiles. They create a smooth, fresh surface without the hassle of removing old tiles.
This option is perfect if you want a durable and long-lasting update. Many overlays mimic natural stone or marble, giving your kitchen an upscale appearance. Could this be the balance between convenience and style you’re looking for?
Wallpaper And Decals
Wallpaper and decals designed for kitchens add patterns and colors that tiles alone can’t provide. Modern waterproof wallpapers can handle kitchen humidity and are easy to wipe clean.
Decals let you experiment with designs without commitment—they peel off without damaging tiles. This is a great choice if you love changing up your decor or want a playful touch. How bold are you willing to go with your kitchen’s new look?
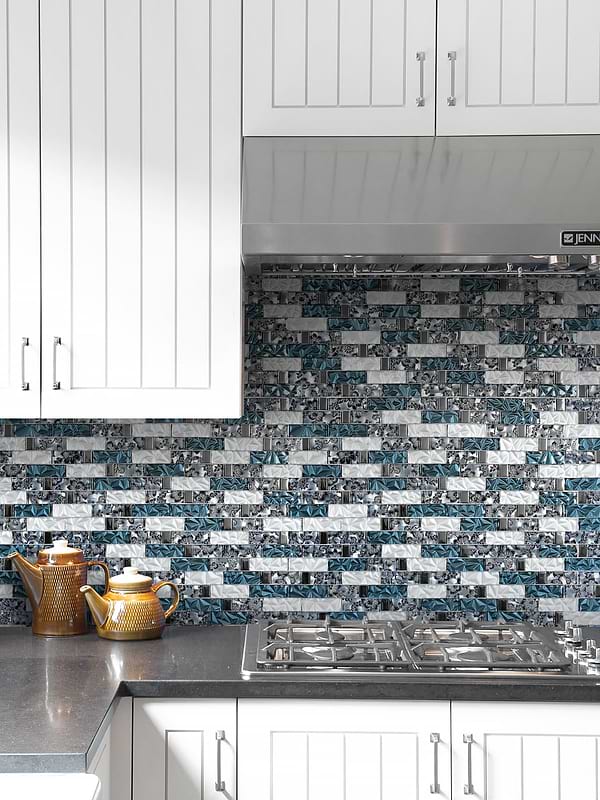
Credit: www.backsplash.com
Preparing Your Kitchen Tiles
Preparing your kitchen tiles is the key to a smooth and lasting finish. Proper preparation ensures the new surface will stick well. It also helps avoid peeling or bubbling later. Take time to clean, smooth, and repair the tiles before covering them.
Cleaning And Degreasing
Start by removing all dirt and grease from the tiles. Use warm water mixed with a mild detergent. Scrub the surface gently with a sponge or cloth. Rinse thoroughly to remove soap residue. For tough grease, use a degreaser designed for kitchen surfaces. Let the tiles dry completely before moving on.
Sanding And Smoothing
Light sanding roughens the tile surface. This step helps the new covering stick better. Use fine-grit sandpaper and sand evenly across all tiles. Focus on glossy or shiny areas. After sanding, wipe away dust with a damp cloth. Allow the tiles to dry fully before the next step.
Repairing Damaged Tiles
Check for cracks, chips, or loose tiles. Small cracks can be filled with epoxy or tile filler. Smooth the filler with a putty knife. For loose tiles, use strong adhesive to fix them in place. Remove any old grout that is crumbling. Repairing damages creates a solid base for your new covering.
Step-by-step Tile Painting Guide
Painting your kitchen tiles can transform the entire look of your space without the hassle of removing them. It’s a practical way to refresh your kitchen on a budget. To get a flawless finish that lasts, you need to follow a clear process that covers everything from choosing the right materials to sealing the painted surface.
Selecting Paint And Primer
Not all paints work well on glossy tiles. You’ll want a paint designed specifically for tiles or a strong enamel paint that can handle moisture and cleaning. Always pair your paint with a compatible primer to help the paint stick and prevent peeling.
Look for primers labeled “bonding primer” or “adhesion primer.” These create a rough surface for the paint to grip onto. Skipping this step is tempting but often leads to chipping paint just weeks later.
Applying Primer
Before you start, clean your tiles thoroughly to remove grease and dirt. Use a degreaser and rinse well. Let tiles dry completely.
Use a small roller or brush to apply a thin, even layer of primer. Avoid thick coats that can drip or pool. Allow the primer to dry as directed on the label—usually a few hours.
If you miss any spots, the paint won’t adhere properly. Don’t rush this step; it’s the foundation for a smooth finish.
Painting Techniques
Choose a high-quality brush or foam roller for painting tiles. A foam roller works well for flat tiles, giving a smooth finish without brush marks. Use a brush for grout lines and edges.
Apply paint in thin layers to avoid drips and uneven texture. Two to three coats are usually needed for full coverage. Let each coat dry fully before applying the next.
Wondering how to avoid streaks? Light, even strokes in one direction help keep your surface looking professional. Patience pays off here more than speed.
Sealing The Surface
Once your paint is fully dry, protect your work with a clear sealer. A water-based polyurethane sealer works well for kitchen tiles. It adds durability and makes cleaning easier.
Apply the sealer evenly with a clean brush or roller. Two thin coats provide the best protection without clouding the paint color. Allow ample drying time between coats.
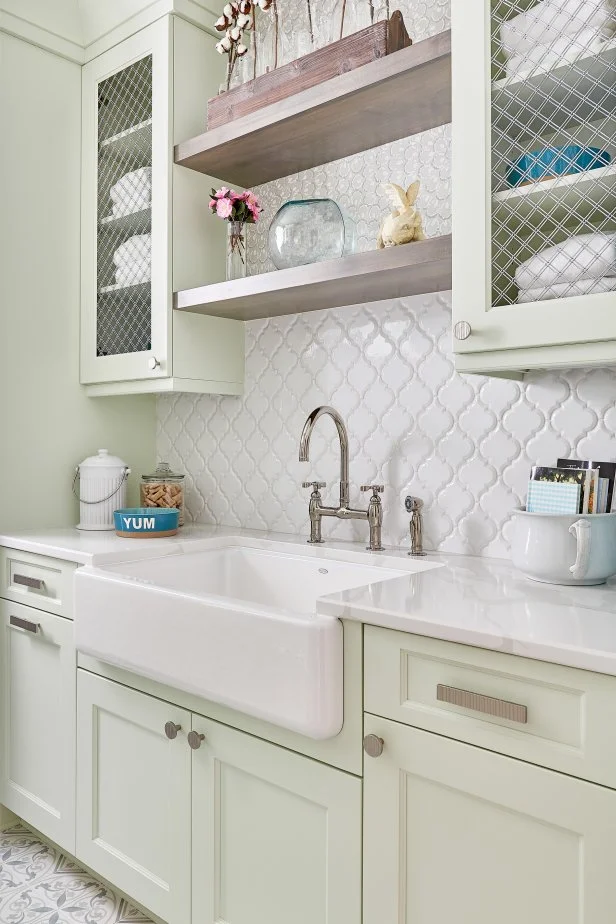
Would you want your beautiful paint job to chip after a few weeks? Sealing is your best defense against wear and tear in a busy kitchen.

Credit: food52.com
Installing Peel-and-stick Tiles
Installing peel-and-stick tiles is a smart way to update your kitchen without the mess of traditional tile work. These tiles are easy to handle and can give your kitchen a fresh, modern look in just a few hours. But getting them right means careful preparation and attention to detail.
Measuring And Cutting
Start by measuring the area where you want to apply the tiles. Use a tape measure to get accurate dimensions of each section, especially around outlets or corners.
Cut the tiles to fit these spaces using a utility knife and a straight edge. It’s better to cut slowly and check your work often rather than rushing and making mistakes.
Peeling And Placing Tiles
Peel the backing off the tile carefully to avoid touching the adhesive too much. This keeps it sticky and ready to stick firmly.
Place each tile gently on the wall or backsplash, starting from the center and moving outward. This helps keep the pattern balanced and reduces gaps.
Aligning And Smoothing
Once placed, press each tile firmly to ensure it sticks well. Use a flat tool like a squeegee or a credit card to smooth out any bubbles or wrinkles.
If a tile isn’t perfectly aligned, peel it off carefully and reposition before the adhesive sets. It’s easier to fix early than later.
Maintenance Tips
Keep your peel-and-stick tiles looking new by wiping them with a damp cloth regularly. Avoid abrasive cleaners that can damage the surface.
If a tile gets chipped or stained, you can replace it easily without disturbing the surrounding tiles. Isn’t it nice to know your kitchen can stay fresh with minimal effort?
Creative Tile Overlay Ideas
Covering kitchen tiles can transform your space without the hassle of a full renovation. Creative tile overlay ideas offer a fresh look while saving time and money. You can customize your kitchen to reflect your style with simple, practical techniques.
Using Stencils
Stencils let you add unique designs directly onto your tiles. Choose bold shapes or delicate patterns to suit your kitchen’s vibe. Use paint made for tiles to ensure durability and easy cleaning.
Try geometric shapes for a modern feel or floral designs for something softer. You can even create a repeating pattern across your backsplash to make a striking statement. Have you thought about using multiple stencil colors to add depth?
Adding Patterns And Textures
Patterns and textures can change the look and feel of your tiles completely. Consider textured tile stickers or adhesive panels that mimic brick, stone, or wood. These add dimension without heavy installation work.
Mixing matte and glossy finishes can also create subtle contrasts. Think about arranging tiles in a herringbone or chevron pattern using overlays to add interest. What kind of texture would make your kitchen feel cozier or more dynamic?
Mixing Materials
Combining different materials over your tiles can produce a unique, layered effect. Use peel-and-stick metal sheets, glass mosaics, or even fabric-backed vinyl to complement your existing tiles. This mix can highlight specific areas like the backsplash or around the stove.
Try pairing smooth glass overlays with rough stone textures for a striking balance. This approach lets you highlight your kitchen’s personality without committing to permanent changes. Which materials would best match your kitchen’s color and style?
Alternative Covering Options
Transforming your kitchen doesn't always require a complete renovation. Alternative covering options for kitchen tiles offer a cost-effective solution. These options provide versatility and style without permanent changes. Explore creative ways to enhance your kitchen space.
Magnetic Tile Covers
Magnetic tile covers are simple yet innovative. They attach directly to your existing tiles. These covers offer a quick way to change your kitchen's look. Choose from a variety of colors and patterns. Magnetic covers are reusable, making them ideal for seasonal changes. They are easy to clean and maintain, adding convenience to style.
Fabric And Textile Applications
Fabric and textile applications add warmth and texture. Use special adhesive to attach fabric directly to tiles. This method offers a unique, soft finish. Choose washable fabrics for easy maintenance. Change the fabric pattern to refresh your kitchen decor. This approach allows for creative expression in your kitchen design.
Temporary Covers For Renters
Temporary covers are perfect for renters. They allow personalization without permanent changes. Peel-and-stick vinyl sheets offer a quick and easy solution. These sheets mimic the look of real tiles. They are removable and leave no residue. This option provides flexibility for those in temporary living situations.
Maintaining Your New Kitchen Tiles
Maintaining your new kitchen tiles is key to keeping your space looking fresh and inviting. Regular care not only preserves the tiles’ appearance but also extends their lifespan. With the right approach, you can avoid common issues like stains, cracks, and dullness.
Cleaning Techniques
Start with gentle cleaning solutions like warm water mixed with mild dish soap. Avoid harsh chemicals that can erode tile surfaces or grout. Use a soft sponge or microfiber cloth to wipe tiles, focusing on grout lines where dirt tends to build up.
For tougher stains, try a paste made from baking soda and water. Apply it to the stain, let it sit for 10 minutes, then scrub gently with a soft brush. Rinse thoroughly and dry with a clean cloth to prevent water spots.
Preventing Damage
Protect your tiles by placing mats or rugs near high-traffic areas like sinks and cooking zones. This helps reduce wear and tear caused by dropped utensils or spilled liquids. Avoid dragging heavy appliances or furniture across the floor; use felt pads or sliders instead.
Have you noticed small cracks or chips? Address them quickly to prevent further damage. Even minor issues can lead to bigger problems if ignored.
Touch-up Tips
Keep a small repair kit handy with matching grout and tile paint for quick fixes. If grout starts to discolor or crack, remove the damaged parts and reapply fresh grout to maintain a seamless look.
For chipped tiles, use tile filler or epoxy putty designed for ceramics. After drying, gently sand the area and touch up with paint that matches your tile color. This approach can save you from costly replacements and keeps your kitchen looking flawless.
Credit: www.hgtv.com
Frequently Asked Questions
How Can I Cover Kitchen Tiles Without Removing Them?
You can cover kitchen tiles using peel-and-stick vinyl, tile paint, or adhesive wallpaper. These options save time and reduce mess. They offer a cost-effective way to refresh your kitchen look without demolition.
What Materials Work Best To Cover Kitchen Tiles?
Vinyl tiles, tile paint, and beadboard panels work well to cover kitchen tiles. Choose materials that resist moisture and heat for durability. These options are easy to install and maintain in a kitchen environment.
Is Painting Kitchen Tiles A Good Option?
Yes, painting tiles is a budget-friendly way to update your kitchen. Use a primer and specialized tile paint for best results. This method requires minimal tools and offers a smooth, clean finish.
How Long Does It Take To Cover Kitchen Tiles?
Covering kitchen tiles can take from a few hours to a couple of days. It depends on the method used and the kitchen size. Painting tiles typically takes 1-2 days including drying time.
Conclusion
Covering kitchen tiles can refresh your space quickly and affordably. Choose the right method for your style and budget. Simple steps can create a clean, new look. Take time to prepare the surface well before starting. With care, your kitchen will look bright and fresh.
Small changes make a big difference in your home. Start your project today and enjoy the results soon.