
Are your old kitchen cabinets making your whole kitchen look tired and outdated? You don’t have to spend a fortune or go through a full renovation to give your space a fresh, modern feel.
Imagine transforming your cabinets quickly and easily, making your kitchen the place you love to cook and gather again. You’ll discover simple, effective ways to cover old kitchen cabinets that save you time, money, and stress. Keep reading, and you’ll learn how to breathe new life into your kitchen with solutions anyone can do.

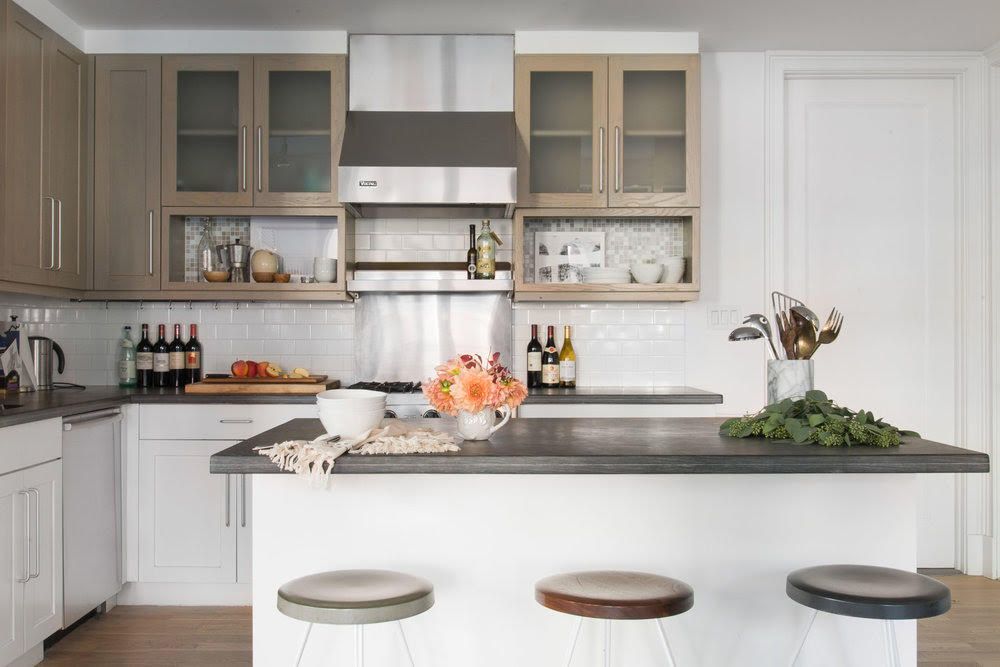
Credit: artzyfartzycreations.com
Assessing Your Cabinets
Before you start covering old kitchen cabinets, it's important to assess their current state carefully. This helps you decide the best approach and avoid surprises during the makeover. Understanding your cabinets’ condition, size, and style sets a solid foundation for a successful update.
Checking Condition And Material
First, inspect the cabinets closely for damage like cracks, warping, or water stains. These issues can affect how well new coverings will stick or hold up over time.
Next, identify what material your cabinets are made of—solid wood, plywood, MDF, or laminate. This matters because each material reacts differently to paint, veneers, or adhesive films.
Measuring For Accuracy
Grab a tape measure and jot down the dimensions of each cabinet door and drawer front. Accuracy here prevents costly mistakes with materials that might not fit or cover properly.
Measure both width and height, and note any irregular shapes or cutouts. Double-checking your numbers saves you from frustration later on.
Identifying Style And Design
Look at the overall style of your cabinets—are they modern, traditional, or something in between? This helps you pick coverings that enhance rather than clash with your kitchen’s vibe.
Notice details like raised panels, bevels, or decorative trim. These features might require special techniques or products to cover effectively.
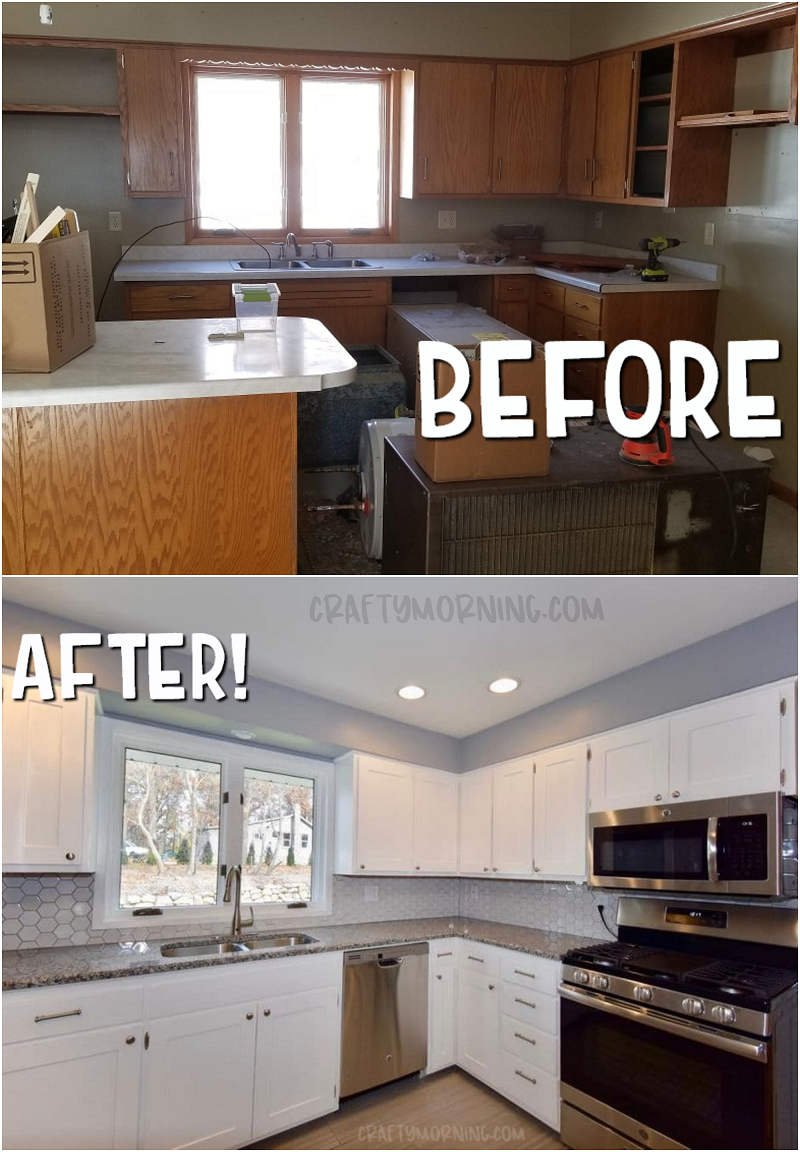
Credit: www.craftymorning.com
Preparing Cabinets For Transformation
Preparing your kitchen cabinets for a fresh look sets the foundation for a successful makeover. Taking time to properly prep ensures your new finish lasts longer and looks professional. Skipping these steps often leads to peeling paint or uneven coverage, which no one wants after hours of hard work.
Cleaning And Degreasing
Start by thoroughly cleaning your cabinets to remove grease, dirt, and grime. Kitchens are prone to sticky surfaces from cooking oils and spills, which can prevent paint or adhesive from sticking properly.
Use a strong degreaser or a mix of warm water and dish soap with a sponge or cloth. Make sure to wipe every corner, including edges and inside surfaces. After cleaning, let the cabinets dry completely before moving on.
Removing Hardware
Take off all knobs, handles, and hinges before painting or covering your cabinets. This gives you a smooth, uninterrupted surface to work on and prevents hardware from getting damaged or stained.
Keep the screws and hardware in a labeled container so you don’t lose any pieces. If you want to replace the hardware later, this also makes the process easier and faster.
Sanding Surfaces
Sanding is key to creating a surface that new paint or covering materials can grip onto. Even if your cabinets look smooth, a light sanding removes the glossy finish and any rough spots.
Use fine-grit sandpaper (around 220 grit) and sand in the direction of the wood grain. After sanding, wipe away dust with a damp cloth or tack cloth to ensure a clean surface.
Painting Techniques For Cabinets
Old kitchen cabinets can look fresh with simple painting techniques. Sanding, priming, and using smooth brush strokes help cover worn surfaces. Choosing the right paint and letting it dry well ensures a neat, lasting finish.
Painting your kitchen cabinets can be a game-changer. It's a cost-effective way to breathe new life into your space. With the right techniques, you can achieve a professional finish that will make your kitchen look fresh and modern.
Choosing The Right Paint
Selecting the perfect paint is crucial for a long-lasting finish. Opt for paints specifically designed for cabinets or furniture. These paints are more durable and can withstand the constant use and cleaning that kitchen cabinets endure. Look for a semi-gloss or satin finish. These finishes offer a nice sheen without being too shiny and are easier to clean.
Priming Tips
Priming is a step you shouldn't skip. It ensures the paint adheres well and covers any old stains or colors. Use a primer that's suitable for the material of your cabinets, whether wood, laminate, or metal. Apply the primer in thin, even coats. Allow ample drying time between coats to avoid any peeling or bubbling later.
Applying Paint Smoothly
Achieving a smooth finish requires patience and the right tools. Use a high-quality brush or roller for best results. Begin by painting the edges and details with a brush, then switch to a roller for the larger, flat surfaces. Apply the paint in thin, even layers, allowing each coat to dry completely before adding the next. This method prevents drips and ensures a flawless finish. Have you ever considered how a simple change like cabinet color could transform your kitchen's ambiance? Painting your cabinets is not just a practical solution; it's an opportunity to express your style. With these techniques, you're well on your way to creating a kitchen that feels both personal and inviting.
Using Peel-and-stick Veneers
Using peel-and-stick veneers is a quick and cost-effective way to refresh your old kitchen cabinets. These veneers come with an adhesive backing, making them easy to apply without needing professional help. You can achieve a modern look without the mess of paint or the expense of replacing cabinets.
Selecting Suitable Veneers
Choosing the right veneer is crucial for a smooth and durable finish. Look for materials that are water-resistant and easy to clean, especially in a kitchen environment.
Consider the style and color that will complement your kitchen’s overall design. Matte finishes hide imperfections better, while glossy ones offer a sleek, modern look.
Have you checked the size of your cabinet surfaces? Make sure the veneer sheets are large enough to cover your doors without too many seams.
Cutting And Fitting
Accurate cutting is key to a professional result. Use a sharp utility knife and a straight edge to trim the veneer to the exact size of your cabinet doors.
Take your time measuring each panel. Even a small miscut can create gaps or wrinkles when you apply the veneer.
Dry fit the pieces before peeling off the backing to ensure they align perfectly with the edges and handles.
Applying Without Bubbles
Peel the backing slowly while smoothing the veneer onto the cabinet surface to avoid bubbles. Use a plastic squeegee or a credit card wrapped in a soft cloth to press the veneer firmly.
Start from the center and push towards the edges to push out any trapped air. If you notice small bubbles, prick them gently with a pin and smooth out the area.
Have patience during this step—it’s worth spending extra time here for a flawless finish that looks like a pro did it.
Installing Cabinet Doors And Panels
Installing new cabinet doors and panels can transform old kitchen cabinets quickly. This update refreshes the entire kitchen look without a full remodel. New doors and panels provide style and function. They cover worn surfaces and add personality to your space.
Choosing the right doors and panels depends on your kitchen style and budget. Each option offers a unique texture and finish. Proper installation ensures a smooth, polished appearance that lasts.
Replacing Doors For A New Look
Removing old doors and adding new ones creates a fresh kitchen vibe. Choose styles like flat panels, raised panels, or glass inserts to match your taste. New hinges and handles complete the upgrade. This process requires measuring carefully to fit new doors perfectly.
Adding Decorative Panels
Decorative panels enhance cabinet sides and drawer fronts. They add depth and interest to plain surfaces. Use materials like wood, MDF, or laminate for easy installation. Panels can be painted or stained to coordinate with cabinet doors. This adds a custom feel without replacing the whole cabinet.
Using Beadboard Or Shiplap
Beadboard and shiplap bring charm and texture to cabinets. Beadboard features narrow vertical grooves for a classic look. Shiplap has horizontal boards that create a farmhouse style. Both are easy to cut and attach with nails or adhesive. Painting these panels brightens the kitchen and hides cabinet wear.
Credit: www.kylieminteriors.ca
Adding New Hardware
Adding new hardware to old kitchen cabinets refreshes their look instantly. It gives cabinets a fresh style without full replacement. New handles and knobs bring character and update the kitchen’s feel. Changing hardware is simple and budget-friendly. It also improves cabinet functionality by making doors easier to open.
Choosing Modern Handles And Knobs
Pick handles and knobs that match your kitchen style. Sleek metal finishes like brushed nickel or matte black fit modern kitchens well. Classic kitchens suit bronze or brass hardware. Consider size and shape to fit cabinet doors comfortably. Choose pieces easy to grip and clean. Trends include minimalistic bars and geometric shapes for a fresh look.
Installation Tips
- Measure existing holes to match new hardware size.
- Use a template for even placement on all cabinets.
- Drill carefully to avoid damaging wood surfaces.
- Tighten screws snugly but avoid overtightening.
- Replace one door at a time to keep track easily.
Mixing And Matching Styles
Combine different hardware styles to add interest. Pair round knobs with straight handles for contrast. Use varied finishes like bronze knobs with black handles. Keep colors within the same tone for balance. Mixing styles works well in eclectic or farmhouse kitchens. It adds personality without overwhelming the space.
Creative Finishing Touches
Creative finishing touches can transform old kitchen cabinets into stunning focal points. These details add personality and charm without major renovations. Small changes can bring freshness and style to your kitchen space.
Adding creative elements also protects your cabinets and enhances their durability. These finishing touches offer a practical and beautiful solution for cabinet makeovers.
Stenciling And Decorative Accents
Stenciling allows you to add patterns or designs on cabinet surfaces. Choose simple shapes or floral patterns for a classic look. Use painter’s tape to secure the stencil and apply paint with a sponge for clean edges.
Decorative accents like new knobs and handles can refresh the look instantly. Consider vintage or modern styles based on your kitchen’s theme. Adding decals or wallpaper inside glass cabinet doors also creates a unique touch.
Applying Clear Protective Coats
Clear protective coats shield cabinets from moisture, stains, and scratches. Use polyurethane or acrylic finishes for a long-lasting effect. Choose matte or glossy finishes depending on the desired look.
Apply thin layers with a brush or spray. Let each coat dry fully before adding another. This protection keeps cabinets looking new and makes cleaning easier.
Incorporating Lighting Elements
Lighting under or inside cabinets adds warmth and highlights details. LED strip lights are energy-efficient and easy to install. Use warm white lights for a cozy feel or cool white for a modern touch.
Lighting improves kitchen visibility and creates an inviting atmosphere. Small spotlights inside glass cabinets can showcase dishware or collectibles beautifully.
Maintaining Your Refreshed Cabinets
Maintaining your refreshed kitchen cabinets keeps them looking new longer. Simple care routines protect the finish and prevent damage. Regular attention stops small issues from becoming big problems.
Cleaning Tips
Use a soft cloth and mild soap to clean cabinets. Avoid harsh chemicals that can strip paint or stain. Wipe spills quickly to prevent stains and water damage. Dry the surface fully after cleaning to stop moisture build-up.
Handling Minor Repairs
Fix small scratches with matching touch-up paint or markers. Fill tiny holes or dents with wood filler and sand lightly. Check for loose hinges or handles and tighten screws as needed. Repair chips early to avoid further peeling or cracking.
Keeping Hardware Polished
Clean hardware with warm soapy water and a soft brush. Dry thoroughly to stop rust or corrosion. Use metal polish sparingly to keep shine without damage. Replace worn or broken knobs and pulls to maintain a fresh look.
Frequently Asked Questions
How Can I Cover Old Kitchen Cabinets Cheaply?
You can use peel-and-stick vinyl, paint, or contact paper. These options are affordable, easy to apply, and update your cabinets quickly without replacing them.
What Materials Work Best To Cover Old Cabinets?
Vinyl wraps, paint, and wood veneer are popular choices. They offer durability, aesthetic appeal, and require minimal prep work for old kitchen cabinets.
How Long Does It Take To Cover Old Kitchen Cabinets?
Covering cabinets usually takes 1-3 days. Time depends on preparation, drying, and the method you choose, like painting or applying adhesive coverings.
Can I Cover Old Cabinets Without Sanding?
Yes, using self-adhesive vinyl or cabinet refinishing kits allows you to skip sanding. Proper cleaning and priming ensure good adhesion and a smooth finish.
Conclusion
Old kitchen cabinets can look fresh with simple updates. Paint, peel-and-stick, or new doors can change the space. Small changes save money and add style quickly. Choose a method that fits your time and budget. A little effort can make your kitchen feel new.
Enjoy your refreshed space without a full remodel. Start your project today and see the difference.