
Are your kitchen tiles looking outdated or just not matching your style anymore? You don’t have to go through the hassle of a full renovation to change the look.
Imagine giving your kitchen a fresh, new vibe without breaking the bank or spending weeks on construction. You’ll discover simple and effective ways to cover up your kitchen tiles that anyone can do. Whether you want a quick fix or a more creative makeover, these tips will help you transform your space and fall in love with your kitchen all over again.
Keep reading—you’re closer than you think to a kitchen you’ll enjoy every day.
Choosing The Right Covering
Choosing the right covering for your kitchen tiles can change the entire look and feel of your space without the mess of a full renovation. It's about finding a balance between style, durability, and ease of application. Think about how much time you want to spend on the project and how long you want the results to last.
Are you looking for something quick and temporary or a more permanent upgrade? Your choice will depend on your lifestyle and how often you want to refresh your kitchen’s look.
Peel-and-stick Tiles
Peel-and-stick tiles offer a fast and mess-free way to cover up old kitchen tiles. They come in a variety of patterns and textures, including faux stone, ceramic, and even metallic finishes.
These tiles are perfect if you want to add a modern touch without hiring a professional. You just peel off the backing and stick them directly onto your existing tiles. Plus, they’re easy to remove if you decide to change your design later.
Keep in mind, though, that they work best on smooth surfaces. Uneven or heavily textured tiles might cause the adhesive to fail over time.
Paint Options
Painting your kitchen tiles is a cost-effective way to refresh your space. Special tile paints are designed to stick well and resist moisture, which is important in a kitchen environment.
You’ll need to clean and lightly sand your tiles before painting to ensure proper adhesion. This method allows you to pick any color you want, giving you complete control over your kitchen’s look.
Have you thought about adding a bold color to brighten up your kitchen, or maybe a subtle shade to create a calm atmosphere? The right paint can make a big difference.
Wallpaper Solutions
Wallpaper might not be the first thing that comes to mind for covering kitchen tiles, but special vinyl or washable wallpapers can work well. They add patterns and textures that paint or tiles can’t replicate easily.
Apply wallpaper over a smooth tile surface using a strong adhesive. It’s a fantastic option if you want to introduce unique designs, from floral prints to geometric shapes.
Remember, kitchens can be humid, so choosing a moisture-resistant wallpaper is key to avoiding peeling or damage.
Fabric And Decals
Fabric and decals are creative options to cover kitchen tiles with minimal effort. Decals come in countless designs and can be applied like stickers, allowing you to personalize your backsplash instantly.
Fabric can be used with the right adhesive and sealed with a waterproof coating to protect against spills and stains. This approach is perfect if you want a soft texture or a handmade feel in your kitchen.
Have you tried mixing different decal patterns to create a custom look? Combining fabrics and decals might give your kitchen a unique personality that reflects your style perfectly.
Preparation Steps
Covering up kitchen tiles can transform your space without the mess of a full renovation. But before you jump in, preparation is key to making sure your new surface sticks well and looks great. Taking the time to properly prepare your tiles will save you from headaches later on and help achieve a smooth, lasting finish.
Cleaning And Drying Tiles
Start by giving your tiles a thorough clean to remove grease, dirt, and any residue. Use a strong degreaser or a mixture of warm water and dish soap for scrubbing. Rinse well and allow the tiles to dry completely—moisture can ruin adhesives or paint.
Have you noticed stubborn stains or sticky spots? Tackling these now means your covering material won’t peel or bubble after application. A clean, dry surface is your foundation for success.
Repairing Damages
Check your tiles for cracks, chips, or missing grout. Small chips can be filled with epoxy or tile filler, while cracked grout should be scraped out and replaced. Repairing these imperfections prevents uneven surfaces and ensures your covering lays flat.
Ignoring damage might seem tempting if it’s minor, but it often leads to issues down the line. Think about how a tiny crack can widen and ruin your fresh finish. Fixing early means fewer problems later.
Gathering Tools And Materials
Make a list of everything you’ll need before you start—this saves time and frustration. Common essentials include:
- Cleaning supplies (degreaser, scrub brush, rags)
- Repair kits (epoxy filler, grout)
- Covering materials (paint, adhesive vinyl, peel-and-stick tiles)
- Application tools (paintbrushes, rollers, squeegees)
- Protective gear (gloves, masks)
Gathering tools ahead helps you stay focused and prevents those annoying mid-project trips to the store. How often have you stopped a project just because you forgot one item? Avoid that by preparing now.
Applying Peel-and-stick Tiles
Applying peel-and-stick tiles offers a quick way to refresh kitchen walls. These tiles are easy to install and remove. They provide a clean, updated look without heavy renovation. The key is careful measuring, neat cutting, and proper application. This ensures the tiles stick well and last long.
Measuring And Cutting
Start by measuring the area to cover. Use a tape measure for accuracy. Mark the measurements on the tile backing with a pencil. Cut tiles carefully using a utility knife or scissors. Score the tile surface and snap it cleanly along the line. Cut tiles to fit around outlets and corners. Keep cuts straight for a neat finish.
Surface Application Tips
Clean the wall surface thoroughly before applying tiles. Remove grease, dust, and dirt for better adhesion. Peel off the backing paper gently to avoid damage. Align the tile at the starting point carefully. Press the tile firmly onto the wall to remove air bubbles. Use a plastic scraper or a soft cloth to smooth tiles. Work from top to bottom for easier handling.
Sealing Edges
Seal edges to prevent moisture and peeling. Use silicone caulk around tile borders and corners. Apply a thin, even bead along all edges. Smooth caulk with a wet finger or tool for a clean look. Allow the sealant to dry fully before touching the tiles. Sealing protects the tiles and extends their life.

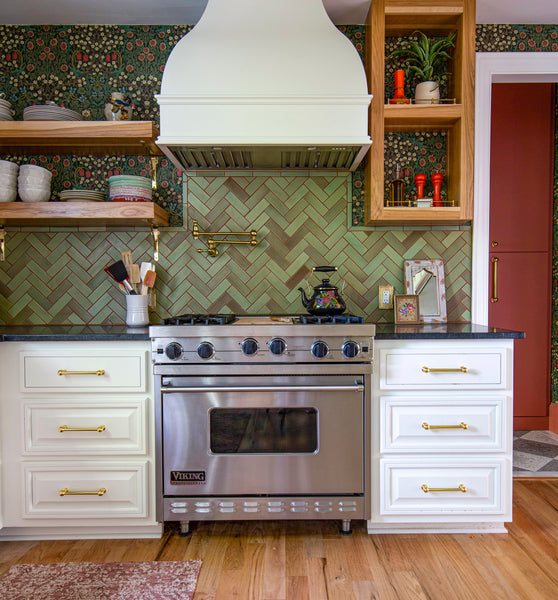
Credit: casacor.abril.com.br
Painting Over Tiles
Painting over kitchen tiles offers a quick way to refresh your space without removing them. Proper cleaning and using the right paint ensure a smooth, lasting finish. This method saves time and money while changing the kitchen’s look.
Painting over kitchen tiles can transform your space without the hassle of a full renovation. It's an affordable and creative way to refresh your kitchen's look. Whether you're dealing with outdated colors or wear and tear, a fresh coat of paint can be your solution. But how do you ensure a lasting finish that won't peel or fade? Here’s how you can effectively cover up your kitchen tiles with paint.
Choosing The Right Paint
Selecting the right type of paint is crucial. You need a paint that adheres well to the tile surface and withstands kitchen conditions. Epoxy or enamel paints are excellent choices due to their durability and water resistance. You might ask, why not regular wall paint? Regular paint may not adhere well and can chip or peel easily. Color choice also matters; lighter shades can brighten up a small kitchen, while bold colors can make a statement.
Priming Tiles
Priming is a non-negotiable step in painting tiles. A high-quality primer ensures the paint bonds well with the tile surface. Clean tiles thoroughly to remove grease and grime before applying primer. Do you skip priming? Skipping primer could lead to poor adhesion and peeling paint. Use a tile-specific primer for the best results and let it dry completely before the next step.
Layering And Finishing
Once the primer has set, it's time to apply the paint. Start with a thin, even coat and allow it to dry fully. Multiple layers are usually necessary for a rich, even finish. Patience here pays off. Rushing the process can lead to streaks or uneven coverage. Finish with a sealant to protect your work and ensure longevity. This final step shields your paint from moisture and stains, keeping your kitchen looking fresh.
Using Wallpaper And Decals
Using wallpaper and decals is a clever way to refresh your kitchen tiles without the hassle of removing them. They offer a quick transformation and can add a splash of personality to your cooking space. But to get the best results, you need to choose the right materials and apply them carefully.
Selecting Water-resistant Options
Kitchen walls can get wet and oily, so pick wallpapers and decals designed to handle moisture. Look for vinyl or laminated wallpapers that repel water and resist stains. Matte finishes reduce glare, making your kitchen look neat and clean even under bright lights.
Have you checked the product labels for water resistance? Some wallpapers are labeled “scrubbable,” meaning you can wipe off spills without damage. Decals made from waterproof vinyl work well, especially near the sink or stove.
Proper Adhesion Techniques
Clean your tiles thoroughly before applying wallpaper or decals. Any grease or dust will stop the adhesive from sticking properly. Use rubbing alcohol and a lint-free cloth for the best surface prep.
When applying, start from one edge and smooth out air bubbles as you go. A plastic scraper or credit card helps push out trapped air for a flawless finish. If your tiles have grout lines, consider flexible wallpaper that can bend without peeling.
Maintenance Tips
To keep your tile coverings looking fresh, wipe them regularly with a damp cloth and mild soap. Avoid harsh chemicals or abrasive scrubbers that can wear down the surface. Spot clean stains right away to prevent long-term damage.
Check the edges every few months for any signs of peeling, especially in high-moisture areas. Small lifts can be re-stuck with wallpaper adhesive or clear glue. How often do you inspect your kitchen walls? Catching problems early saves you from bigger repairs later.

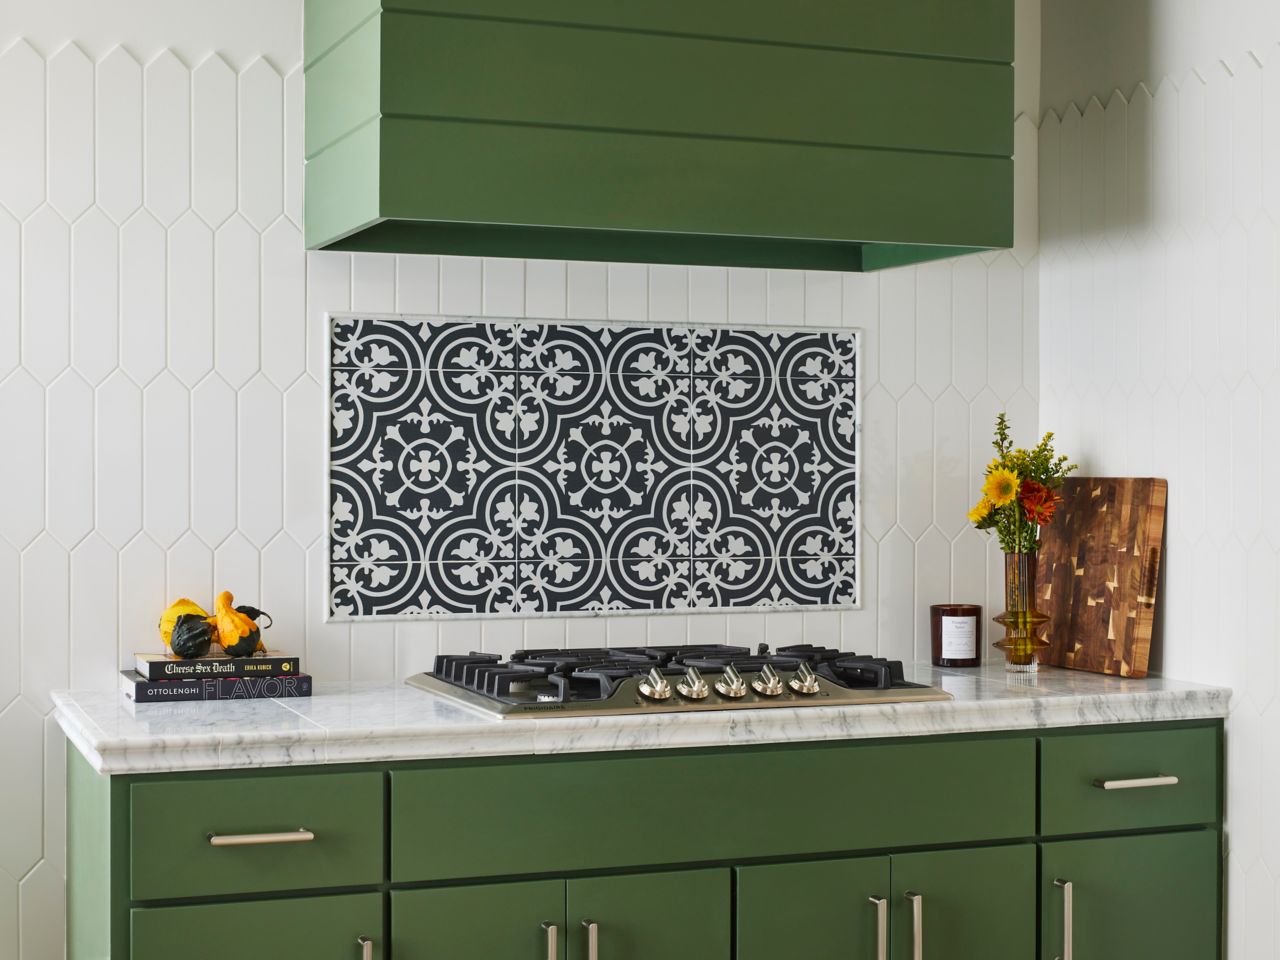
Credit: decorateandmorewithtip.com
Alternative Cover-up Hacks
Alternative cover-up hacks offer creative ways to hide old or unattractive kitchen tiles. These solutions add charm and style without much hassle. They suit renters and homeowners who want a fresh look fast.
Try simple, budget-friendly ideas that require little skill. These hacks can transform your kitchen’s vibe and bring warmth or color. Some options are removable, making them perfect for temporary changes.
Installing Beadboard Panels
Beadboard panels give a classic, cozy look to kitchens. They are easy to install over tiles with basic tools. Panels come in different colors and can be painted to match your decor.
Attach panels using adhesive or small nails. This covers tiles fully and creates a smooth, clean surface. Beadboard also protects walls from moisture and spills.
Adding Fabric Curtains
Fabric curtains can cover kitchen tiles stylishly and softly. Choose water-resistant fabric for areas near the sink. Hang curtains on tension rods or small curtain rods fixed above tiles.
Pick colors or patterns that brighten the kitchen space. Curtains are easy to remove and wash, keeping your kitchen fresh. They add texture and a homey feel instantly.
Using Magnetic Covers
Magnetic covers stick directly to metal tile backs or magnetic sheets installed first. They come in many designs, from plain colors to fun prints. This makes quick changes possible without damage.
These covers are perfect for renters or those who like frequent updates. They are simple to place and remove. Magnetic covers protect tiles and give your kitchen a neat look.
Maintaining Your New Look
Maintaining your new kitchen tile cover keeps your space fresh and inviting. Simple care routines help preserve the look and extend its life. Small fixes stop damage from growing and keep everything neat.
Cleaning Methods
Use gentle cleaning products to avoid damage. Mild soap mixed with warm water works well. Soft cloths or sponges prevent scratches on surfaces. Avoid harsh chemicals or abrasive tools that can wear down finishes.
- Wipe spills quickly to prevent stains
- Clean regularly to avoid dirt buildup
- Use vinegar solution for tough spots, but rinse well
- Dry surfaces to stop water marks
Touch-up Ideas
Small cracks or chips can be fixed easily. Use matching paint or tile filler for a smooth look. Replace damaged decals or peel-and-stick tiles if needed. Keep extra materials from your project for quick repairs.
- Fill gaps with grout or caulk
- Apply touch-up paint carefully with a fine brush
- Replace single tiles without redoing the whole area
Long-term Care
Regular checks help catch issues early. Keep grout sealed to prevent moisture damage. Avoid heavy impacts or sharp objects on tile surfaces. Consider adding a protective finish to boost durability.
- Inspect tiles and grout every few months
- Re-seal grout annually for protection
- Use mats or rugs in high-traffic areas
Credit: www.tileshop.com
Frequently Asked Questions
What Are The Best Ways To Cover Up Kitchen Tiles?
You can cover kitchen tiles with peel-and-stick tiles, paint, or tile decals. Another option is installing a backsplash over the tiles. These methods are cost-effective, easy to apply, and can transform your kitchen’s look without removing existing tiles.
Can I Paint Over Kitchen Tiles Safely?
Yes, you can paint over kitchen tiles with proper preparation. Clean tiles thoroughly and use a primer designed for glossy surfaces. Then, apply high-quality tile paint to ensure durability and a smooth finish. This method is budget-friendly and refreshes old tiles quickly.
How Do Peel-and-stick Tiles Work On Kitchen Walls?
Peel-and-stick tiles have an adhesive backing for easy application. Simply clean the surface, peel off the backing, and press the tile onto the wall. They are waterproof, removable, and perfect for updating kitchen tiles without professional help or messy renovations.
Is Covering Kitchen Tiles Cheaper Than Replacing Them?
Covering kitchen tiles is generally cheaper and faster than replacing them. It avoids demolition costs, reduces labor, and minimizes mess. Options like paint, decals, or peel-and-stick tiles are affordable solutions that can update your kitchen’s style without a full remodel.
Conclusion
Covering kitchen tiles can change your space quickly and easily. Choose a method that fits your style and budget. Small changes make a big difference in how your kitchen feels. With the right tools and a little effort, you can update your tiles without a full renovation.
Enjoy a fresh look that brightens your cooking area. Keep your kitchen looking new and inviting for years to come. Simple steps lead to great results. Start your tile makeover today and see the change yourself.