
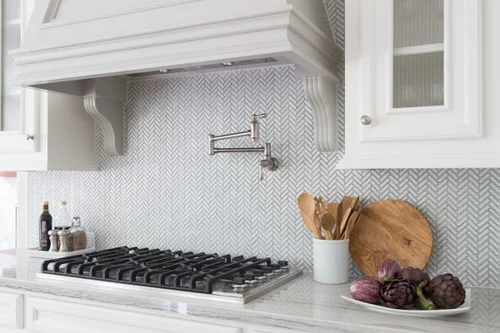
Are your kitchen wall tiles looking tired or outdated? You don’t have to live with a backsplash that doesn’t match your style.
Imagine transforming your kitchen quickly and affordably without the hassle of ripping out tiles. You’ll discover simple, effective ways to cover up your kitchen wall tiles and give your space a fresh, modern look. Whether you want a quick fix or a long-lasting upgrade, you’ll find ideas that fit your needs and budget.
Keep reading to unlock easy solutions that will make your kitchen shine again.

Credit: decorateandmorewithtip.com
Reasons To Cover Kitchen Tiles
Covering kitchen wall tiles is a popular choice for many homeowners. It offers a simple way to refresh the kitchen’s look without a full remodel. Various reasons push people to cover their tiles instead of removing them. Understanding these reasons helps you decide if this option suits your kitchen update.
Outdated Or Damaged Tiles
Old tiles can make a kitchen look tired and worn out. Cracks, chips, or stains spoil the overall appearance. Covering tiles hides these flaws quickly and neatly. It saves time and avoids the mess of tile removal. This approach breathes new life into the kitchen walls without heavy work.
Changing Kitchen Style
Kitchen styles change with trends and personal taste. Tiles that once matched the decor may no longer fit. Covering tiles lets you update the style easily. You can choose colors, patterns, or textures that match your new design. It gives your kitchen a fresh, modern look without extra hassle.
Cost-effective Renovation
Removing and replacing tiles can be expensive and labor-intensive. Covering existing tiles costs less and takes less time. It reduces waste and avoids damage to walls underneath. This method offers a budget-friendly way to improve your kitchen’s appearance. Great for those who want a quick, affordable makeover.

Credit: mercurymosaics.com
Preparation Before Covering Tiles
Proper preparation makes covering kitchen wall tiles easier and more durable. It ensures the new surface sticks well and looks smooth. Taking time to prepare helps avoid problems later. Focus on cleaning, repairing, gathering tools, and planning measurements first.
Cleaning And Repairing
Start by cleaning the tiles thoroughly. Remove grease, dirt, and grime with a strong cleaner. Use a scrub brush or sponge for better results. Rinse with water and let dry completely.
Check for cracked or loose tiles. Repair cracks with a suitable filler or replace damaged tiles. A smooth, even surface is essential for good adhesion. Fix any holes or gaps in grout as well.
Gathering Necessary Tools
Collect all tools before starting the project. Common tools include:
- Scrub brush or sponge
- Tile adhesive or primer
- Putty knife or scraper
- Measuring tape
- Level
- Protective gloves
- Drop cloth or plastic sheet
Having everything ready saves time and avoids interruptions.
Measuring And Planning
Measure the wall area carefully. Note width and height in inches or centimeters. Calculate total surface area to estimate materials needed.
Plan the layout of your covering material. Mark sections to cut or fit around outlets and fixtures. Visualizing the final look helps reduce mistakes.
Paint Options For Tile Cover-up
Transforming your kitchen can be as simple as painting over the tiles. Painting is a cost-effective solution to refresh and modernize your space. Discover the right paint options to achieve a stunning new look.
Choosing The Right Paint
Selecting the correct paint is crucial for durability and appearance. Use epoxy or latex paint for tiles. Both offer excellent adhesion and moisture resistance. Consider the color that complements your kitchen's theme. Light colors can make the room appear larger. Dark colors add a touch of elegance.
Step-by-step Painting Process
Begin by cleaning the tiles thoroughly. Remove any grease and dirt. Sand the surface lightly to help the paint stick. Apply a primer designed for tiles. Let it dry completely.
Once the primer is dry, apply the first coat of paint. Use a roller for large areas and a brush for edges. Wait for the paint to dry before applying a second coat. This ensures even coverage and a rich finish.
Tips For Long-lasting Results
- Ensure the room is well-ventilated during painting.
- Use high-quality brushes and rollers.
- Allow ample drying time between coats.
- Apply a clear sealant for added protection.
- Avoid scrubbing the painted tiles with harsh cleaners.
Regular maintenance will keep your tiles looking new for years. A little care goes a long way.
Peel-and-stick Tile Alternatives
Peel-and-stick tile alternatives offer a quick and affordable way to refresh your kitchen walls without the hassle of removing old tiles. These options let you change the look of your kitchen in just a few hours, making them perfect for renters or anyone wanting a temporary upgrade. Ready to explore how these clever materials can transform your space?
Types Of Stickers And Films
There are several types of peel-and-stick options to choose from, each with unique benefits. Vinyl decals are popular for their vibrant designs and water resistance, ideal for kitchens prone to splashes. Another choice is adhesive films, which often mimic real tile textures like subway, marble, or even metallic finishes.
Some films come with patterns printed directly on textured surfaces, adding depth and a realistic feel. Magnetic peel-and-stick panels are also available, allowing you to swap designs easily without damaging walls. Have you considered how different materials might hold up in a humid kitchen environment?
Application Techniques
Applying peel-and-stick tiles is straightforward but requires some preparation to avoid bubbles and misalignment. Start with a clean, dry surface—grease or dirt can reduce adhesion. Use a level or ruler to mark guidelines, helping you place each piece evenly.
Peel the backing off slowly, pressing the tile firmly from one edge to the other to push out air pockets. A plastic squeegee or even a credit card works well to smooth out bubbles. Don’t rush; taking your time here prevents peeling later on.
Maintenance And Durability
Peel-and-stick alternatives are generally easy to clean with a damp cloth and mild detergent. Avoid abrasive scrubbers that can damage the surface or wear away the print. While they resist moisture, excessive heat or steam can shorten their lifespan.
Many users find these tiles last several years with proper care, but they’re not as durable as traditional ceramic or stone tiles. If you want a quick fix that looks great and cleans easily, these stickers might be just what your kitchen needs. How long do you want your kitchen makeover to last?
Installing New Tile Over Existing Ones
Installing new tile over existing kitchen wall tiles is a smart way to refresh your kitchen without full demolition. It saves time, reduces dust, and cuts costs. This approach works well if the old tiles are firmly attached and in good condition.
Choosing the right tiles and preparing the surface correctly ensures a strong bond. Proper installation techniques prevent issues like peeling or cracking. Follow these tips to get a smooth, durable finish.
Selecting Compatible Tiles
Pick tiles that bond well to your current wall surface. Porcelain and ceramic tiles usually work best. Avoid very smooth or glossy tiles, as they reduce adhesion. Look for tiles with a textured or matte back.
Consider the thickness too. New tiles should not add too much bulk to your walls. Thin tiles or tile panels are ideal. They keep the wall level and make installation easier.
Surface Preparation
Clean the existing tiles thoroughly to remove grease and dirt. Use a strong degreaser or a mix of water and vinegar. Scrub the surface with a stiff brush and rinse well.
Roughen the tile surface using sandpaper or a wire brush. This helps the new adhesive stick firmly. Remove dust and debris after sanding.
Check for loose or damaged tiles. Fix or remove them before tiling. A stable base is critical for long-lasting results.
Installation Tips
- Use a high-quality adhesive made for tiling over tiles.
- Apply adhesive evenly with a notched trowel for better grip.
- Press new tiles firmly against the old surface.
- Use spacers to keep tiles aligned and even.
- Allow adhesive to cure fully before grouting.
- Seal grout lines to protect against moisture and stains.

Credit: www.create-enjoy.com
Using Panels And Backsplashes
Using panels and backsplashes is a smart way to cover up kitchen wall tiles without the mess of demolition. These options offer a fresh look and protect your walls from spills and stains. They can be installed quickly, saving you time and effort while transforming the kitchen’s style.
Materials For Wall Panels
Choosing the right material makes a big difference in durability and appearance. Popular choices include acrylic, glass, PVC, and laminate. Acrylic panels are lightweight and easy to clean, while glass panels add a sleek, modern shine.
Wood-effect PVC panels bring warmth and texture, and laminate options offer a budget-friendly solution with a variety of patterns. Think about how much moisture and heat your kitchen walls will face when picking materials.
Installing Acrylic Or Glass Panels
Installing acrylic or glass panels is easier than you might think. First, clean the tile surface thoroughly to ensure good adhesion. Measure the wall space carefully and cut panels to fit if needed.
Use strong adhesive or mounting tape designed for kitchen use to fix the panels securely. Seal the edges with silicone to prevent water from getting behind the panels. This method keeps your kitchen wall smooth and easy to wipe down.
Creative Backsplash Ideas
Backsplashes don’t have to be boring. You can create a focal point with patterned tiles, mirrored panels, or even peel-and-stick options for a quick update. Think about mixing textures like metal and glass for a dynamic look.
Have you considered using chalkboard paint or magnetic panels as a backsplash? They add functionality, letting you write notes or display recipes right on your kitchen wall. What style would inspire you every time you cook?
Decorative Wall Treatments
Decorative wall treatments offer a creative way to cover up kitchen wall tiles without the hassle of demolition. They let you transform your kitchen’s look quickly and with minimal mess. Whether you want something subtle or a bold statement, these options can refresh your space and reflect your personality.
Wall Decals And Murals
Wall decals and murals are easy, affordable ways to hide outdated or plain tiles. You can find decals in various patterns, from floral to geometric, or even custom designs. Applying them is simple—just peel and stick—making it a perfect weekend project.
If you want a dramatic change, a mural can turn your kitchen into a focal point. Imagine a large, vibrant mural of fresh herbs or a rustic market scene brightening up your cooking area. Have you thought about how a mural could inspire you every time you step into your kitchen?
Textured Plaster Or Wallpaper
Textured plaster adds depth and interest to flat tile surfaces. It’s a great choice if you prefer a natural, tactile feel. Applying plaster over tiles smooths the surface and allows you to paint or finish it in any color you like.
Wallpaper has come a long way, now offering varieties designed specifically for kitchens. Look for moisture-resistant types that can handle splashes and steam. Choosing wallpaper with bold patterns or subtle textures can completely change your kitchen’s vibe without heavy renovation.
Adding Open Shelving
Open shelving can cleverly cover parts of your tiled walls while adding storage and style. Use shelves to display your favorite dishes, cookbooks, or plants, drawing attention away from less attractive tiles. This also gives you a chance to personalize your kitchen with items you love.
Think about the impact of layering decorative items on shelves to distract from the tiles. You might place colorful bowls or vintage jars strategically to create a cozy, lived-in feel. Could rearranging your kitchen items offer a fresh look without spending a dime?
Budget-friendly Makeover Tips
Updating kitchen wall tiles does not have to drain your wallet. Small changes can bring a fresh look without big expenses. Smart planning and careful choices help create a stylish space on a budget.
Focus on options that save money and still look great. Using simple techniques can transform your kitchen quickly. Explore ideas that suit your skills and budget.
Diy Vs Professional Help
Doing it yourself saves money on labor costs. Simple tile coverings like paint or peel-and-stick tiles work well for beginners. These methods require minimal tools and skills.
Professional help suits complex tasks or damaged tiles. Experts ensure a clean, lasting finish. The cost is higher but may prevent costly mistakes.
Decide based on your confidence and the project’s difficulty. Small projects are perfect for DIY. Large or tricky jobs benefit from professionals.
Shopping For Affordable Materials
Choose budget-friendly materials that still look good. Vinyl tiles, tile stickers, and paint offer low-cost options. Check discount stores or online sales for deals.
- Buy only what you need to avoid waste.
- Compare prices and read reviews before buying.
- Consider leftover materials from other projects.
Mix and match items to create unique styles. Affordable materials can mimic expensive designs with the right approach.
Maximizing Small Changes
Focus on details that create big impact. Changing grout color or adding decals updates the look fast. These small tweaks cost less but improve style.
Rearrange kitchen elements like shelves or artwork near tiles. Fresh accessories draw attention away from old tiles.
- Use lighting to highlight new features.
- Clean tiles thoroughly for a brighter appearance.
- Apply a fresh coat of paint on surrounding walls.
Small updates refresh your kitchen without a full remodel. These budget-friendly tips bring a new feel to your space.
Frequently Asked Questions
How Can I Cover Kitchen Wall Tiles Without Removing Them?
You can cover kitchen wall tiles using peel-and-stick wallpaper, tile paint, or adhesive panels. These options save time and avoid messy removal. They also give your kitchen a fresh, updated look quickly and cost-effectively.
What Materials Work Best To Cover Old Kitchen Tiles?
Peel-and-stick vinyl tiles, beadboard panels, and tile paint are popular materials. They are easy to apply and durable. Choose materials that resist moisture and heat for the best kitchen performance.
Is Painting Kitchen Wall Tiles A Good Option?
Yes, painting tiles is an affordable way to refresh your kitchen walls. Use a high-quality primer and tile-specific paint for long-lasting results. Proper surface preparation ensures paint adhesion and durability.
Can I Use Wallpaper To Cover Kitchen Tiles?
Peel-and-stick wallpaper can cover kitchen tiles effectively. Choose waterproof and washable wallpaper designed for kitchens. It’s a quick, stylish way to update tiles without demolition.
Conclusion
Covering kitchen wall tiles can change your space quickly. Choose a method that fits your style and budget. Painting, paneling, or using adhesive covers all work well. Take time to prepare surfaces for best results. Small changes can make a big difference in your kitchen’s look.
Enjoy your refreshed, clean, and modern kitchen walls every day. Simple steps bring fresh life to old tiles. Start your project with confidence and creativity today.