
Are your kitchen tiles making you cringe every time you walk in? Ugly or outdated tiles can quickly drain the charm from your whole kitchen, leaving you feeling stuck with a look you don’t love.
But what if you could fix this without tearing everything apart or spending a fortune? You’ll discover simple, smart ways to cover up those tiles and transform your kitchen into a space you’re proud of. Keep reading—your dream kitchen makeover is easier than you think.
Assessing Your Kitchen Tiles
Assessing your kitchen tiles is the first step toward improving your space. It helps you understand the current condition and what changes suit your needs. Taking time to evaluate tiles saves effort and money later. Knowing the details guides your decision on how to cover or update them.
Identifying Tile Issues
Look closely at your tiles for cracks, chips, or stains. Notice if the color feels outdated or clashes with your kitchen style. Check grout lines for dirt or damage. Uneven or loose tiles can also affect the look and safety. Write down all problems to plan the right fix.
Measuring Your Space
Measure the tiled area carefully. Use a tape measure to get length and height in feet or meters. Note corners, edges, and any odd shapes. Accurate measurements help in buying materials and estimating costs. Double-check numbers to avoid mistakes during the project.
Choosing The Right Approach
Decide how you want to cover your tiles based on issues and size. Options include painting, adhesive covers, or installing new panels. Think about your budget and skill level. Some methods need professional help, others you can do yourself. Pick the one that fits your style and needs best.
Painting Kitchen Tiles
Painting kitchen tiles offers a fresh, affordable way to update your space. It hides old designs and brightens dull colors. This simple makeover can transform your kitchen without a full renovation. Proper paint and preparation ensure durability and a smooth finish. Follow these tips to get the best results.
Selecting Tile Paint
Choose paint made especially for tiles or high-gloss surfaces. These paints stick well and resist moisture and stains. Look for epoxy or enamel tile paint for kitchens. Pick a color that matches your kitchen style. Matte or satin finishes can hide imperfections better than glossy ones.
Preparing The Surface
Clean tiles thoroughly to remove grease and dirt. Use a strong cleaner or degreaser for best results. Rinse and dry completely before painting. Sand tiles lightly with fine-grit sandpaper to help paint stick. Wipe away dust with a damp cloth. Cover edges and nearby areas with painter’s tape to avoid mess.
Applying Paint Effectively
Use a high-quality brush or small roller for even coverage. Apply thin, smooth coats rather than thick layers. Allow each coat to dry fully before adding another. Two or three coats usually give the best look. Remove painter’s tape before the paint fully dries to avoid peeling. Let tiles cure for several days before heavy use.
Using Tile Stickers And Decals
Transforming your kitchen doesn't always mean a complete overhaul. One easy way to refresh the space is by using tile stickers and decals. These affordable solutions can cover up unsightly tiles without the hassle of a full renovation. With a variety of styles and colors, tile stickers offer an easy way to personalize your kitchen. Plus, they’re removable, making them perfect for renters or those who love to change decor often.
Types Of Tile Stickers
Tile stickers come in various materials and designs. Some mimic classic ceramic tiles, while others offer bold patterns or vibrant colors. Vinyl stickers are popular due to their durability and resistance to moisture. They are available in glossy or matte finishes, allowing you to choose the perfect look for your kitchen. Some brands even offer custom designs to match your unique style.
Installation Tips
Installing tile stickers is straightforward and requires minimal tools. First, clean the tiles thoroughly to remove any grease or dirt. This ensures the stickers adhere properly. Measure each tile to ensure a perfect fit. Peel off the backing and press the sticker onto the tile, smoothing out any air bubbles as you go. Use a soft cloth or a squeegee for a flawless finish.
Maintenance And Durability
Tile stickers are designed to withstand kitchen conditions. They resist heat and moisture, making them suitable for areas near the stove or sink. To clean, simply wipe with a damp cloth. Avoid abrasive cleaners that might damage the surface. With proper care, tile stickers can last several years, offering a long-lasting solution to outdated tiles.
Credit: www.apartmenttherapy.com
Installing Peel-and-stick Tiles
Installing peel-and-stick tiles is one of the easiest ways to cover up ugly kitchen tiles without a full renovation. These tiles offer a quick and affordable upgrade that can transform your kitchen’s look in just a few hours. You don’t need special tools or professional skills, making it a perfect DIY project for anyone.
Benefits Of Peel-and-stick
Peel-and-stick tiles are lightweight and easy to handle. You simply remove the backing and press them onto a clean surface. This means no messy grout or complicated adhesives.
They are also budget-friendly compared to traditional tile installations. Plus, if you ever want to change your kitchen’s look, you can remove or replace them without damaging the original tiles.
These tiles come in many styles and finishes, from classic subway tile looks to bold patterns. You can quickly update your kitchen to match your personal style or current trends.
Surface Preparation
Good surface preparation is key to making peel-and-stick tiles last. First, clean your existing tiles thoroughly with soap and water to remove grease and dirt.
After cleaning, dry the surface completely. Any moisture can weaken the adhesive and cause the tiles to peel off later.
If your tiles have cracks or uneven spots, use a tile repair filler or sand them smooth. A flat surface helps the new tiles stick better and look more polished.
Design Ideas
Think about the mood you want in your kitchen before picking a design. Do you prefer a bright, fresh look or something warm and cozy?
- Try a classic white subway tile pattern for a timeless, clean feel.
- Use patterned peel-and-stick tiles to add a pop of color and personality.
- Combine neutral tiles with one or two accent tiles to create subtle interest.
- Consider metallic or textured tiles for a modern, sophisticated edge.
Experiment with layout too—horizontal, vertical, or herringbone patterns change the room’s energy. What style would make you excited to spend more time cooking?
Adding A Tile Overlay
Adding a tile overlay is a clever way to transform ugly kitchen tiles without tearing everything out. It lets you cover up the old tiles with new ones, giving your kitchen a fresh look quickly and often on a budget. This approach works especially well if your existing tiles are still firmly attached and the surface is even.
Materials For Overlay
You’ll need materials that stick well to the old tiles and stand up to kitchen use. Popular choices include:
- Thin-set mortar:A strong adhesive that bonds new tiles directly over old ones.
- Tile backer board:Sometimes used to create a smooth base if the old tiles are uneven.
- New tiles:Choose lightweight tiles like porcelain or ceramic for easier installation.
- Grout and sealant:These finish the job and protect your new tile surface.
Have you checked if your current tiles are firmly stuck? Loose tiles can cause problems for an overlay.
Step-by-step Installation
Start by cleaning your old tiles thoroughly. Remove any grease and dirt to ensure good adhesion.
Next, roughen the tile surface with sandpaper or a grinder. This helps the thin-set mortar grip better.
Mix your thin-set mortar according to the package instructions. Spread it evenly over the old tiles using a notched trowel.
Press your new tiles into place, applying consistent pressure. Use tile spacers to keep even gaps for grout.
Let the mortar dry as recommended, then fill the gaps with grout. Finally, seal the grout to protect it from moisture and stains.
Does your kitchen tile pattern allow for easy tile placement, or will you need to cut tiles for a perfect fit?
Cost And Time Considerations
| Factor | Details | Average Cost | Estimated Time |
|---|---|---|---|
| Materials | Thin-set mortar, tiles, grout, sealant | $100 - $300 | 1 day for prep and installation |
| Labor | DIY or professional installation | DIY: Free; Pro: $300 - $700 | 1-2 days depending on size |
| Total | Overall project cost and duration | $100 - $1000 | 1-3 days |
Would investing a few days and some money in a tile overlay be worth the fresh, updated kitchen look you want?
Credit: designertrapped.com
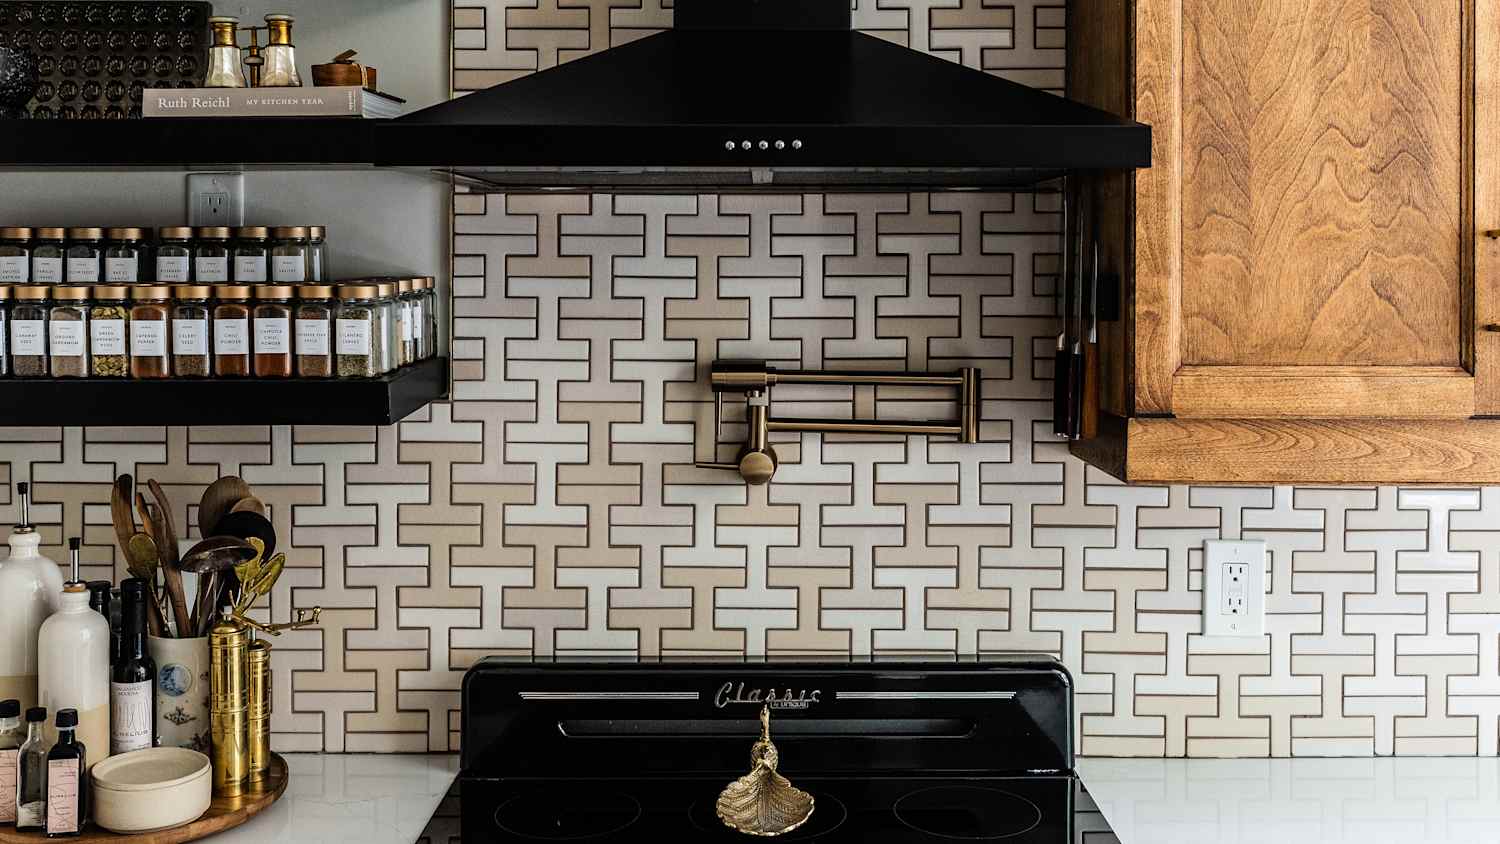
Incorporating Creative Backsplash Solutions
Ugly kitchen tiles can spoil the whole look of your cooking space. Covering them up with creative backsplash ideas can make a big difference. Choose solutions that suit your style and budget. These ideas will hide tiles and add charm.
Using Beadboard Or Wood Panels
Beadboard or wood panels bring warmth and texture to the kitchen. They are easy to install over existing tiles. Paint or stain them for a fresh look. Wood panels create a cozy, rustic feel. Beadboard adds classic charm and can brighten the area.
Applying Wallpaper Or Fabric
Wallpaper or fabric can add patterns and colors to the backsplash. Use water-resistant wallpaper designed for kitchens. Fabric backed with clear adhesive or sealed with a protective layer works too. Choose simple designs for a clean look. This option offers endless style choices at low cost.
Using Mirrors Or Metal Sheets
Mirrors or metal sheets reflect light and open up space visually. Stainless steel or copper sheets give a modern or industrial look. Mirrors make the kitchen appear larger and brighter. These materials are easy to clean and very durable. They add a sleek touch while hiding old tiles completely.
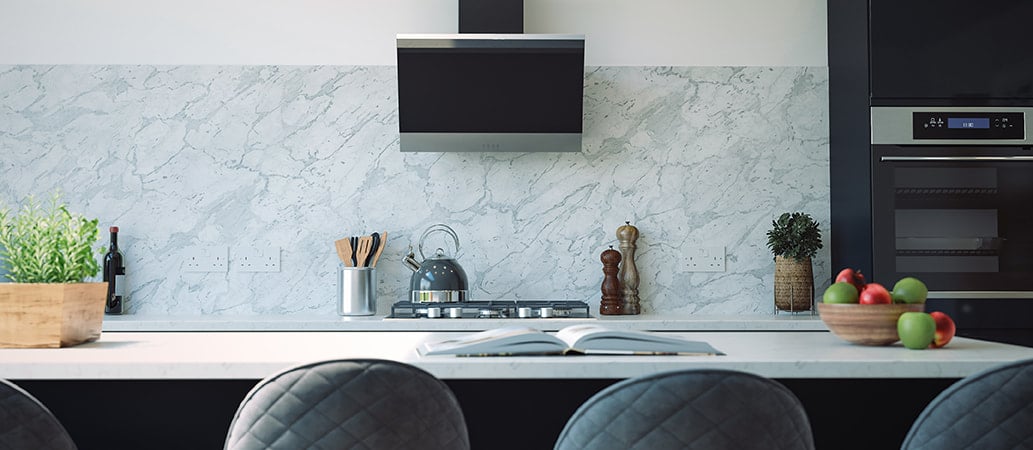
Accessorizing To Distract And Enhance
Ugly kitchen tiles don’t have to steal the spotlight. You can shift attention away by adding stylish accessories that both distract and enhance your space. Thoughtfully chosen elements can turn your kitchen into a charming area, making those tiles feel like a background detail rather than a focal point.
Choosing Colorful Accessories
Bright and bold accessories grab the eye immediately. Think about vibrant dish towels, colorful countertop containers, or playful utensil holders. These small pops of color can change the room’s energy and make the tiles less noticeable.
Try mixing different hues that complement each other. For example, if your tiles are dull gray, add turquoise or mustard yellow items. You’ll find your kitchen feels fresh and lively without a full renovation.
Using Open Shelves And Plants
Open shelves offer a great way to add personality and soften harsh tile patterns. Use them to display attractive dishes, cookbooks, or unique jars. This draws focus to the shelf contents rather than the wall behind them.
Adding plants can also make a huge difference. Their natural green color and organic shapes break up the monotony of tiles. Plus, they bring a bit of life and freshness that brightens the entire kitchen.
Lighting Tricks
Lighting can dramatically change how your kitchen looks and feels. Use under-cabinet LED strips or spotlights to highlight countertops and accessories. This creates shadows and layers that hide tile imperfections.
Warm light bulbs soften harsh tile colors. Experiment with different types of lighting to see what makes your kitchen feel more inviting and less focused on the tiles. What lighting setup could you try tonight?
Maintaining Your Kitchen Makeover
Maintaining your kitchen makeover is key to keeping your space fresh and inviting. Once you’ve covered up those ugly tiles, the next step is to protect your investment and ensure your kitchen stays beautiful over time. Simple care routines and small habits can make a big difference in preserving the look and feel of your updated kitchen.
Cleaning Painted Tiles
Cleaning painted tiles requires a gentle approach. Avoid harsh scrubbing or abrasive cleaners that can chip the paint. Use a soft cloth or sponge with mild soap and warm water to wipe down surfaces.
Have you noticed how quickly grime builds up in the kitchen? Regular, light cleaning prevents stubborn stains and keeps your painted tiles looking new. Dry the tiles immediately after washing to avoid water spots or damage.
Protecting Stickers And Overlays
Stickers and tile overlays add style but need careful handling. Protect them from moisture and heat to prevent peeling or fading. Applying a clear sealant or varnish can extend their lifespan and enhance durability.
Consider where you place these covers—avoid areas near the stove or sink where water and steam are frequent. Have you ever had a sticker peel off at the worst moment? A little extra care can save you from that frustration.
Regular Upkeep Tips
- Wipe spills immediately to prevent stains and damage.
- Use a soft brush to clean grout lines gently.
- Avoid using metal scrubbers or bleach on your tiled surfaces.
- Inspect overlays and painted areas monthly for signs of wear.
- Touch up paint chips quickly to maintain a seamless look.
How often do you check your kitchen tiles for small damages? Catching issues early keeps your makeover looking flawless and saves you time and money. A little attention now prevents major repairs later.

Credit: www.architecturaldigest.in
Frequently Asked Questions
How Can I Hide Ugly Kitchen Tiles Cheaply?
Use peel-and-stick tile decals or paint tiles with tile-specific paint. These methods are affordable and quick. Both options refresh your kitchen without removing tiles, saving time and money.
What Materials Work Best To Cover Kitchen Tiles?
Tile paint, peel-and-stick tiles, and beadboard panels work well. They are durable, easy to install, and improve kitchen aesthetics. Choose based on your style and budget.
Can I Paint Over Kitchen Tiles Safely?
Yes, with proper prep, tile paint adheres well. Clean tiles thoroughly, sand lightly, and use a primer. Use paint designed for tiles to ensure durability.
How Long Does Covering Tiles With Decals Last?
High-quality peel-and-stick decals last 5 to 7 years. They resist moisture and stains but may peel in high-traffic areas. Proper surface prep extends their lifespan.
Conclusion
Ugly kitchen tiles don’t have to stay that way. Simple fixes can change the whole look fast. Painting or adding peel-and-stick tiles works well. Covering tiles with wood or fabric adds warmth. Even rearranging kitchen items can distract from tiles.
Small changes make a big difference in your space. Try one or combine a few ideas to refresh your kitchen. Enjoy your improved kitchen without costly renovations or stress. Your kitchen can feel bright and fresh again.