
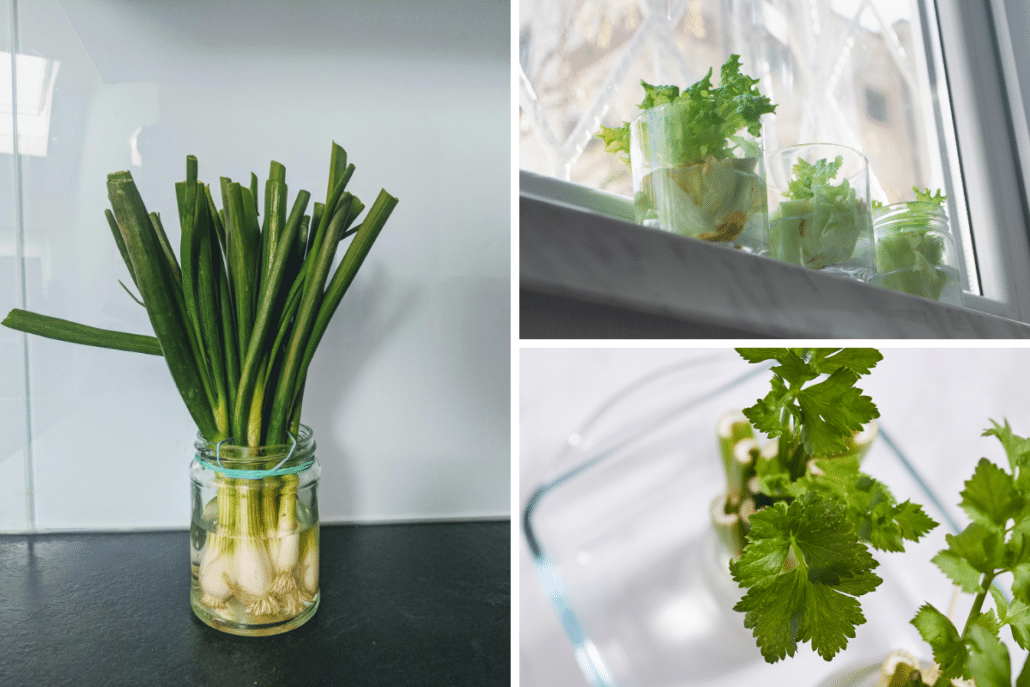
Have you ever wondered if you could turn your kitchen scraps into fresh, crunchy celery? Imagine saving money and reducing waste by growing your own celery right at home, using parts you would normally toss away.
It’s easier than you think, and you don’t need a garden or fancy tools. In this guide, you’ll discover simple steps to grow celery from scraps, so you can enjoy homegrown flavor and watch your kitchen waste come to life.
Ready to see how your leftover celery can become a fresh new plant? Let’s get started!
Choosing The Right Celery Stalks
Choosing the right celery stalks is key for successful regrowth. Healthy stalks provide strong roots and fresh leaves. Picking the best pieces ensures your celery grows fast and looks good.
Selecting Fresh Stalks
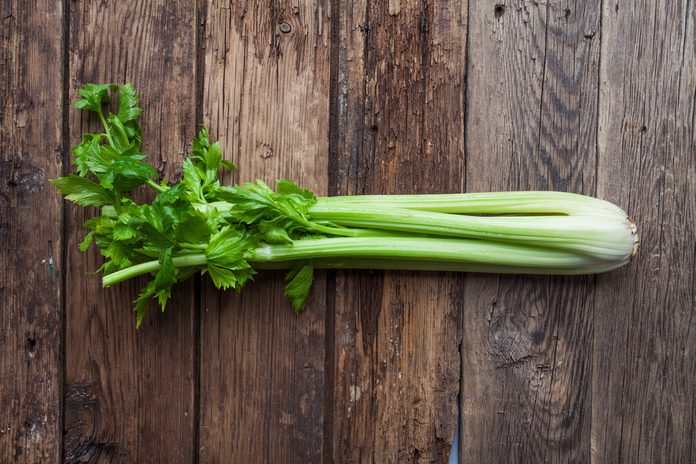
Pick celery stalks that look crisp and firm. Avoid stalks that are soft or wilted. Bright green color shows freshness and good health. Stalks with no brown spots or cracks work best. Fresh celery has a clean smell without any sourness.
Identifying Healthy Bases
Focus on the base of the celery stalk. It should be thick and sturdy. Avoid bases that are slimy or dried out. A healthy base has no mold or dark patches. Cut the base about 2 inches from the bottom. This part will help new roots grow quickly.
Credit: www.familyhandyman.com
Preparing Celery For Regrowth
Preparing celery for regrowth is a simple but crucial step to ensure your kitchen scraps turn into a thriving plant. The way you cut and trim your celery directly affects how well it will grow back. Paying attention to these details saves you time and frustration, turning your leftover celery base into a green success.
Cutting The Base Correctly
Start by cutting the celery stalks off, leaving about 2 to 3 inches of the base intact. Make sure to use a sharp knife to get a clean cut; jagged edges can invite bacteria and slow growth.
Place the celery base in a shallow dish with just enough water to cover the bottom. Changing the water every day keeps it fresh and encourages new shoots to form.
Have you noticed how some bases sprout faster than others? That usually depends on how clean and even the cut is. Aim for a smooth cut to boost your celery’s chances.
Trimming Leaves And Stalks
After you cut the base, trim any remaining leaves and stalks down to the base level. This helps the plant focus energy on root and new shoot development instead of supporting dying leaves.
Trim brown or wilted parts carefully, as they can cause mold or rot if left on. Healthy bases without extra foliage tend to regrow stronger and faster.
Try to keep the trimmed base in a warm spot with indirect sunlight. This environment mimics natural conditions and supports quicker regrowth.
Regrowing Celery In Water
Place the celery base in a shallow bowl of water, keeping the bottom submerged. Change the water every few days to encourage new roots and fresh green growth. Watch as celery regrows from scraps right on your kitchen windowsill.
Regrowing celery from kitchen scraps is a simple, eco-friendly activity. You only need a few household items and some patience. This method is perfect for beginners and those short on garden space. Let's explore how to regrow celery in water.
Setting Up The Container
Choose a small, shallow container. A mason jar or a bowl works well. Fill it with enough water to cover the bottom of the celery base. Place the celery base cut-side up in the container. Ensure the root end is submerged in water. Position the container on a sunny windowsill. Sunlight is crucial for growth.
Changing Water Regularly
Change the water every two days. Fresh water prevents bacteria and mold. It also keeps the celery healthy. Use room temperature water for the best results. This keeps the plant comfortable.
Monitoring Root Growth
Watch for root growth over the next week. Small roots will appear from the bottom. Once roots are visible, the celery is ready to plant. The leaves will start growing too. This indicates healthy progress. Keep an eye on both roots and leaves. This ensures your celery grows successfully.

Credit: www.astigvegan.com
Transferring Celery To Soil
Transferring celery from kitchen scraps to soil is a vital step in growing healthy plants. The celery base, after sprouting roots, needs proper soil and care to thrive. Moving it to soil helps the plant develop strong roots and fresh stalks. This process supports its growth beyond the initial water stage.
Choosing The Right Pot And Soil
Select a pot with good drainage holes to prevent waterlogging. A container about 6 to 8 inches deep works well for celery roots. Use rich, well-draining soil that holds moisture but does not stay soggy. A mix of potting soil and compost offers nutrients and good structure. Avoid heavy clay or sandy soils, which harm root growth.
Planting Techniques
Fill the pot with soil, leaving space for the celery base. Gently place the celery stalk base in the soil with roots facing down. Cover the roots and part of the stalk with soil, but keep the top leaves above soil. Press the soil lightly around the base to secure it. Keep the plant upright and stable for best growth.
Watering And Care Tips
Water the celery immediately after planting to settle the soil. Keep the soil consistently moist, as celery prefers damp conditions. Avoid letting the soil dry out completely or become waterlogged. Place the pot in a spot with indirect sunlight for 6 hours daily. Trim dead or yellow leaves to encourage fresh growth. Fertilize lightly every two weeks with a balanced liquid fertilizer for healthy plants.
Maintaining Healthy Celery Plants
Keeping your celery plants healthy is key to getting crisp, flavorful stalks from those kitchen scraps. Healthy plants grow stronger roots and resist common problems that can stunt growth. Paying attention to their needs daily can make a huge difference in your celery's success.
Light Requirements
Celery loves bright, indirect sunlight. Aim for at least 6 hours of light each day to keep your plants thriving.
If you notice your celery stretching or leaning toward the light, it might not be getting enough. Try moving your plant closer to a sunny window or use a grow light if natural light is limited.
Fertilizing Tips
Celery is a heavy feeder, so regular fertilizing helps it grow lush and strong. Use a balanced liquid fertilizer every 2-3 weeks during the growing season.
Too much fertilizer can burn the plant, so dilute it to half strength. Organic options like compost tea also work well and improve soil health over time.
Pest And Disease Prevention
Watch out for pests like aphids and slugs, which can damage your celery leaves and slow growth. Check your plants regularly and remove pests by hand or spray with a gentle insecticidal soap.
Good air circulation helps prevent fungal diseases, so avoid overcrowding your celery. Water at the base to keep leaves dry and reduce the risk of mold or rot.

Credit: www.everydaycheapskate.com
Harvesting And Using Regrown Celery
Harvesting regrown celery is an exciting moment after weeks of care. Knowing the right time to pick and how to use your homegrown celery helps you enjoy fresh, tasty stalks. It also keeps your celery growing longer and healthier. This section guides you through harvesting and using celery regrown from kitchen scraps.
When To Harvest
Harvest celery once the stalks reach 6 to 8 inches tall. The leaves should look green and fresh, not yellow or wilted. Check the base for firm, thick stalks. Avoid harvesting too early, as the celery will be small and less flavorful.
Harvest by cutting stalks close to the base with a sharp knife. Leave the inner stalks to keep growing. You can harvest repeatedly every few weeks if you take only outer stalks. This encourages new growth and extends your celery’s life.
Best Uses For Homegrown Celery
Homegrown celery is crisp and full of flavor. Use it fresh in salads for a crunchy touch. Add chopped celery to soups and stews for extra texture and taste.
- Include celery in stir-fries for a healthy crunch
- Use celery sticks as a snack with dips like hummus
- Add celery to smoothies for a fresh, green boost
- Make homemade stock with celery scraps for rich flavor
Fresh celery from your kitchen scraps offers more taste than store-bought. It’s a great way to reduce waste and enjoy garden-fresh produce.
Troubleshooting Common Issues
Troubleshooting common issues while growing celery from kitchen scraps can save your plants and improve your success rate. Small problems like mold or slow growth can seem discouraging, but they often have simple fixes. Paying attention to these issues early can keep your celery thriving and ready to enjoy again.
Preventing Mold And Rot
Mold and rot usually happen when celery scraps sit in water too long or the environment is too damp. Avoid this by changing the water every couple of days to keep it fresh and oxygen-rich. Make sure the celery base is not submerged too deeply; just enough to cover the roots is enough.
Using a shallow dish with good drainage can also help. If you notice any fuzzy white or gray spots, rinse the base gently and swap the water immediately. Have you checked if your kitchen window gets enough sunlight? Mold thrives in dark, stagnant spaces, so a sunny spot can make a big difference.
Dealing With Slow Growth
Slow growth is a sign your celery needs a boost. It might lack sufficient light, warmth, or nutrients. If your celery stalks look pale or thin, try moving them to a brighter window or supplement with a small grow light.
Temperature matters too. Celery prefers moderate warmth—too cold slows growth dramatically. If your kitchen is chilly, try placing the container near a warm appliance or cover it lightly with plastic to create a mini greenhouse effect.
Have you tried feeding your celery scraps? Adding a weak liquid fertilizer or a pinch of compost in the water can speed up root and leaf development. Sometimes, a small change makes a big difference in your celery’s comeback journey.
Saving Money And Reducing Waste
Saving money and reducing waste go hand in hand when you start growing celery from kitchen scraps. Instead of tossing out the leftover celery base, you can turn it into a fresh supply of greens right on your windowsill. This simple habit not only cuts your grocery bills but also helps you rethink what “waste” really means in your kitchen.
Benefits Of Regrowing Kitchen Scraps
Regrowing celery from scraps saves you money because you reuse what you already have. You don’t need to buy new seeds or plants, which means fewer trips to the store and less spending. Plus, you get fresh celery stalks that you can harvest repeatedly over weeks.
It’s also a fun way to watch your food grow and encourages you to cook more with fresh ingredients. Have you ever noticed how much edible material ends up in the trash? Growing from scraps helps reduce that waste significantly.
Eco-friendly Gardening Practices
Using kitchen scraps to grow celery supports eco-friendly gardening. It lowers the demand for packaged produce, which often involves plastic wrapping and long-distance shipping. By growing at home, you reduce your carbon footprint.
Additionally, you avoid food waste that contributes to landfill methane emissions. Composting is great, but regrowing gives your scraps a second life as food instead of just breaking down. How might your daily habits shift if you thought twice before throwing away veggie ends?
Frequently Asked Questions
How Do You Regrow Celery From Kitchen Scraps?
To regrow celery, cut the base about 2-3 inches tall. Place it in a shallow bowl of water. Keep it in a sunny spot. Change water every 2 days. New growth appears in 1-2 weeks, then transplant to soil for best results.
How Long Does Celery Take To Grow From Scraps?
Celery usually takes 3-4 weeks to show significant regrowth in water. After transplanting to soil, it may take 2-3 months to mature fully. Growing time depends on conditions like sunlight, temperature, and water quality.
What Soil Is Best For Growing Celery Scraps?
Celery thrives in rich, well-draining soil. Use soil high in organic matter with good moisture retention. A loamy soil with a pH of 6. 0-7. 0 works best. Keep soil consistently moist but not waterlogged for healthy growth.
Can Celery Scraps Regrow Indoors Successfully?
Yes, celery scraps can regrow indoors with proper care. Provide bright, indirect sunlight and keep the water or soil moist. Indoor humidity helps prevent drying. Regularly rotate the container for even growth.
Conclusion
Growing celery from kitchen scraps saves money and reduces waste. It takes just a few days to see new growth. Place the celery base in water, then transfer it to soil. Watch roots and leaves develop with simple care. This method suits small spaces and beginners alike.
Try it yourself and enjoy fresh celery at home. Gardening can be easy and rewarding. Give it a chance—you might be surprised!