
Have you ever wondered if you could turn your everyday kitchen scraps into fresh, tasty mushrooms right at home? It might sound surprising, but growing mushrooms from leftovers is easier than you think.
Imagine saving money, reducing waste, and enjoying homegrown mushrooms—all by using things you usually throw away. In this guide, you’ll discover simple steps to transform your kitchen waste into a mini mushroom farm. Keep reading, and you’ll be amazed at how quickly you can start growing your own mushrooms with just a little effort and some common scraps.

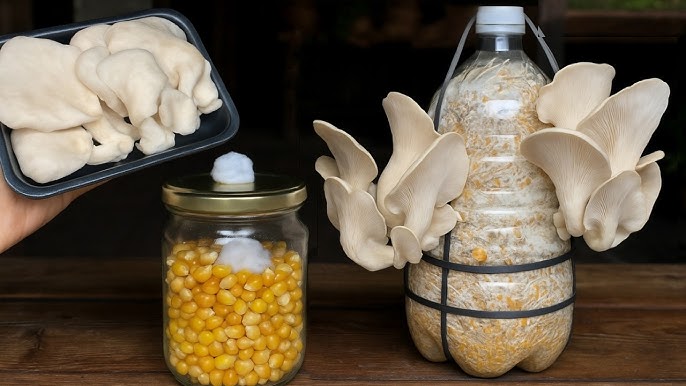
Credit: www.youtube.com
Benefits Of Growing Mushrooms At Home
Growing mushrooms at home offers many benefits beyond just fresh food. It creates a positive impact on the environment and your wallet. Home-grown mushrooms also provide a nutritious boost to your meals. This simple practice turns kitchen scraps into valuable resources.
Eco-friendly Waste Reduction
Mushrooms grow well on kitchen waste like coffee grounds and vegetable peels. This process reduces the amount of trash sent to landfills. It helps lower methane gas emissions from decomposing food. Using scraps for mushrooms supports a cleaner and greener home.
Fresh And Nutritious Harvest
Home-grown mushrooms are free from harmful chemicals and pesticides. They provide a rich source of vitamins, minerals, and antioxidants. Fresh mushrooms taste better and have a firmer texture than store-bought ones. Growing them yourself ensures a steady supply of healthy food.
Cost Savings And Sustainability
Growing mushrooms at home cuts down grocery bills. It requires minimal space and low startup costs. Using kitchen scraps means no extra spending on growing materials. This sustainable practice promotes self-sufficiency and reduces reliance on commercial farming.
Best Kitchen Scraps For Mushroom Growth
Choosing the right kitchen scraps is key to growing healthy mushrooms. Mushrooms need organic material to feed on. Certain scraps provide the best nutrients and support fast growth. Using scraps from your kitchen saves waste and gives mushrooms a great start. Below are the best scraps to use for mushroom cultivation.
Coffee Grounds And Tea Leaves
Used coffee grounds are rich in nitrogen, perfect for mushroom growth. They are moist and easy for mushrooms to break down. Tea leaves offer similar benefits with nutrients that fungi love. Both scraps are easy to collect from daily kitchen use. Avoid coffee with added oils or flavors. Spread grounds and leaves evenly in your mushroom bed.
Vegetable Peels And Stems
Vegetable scraps like peels and stems add variety to mushroom food. Potato skins, carrot tops, and celery ends work well. These scraps contain fiber and minerals mushrooms need. Chop them into small pieces for faster decomposition. Avoid citrus peels because they can be too acidic. Mixing different vegetable scraps helps create a balanced diet for fungi.
Other Suitable Organic Materials
Besides coffee and vegetables, other organic scraps boost mushroom growth. Eggshells add calcium but should be crushed finely. Paper towels and cardboard pieces provide cellulose, a good food source. Avoid oily or salty scraps as they harm mushrooms. Clean, dry leaves from your garden can also help. Combine these materials to create a rich growing medium for mushrooms.
Selecting The Right Mushroom Varieties
Selecting the right mushroom varieties is key to a successful kitchen scrap growing project. Different mushrooms thrive on different materials. Some grow quickly and easily, while others need more care and time. Knowing which type fits your scraps and space helps you get better results. This guide covers popular mushroom types that suit kitchen waste well.
Oyster Mushrooms
Oyster mushrooms grow fast and tolerate many scrap types. They like cardboard, coffee grounds, and straw. These mushrooms have a mild flavor and a soft texture. They fruit in just a few weeks. Oyster mushrooms are ideal for beginners. Their strong growth and simple needs make them popular.
Button Mushrooms
Button mushrooms grow on composted materials like old vegetable scraps. They take longer to grow than oyster mushrooms. These mushrooms have a firm texture and a mild, earthy taste. They need stable temperature and humidity. Button mushrooms are common in stores and kitchens. They work well if you have a steady supply of kitchen waste.
Shiitake And Other Options
Shiitake mushrooms prefer hardwood sawdust or logs but can grow on some kitchen scraps mixed with sawdust. They have a rich, smoky flavor. Shiitake mushrooms take longer to grow, usually a few months. Other varieties like Lion's Mane or Enoki may need special conditions. Choose varieties based on your scrap types, space, and time for growing.

Credit: www.greenunion.co.uk
Preparing Your Growing Medium
Preparing your growing medium is a crucial step to successfully grow mushrooms from kitchen scraps. The right preparation ensures a clean, nutrient-rich environment where mushroom mycelium can thrive. Taking the time to properly sterilize, mix, and set up your container will give you the best chance at a bountiful harvest.
Sterilizing Kitchen Scraps
Kitchen scraps can carry harmful bacteria and mold that compete with mushroom spores. To prevent this, sterilize your scraps by heating them. You can steam or boil them for at least 30 minutes to kill off unwanted microbes.
After heating, let the scraps cool in a clean environment. This step reduces contamination risks and creates a safer space for mycelium growth. Have you noticed how a simple sterilization step can save your entire mushroom batch from failure?
Mixing With Substrate Materials
Kitchen scraps alone usually don’t provide the right texture or nutrients for mushrooms. Mix them with a substrate like straw, sawdust, or coffee grounds. This blend offers a balanced structure and food source for the mushrooms.
Try a ratio of about 60% substrate to 40% kitchen scraps. Too many scraps can make the mix soggy, while too little may lack nutrients. Experiment with different combinations to see what works best for your mushroom variety.
Setting Up The Growing Container
Choose a container that holds moisture well but allows air exchange, such as plastic bins with holes or grow bags. Layer your prepared medium inside, pressing it lightly without compacting it too much.
Keep the container in a warm, dark place with good humidity. Have you thought about how container choice affects mushroom growth speed and yield? Small changes here can make a big difference in your mushroom garden’s success.
Inoculating With Mushroom Spawn
Inoculating with mushroom spawn is the key step to start growing mushrooms from kitchen scraps. This process introduces the mushroom mycelium into a prepared substrate, allowing mushrooms to grow effectively. Understanding the types of spawn, how to inoculate correctly, and maintaining the right conditions ensures healthy mushroom growth.
Types Of Mushroom Spawn
Mushroom spawn comes in several forms. Each type suits different growing setups and mushrooms.
- Sawdust Spawn:Fine sawdust mixed with mycelium, easy to spread in substrates.
- Grain Spawn:Grains like rye or millet fully colonized by mycelium, used for quick colonization.
- Plug Spawn:Wooden dowels inoculated with mycelium, ideal for logs or wood-based substrates.
- Syringe Spawn:Liquid culture containing mycelium spores, good for sterile environments.
Inoculation Techniques
Inoculation introduces spawn into the substrate. Cleanliness is crucial to avoid contamination.
- Break the kitchen scraps into small pieces for better colonization.
- Mix spawn evenly with the substrate for uniform growth.
- Use gloves to keep the process sanitary.
- Place the inoculated substrate in a clean container or bag.
Maintaining Ideal Conditions
Proper conditions help mushroom mycelium thrive after inoculation.
- Keep temperature between 65°F and 75°F (18°C to 24°C).
- Maintain humidity around 85% to 95% for best growth.
- Provide indirect light to encourage mushroom fruiting.
- Ensure good airflow to prevent mold and stale air.

Credit: www.simpleecology.com
Caring For Your Mushroom Garden
Caring for your mushroom garden is a vital part of ensuring a healthy and bountiful harvest. Mushrooms are sensitive organisms that thrive under specific conditions. Paying close attention to their environment helps you avoid common pitfalls and enjoy the satisfaction of watching them grow right from your kitchen scraps.
Temperature And Humidity Control
Mushrooms need a consistent temperature to grow well. Most varieties prefer a range between 55°F and 70°F (13°C to 21°C). Too hot or too cold can slow growth or even kill your crop.
Humidity is just as important as temperature. Aim to keep it around 80-90% by misting your mushroom garden regularly. A small spray bottle works perfectly for this task. Have you noticed how dry air quickly shrinks your mushrooms? Keeping humidity high prevents that.
Light And Air Circulation
Mushrooms don’t need direct sunlight, but they do require some light to trigger fruiting. A few hours of indirect natural light or a low-wattage LED light each day is enough. Too much light can dry them out, so balance is key.
Fresh air circulation keeps your mushrooms healthy by reducing the risk of mold and other contaminants. Open a window nearby or use a small fan on a low setting, but avoid strong drafts. How often do you check if your mushroom bed feels stuffy? Proper airflow keeps them happy and growing.
Monitoring Growth Progress
Check your mushroom garden daily to catch early signs of trouble. Look for discoloration, unusual smells, or slimy patches—these could indicate contamination. If you notice these, remove the affected area immediately to protect the rest.
Tracking growth also helps you learn your mushrooms’ patterns. Use a notebook or smartphone to log when you mist, adjust temperature, or see new growth. Over time, these records can reveal what works best for your specific setup. Are you ready to become a mushroom-growing expert through observation?
Harvesting And Storing Mushrooms
Harvest mushrooms gently to avoid bruising. Store them in a paper bag inside the fridge for better freshness. Keep them dry to prevent spoilage.
Harvesting and storing mushrooms is an exciting part of growing them. Once your mushrooms are ready, proper harvesting and storage ensure their freshness. This section guides you through the process, ensuring your mushrooms remain delicious and safe to eat.
When To Harvest
Harvest mushrooms when their caps open. Look for caps that have fully spread but not curled edges. This is a sign they are mature. They should feel firm to the touch.
Safe Harvesting Methods
Use a sharp knife or scissors. Cut the stem close to the base. Avoid pulling mushrooms as it can damage the mycelium. Leave a small part of the stem to promote regrowth. Always handle mushrooms gently to avoid bruising.
Storage Tips For Freshness
Store fresh mushrooms in a paper bag. This allows them to breathe and stay dry. Avoid plastic bags; they trap moisture and cause spoilage. Keep them in the refrigerator for up to a week. For longer storage, consider drying or freezing. This preserves their flavor and texture.
Troubleshooting Common Issues
Growing mushrooms from kitchen scraps can be a rewarding experience, but it doesn’t always go smoothly. You might face issues that slow down growth or spoil your batch. Understanding common problems and how to fix them can save your harvest and help you enjoy fresh mushrooms sooner.
Contamination Problems
Contamination is one of the biggest challenges in mushroom cultivation. If you notice strange colors like green, black, or pink on your substrate, it’s likely mold or bacteria invading your setup. This often happens when the environment is too wet or not clean enough.
To prevent contamination, always sterilize your kitchen scraps before use. Use a clean workspace and tools, and wash your hands thoroughly. If contamination appears, remove the affected parts quickly to stop it from spreading, or start fresh if it’s widespread.
Slow Or No Growth
Sometimes, your mushrooms may take longer than expected to grow or might not grow at all. This can happen if the temperature is too low or too high, or if the substrate lacks enough nutrients. Mushrooms prefer a consistent, humid environment with moderate temperatures.
Check if your growing area stays between 60-75°F (15-24°C), and keep the humidity around 80-90%. If growth still stalls, try adding fresh coffee grounds or spent grain to your scraps to boost nutrients. Have you noticed that slight changes in temperature can make a big difference in your mushroom growth?
Pests And Mold Prevention
Pests like flies and mites can attack your mushroom setup, and mold can quickly take over if conditions aren’t right. Keeping your growing area clean and well-ventilated reduces these risks. Avoid overcrowding your substrate to allow good airflow.
Use fine mesh covers or netting to keep pests out without blocking air. Regularly inspect your mushrooms for signs of pests or mold and act fast if you spot any. What small changes in your setup could help you keep pests at bay?
Expanding Your Mushroom Projects
Growing mushrooms from kitchen scraps turns waste into fresh food. Use leftover vegetables and coffee grounds to create a simple growing medium. This eco-friendly method saves money and reduces trash.
Expanding your mushroom projects can be both exciting and rewarding. Once you've mastered growing mushrooms from kitchen scraps, you might find yourself eager to explore new possibilities. Whether you're looking to increase your yield or discover creative ways to use your harvest, there's no shortage of options.
Scaling Up Production
To grow more mushrooms, consider utilizing larger containers or expanding your growing space. You might start by using bigger buckets or trays, allowing for a more substantial amount of substrate. This can lead to a more abundant harvest, providing you with plenty of mushrooms to enjoy and share. Think about experimenting with different types of mushrooms. While you might be starting with oyster mushrooms, expanding to shiitake or lion's mane can diversify your crop. Each type has unique growing requirements, adding a layer of complexity and excitement to your project. You could also explore outdoor cultivation if you have the space. Logs, straw bales, or even small garden beds can serve as excellent environments for certain mushroom varieties. This approach not only scales up your production but also integrates your mushroom cultivation into your broader gardening efforts.
Creative Uses For Mushrooms
Mushrooms are incredibly versatile, lending themselves to countless culinary adventures. Try incorporating your harvest into your favorite recipes, or get creative with new dishes. From savory soups to gourmet pizzas, mushrooms can elevate any meal. Beyond cooking, consider other ways to use your mushrooms. They can be dried for longer storage or turned into powder for seasoning. Mushroom teas and tinctures are gaining popularity for their health benefits, providing another avenue to explore. You might also look into using mushrooms for non-culinary purposes. Certain species have applications in natural dyeing processes or even in eco-friendly packaging solutions. This creative exploration can open up new horizons for your mushroom projects.
Sharing And Selling Your Harvest
As your mushroom yield increases, sharing your harvest can bring joy to friends and family. Surprise them with a fresh batch of mushrooms or a homemade mushroom dish. It’s a great way to connect and share your passion for growing. If you produce more than you can consume, consider selling your mushrooms locally. Farmers' markets, community-supported agriculture (CSA) programs, or even local restaurants might be interested in fresh, homegrown mushrooms. This venture can not only bring in some extra income but also introduce more people to the wonders of home mushroom cultivation. Engage with local gardening or cooking groups to share your experiences and tips. This can lead to valuable connections and even collaborative projects. Who knows, your mushroom-growing journey might inspire others to start their own.
Frequently Asked Questions
What Kitchen Scraps Are Best For Growing Mushrooms?
Best scraps include coffee grounds, vegetable peels, and sawdust. Avoid oily or acidic scraps. These provide nutrients for mushroom mycelium growth.
How Long Does It Take To Grow Mushrooms From Scraps?
Mushrooms typically take 2 to 4 weeks to grow. Time varies based on mushroom type, temperature, and moisture levels.
Can I Grow Mushrooms Indoors Using Kitchen Scraps?
Yes, mushrooms grow well indoors with controlled humidity and temperature. Use a clean container and ensure indirect light for best results.
How Do I Prepare Kitchen Scraps For Mushroom Cultivation?
Chop scraps finely and pasteurize by heating to kill contaminants. Cool them before inoculating with mushroom spawn for healthy growth.
Conclusion
Growing mushrooms from kitchen scraps saves waste and grows fresh food. It’s simple and fun for anyone to try at home. Just gather your scraps, keep them moist, and watch mushrooms appear. This method helps reduce trash and adds nutrition to meals.
Small effort, big rewards. Give it a go and enjoy fresh mushrooms right from your kitchen!