
Have you ever tossed out vegetable peels or fruit scraps without a second thought? What if you could turn those kitchen leftovers into a thriving garden instead?
Growing plants from kitchen scraps is easier than you think, and it’s a fun way to save money while reducing waste. Imagine watching new life sprout right from the things you usually throw away. You’ll discover simple steps to transform your kitchen scraps into healthy, growing plants.
Ready to see your scraps come alive? Let’s dive in and make your kitchen waste work for you!
Choosing Kitchen Scraps
Choosing the right kitchen scraps is key to growing healthy plants. Not all scraps will grow well or at all. Some scraps sprout easily and quickly. Others might rot or fail to grow roots. Picking the best scraps saves time and effort.
Best Scraps For Regrowing
Some kitchen scraps regrow fast and need little care. These scraps have strong roots or shoots inside them. They can grow new plants from small parts.
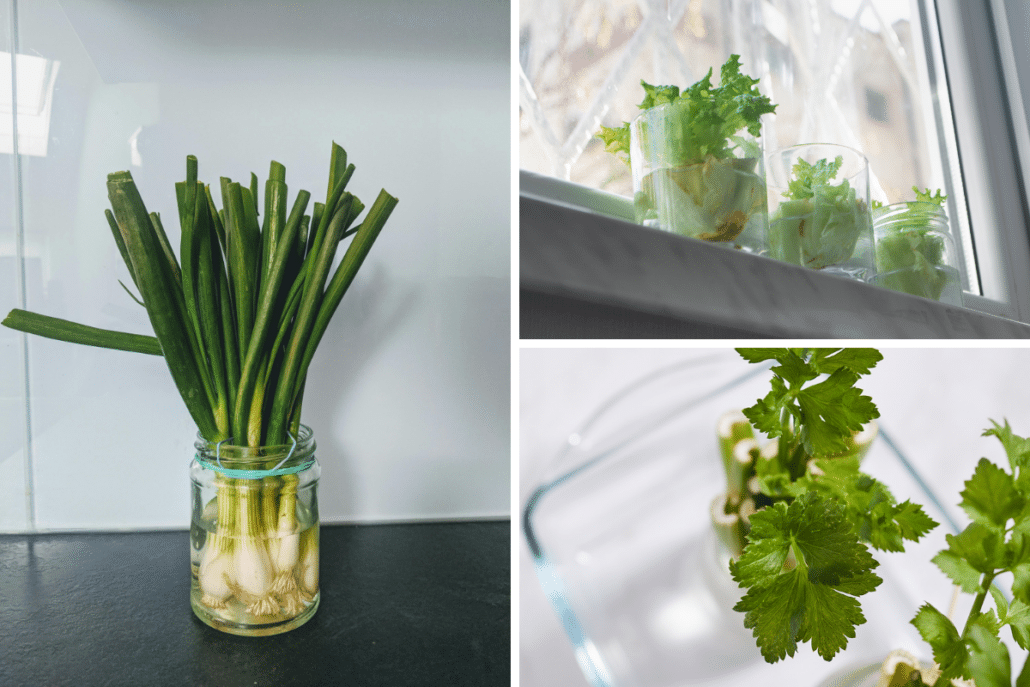
- Green onions:Place the white root ends in water for quick regrowth.
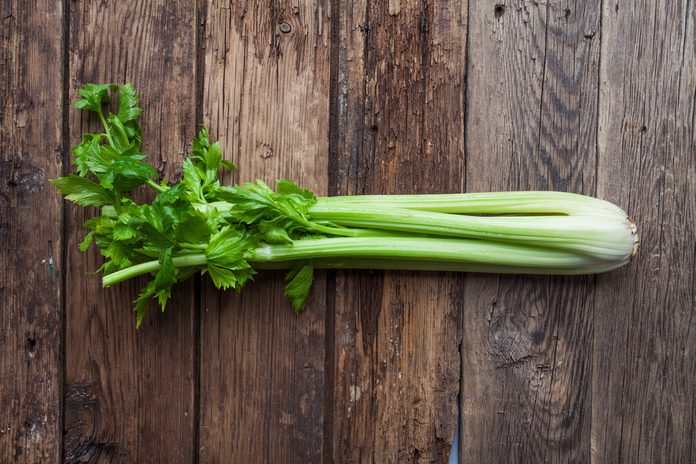
- Lettuce and celery:Use the base of the stalk and place it in shallow water.
- Carrot tops:The leafy green tops can regrow in water or soil.
- Garlic cloves:Plant a clove with the root side down to sprout new shoots.
- Potato eyes:Cut a potato with eyes and plant it in soil.
- Herb stems:Basil, mint, and cilantro stems root easily in water.
Scraps To Avoid
Not all scraps regrow well or are safe to grow. Some scraps rot quickly or do not sprout roots. Avoid scraps that show signs of mold or rot.
- Citrus peels:They do not regrow and can attract pests.
- Cooked vegetables:They will rot and do not grow new plants.
- Banana peels:They decompose but don’t sprout roots.
- Meat or dairy scraps:Not plant material and will attract pests.
- Old or dried scraps:They usually will not sprout healthy roots.

Credit: shopping.yahoo.com
Preparing Scraps For Planting
Preparing kitchen scraps for planting is a key step in growing healthy plants. Proper preparation helps scraps root better and reduces the risk of rot or disease. Clean and trim your scraps to remove any dirt or damaged parts. Choose the right method to start growing, either using water or soil. Each method supports root growth in different ways.
Cleaning And Trimming
Rinse scraps under cool water to remove dirt and bacteria. Use clean scissors or a knife to cut off browned or soft areas. Trim scraps to about 2-4 inches, depending on the plant type. Make fresh cuts to expose healthy tissue and encourage new roots. Avoid using scraps with mold or rot, as they won't grow well.
Using Water Or Soil Methods
Water method:
- Place scraps in a clear glass or jar filled with water.
- Change the water every 2-3 days to keep it fresh.
- Keep the container in a sunny spot but avoid direct sunlight.
- Watch for roots to grow from the base of the scrap.
Soil method:
- Fill a small pot with well-draining potting soil.
- Plant the scrap with the trimmed end down, about 1-2 inches deep.
- Water gently to moisten the soil without soaking it.
- Place the pot in indirect sunlight and keep the soil moist.
Planting Techniques
Kitchen scraps like carrot tops and celery bases can grow new plants easily. Simply place scraps in water or soil and watch roots develop. This simple method saves money and reduces waste.
Growing plants from kitchen scraps is not only a delightful way to reduce waste but also an exciting opportunity to witness the magic of nature up close. The key to success lies in mastering the right planting techniques. Whether you're using water or soil, each method has its unique charm and set of requirements. Let’s dive into how you can transform those scraps into thriving plants.
Water Propagation Tips
Water propagation is a simple yet effective way to start growing plants from scraps. It allows you to clearly see the roots developing, which can be quite rewarding. Start by selecting a clear jar or glass; this way, you can easily monitor the water level and root growth. Ensure the water is changed every few days to prevent stagnation and bacteria buildup. You might be surprised at how fast roots can develop when they have fresh water. Place the jar in a well-lit area, but avoid direct sunlight. Too much sun can overheat the water and damage the delicate roots.
Soil Planting Tips
Once roots have sprouted, soil planting becomes the next step to nurture your new plant. Choose a well-draining potting mix to provide the right environment for your plant to thrive. Compact soil can suffocate the roots and hinder growth. Bury the rooted end of the scrap about an inch deep into the soil. Gently press the soil around the base to secure it in place. Water the soil lightly until it's evenly moist, but be cautious not to overwater, as this can lead to root rot. Position your potted plant in a spot with plenty of indirect sunlight. Regularly check the soil moisture and adjust watering frequency as needed. Have you ever tried growing your own food from kitchen scraps? It's amazing to see how a little patience and care can turn waste into a mini garden. Give it a try and experience the joy of watching your kitchen remnants come to life.
Caring For Regrown Plants
Caring for regrown plants is key to turning kitchen scraps into thriving greenery. These plants need gentle attention and the right environment to grow strong. Small changes in light, water, and nutrients make a big difference in their health.
Light And Temperature Needs
Most regrown plants thrive in bright, indirect sunlight. Direct sun can burn young leaves. A spot near a window with filtered light works well.
Keep the temperature steady, between 65°F and 75°F (18°C to 24°C). Avoid cold drafts or hot, dry air from heaters. These conditions stress the plants and slow growth.
Watering And Fertilizing
Water regrown plants when the top inch of soil feels dry. Overwatering causes root rot. Use a pot with drainage holes to prevent water buildup.
Add a mild liquid fertilizer every two weeks during the growing season. This helps supply nutrients that kitchen scraps may lack. Dilute fertilizer to half strength to avoid burning roots.
Common Challenges
Growing plants from kitchen scraps is fun and eco-friendly. Yet, it comes with some common challenges. These issues can slow down growth or even kill your plants. Recognizing and addressing these problems early helps keep your plants healthy.
Dealing With Mold And Rot
Mold and rot often appear on kitchen scraps left too wet or in poor air circulation. These fungi can harm the plants by damaging roots or stems. To avoid this, use dry containers and change the water regularly. Avoid planting scraps that already show signs of decay.
Keeping the soil or water clean stops mold growth. If mold appears, gently rinse the plant scraps and let them dry before replanting. Using a well-draining potting mix also helps prevent rot by removing excess moisture quickly.
Preventing Pests
Pests like aphids, mites, and small bugs can attack plants grown from scraps. They feed on tender leaves and stems, causing damage. Check your plants often for signs of pests. Early detection prevents infestations from spreading.
Use natural pest control methods, such as spraying water to remove bugs or introducing beneficial insects. Keeping the growing area clean and removing dead leaves reduces places for pests to hide. Avoid chemical pesticides to keep the plants safe and edible.
Harvesting And Transplanting
Harvesting and transplanting are crucial steps when growing plants from kitchen scraps. Knowing the right time to harvest ensures your new plants are healthy and ready to thrive. Transplanting carefully moves your plants to a better environment, giving them room to grow strong and productive.
When To Harvest
Watch your plants closely as they grow from scraps. Harvest leaves or shoots when they look vibrant and healthy, usually after a few weeks. For root vegetables or bulb scraps, wait until new growth appears and the roots start to develop.
Harvesting too early can stunt growth, while waiting too long might make the plant tough or bitter. Use clean scissors or gently twist off leaves to avoid damaging the plant. Have you noticed how some scraps sprout faster than others? That’s your cue to check regularly.
Moving Plants Outdoors
Before moving your plants outside, harden them off by gradually exposing them to outdoor conditions. Start with a few hours in the shade and slowly increase sunlight and time over a week. This helps your plants adjust without shock.
Choose a spot with appropriate sunlight based on the plant type—leafy greens prefer partial shade, while tomatoes need full sun. Make sure the soil is loose and well-drained to encourage root growth. Have you prepared your garden space to welcome these new plants comfortably?
When transplanting, dig a hole slightly larger than the root ball, place the plant gently, and cover it with soil. Water immediately to settle the soil and reduce transplant stress. Keep an eye on your plants after transplanting; they might need extra water and protection from harsh weather.
Creative Uses For Regrown Plants
Regrowing plants from kitchen scraps opens up a world of creative possibilities beyond just saving money and reducing waste. These new plants can add life and freshness to your home in unique ways that you might not have considered before. Let’s look at how you can turn your regrown plants into something truly special.
Indoor Gardens
Creating an indoor garden with regrown plants is both fun and rewarding. You can use scraps from green onions, lettuce, or celery to start a small garden right on your kitchen windowsill. This not only provides fresh ingredients for your meals but also brightens your space with natural greenery.
Try grouping different regrown plants together in colorful pots or recycled containers. This makes watering easier and adds a vibrant, natural touch to your home décor. Have you noticed how caring for plants can improve your mood? Indoor gardens bring a bit of calm and nature inside, making your daily routine more enjoyable.
Gifts And Decorations
Regrown plants make thoughtful, eco-friendly gifts. Imagine giving someone a small pot of basil or mint that you started from kitchen scraps. It’s a gift that keeps on growing and shows you care about sustainability.
You can also use regrown plants as decorations for your table or shelves. Place a cluster of regrown herbs in mason jars or clear glasses to create charming, natural centerpieces. These living decorations are more meaningful than store-bought items and can spark interesting conversations about gardening and waste reduction.
Have you ever thought about how a simple kitchen scrap can turn into a beautiful gift or a unique décor piece? It’s a great way to share your green thumb with others and inspire them to try it too.
Credit: www.familyhandyman.com

Credit: www.youtube.com
Frequently Asked Questions
How Do I Start Growing Plants From Kitchen Scraps?
Begin by selecting healthy scraps like potato eyes or green onion bases. Place them in water or soil. Keep them in sunlight and change water regularly. Roots and shoots will grow within days, ready for planting or continued growth.
Which Kitchen Scraps Grow Best Into Plants?
Green onions, garlic, potato eyes, celery bases, and carrot tops grow well. These scraps root quickly and regenerate edible parts. Choose fresh, healthy scraps for better success. Avoid spoiled or moldy pieces.
How Long Does It Take For Scraps To Sprout Roots?
Roots usually form within 5 to 14 days, depending on the scrap. Green onions and garlic sprout faster, around 5-7 days. Potato eyes and celery may take up to two weeks. Keep scraps moist and in indirect sunlight.
Can All Vegetable Scraps Grow Into New Plants?
Not all scraps regrow successfully. Leafy greens like lettuce or cabbage may regrow leaves but not roots. Root vegetables and bulbs like carrots and onions are ideal. Experiment with different scraps for best results.
Conclusion
Growing plants from kitchen scraps saves money and reduces waste. It also brings fresh greens right to your home. Anyone can start with simple scraps like potato peels or carrot tops. Just follow easy steps and be patient. Watching new plants grow feels rewarding and fun.
Try this eco-friendly method and enjoy a small garden. It connects you to nature and healthy eating. Give it a go today!