
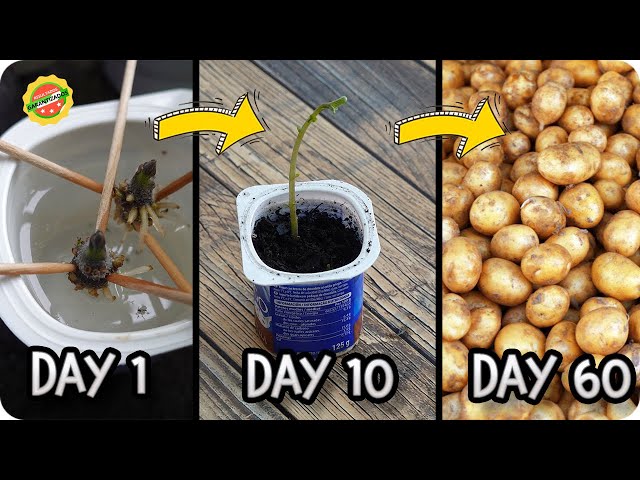
Have you ever wondered if you could turn your leftover potato scraps into a fresh batch of potatoes? What if you could grow your own food right from your kitchen, saving money and reducing waste at the same time?
Growing potatoes from kitchen scraps is easier than you think—and it’s a rewarding way to bring new life to something you might usually toss out. You’ll discover simple steps to transform those potato pieces into a thriving crop. Ready to see how your scraps can become a tasty harvest?
Keep reading to unlock the secrets of growing potatoes from your kitchen leftovers.
Choosing Potato Scraps
Choosing the right potato scraps is crucial for growing healthy plants. Not all kitchen scraps will grow well. Picking good pieces sets the foundation for success. Focus on selecting parts with strong potential to sprout.
Selecting Healthy Potato Eyes
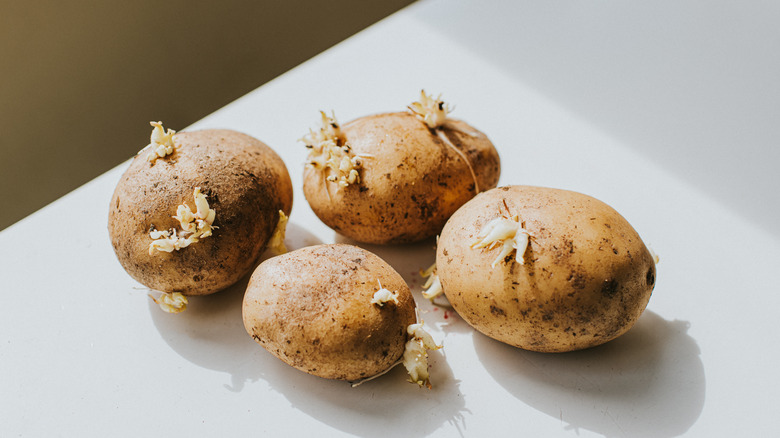
Potato eyes are small buds where new shoots grow. Look for pieces with several firm, plump eyes. Avoid eyes that are shriveled or dry. Healthy eyes appear slightly raised and have a light color. These eyes will sprout quickly and produce strong stems.
Choose potato scraps with eyes spaced apart. This allows multiple shoots to grow without crowding. Cut larger potatoes into pieces with at least one or two eyes each. This increases the chance of healthy growth.
Avoiding Spoiled Pieces
Discard any potato scraps that show signs of rot or mold. Soft spots or dark patches indicate spoilage. These pieces will not grow and can spread disease. Also avoid scraps that are shriveled or dehydrated.
Inspect every piece carefully before planting. Healthy potato scraps feel firm and solid. Clean scraps by gently wiping off dirt, but do not wash them. Wet pieces can rot faster.
Preparing Scraps For Planting
Preparing potato scraps for planting is a key step in growing healthy plants. Proper preparation helps the scraps develop strong sprouts and roots. It also reduces the risk of rotting. This process involves cutting the potatoes correctly and encouraging sprout growth before planting.
Cutting And Curing Potato Pieces
Start by selecting healthy potatoes with visible eyes. Use a clean knife to cut them into pieces. Each piece should have at least one or two eyes. The pieces should be about 1 to 2 inches in size.
After cutting, place the pieces on a dry surface. Let them sit for 2 to 3 days in a cool, dark place. This curing process helps form a protective layer over the cut areas. It prevents rotting when planted.
Promoting Sprout Growth
Move the cured potato pieces to a bright, cool area. Avoid direct sunlight as it can dry them out. Leave the pieces for 1 to 2 weeks. Small sprouts will start to grow from the eyes.
Sprouts about 1 inch long are ideal for planting. If the sprouts grow too long, handle the pieces carefully to avoid breaking them. Healthy sprouts signal strong future plants.
Planting Techniques
Planting potatoes from kitchen scraps is simple with the right techniques. Proper planting helps your potatoes grow strong and healthy. It starts with preparing the soil correctly and planting at the perfect depth and spacing. These steps give your potatoes room to grow and access to nutrients.
Soil Preparation Tips
Choose loose, well-drained soil for planting potatoes. Avoid heavy clay or compacted soil. Work the soil deeply to break up clumps. Remove stones and weeds that block growth. Mix in compost or aged manure to add nutrients. This improves soil texture and fertility. A slightly acidic soil with pH 5.5 to 6.5 suits potatoes best. Water the soil lightly before planting to keep it moist but not wet.
Ideal Planting Depth And Spacing
Plant potato scraps about 4 inches deep into the soil. This depth protects the pieces and helps roots develop. Space each piece 12 inches apart to give tubers room to grow. Leave about 2 to 3 feet between rows for easy access and air circulation. Cover the scraps with soil gently to avoid damaging them. Proper spacing reduces competition for nutrients and sunlight. This leads to bigger and more potatoes at harvest time.

Credit: www.youtube.com
Caring For Growing Potatoes
Caring for your growing potatoes is essential to ensure a healthy and bountiful harvest. Paying attention to their basic needs helps prevent common problems like rot or stunted growth. You’ll find that small, consistent actions make a big difference in the quality of your potatoes.
Watering And Sunlight Needs
Potatoes need consistent moisture, especially once the plants start to grow. Too little water causes the tubers to be small and misshapen, while too much water can lead to rot. Aim to keep the soil evenly moist but not soggy.
Sunlight is equally important. Potatoes thrive in full sun, meaning they need at least 6 hours of direct sunlight daily. If your kitchen scraps are sprouting in a shady spot, consider moving them to a sunnier location to boost growth.
Fertilizing And Mulching
Feeding your potatoes can speed up growth and increase yield. Use a balanced fertilizer with equal parts nitrogen, phosphorus, and potassium, or a fertilizer specifically for root vegetables. Apply fertilizer every 3-4 weeks according to the package instructions.
Mulching helps keep soil temperature steady and retains moisture. Use straw, grass clippings, or shredded leaves to cover the base of your plants. Mulch also prevents weeds, which compete for nutrients and water, so don’t skip this step.
Harvesting And Storing
Growing potatoes from kitchen scraps is a rewarding experience. Knowing how to harvest and store them is key. Proper techniques ensure your efforts pay off with delicious potatoes.
Signs Potatoes Are Ready
Watch for the right signs. The plants will yellow and die back. This indicates that the potatoes are ready to harvest. Gently dig around the base to check their size. Ensure they are firm and fully grown. Avoid harvesting during wet conditions. Wet soil can cause damage to the potatoes.
Proper Storage Methods
Store potatoes correctly to extend their shelf life. First, cure them for a week. Place them in a dry, dark place at room temperature. This toughens their skin for longer storage. After curing, move them to a cooler area. A temperature of 45°F to 50°F is ideal. Use burlap or paper bags to allow air circulation. Keep them away from onions. Onions can make potatoes spoil faster. Regularly check for any signs of spoilage.
Credit: www.tastingtable.com
Troubleshooting Common Issues
Growing potatoes from kitchen scraps can be fun and rewarding. Sometimes, issues arise that slow growth or harm plants. Troubleshooting these problems helps keep your crop healthy and strong. Understanding common issues saves time and improves your harvest.
Pest And Disease Management
Pests like aphids, beetles, and wireworms attack potato plants. These bugs chew leaves and tubers, reducing yield. Use natural pest control options to protect plants.
- Handpick visible insects off plants.
- Spray plants with a mild soap solution to remove pests.
- Encourage beneficial insects like ladybugs to control pests.
- Keep the growing area clean to avoid attracting bugs.
Diseases such as blight and rot cause leaves to yellow and tubers to decay. Remove infected parts immediately. Avoid watering leaves to reduce fungal infections. Plant in well-drained soil and rotate crops yearly.
Dealing With Poor Growth
Slow or stunted growth signals nutrient or environmental problems. Potatoes need loose, fertile soil rich in organic matter. Add compost or aged manure to improve soil quality.
- Check soil moisture; avoid too much or too little water.
- Ensure plants get at least six hours of sunlight daily.
- Thin crowded plants to give space for tubers to grow.
- Test soil pH; potatoes prefer slightly acidic soil (pH 5.0-6.0).
Yellow leaves often mean nitrogen deficiency. Add a balanced fertilizer or natural amendments like fish emulsion. Consistent care helps potatoes grow healthy and strong.

Credit: www.youtube.com
Frequently Asked Questions
How Do I Start Growing Potatoes From Kitchen Scraps?
Begin by selecting healthy potato scraps with eyes. Let them dry for a day. Plant in well-drained soil, 4 inches deep. Keep soil moist and provide sunlight. Harvest after 10-12 weeks when plants flower and die back.
What Soil Is Best For Growing Potatoes?
Potatoes grow best in loose, well-drained soil with a pH of 5. 0 to 6. 5. Enrich soil with organic matter like compost. Avoid heavy clay soils to prevent rot. Proper soil ensures healthy tuber development and good yield.
Can I Grow Potatoes Indoors From Scraps?
Yes, you can grow potatoes indoors using containers. Use a deep pot with drainage holes. Fill with loose soil and plant potato scraps with eyes up. Provide 6-8 hours of sunlight or use grow lights. Keep soil moist and well-drained.
How Long Does It Take To Grow Potatoes From Scraps?
Potatoes typically take 10 to 12 weeks to mature. This varies based on variety and growing conditions. Harvest when plants flower and foliage starts dying back. Early varieties may take less time, while late types may need longer.
Conclusion
Growing potatoes from kitchen scraps saves money and reduces waste. It’s a simple way to start gardening at home. With just a few steps, you can enjoy fresh potatoes. Watch your scraps turn into healthy plants over time. This method works well for beginners and experienced gardeners alike.
Try it in your kitchen or backyard and see the results. Gardening becomes fun and rewarding with easy projects like this. Give it a go and enjoy the fresh taste of homegrown potatoes.