
Are you looking to give your Ikea kitchen a fresh, polished look? Installing cover panels is one of the easiest ways to transform your space without a full renovation.
But if you’re unsure where to start or worried about making mistakes, you’re in the right place. This guide will walk you through every step, so you can confidently install Ikea kitchen cover panels yourself. By the end, you’ll have a sleek, seamless kitchen that looks professionally done—and all with your own hands.
Ready to upgrade your kitchen effortlessly? Let’s dive in!

Credit: www.reddit.com
Preparing For Installation
Preparing for the installation of Ikea kitchen cover panels sets the foundation for a smooth process. Careful preparation saves time and reduces errors. It involves collecting the right tools, measuring cabinets accurately, and selecting suitable panels. This preparation ensures the panels fit well and look great in your kitchen space.
Gathering Necessary Tools
Start by collecting tools needed for the installation. Common tools include:
- Measuring tape
- Level
- Drill with screwdriver bits
- Clamps
- Adhesive or screws (as recommended)
- Protective gloves
Having all tools ready prevents interruptions during the work. It also helps keep the workspace organized and efficient.
Measuring Your Kitchen Cabinets
Accurate measurements are crucial for a perfect fit. Measure the height, width, and depth of each cabinet surface. Record measurements clearly for each panel needed.
Double-check every measurement to avoid mistakes. Use a level to ensure cabinets are straight and even. This step helps in adjusting panels properly during installation.
Choosing The Right Cover Panels
Select panels that match your kitchen style and cabinet dimensions. Ikea offers various finishes and colors to complement your kitchen design. Consider the durability and material type suitable for your kitchen environment.
Check panel thickness and compatibility with your existing cabinets. Confirm that panels have proper mounting options for easy installation. Choosing the right panels ensures a lasting and attractive kitchen upgrade.

Credit: www.familyhandyman.com
Removing Old Panels
Removing old kitchen cover panels can feel like a chore, but it’s a key step to ensure your new Ikea panels fit perfectly. Taking your time here saves you headaches later. You’ll want to handle the old panels carefully to avoid damage and prepare your cabinets for a smooth makeover.
Detaching Existing Panels Safely
Start by inspecting how the panels are attached. Most Ikea kitchen panels are fixed with screws or clips behind the handles or edges. Use a screwdriver to loosen screws gently, avoiding stripping them.
Be cautious pulling off panels—force can crack wood or damage cabinet frames. If a panel feels stuck, check for hidden fasteners or adhesive spots. Patience pays off here; carefully wiggle panels free instead of yanking them off.
Have you ever rushed this step and ended up with chipped edges? Taking a moment to work methodically prevents those costly mistakes.
Cleaning The Cabinet Surfaces
Once the panels are off, your cabinets might look dusty or sticky. Clean all surfaces with a mild detergent and warm water to remove grease and dirt. This prepares the surface for new panels to adhere securely.
Use a soft cloth or sponge to avoid scratching. Pay special attention to corners and edges where grime tends to build up. A clean cabinet surface means better adhesion and a longer-lasting finish.
Try to avoid harsh chemicals that could damage wood or laminate surfaces. Your new panels deserve a clean, smooth foundation to shine on.
Fitting The New Cover Panels
Align the cover panels carefully with the kitchen cabinets. Secure them using screws or clips provided by Ikea. Ensure panels fit snugly for a clean, finished look.
Fitting new Ikea kitchen cover panels can transform the look of your space, adding a sleek, modern touch. However, the key to achieving a professional finish lies in proper installation. Paying attention to detail and following the right steps can make all the difference. Let’s dive into the essentials for fitting these panels like a pro.
Aligning Panels Correctly
Ensuring your panels are properly aligned is crucial. Misalignment can throw off the entire aesthetic of your kitchen. Start by measuring twice and marking the exact spots where the panels will go. Use a level to double-check your lines. I once thought I could eyeball it and ended up with a panel that looked like it was installed by someone with one eye shut. Lesson learned! Get those lines straight from the start.
Securing Panels With Screws And Adhesive
Once your panels are aligned, it's time to secure them. A combination of screws and adhesive offers the best hold. Apply a thin line of adhesive along the back edge of the panel. Press firmly and ensure the adhesive spreads evenly. Use screws sparingly but strategically to reinforce the hold, especially at the corners. Imagine the frustration of a panel peeling off while you're cooking! Securing them properly is worth the effort.
Adjusting For Perfect Fit
Even the most precise measurements can require minor adjustments. Take a step back and assess. Are there any gaps or overlapping edges? Use a fine-grit sandpaper to smooth out uneven edges. Adjustments are not a sign of failure; they're a part of the process. It’s like tailoring a suit—perfect fit takes patience and a few tweaks. How do you ensure a perfect fit in your projects? Share your tips in the comments!
Finishing Touches
Finishing touches are what transform your Ikea kitchen cover panels from a simple installation into a polished, professional-looking upgrade. These final steps ensure your kitchen not only looks great but also stands the test of daily use. Paying attention to details now can save you from headaches later.
Sealing Edges And Gaps
Sealing the edges and gaps around your cover panels helps prevent moisture and dirt from getting in. Use a paintable acrylic caulk or silicone sealant designed for kitchens. Apply it smoothly with a caulking gun, then wipe away excess with a damp cloth before it dries.
Have you noticed tiny gaps between panels and walls? Those can become breeding grounds for mold or pests if left open. Sealing them tight creates a cleaner look and adds durability to your kitchen surfaces.
Checking For Stability
Once the panels are in place, give each one a gentle push and pull to check for any wobbling or loose spots. Stability means your panels will stay put through everyday bumps and knocks. Tighten screws or add extra brackets if needed.
Imagine the frustration of a panel coming loose while you're washing dishes or cooking. Taking a moment now to ensure everything feels solid saves you from that hassle. Stability also boosts your confidence that the installation was done right.
Cleaning Up The Workspace
Cleaning your workspace after installation is more than just tidying up; it helps you spot any missed details. Remove dust, fingerprints, and leftover adhesive with a mild cleaner and soft cloth. Avoid harsh chemicals that might damage the panel finish.
Don’t forget to check your tools and leftover materials—put them away safely to prevent accidents. A clean kitchen invites you to enjoy your newly updated space without distraction or mess. How much more satisfying is a project when you end with a spotless area?
Troubleshooting Common Issues
Troubleshooting common issues during the installation of Ikea kitchen cover panels can save you time and frustration. Even with careful planning, you might face challenges like misaligned panels, surface imperfections, or loose attachments. Addressing these problems early helps maintain the sleek, professional look you want for your kitchen.
Fixing Misaligned Panels
Misaligned panels are a common hiccup that can throw off the entire aesthetic of your kitchen. Check if the cabinet doors or frames are level before attaching the panels. Sometimes, adjusting the hinges or repositioning the panels slightly can solve the issue.
If the panels still don’t line up, use a rubber mallet to gently tap them into place without causing damage. Are you noticing gaps between panels? Adding thin shims behind the panels can help even out the alignment. Remember, patience is key here—rushing this step often leads to uneven results.
Dealing With Surface Imperfections
Surface imperfections like scratches or dents can be frustrating, especially after careful installation. Light scratches can often be buffed out with a mild abrasive cleaner or a fine sanding sponge.
For deeper dents, consider using a wood filler that matches the panel’s finish. Apply it sparingly and sand it smooth once dry. Have you checked the lighting in your kitchen? Sometimes, imperfections appear worse under direct light but are hardly noticeable otherwise.
Handling Loose Attachments
Loose attachments can cause panels to wobble or fall off, damaging both the panel and the cabinet. Start by tightening all screws and clips securing the panels. If screws don’t hold well, use wall anchors or larger screws suited for the material.
Double-check that you’re using the right fasteners recommended by Ikea. If panels still feel unstable, applying a small amount of construction adhesive can provide extra hold. How secure do your panels feel when you gently push or pull them? This simple test can help you avoid future issues.

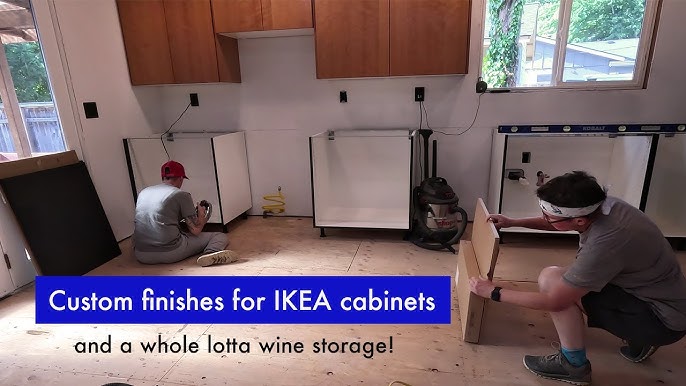
Credit: m.youtube.com
Frequently Asked Questions
How Do I Measure For Ikea Kitchen Cover Panels?
Measure the height, width, and depth of your cabinet fronts. Double-check measurements for accuracy. This ensures panels fit perfectly without gaps or overlaps.
What Tools Are Needed To Install Ikea Kitchen Cover Panels?
You will need a screwdriver, drill, measuring tape, level, and mounting brackets. These tools help secure panels safely and align them correctly on cabinets.
Can I Install Ikea Cover Panels Myself?
Yes, Ikea panels are designed for DIY installation. Follow the step-by-step instructions carefully. Basic handyman skills and the right tools are essential for success.
How Do I Attach Cover Panels To Ikea Cabinets?
Use the supplied mounting clips or brackets. Align the panel with cabinet edges, then secure it with screws. Ensure panels are flush and evenly spaced.
Conclusion
Installing Ikea kitchen cover panels is a simple way to refresh your space. Follow the steps carefully for a neat finish. Take your time to measure and align each panel right. Use the right tools to avoid damage or mistakes.
Enjoy the new look of your kitchen after the installation. Small changes can make a big difference in your home. Now, your kitchen looks tidy and stylish without much effort. Try this project to improve your kitchen’s appearance today.