
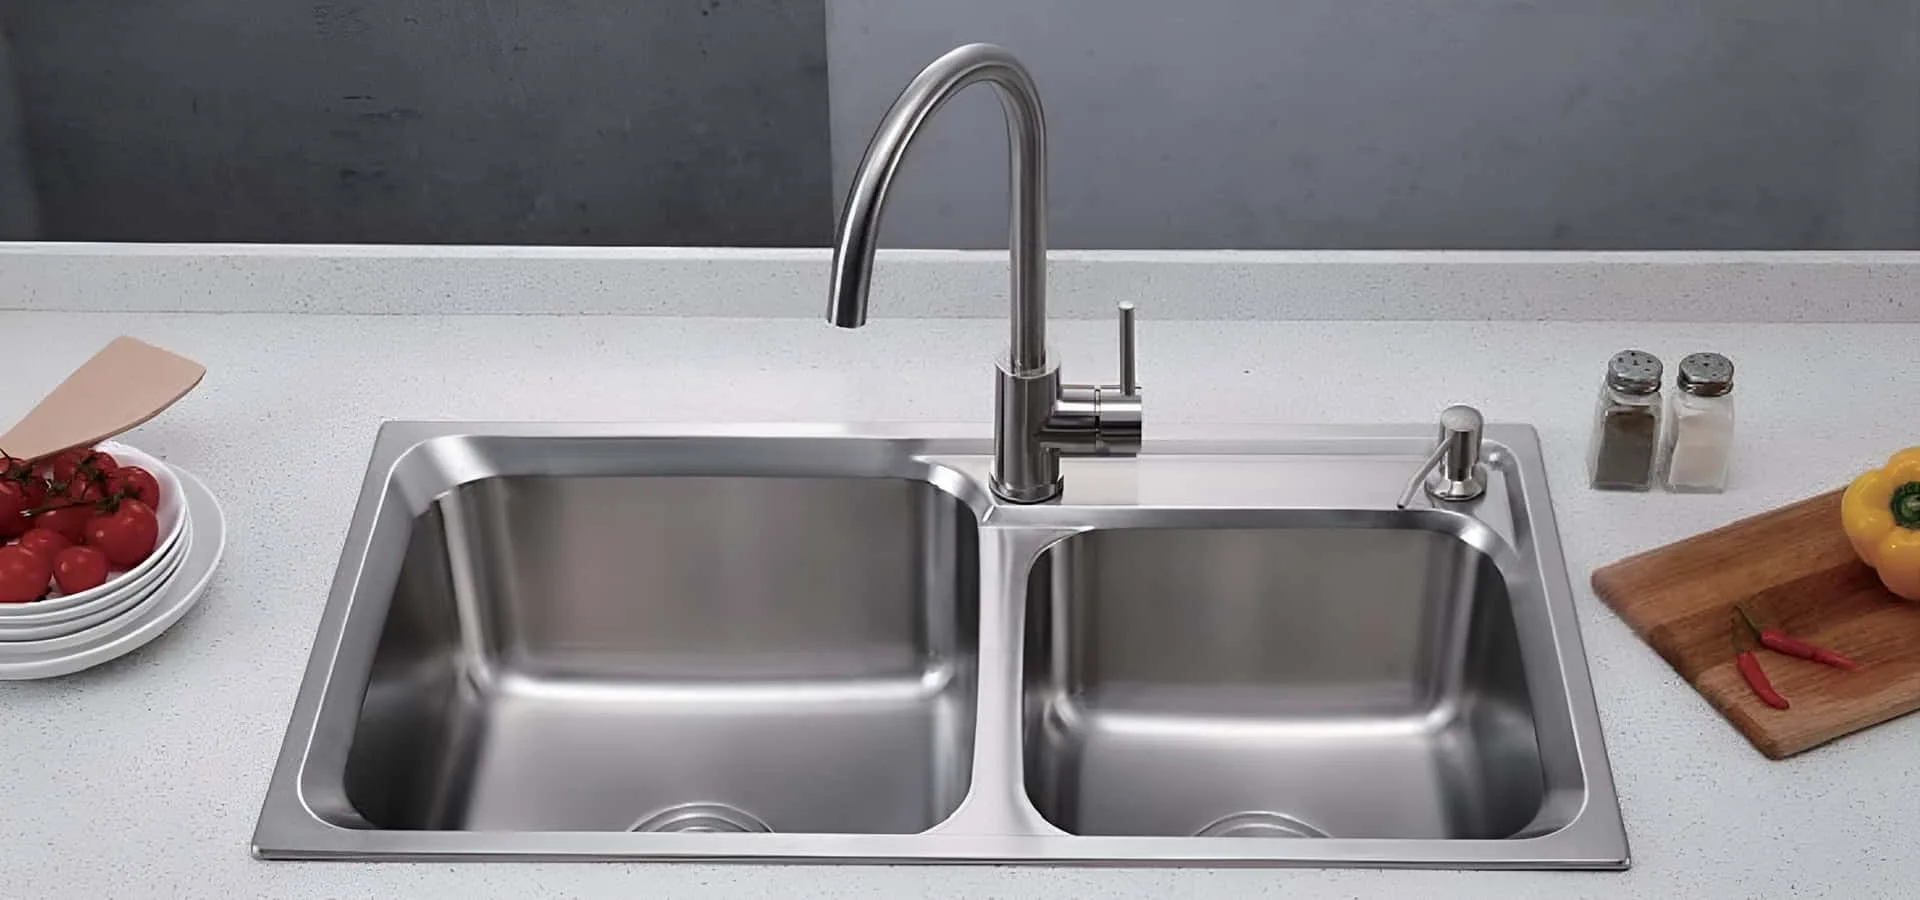
Are you tired of cluttered countertops and messy soap bottles around your kitchen sink? Installing a soap dispenser right at your sink can make your daily routine smoother and your kitchen look cleaner.
But how do you do it without calling a plumber or spending hours figuring it out? In this guide, you’ll learn exactly how to install a kitchen sink soap dispenser quickly and easily. By the end, you’ll have a neat, convenient setup that saves you time and keeps your kitchen looking great.
Keep reading to discover the simple steps that anyone can follow!
Tools And Materials Needed
Installing a kitchen sink soap dispenser is simpler when you have the right tools and materials on hand. Gathering everything beforehand saves you from frustrating interruptions mid-project. It also helps you feel confident as you move through each step.
Think about what you already have in your toolbox. Are your basic tools ready? If not, adding a few specific items will make your job smoother and faster.
Essential Tools
- Adjustable wrench:Perfect for tightening nuts and bolts in tight spots under the sink.
- Screwdriver (Phillips and flathead):Necessary to secure mounting hardware and screws.
- Drill with hole saw bit:Needed if your sink doesn’t have a pre-drilled hole for the dispenser.
- Plumber’s putty or silicone sealant:Seals the dispenser base to prevent leaks.
- Bucket and towels:To catch any water drips and keep your workspace dry.
Required Materials
- Kitchen sink soap dispenser kit:Includes the pump head, reservoir bottle, and mounting hardware.
- Replacement soap or dish detergent:Choose a soap that won’t clog the dispenser.
- Optional extension tube:Useful if your soap bottle sits further down under the sink.
Why These Tools Matter
Using the right tools saves time and prevents damage. For example, an adjustable wrench helps avoid stripping bolts, which can happen if you use pliers instead.
Have you ever tried to tighten a screw with the wrong screwdriver? It’s frustrating and often ruins the screw head. Having both Phillips and flathead screwdrivers ensures you’re prepared for any hardware type.
Preparing your workspace with a bucket and towels might sound basic, but it keeps your kitchen clean and prevents water damage. This small step can save you a lot of cleanup later.
Choose The Right Soap Dispenser
Choosing the right soap dispenser is important for both function and style. The dispenser should fit your kitchen sink and match your kitchen design. It must be easy to use and refill. Size and material also matter to ensure durability and convenience.
Think about how often you use soap and the type you prefer. Some dispensers work with liquid soap only, while others handle foam soap. Consider the soap type before buying.
Consider Sink Compatibility
Check the number of holes in your sink. Most soap dispensers need one hole for installation. Some sinks have extra holes for accessories, which can be used for a soap dispenser.
Measure the hole size to make sure the dispenser fits snugly. A loose fit can cause leaks or wobbling.
Choose The Right Material
Soap dispensers come in stainless steel, plastic, or chrome finishes. Stainless steel is strong and resists rust. Plastic models are budget-friendly but less durable. Chrome looks sleek but may show fingerprints.
Pick a material that matches your sink and lasts long.
Check Soap Capacity
Look for a dispenser with a large soap tank if you use soap often. Larger tanks mean fewer refills. Small tanks need more frequent refilling but save space.
Consider the size based on your kitchen use.
Manual Or Automatic Operation
Manual dispensers require pressing the pump to get soap. They are simple and affordable. Automatic dispensers use sensors to release soap without touching. They reduce germs but need batteries.
Choose the type that suits your needs and preferences.
Prepare The Sink Area
Clear the sink area and remove any items to create space. Check for a suitable hole or mark where the soap dispenser will go. Ensure the surface is clean and dry for easy installation.
Preparing the sink area is essential when installing a kitchen sink soap dispenser. A well-prepared area ensures a smooth installation process. It also helps avoid potential issues.
Clear The Surrounding Area
Remove any items around the sink. This includes cleaning products or sponges. A clear space helps avoid accidents. It also gives you more room to work.
Clean The Sink Surface
Wipe down the sink surface with a damp cloth. This removes dirt and debris. A clean surface ensures a better fit for the dispenser. It also helps the adhesive stick better.
Check For Existing Holes
Look for pre-drilled holes on your sink. Some sinks have extra holes for accessories. If there is one, measure it. Make sure it fits the soap dispenser.
Measure And Mark The Installation Spot
If no hole is available, choose a spot for the dispenser. Use a measuring tape for accuracy. Mark the spot with a pencil. Ensure it's within easy reach when you wash dishes.
Gather Necessary Tools
Prepare the tools you need for installation. Common tools include a drill, screwdriver, and wrench. Having tools ready speeds up the process.
Ensure Proper Lighting
Good lighting is crucial. It helps you see what you're doing. Use a lamp or flashlight if needed. Proper lighting reduces errors during installation.
Remove Old Dispenser Or Plug
Removing the old kitchen sink soap dispenser or plug is the first step in installing a new one. This task clears the space and makes room for the new dispenser. It requires some basic tools and a bit of patience. The process is simple but must be done carefully to avoid damage to the sink or plumbing.
Start by locating the dispenser or plug under the sink. It is usually attached to the sink with a mounting nut. Disconnect any hoses or tubes connected to the dispenser. Have a bucket or towel ready to catch any leftover soap or water.
Gather Necessary Tools
- Adjustable wrench or pliers
- Screwdriver
- Towel or rag
- Bucket or small container
Disconnect The Soap Dispenser Hose
Look under the sink for the hose connected to the dispenser. Hold the hose and gently twist or pull it off the dispenser. Be ready for some soap to drip out. Use a towel to clean any spills immediately.
Loosen The Mounting Nut
Find the mounting nut holding the dispenser or plug in place. Use an adjustable wrench or pliers to turn the nut counterclockwise. It may be tight, so apply steady pressure. Avoid forcing it to prevent damage.
Remove The Dispenser Or Plug
Once the mounting nut is loose, lift the dispenser or plug from the sink top. Wipe the area clean. Check for any old sealant or debris and remove it. This ensures a smooth installation of the new dispenser.
Insert New Soap Dispenser
Inserting a new soap dispenser in your kitchen sink is a simple task. It adds convenience and keeps your sink area neat. Focus on placing the dispenser correctly to avoid leaks and ensure smooth operation.
Prepare The Sink Hole
Clear any debris or old putty from the sink hole. Check the hole size matches the soap dispenser’s base. Clean the area well to help the dispenser sit firmly.
Insert The Dispenser Body
Push the soap dispenser body through the sink hole from above. Align it straight to avoid tilting. Hold it steady while securing from underneath.
Attach the mounting nut or bracket on the dispenser’s threaded shaft. Tighten it by hand first, then use a wrench for a snug fit. Avoid overtightening to prevent damage.
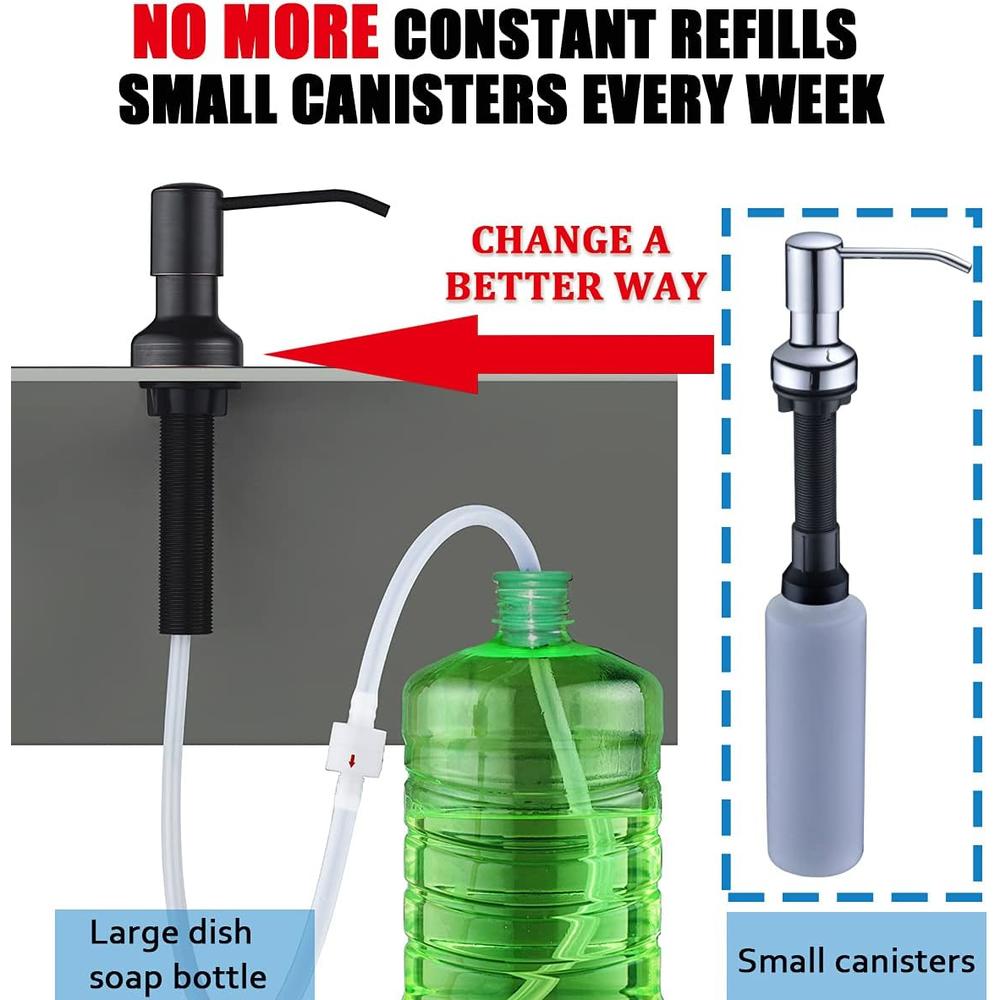
Screw the soap bottle onto the dispenser’s threaded shaft below the sink. Make sure it is secure but easy to remove for refills. Check the bottle position for easy access.
Connect The Pump Head
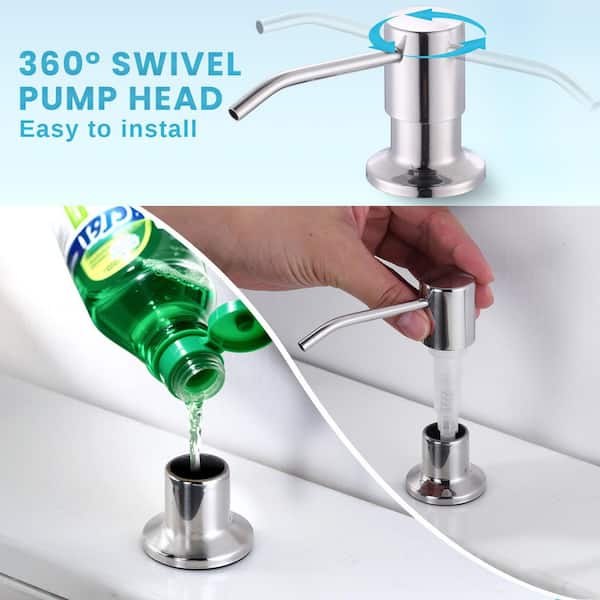
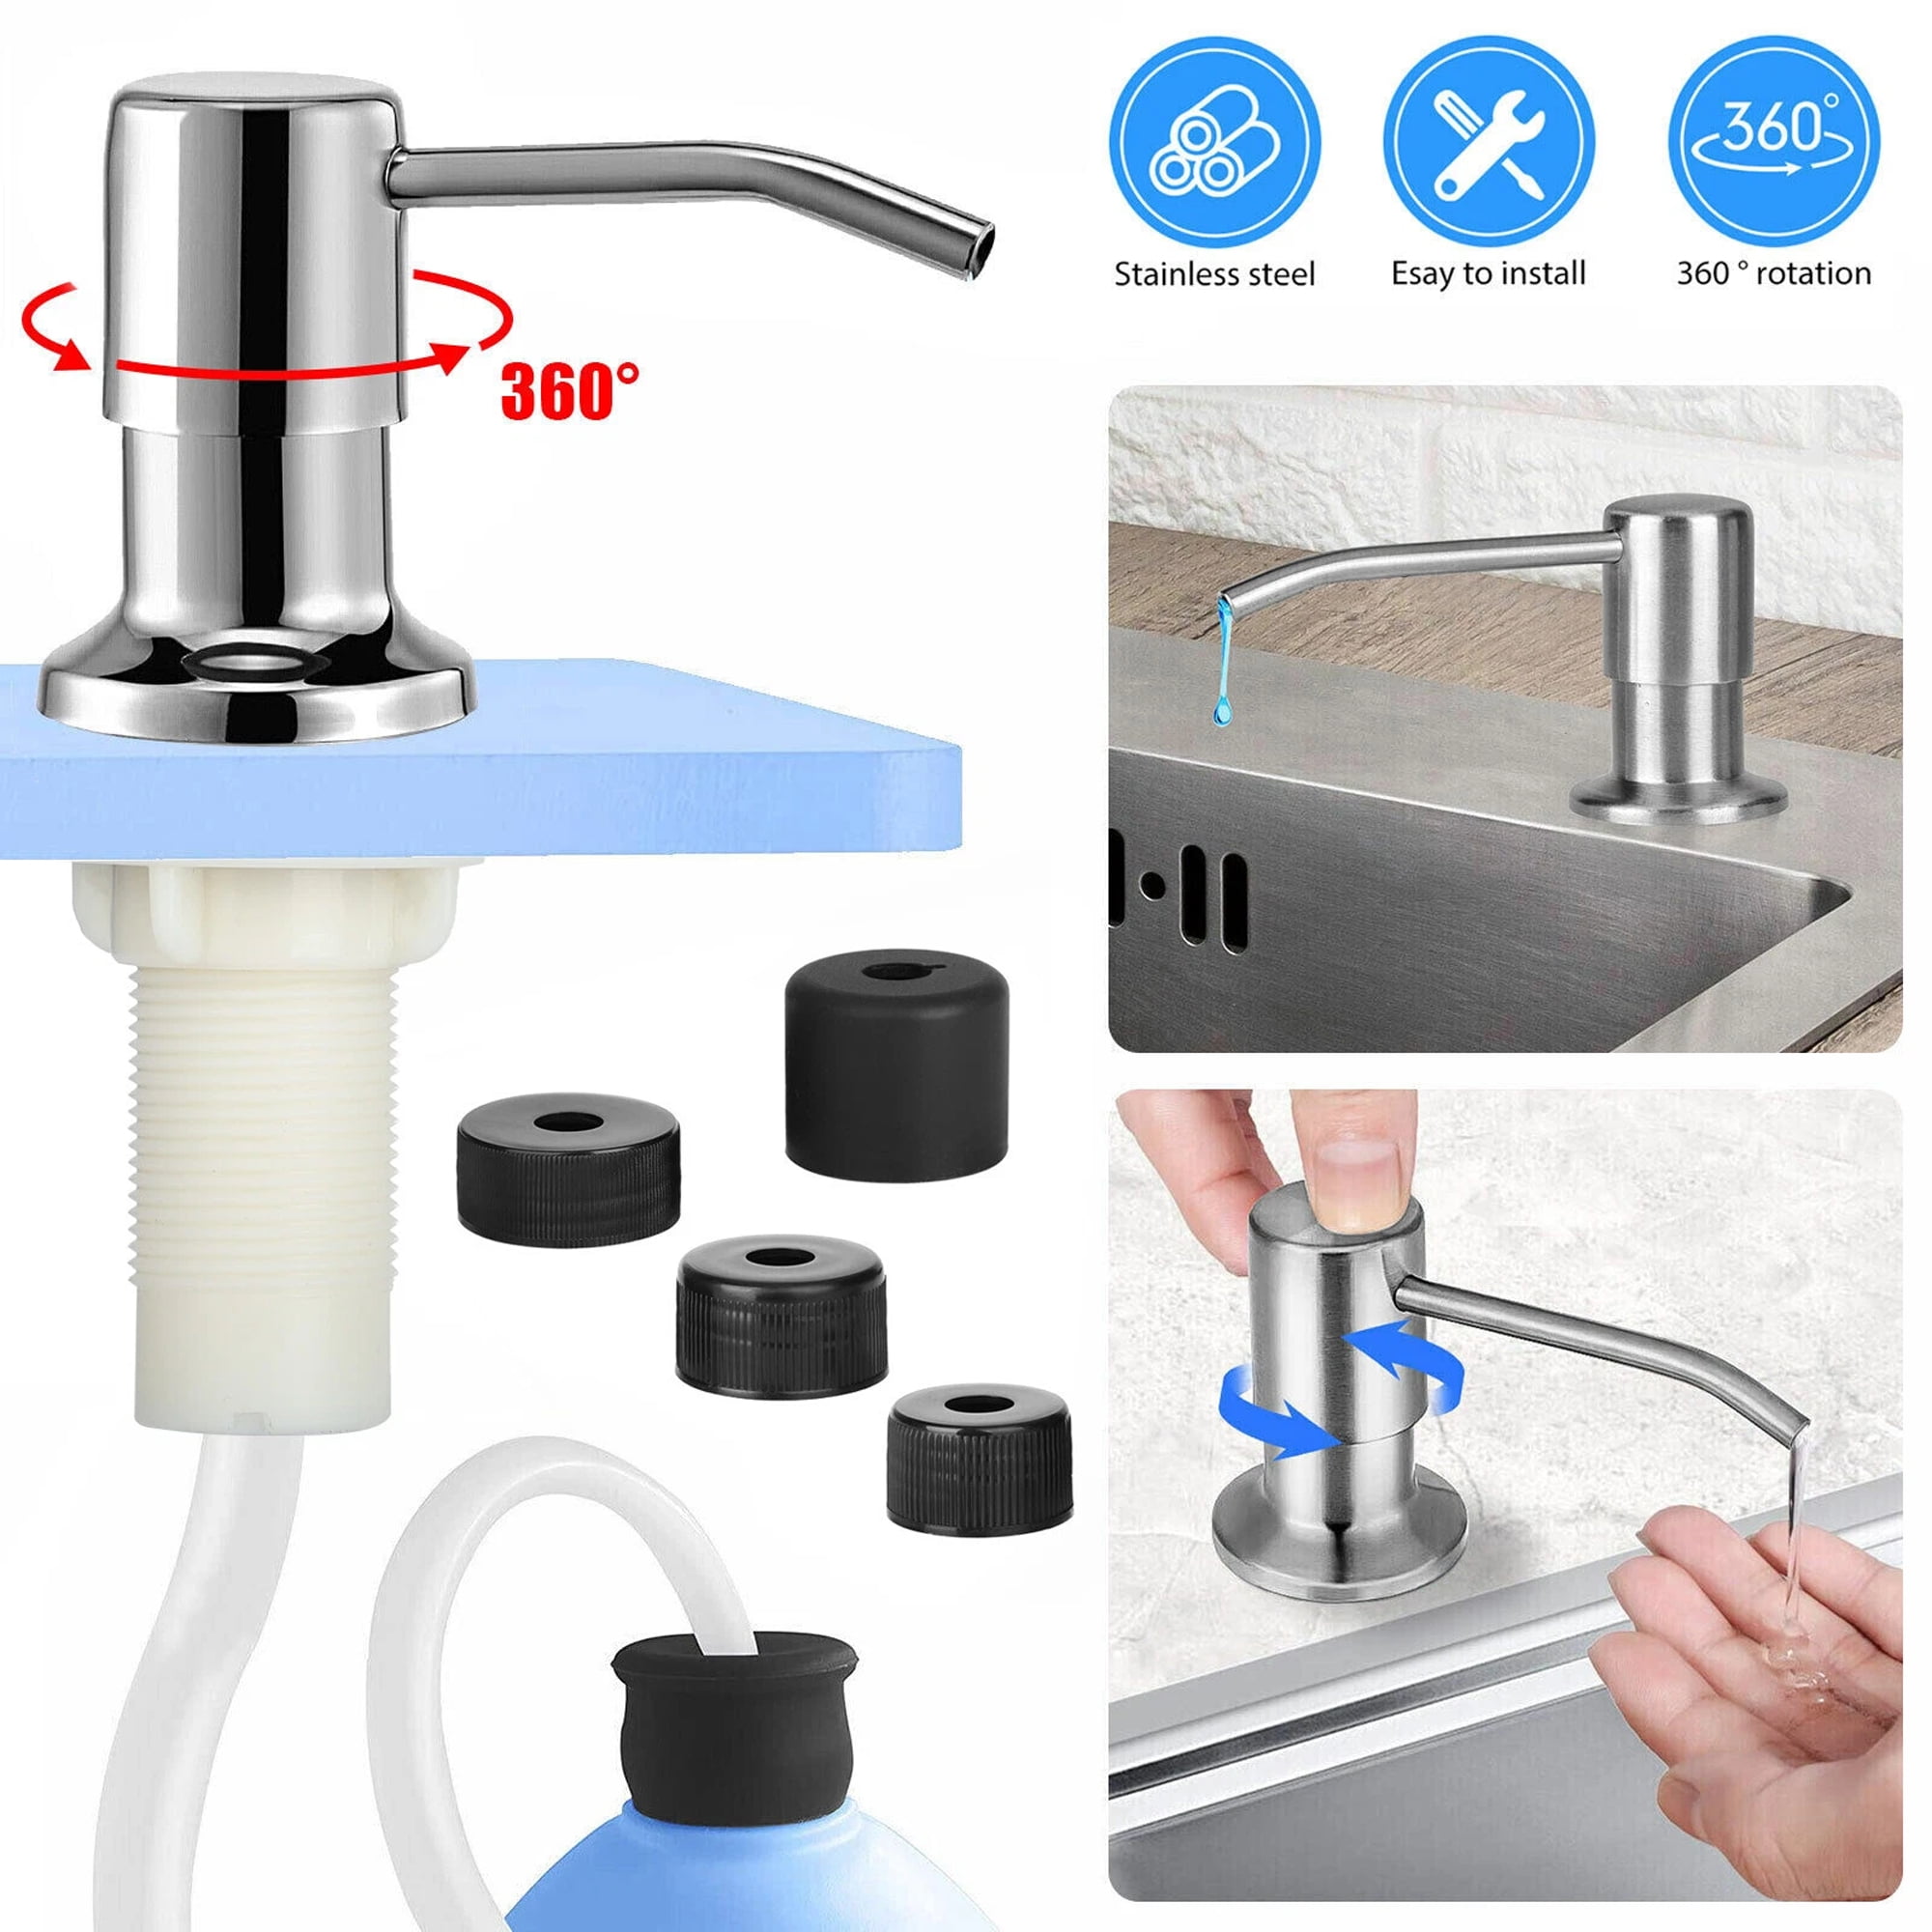
Place the pump head on top of the dispenser body. Press down firmly to lock it in place. Test the pump by pressing to ensure smooth soap flow.
Credit: www.homedepot.com
Secure The Dispenser Under The Sink
Securing the soap dispenser under your kitchen sink is a crucial step that ensures it stays firmly in place and functions smoothly. Without a solid hold, the dispenser can wobble or even detach, making your soap dispensing frustrating. Let’s look at how you can securely fix it under the sink with simple, effective actions.
Identify The Mounting Location
First, find a flat, accessible spot under your sink where the dispenser can sit comfortably. It should be close enough to the sink hole to connect easily but away from pipes or other obstructions. Take a moment to check for any interference that might make installation tricky later on.
Use The Provided Mounting Hardware
Most soap dispensers come with a mounting bracket or nut designed specifically for securing the unit. Make sure you use these parts rather than improvising with random materials. Tighten the mounting nut firmly by hand, then use a wrench if needed to prevent the dispenser from moving.
Check The Soap Bottle Placement
Once the dispenser is loosely in place, attach the soap bottle underneath. Ensure it fits well without putting pressure on the dispenser’s neck or hose. A misaligned bottle can cause leaks or make pressing the pump difficult.
Secure The Soap Bottle With Straps Or Clips
Some installations benefit from extra support using straps or clips to hold the soap bottle steady. If your dispenser kit doesn’t include these, try using simple zip ties or adhesive clips available at hardware stores. This extra step can prevent accidental spills and keep your workspace tidy.
Test For Stability And Function
Before finalizing everything, press the dispenser pump a few times to ensure it doesn’t shift or loosen. If you notice any movement, tighten the mounting hardware a bit more. A stable dispenser will save you headaches and keep your kitchen workflow smooth.
Attach The Soap Bottle
Attaching the soap bottle is a crucial part of installing your kitchen sink soap dispenser. This step ensures that the dispenser functions smoothly and delivers soap efficiently. If the bottle isn't secured properly, you might face leaks or inconsistent soap flow.
Check The Soap Bottle For Compatibility
Before attaching, make sure the soap bottle fits your dispenser model. Some bottles are designed to work only with specific dispensers, so double-check the size and threading. Using the wrong bottle can cause leaks or even damage the dispenser.
Align The Bottle With The Dispenser Tube
Hold the soap bottle under the sink and line up the dispenser tube with the bottle’s opening. Proper alignment is key to avoiding leaks and ensuring soap flows smoothly. Take your time here—rushing can cause cross-threading or loose connections.
Screw The Bottle Onto The Dispenser
Turn the soap bottle clockwise to screw it onto the dispenser tube. Tighten it by hand until snug, but don’t overtighten—this could crack the bottle or strip the threads. If you feel resistance, back off and try again to avoid damage.
Test For Leaks And Proper Flow
Once attached, fill the bottle with soap and pump the dispenser a few times. Check under the sink for any leaks around the connection. If you notice dripping, try tightening the bottle slightly or re-aligning the threads.
Consider Bottle Placement For Easy Refills
Position the soap bottle where you can easily reach it for refills without moving other items. I once placed mine behind a cleaning spray bottle, and it made refills frustratingly slow. Think about convenience now to save time later.
Credit: majlont.cz
Fill The Dispenser With Soap
Pour liquid soap gently into the dispenser tank until nearly full. Avoid overfilling to prevent spills or clogging. Secure the pump firmly before use.
Filling your kitchen sink soap dispenser is a simple task. Yet, it can sometimes seem tricky. Once installed, the dispenser offers convenience and cleanliness. It reduces clutter around your sink area. Follow these easy steps to fill your dispenser efficiently.
Gather Your Supplies
Before you begin, have everything ready. You will need dish soap and a small funnel. Some dispensers come with a refill tube. If yours has one, keep it handy.
Check The Soap Level
Remove the dispenser pump. Look inside to see how much soap is left. This helps you know how much new soap to add.
Use A Funnel For Easy Pouring
Place the funnel in the dispenser opening. Pour the soap slowly. This prevents spills and overflows.
Refill Using The Refill Tube
If you have a refill tube, connect it. Pour soap directly from the bottle. This method is faster and less messy.
Reattach The Pump
Once filled, securely reattach the pump. Ensure it's tightly screwed on. Test the pump by pressing it a few times. This ensures the soap flows smoothly.
Clean Any Spills
Wipe away any spilled soap. Keep the area clean and dry. This prevents slipping and keeps your kitchen tidy. By following these steps, keep your kitchen sink area neat and efficient. Enjoy the convenience of a well-filled soap dispenser.
Test The Soap Dispenser
Testing the soap dispenser ensures it works properly after installation. It checks for leaks, proper soap flow, and smooth pump action. A quick test saves time and frustration later. Follow these tips to test your new kitchen sink soap dispenser effectively.
Check For Leaks Around The Base
Look closely at the dispenser base under the sink. Run your fingers around the edges. Any wetness or soap residue shows a leak. Tighten connections if needed. A dry base means a secure fit.
Press The Pump To Dispense Soap
Push the soap pump slowly and firmly. Soap should come out smoothly without splashing. If it feels stuck or too loose, adjust the pump. Proper pressure is key to good soap flow.
Refill And Test Soap Flow
Fill the dispenser with your preferred soap. Press the pump several times to prime it. Soap should flow steadily with each press. If not, check for clogs or air pockets inside.
Clean Up Any Soap Spills
Soap drips can make your sink messy. Wipe spills immediately with a cloth. Keeping the area clean helps you spot new leaks fast.
Maintenance Tips For Longevity
Proper care keeps your kitchen sink soap dispenser working well. Regular maintenance stops clogs and leaks. It also extends the dispenser’s lifespan. Small habits make a big difference over time.
Cleaning and checking parts often prevents damage. It helps the dispenser stay efficient and clean. Follow simple steps to maintain your soap dispenser properly.
Cleaning The Dispenser Pump
Remove the pump regularly and rinse it with warm water. This clears soap buildup and stops blockages. Use a soft cloth to wipe the pump and nozzle. Avoid harsh chemicals that can damage the dispenser.
Checking For Leaks
Inspect the dispenser for leaks under the sink. Tighten any loose connections gently. Replace worn-out washers or seals quickly. Leaks can cause water damage and waste soap.
Refilling With Proper Soap
Use liquid soap that is compatible with your dispenser. Thick or gritty soaps can clog the pump. Fill the dispenser before it runs completely dry. This keeps the pump working smoothly.
Preventing Rust And Corrosion
Dry the dispenser area to avoid moisture buildup. Wipe metal parts with a dry cloth after use. Use rust-resistant materials for replacement parts if needed. Rust can weaken the dispenser structure.
Regular Use And Testing
Use the soap dispenser often to keep it functional. Press the pump a few times to check flow. This prevents soap from drying inside the pump. Regular testing helps catch problems early.
Credit: www.walmart.com
Frequently Asked Questions
How Do I Install A Kitchen Sink Soap Dispenser?
First, remove the old soap dispenser if any. Insert the new dispenser into the hole. Tighten the mounting nut underneath. Connect the soap bottle and pump tube securely. Test by pumping soap to ensure proper installation.
What Tools Are Needed For Soap Dispenser Installation?
You need a wrench, screwdriver, and pliers. A flashlight may help in tight spaces. Have a towel ready to catch spills. Most dispensers come with installation instructions and necessary parts included.
Can I Install A Soap Dispenser Without A Hole?
Yes, but you must drill a hole in the sink or countertop. Use a drill bit sized for your dispenser. Be careful to avoid damaging plumbing or the sink surface during drilling.
How Do I Refill The Kitchen Sink Soap Dispenser?
Simply unscrew or lift the dispenser pump from the top. Pour liquid soap into the reservoir. Replace the pump securely. Pump a few times to prime the dispenser for use.
Conclusion
Installing a kitchen sink soap dispenser is easier than it seems. Follow the steps carefully to avoid mistakes. Take your time and double-check each part. A well-installed dispenser adds convenience to your kitchen tasks. Enjoy cleaner hands and less clutter around the sink.
Small projects like this boost your home’s function and look. You can do it yourself with basic tools and patience. Feel proud every time you use your new soap dispenser. Simple changes make a big difference in your daily routine.