
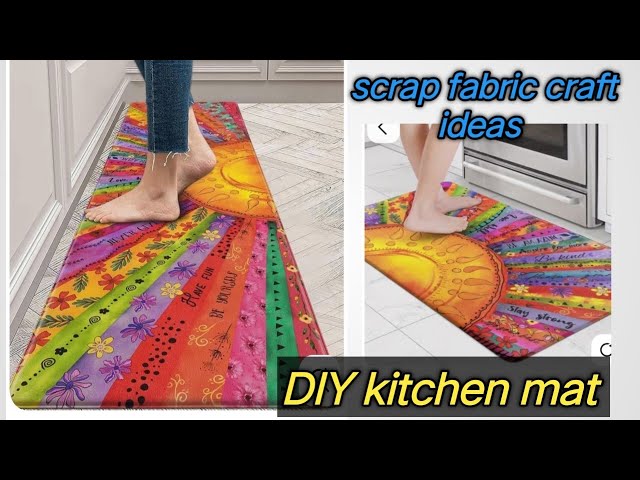
Are you tired of standing on hard, cold floors while cooking or washing dishes? A kitchen floor mat can make a huge difference in your comfort and safety.
Imagine having a soft, cushioned mat right where you need it most, tailored to your style and needs. Making your own kitchen floor mat is easier than you think, and it lets you create something unique that fits perfectly in your space.
Keep reading, and you’ll discover simple steps to craft a mat that transforms your kitchen experience.
Choosing The Right Materials
Choosing the right materials is crucial when making a kitchen floor mat. The durability, comfort, and safety of your mat depend largely on what you pick. Think about how much time you spend standing in the kitchen and the kind of spills or messes the mat might face daily.
Fabric Options
Picking the right fabric can change your mat from ordinary to perfect. Cotton is soft and easy to clean but might wear out quickly with heavy use. On the other hand, polyester or nylon fabrics hold up better against stains and water.
If you want something cushioned, consider memory foam or gel inserts covered with a durable fabric. These options help reduce fatigue if you stand for long periods. Ask yourself, do you prefer something plush or easy to wipe down?
Non-slip Backing
Your mat needs to stay put, especially in a busy kitchen. Non-slip backing prevents accidents and adds a layer of safety. Rubber or latex backing works well on tile or hardwood floors, gripping the surface firmly.
Some mats come with adhesive strips or textured undersides for extra hold. If you want to DIY, you can buy non-slip pads separately and attach them to your mat’s base. How slippery is your kitchen floor right now?
Tools Needed
Gathering the right tools makes the process smoother and your mat neater. You’ll need sharp fabric scissors or a rotary cutter for clean edges. Sewing needles and strong thread help secure your fabric layers together.
Consider a measuring tape for precise cuts and a fabric marker to draw your pattern. If your fabric is thick, a heavy-duty sewing machine can save time and effort. Do you have all these tools ready, or will you start collecting them?

Credit: www.vmathome.com
Measuring And Cutting Fabric
Measuring and cutting fabric is a crucial step in making a kitchen floor mat. Accurate measurements ensure the mat fits perfectly in the kitchen space. Cutting the fabric carefully prevents frayed edges and wasted material. Follow simple steps to get the right size and clean cuts.
Determining Mat Size
Start by measuring the area where the mat will go. Use a tape measure to get the length and width of the space. Add a few extra inches to each side for seam allowance and comfort. This helps the mat stay in place and fit well around corners or appliances.
Write down the measurements clearly. Check them twice before cutting. Decide if the mat will be rectangular, square, or custom-shaped based on your kitchen layout.
Marking And Cutting
Lay the fabric flat on a clean surface. Use fabric chalk or a pencil to mark the measurements on the fabric. Draw straight lines using a ruler or measuring tape to guide your cuts.
Use sharp fabric scissors for clean edges. Cut slowly along the marked lines to avoid mistakes. Keep the fabric steady to prevent slipping.
Double-check the cut fabric against your measurements. Adjust if needed before sewing or adding backing material.
Sewing The Mat Edges
Sewing the edges of your kitchen floor mat is where your project starts to take shape. Neat edges not only improve the mat’s durability but also give it a polished look that stands out. Paying attention to this step can save you from frayed fabric and uneven wear over time.
Basic Stitching Techniques
To begin, fold the raw edges of your fabric about half an inch inward. This prevents fraying and creates a clean base for stitching. Use pins to hold the folds in place so your fabric doesn’t shift as you sew.
Try using a straight stitch if you want simplicity and strength. It’s perfect for beginners and provides a secure seam. If your fabric is thicker, a zigzag stitch can add flexibility and prevent the edges from unraveling.
Think about the stitch length too; shorter stitches add durability but can make the fabric stiff. Longer stitches give flexibility but might not hold as well. Which do you think suits your mat’s use better?
Adding A Border
Adding a border can enhance your mat’s style and reinforce the edges. Choose a contrasting color or pattern to make your mat pop or stick with a matching tone for a subtle finish.
Cut strips of fabric about two inches wide for the border. Fold each strip in half lengthwise and press with an iron. This makes it easier to sew and gives a sharp edge.
Pin the border around your mat, aligning the raw edges. Sew carefully, stretching the border slightly if your mat is curved. This technique prevents puckering and keeps everything flat.
Have you thought about using piping or bias tape as a border? These add texture and extra protection but require a bit more precision. Trying one of these might be the perfect way to add your personal touch.
Attaching Non-slip Backing
Attach a non-slip backing to keep the kitchen floor mat steady and safe. Cut the backing to fit the mat’s size and press it firmly onto the bottom surface. This prevents slipping and adds extra grip on smooth floors.
Attaching non-slip backing to your kitchen floor mat is crucial. It prevents slips and keeps the mat in place. This step ensures safety and durability. Let's explore some simple ways to do it.
Types Of Backing
Different types of backing can be used. Here are a few popular ones:
- Rubber backing: Common and effective for preventing slips.
- Latex backing: Provides strong grip and durability.
- Foam backing: Offers comfort and is easy to attach.
Each type has its benefits. Choose one based on your needs and mat fabric.
Securing Backing To Fabric
Securing the backing is easy. Start by cutting the backing to fit your mat. Make sure it covers the entire surface. Use fabric glue for a strong hold. Apply it evenly across the fabric. Press the backing firmly onto the mat. Let it dry for a few hours. For added security, sew the edges. This step ensures the backing stays in place. Your mat is now ready to use. Enjoy a safer kitchen with your non-slip mat!
Finishing Touches
Finishing touches can transform your kitchen floor mat from simple to stunning. These final details not only boost its look but also improve durability and comfort. Think of this stage as your chance to personalize and protect your handiwork.
Decorative Elements
Adding decorative elements makes your mat uniquely yours. You could sew on colorful trims, attach fabric appliques, or use fabric paint to create patterns that match your kitchen’s vibe.
Try using buttons or small patches to add texture and interest. These little details can turn a plain mat into a conversation starter.
Have you thought about the impact of color? Contrasting or coordinating colors can highlight your design and make your kitchen feel more inviting.
Washing And Care Tips
Keeping your mat clean ensures it lasts longer and stays fresh. Before washing, check the materials you used—some fabrics need gentle care.
Hand washing with mild detergent often works best for homemade mats. If you use a washing machine, choose a delicate cycle and cold water to avoid damage.
Dry your mat flat to maintain its shape and prevent stretching. Regular care not only preserves appearance but also keeps your kitchen healthy and hygienic.

Credit: www.amazon.com
Troubleshooting Common Issues
Creating your own kitchen floor mat is rewarding, but it can come with a few hiccups. Some common issues, like fraying edges and slippery surfaces, can affect both the look and safety of your mat. Tackling these problems early ensures your mat stays beautiful and functional for years to come.
Dealing With Fraying Edges
Fraying edges happen when the fabric threads start to unravel, making your mat look worn out quickly. To stop this, you can sew a tight zigzag stitch along the edges or use fabric glue to seal them. Another effective trick is applying a thin line of clear nail polish on the edges—it acts like a barrier without changing the look.
If you’re using a woven fabric, consider folding the edges over before stitching. This creates a double layer that’s less likely to fray. Have you noticed how some mats seem to fall apart after just a few washes? That’s usually because the edges weren’t secured properly in the first place.
Fixing Slippery Mats
A slippery mat can be dangerous, especially in a busy kitchen. To keep your mat in place, add a non-slip backing like rubber shelf liner or purchase a non-slip rug pad cut to size. Both options grip the floor firmly, preventing accidental slips.
If you prefer a quick fix, try spraying the underside with adhesive spray before laying it down. Just make sure the adhesive is safe for your floor type. Have you ever slipped while cooking? Taking these simple steps can save you from a nasty fall.
Small tweaks like these make a big difference in how your kitchen mat performs. Don’t let minor issues ruin the effort you put into making your mat. Instead, use these tips to keep it safe and looking great.

Credit: www.amazon.com
Frequently Asked Questions
What Materials Are Best For A Kitchen Floor Mat?
Choose durable, waterproof, and easy-to-clean materials like rubber, vinyl, or memory foam. These provide comfort and protect floors from spills and stains.
How Do I Measure My Kitchen Floor For A Mat?
Measure the area where you want the mat. Use a tape measure to get length and width in inches or centimeters.
Can I Make A Non-slip Kitchen Floor Mat?
Yes, add a non-slip backing or use a rubber base. This prevents the mat from sliding and enhances safety.
How Often Should I Clean My Kitchen Floor Mat?
Clean your mat weekly to remove dirt and bacteria. Use mild soap and water, then air dry completely before reuse.
Conclusion
Making a kitchen floor mat is simple and fun. You can choose materials that suit your style and needs. A homemade mat adds comfort and safety to your kitchen. It also saves money and lets you be creative. Try different shapes and colors to match your space.
With a little effort, you get a useful and nice mat. Enjoy your cozy kitchen floor every day!