

Are you tired of constantly buying kitchen sponges that wear out too fast or feel rough on your hands? Imagine having a sponge made just the way you like—soft, durable, and perfect for your cleaning needs.
Making your own kitchen sponge isn’t as hard as you might think. You’ll discover simple steps to create a sponge that saves you money, reduces waste, and makes your kitchen chores easier. Ready to take control of your cleaning tools?
Let’s dive in and get started!

Credit: www.amazon.ca
Materials Needed
Gathering the right materials is key to making an effective kitchen sponge. The choice of fabric and absorbent materials affects how well your sponge cleans and lasts. A few optional add-ons can boost cleaning power and durability. Prepare these items before starting your project.
Choosing The Right Fabric
Select fabric that is soft but strong. Cotton and microfiber cloths work well. Avoid fabrics that shed fibers easily. Look for tightly woven materials that hold up when wet. The fabric’s texture should help scrub without scratching surfaces.
Selecting Absorbent Materials
Absorbent filling makes your sponge soak water and soap efficiently. Natural materials like cellulose or cotton batting absorb well and dry fast. Synthetic sponges can also work but might not last as long. Choose material that keeps shape and dries quickly to avoid bad smells.
Optional Add-ons For Extra Cleaning Power
Add scrubbing layers or rough textures to boost cleaning. Scouring pads or nylon mesh offer extra friction for tough stains. You can also include antibacterial fabric or essential oils to reduce germs. These extras make your sponge more useful for heavy cleaning jobs.
Credit: www.housedigest.com
Preparing The Fabric
Preparing the fabric is the first important step to make a kitchen sponge. It sets the base for a sponge that cleans well and lasts long. Choosing the right fabric is key. Cotton or microfiber works best because they absorb water and hold soap. The fabric must be clean and dry before cutting and layering. Proper preparation helps the sponge feel soft yet strong.
Cutting To Size
Cut the fabric into small squares or rectangles. The usual size is about 4 by 6 inches. Use sharp scissors for clean edges. Cutting neat shapes helps the sponge keep its form. Avoid jagged edges. They can fray and weaken the sponge over time.
Layering For Thickness
Stack several fabric pieces to create thickness. Three to five layers work well. More layers make the sponge absorb more water. Fewer layers make it thinner and quicker to dry. Layer the pieces evenly. This prevents lumps and gives a smooth texture to the sponge.
Securing Layers Together
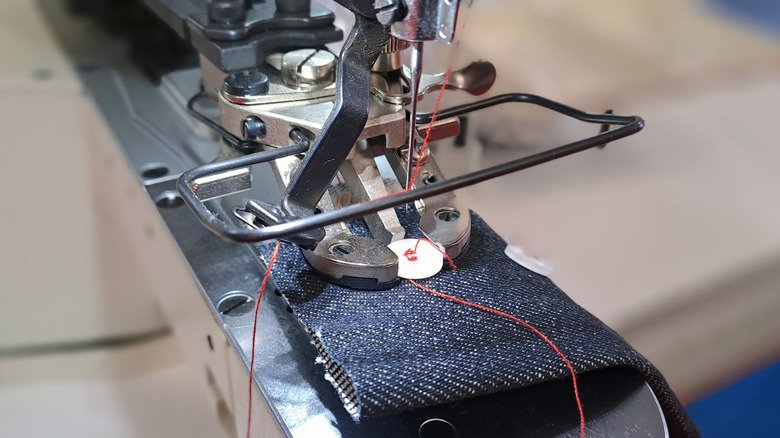
Hold the layers firmly before sewing or gluing. Sewing with a simple stitch keeps layers tightly bound. Use thread that matches the fabric color. Glue can work but may reduce flexibility. Check that all corners and edges are secured. This stops the layers from separating during use.
Sewing Techniques
Learn to sew a simple kitchen sponge using basic stitches and soft fabric. This easy project creates a useful, washable sponge for daily cleaning. Perfect for beginners who want a practical handmade item.
Creating your own kitchen sponge can be a rewarding DIY project that not only saves money but also allows you to customize the sponge to your liking. Sewing techniques play a crucial role in crafting a sturdy and effective sponge. Whether you're a seasoned seamstress or a beginner, mastering a few basic sewing skills can elevate your homemade sponge from functional to fabulous. Let's dive into some essential techniques you can use to make your kitchen sponge both durable and eye-catching.
Basic Stitching Methods
When sewing your kitchen sponge, start with simple stitching methods. The running stitch is a great option for beginners. It involves passing the needle in and out of the fabric at regular intervals, creating a dashed line effect. Another effective method is the backstitch. This stitch provides extra durability by overlapping each previous stitch. It’s perfect for ensuring that your sponge holds together through countless scrubbing sessions. Practice these stitches on a scrap piece of fabric to get a feel for the right tension and spacing. This way, you ensure your stitches are both secure and aesthetically pleasing.
Creating Durable Edges
To make sure your kitchen sponge withstands daily wear and tear, focus on creating strong edges. One technique to achieve this is the overcast stitch. This stitch wraps around the edge of the fabric, preventing fraying. You might also consider using a zigzag stitch if you have access to a sewing machine. This stitch binds the edges tightly, adding extra resilience to your sponge. Think about where the most stress points will be and focus your edge reinforcement in these areas. This attention to detail will extend the life of your sponge.
Adding Decorative Touches
Who says a kitchen sponge can't be stylish? Adding decorative touches can make your DIY sponge stand out. Consider using contrasting thread colors for your stitches to add a pop of color. You could also sew on small fabric patches or embroider simple designs. These embellishments not only make your sponge unique but also add an element of fun to your kitchen cleaning routine. What kind of design would make you smile every time you use your sponge? Let your creativity shine and transform a simple kitchen tool into something delightful.
Alternative No-sew Methods
Alternative no-sew methods offer simple and quick ways to make a kitchen sponge without needing a sewing machine or needle and thread. These approaches use common household items and let you customize your sponge easily. You might find these methods perfect if you want to save time or avoid sewing altogether.
Using Fabric Glue
Fabric glue is a handy tool that helps you stick pieces of sponge material together firmly. Start by cutting your fabric or sponge layers to the desired size and shape. Then, apply fabric glue along the edges and press the pieces tightly for a few minutes.
This method creates a strong bond without the hassle of sewing, and the glue dries clear, so it won’t affect the look of your sponge. Just make sure the glue is non-toxic and safe for kitchen use. Have you ever tried gluing fabric for a craft project? You'll find this just as easy and reliable.
Tying And Folding Techniques
If you prefer a completely hands-on approach, tying and folding can turn a piece of fabric or sponge into a functional kitchen sponge. Fold the fabric into layers or shapes that suit your scrubbing needs.
Next, use strong thread, yarn, or even thin strips of fabric to tie sections tightly. This keeps the layers together while creating texture that helps with scrubbing. This technique is great if you want a sponge that feels unique in your hand and is easy to adjust.
Think about how different folds or tying patterns might improve your sponge's grip or scrubbing power. Would a tighter knot work better for tough stains, or is a looser fold more comfortable to hold? Experimenting with these ideas can lead to surprising results.
Customizing Your Sponge
Customizing your kitchen sponge transforms a simple cleaning tool into a personal helper tailored to your needs. It’s not just about making it look different; it’s about improving its function and making your cleaning routine more enjoyable. You can change textures, add scents, or even choose colors and shapes that brighten up your kitchen space.
Adding Scrubbing Surfaces
Adding a rougher scrubbing surface can make your sponge much more effective against tough stains. You can glue a piece of mesh or a small patch of scouring pad on one side of your sponge. This gives you a dual-purpose tool—soft for delicate dishes and rough for pots and pans.
Think about the types of dishes you clean most often. Do you need a finer scrub for glassware or a heavy-duty one for burnt food? Adjust the scrubbing surface to fit those needs and save time scrubbing away.
Incorporating Aromatics
Adding a fresh scent to your sponge can make dishwashing less of a chore. You might embed a few drops of essential oils like lemon or eucalyptus into the sponge material before it dries. These oils not only smell great but can also help mask unpleasant odors.
Have you ever noticed how a lemony fresh sponge can brighten your mood? Try different scents and see which ones make your kitchen time more pleasant.
Personalizing Colors And Shapes
Changing the color or shape of your sponge can make it easier to assign specific sponges for different tasks. You could dye your sponge using food-safe colors or cut it into fun shapes with scissors. This also helps prevent cross-contamination in the kitchen.
Imagine a bright red sponge just for raw meat dishes and a green one for vegetables. This simple step can improve your kitchen hygiene and add a bit of fun to your cleaning routine.
Care And Maintenance
Proper care and maintenance extend the life of your kitchen sponge. A clean sponge works better and stays hygienic. Neglecting its care can lead to bad smells and bacteria growth. Regular cleaning and drying keep the sponge fresh and safe to use.
Cleaning Your Sponge
Rinse the sponge thoroughly with hot water after each use. Squeeze out excess water to remove food particles. Use mild dish soap to wash the sponge regularly. For deeper cleaning, soak the sponge in a vinegar or baking soda solution. Avoid harsh chemicals that may damage the sponge fibers.
Drying Tips To Prevent Odors
- Place the sponge in a well-ventilated area to air dry.
- Keep the sponge away from damp or enclosed spaces.
- Stand the sponge upright to allow water to drain.
- Use a sponge holder with drainage holes.
- Microwave the damp sponge for 30 seconds to kill germs safely.
When To Replace Your Diy Sponge
Replace the sponge if it starts to smell bad. Check for signs of wear, like fraying or holes. If the sponge feels slimy or sticky, it is time to get a new one. Regular replacement helps maintain kitchen hygiene and cleanliness.
Credit: theseepcompany.com
Frequently Asked Questions
How Do You Make A Kitchen Sponge At Home?
To make a kitchen sponge, combine cellulose fibers with polyurethane foam. Shape, dry, and cut into desired sizes. Homemade sponges are eco-friendly and cost-effective.
What Materials Are Needed For A Kitchen Sponge?
You need cellulose fibers for absorbency and polyurethane foam for scrubbing. These materials ensure durability and effective cleaning.
How Long Does A Homemade Kitchen Sponge Last?
A homemade kitchen sponge lasts about two weeks with regular use. Replace it sooner if it smells or breaks down.
Can I Customize The Sponge’s Texture Or Size?
Yes, you can adjust the foam thickness or cellulose density. Cut sponges to fit specific cleaning tasks or container sizes.
Conclusion
Making a kitchen sponge at home is simple and fun. You only need a few materials and steps. This saves money and reduces waste in your kitchen. Plus, you can customize the sponge size and shape. Try this easy project and see the difference it makes.
Clean dishes feel better with a handmade sponge. Give it a go, and enjoy a fresh, useful tool every day.