

Are you tired of harsh chemicals in your kitchen cleaner? Imagine having a spray that’s not only powerful but also safe and natural.
Making your own kitchen cleaner spray is easier than you think, and it saves you money while protecting your family. In this guide, you’ll discover simple steps to create an effective cleaner using ingredients you probably already have at home.
Ready to transform your cleaning routine and enjoy a fresher, healthier kitchen? Let’s get started!
Benefits Of Diy Kitchen Cleaner
Making your own kitchen cleaner spray comes with a range of benefits that go beyond just having a spotless kitchen. When you create your own cleaner, you gain control over what goes into it, how much you spend, and the impact it has on your environment. These advantages can make your cleaning routine more satisfying and eco-friendly.
Cost Savings
Buying commercial kitchen cleaners can add up quickly, especially if you clean often. A DIY kitchen cleaner uses simple ingredients like vinegar, baking soda, and water, which cost just a fraction of store-bought products.
You might already have these at home, saving you from extra trips to the store. Think about how much you spend on cleaning supplies monthly—could making your own help you save that money for something else?
Natural Ingredients
Many store cleaners contain harsh chemicals that can irritate your skin or trigger allergies. When you make your own cleaner, you choose natural ingredients that are gentler on your health.
Vinegar and lemon juice are natural disinfectants, while essential oils can add antibacterial properties without harmful additives. What if you could clean your kitchen without worrying about toxic residues around your food?
Environmental Impact
Plastic waste from commercial cleaning products contributes to pollution. By reusing spray bottles and mixing your own cleaner, you reduce plastic waste significantly.
Moreover, natural ingredients break down more easily in the environment than chemical cleaners. How important is it for you to reduce your ecological footprint with everyday choices?
Customizable Scents
One of the best parts about making your own cleaner is that you control the scent. You can add your favorite essential oils like lavender, eucalyptus, or citrus to create a fragrance that suits your mood.
This personalization makes cleaning less of a chore and more of a pleasant experience. Have you ever thought about how the scent of your cleaner affects your kitchen atmosphere?
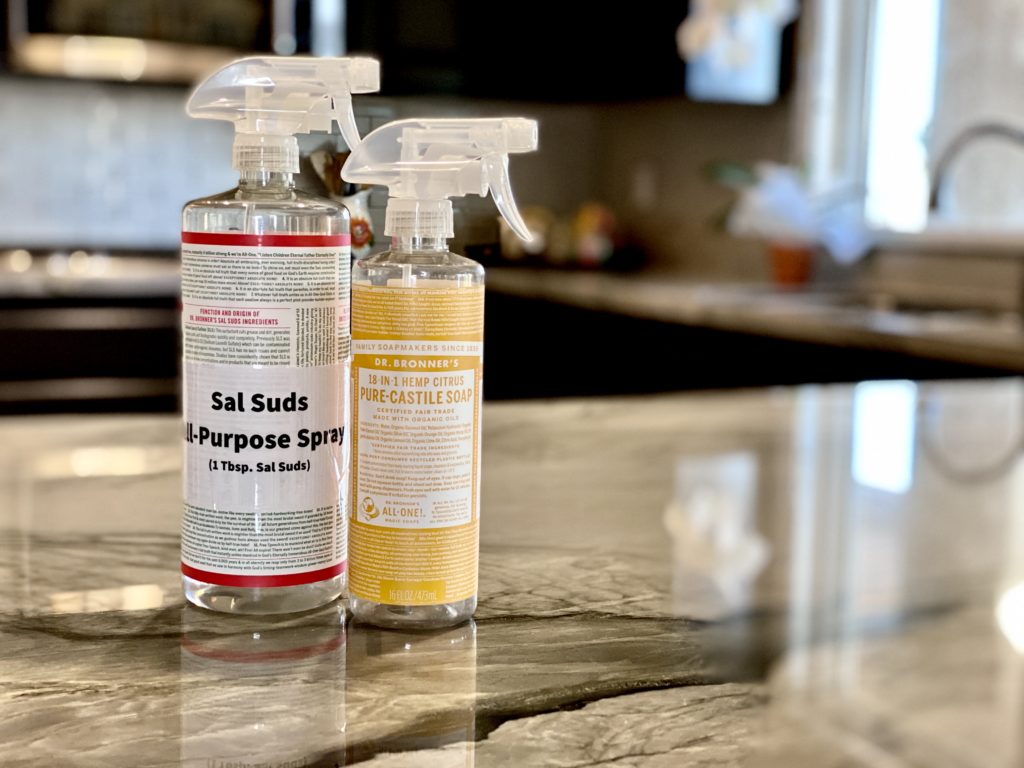
Credit: www.lisabronner.com
Essential Ingredients
Creating an effective kitchen cleaner spray starts with the right ingredients. Each component plays a special role in cleaning and freshening your kitchen surfaces. Understanding these essentials helps you make a safe and powerful cleaner at home.
Vinegar
Vinegar is a natural disinfectant and deodorizer. It cuts through grease and grime easily. Its acidity helps remove stains and kills many types of bacteria. Use white distilled vinegar for best results.
Baking Soda
Baking soda works as a mild abrasive. It gently scrubs away stuck-on dirt without scratching surfaces. It also neutralizes odors, leaving your kitchen smelling fresh. Baking soda balances the acidity of vinegar in the mix.
Essential Oils
Essential oils add fragrance and extra cleaning power. Tea tree, lemon, and eucalyptus oils have natural antibacterial properties. They make your spray smell pleasant and boost its effectiveness. Use a few drops only.
Water
Water dilutes the mixture to make it safe for surfaces. It helps blend the ingredients evenly. Use clean, room-temperature water for best mixing. Avoid hot water as it may reduce the cleaner’s strength.
Optional Additives
- Castile soap for extra grease cutting.
- Rubbing alcohol to speed drying and disinfect further.
- Vitamin E oil to protect spray bottles from corrosion.
These additives improve cleaning power or shelf life but are not necessary.
Tools And Supplies Needed
Creating your own kitchen cleaner spray is simple and cost-effective. You'll need some basic tools and supplies to get started. These will ensure you mix and store your cleaning solution properly. Below are the essential items you'll need.
Spray Bottles
Choose a sturdy spray bottle for your cleaner. Opt for one with adjustable nozzle settings. This allows you to switch between a fine mist or a concentrated stream. Glass bottles are eco-friendly and durable. But, plastic bottles are lightweight and shatter-proof. Ensure the bottle is clean before using it for your mixture.
Measuring Cups And Spoons
Accurate measurements are crucial for effective cleaning solutions. Use measuring cups and spoons to get the right proportions. Stainless steel or plastic sets work well. Keep them separate from your cooking utensils. This avoids cross-contamination with food ingredients.
Mixing Containers
Mix your ingredients in a separate container before transferring them. This ensures thorough blending of the solution. A large bowl or jug works perfectly. Make sure it's big enough to hold your entire mixture. Stir the solution well to combine all ingredients evenly.
Labels
Label your spray bottles clearly. This prevents confusion and ensures safe usage. Include the name of the cleaner and the date it was made. Waterproof labels or a permanent marker work best. This keeps the writing intact, even if the bottle gets wet.

Credit: www.lisabronner.com
Step-by-step Recipe
Making your own kitchen cleaner spray is simpler than you might think. With just a few common ingredients and a little time, you can create a powerful, natural cleaner that tackles grease and grime effectively. Let’s walk through the process so you can see how easy it is to prepare your spray at home.
Measuring Ingredients
Gather your ingredients carefully to ensure the right balance. You will need:
- 1 cup of water
- 1 cup of white vinegar
- 1 tablespoon of baking soda
- 10-15 drops of essential oil (like lemon or tea tree) for a fresh scent
Use a standard measuring cup and spoons for accuracy. Have you noticed how small changes in ingredient amounts can affect cleaning power?
Mixing Process
Start by pouring the water and vinegar into a clean bowl or container. Slowly add the baking soda to avoid excessive fizzing—it’s a natural reaction but can overflow if added too quickly.
Once the fizz settles, add your chosen essential oils. Stir gently to combine everything evenly. This mix not only cleans but leaves your kitchen smelling fresh and inviting.
Transferring To Spray Bottle
Choose a spray bottle that’s easy to handle and has a good nozzle for misting. Use a funnel to pour your cleaner into the bottle, avoiding spills that can waste your mixture.
Label the bottle clearly to avoid confusion with other liquids in your cleaning arsenal. How often do you find yourself guessing what’s inside an unmarked bottle?
Shaking And Storing
Before each use, give the bottle a good shake to mix the ingredients again. The baking soda can settle at the bottom over time, so shaking keeps the solution consistent.
Store the spray in a cool, dark place away from direct sunlight. This helps maintain the effectiveness of the essential oils and extends the life of your cleaner.
Tips For Effective Cleaning
Effective cleaning with homemade kitchen spray depends on smart tips and techniques. Small changes in how you apply and use the spray make a big difference. These tips improve results and keep surfaces safe and clean.
Application Techniques
Spray the cleaner evenly on the surface. Avoid soaking areas to prevent damage. Let the spray sit for a few minutes to break down grease. Use a soft cloth or sponge to wipe gently in circular motions. For tough stains, repeat the spray and scrub lightly. Always rinse with clean water after wiping to remove residue.
Surface Compatibility
Check if the spray suits your kitchen surfaces. Test on a small hidden spot first. Avoid using acidic sprays on natural stone like granite or marble. Use gentle recipes for wood and painted surfaces. Stainless steel and glass handle most homemade sprays well. Adjust ingredients based on the surface to prevent damage.
Safety Precautions
Keep the spray out of reach of children and pets. Store it in a labeled, sealed bottle to avoid mix-ups. Avoid contact with eyes and skin; rinse immediately if contact occurs. Use gloves if you have sensitive skin. Do not mix homemade cleaners with other chemicals. Ventilate the area well while cleaning to reduce fumes.
Troubleshooting Common Issues
Making your own kitchen cleaner spray is simple and effective. Yet, some issues may arise during use. These problems can affect the spray’s performance and cleaning power. Knowing how to fix common issues helps keep your cleaner working well.
Below are solutions for frequent problems you might face with homemade kitchen cleaner spray.
Clogged Spray Nozzle
A clogged nozzle stops the spray from coming out smoothly. This usually happens because of dried cleaner inside the nozzle. To fix this, soak the nozzle in warm water for a few minutes. Use a toothpick or pin to gently clear the tiny holes. Rinse well before reattaching it to the bottle. Regular cleaning of the nozzle prevents clogs.
Residue On Surfaces
Residue left on surfaces can make them sticky or dull. This occurs if the cleaner has too much soap or oil. Use less soap or vinegar in your recipe next time. Wipe surfaces again with a damp cloth to remove leftover residue. Test the cleaner on a small area before full use to avoid residue build-up.
Short Shelf Life
A short shelf life means the cleaner loses its strength quickly. This can happen without proper storage. Keep the spray bottle in a cool, dark place to extend shelf life. Use clean containers and fresh ingredients to avoid contamination. Label your spray with the date made and try to use it within two weeks.
Enhancing Your Cleaner
Enhancing your kitchen cleaner spray makes it more effective and pleasant to use. Simple additions can improve cleaning power and leave a fresh scent. Tailor your spray to fit your cleaning needs with easy tweaks.
Adding Antibacterial Properties
To kill more germs, add natural antibacterial ingredients. Tea tree oil and eucalyptus oil work well. Mix 10-15 drops into your cleaner spray. Vinegar also helps fight bacteria and mold. This makes your spray safer for kitchen surfaces.
Boosting Fragrance
A fresh scent makes cleaning more enjoyable. Add essential oils like lemon, lavender, or peppermint. Use 10-20 drops depending on how strong you want it. These oils also have mild antibacterial effects. They leave your kitchen smelling clean and inviting.
Adjusting For Tough Stains
For stubborn stains, boost your cleaner’s power. Add a small amount of baking soda to the spray bottle. This helps scrub off grease and grime. Increase vinegar slightly for extra strength on hard stains. Always test on a small surface first to avoid damage.
Storage And Shelf Life
Proper storage and understanding shelf life are key for your homemade kitchen cleaner spray. It keeps the spray effective and safe for use. Storing it right also prevents waste and saves money.
Ideal Storage Conditions
Store the kitchen cleaner spray in a cool, dry place. Avoid direct sunlight to keep ingredients stable. Use a dark-colored spray bottle to protect from light. Keep the bottle tightly closed to stop air from entering. Store away from heat sources like stoves or heaters.
Signs Of Spoilage
Check the spray regularly for changes. Cloudiness or separation may mean it’s spoiled. A bad or strange smell is another sign. If the spray stops cleaning well, it might be old. Avoid using it if you notice any mold or particles.
Extending Usability
Make small batches to use quickly. Add a few drops of natural preservatives like tea tree oil. Keep the spray away from moisture and heat. Clean the spray nozzle after each use to prevent clogging. Label your bottle with the date it was made for tracking.

Credit: wellnessmama.com
Frequently Asked Questions
What Ingredients Are Needed For Kitchen Cleaner Spray?
You need water, white vinegar, baking soda, and essential oils. These ingredients clean surfaces effectively and safely. They remove grease, stains, and odors without harsh chemicals.
How Do I Make A Natural Kitchen Cleaner Spray?
Mix equal parts water and white vinegar in a spray bottle. Add 1 tablespoon of baking soda and a few drops of essential oil. Shake well before each use for a fresh, natural cleaner.
Can Kitchen Cleaner Spray Disinfect Surfaces?
Yes, vinegar has antibacterial properties that help disinfect. However, it may not kill all viruses. For stronger disinfection, combine vinegar with alcohol or use a commercial disinfectant.
Is Homemade Kitchen Cleaner Safe For All Surfaces?
Homemade cleaner is safe for most surfaces like countertops and tiles. Avoid using vinegar on natural stone like granite or marble, as it can cause damage.
Conclusion
Making your own kitchen cleaner spray saves money and reduces chemicals. It uses simple ingredients found at home. You control what goes into the spray, making it safer for your family. Cleaning becomes easier and more natural. Try this DIY cleaner to keep your kitchen fresh and healthy.
Small effort, big difference. Give it a try today.