
Are you ready to give your kitchen a fresh, new look with a simple coat of paint? Before you start, there’s one important step you can’t skip: masking your kitchen cabinets properly.
If you don’t protect your hardware and surrounding areas, you might end up with messy paint splatters and uneven edges. But don’t worry—masking your cabinets is easier than you think. You’ll discover clear, step-by-step tips to mask your kitchen cabinets like a pro.
Keep reading, and you’ll save time, avoid frustration, and achieve a flawless finish that makes your kitchen shine.
Prepare Your Workspace
Preparing your workspace is key to a smooth cabinet painting project. A clean and organized area helps prevent mistakes and keeps paint off unwanted surfaces. Taking time to set up your space saves effort later and ensures better results.
Clear The Area
Remove all items from the kitchen counters and inside the cabinets. Clear away appliances, dishes, and decorations near your work zone. Move furniture or cover it with drop cloths to protect from paint spills. Keep pathways free to avoid accidents while painting.
Gather Necessary Tools
Collect all tools before starting. You will need painter’s tape, drop cloths, sandpaper, a paintbrush or roller, and cleaning supplies. Having everything close helps you work faster and reduces distractions. Check your paint and primer are ready and within reach.
Credit: www.thegritandpolish.com
Clean Cabinets Thoroughly
Cleaning kitchen cabinets is the key to a smooth painting job. Dirt and grease can stop paint from sticking well. Taking time to clean cabinets well helps the paint last longer. It also keeps the finish looking fresh and even.
Remove Grease And Dirt
Start by wiping cabinets with a warm, soapy cloth. Use a mild detergent or dish soap. Focus on handles, edges, and corners where grease builds up. For tough grease, mix vinegar and water in equal parts. Apply with a sponge and scrub gently. Rinse with clean water to remove soap. Let cabinets dry completely before moving to the next step.
Sand Surfaces For Better Adhesion
Light sanding helps paint stick to the cabinets. Use fine-grit sandpaper, around 220 grit. Sand all surfaces evenly, including doors and frames. Sanding also smooths out old paint or rough spots. After sanding, wipe away dust with a damp cloth. Allow the surface to dry fully before painting.
Protect Hardware And Fixtures
Protecting your kitchen cabinet hardware and fixtures is essential before you start painting. These small parts can easily get damaged or covered in paint, ruining the look and function of your cabinets. Taking a few minutes to properly mask or remove these items saves you from extra work later and keeps your project looking professional.
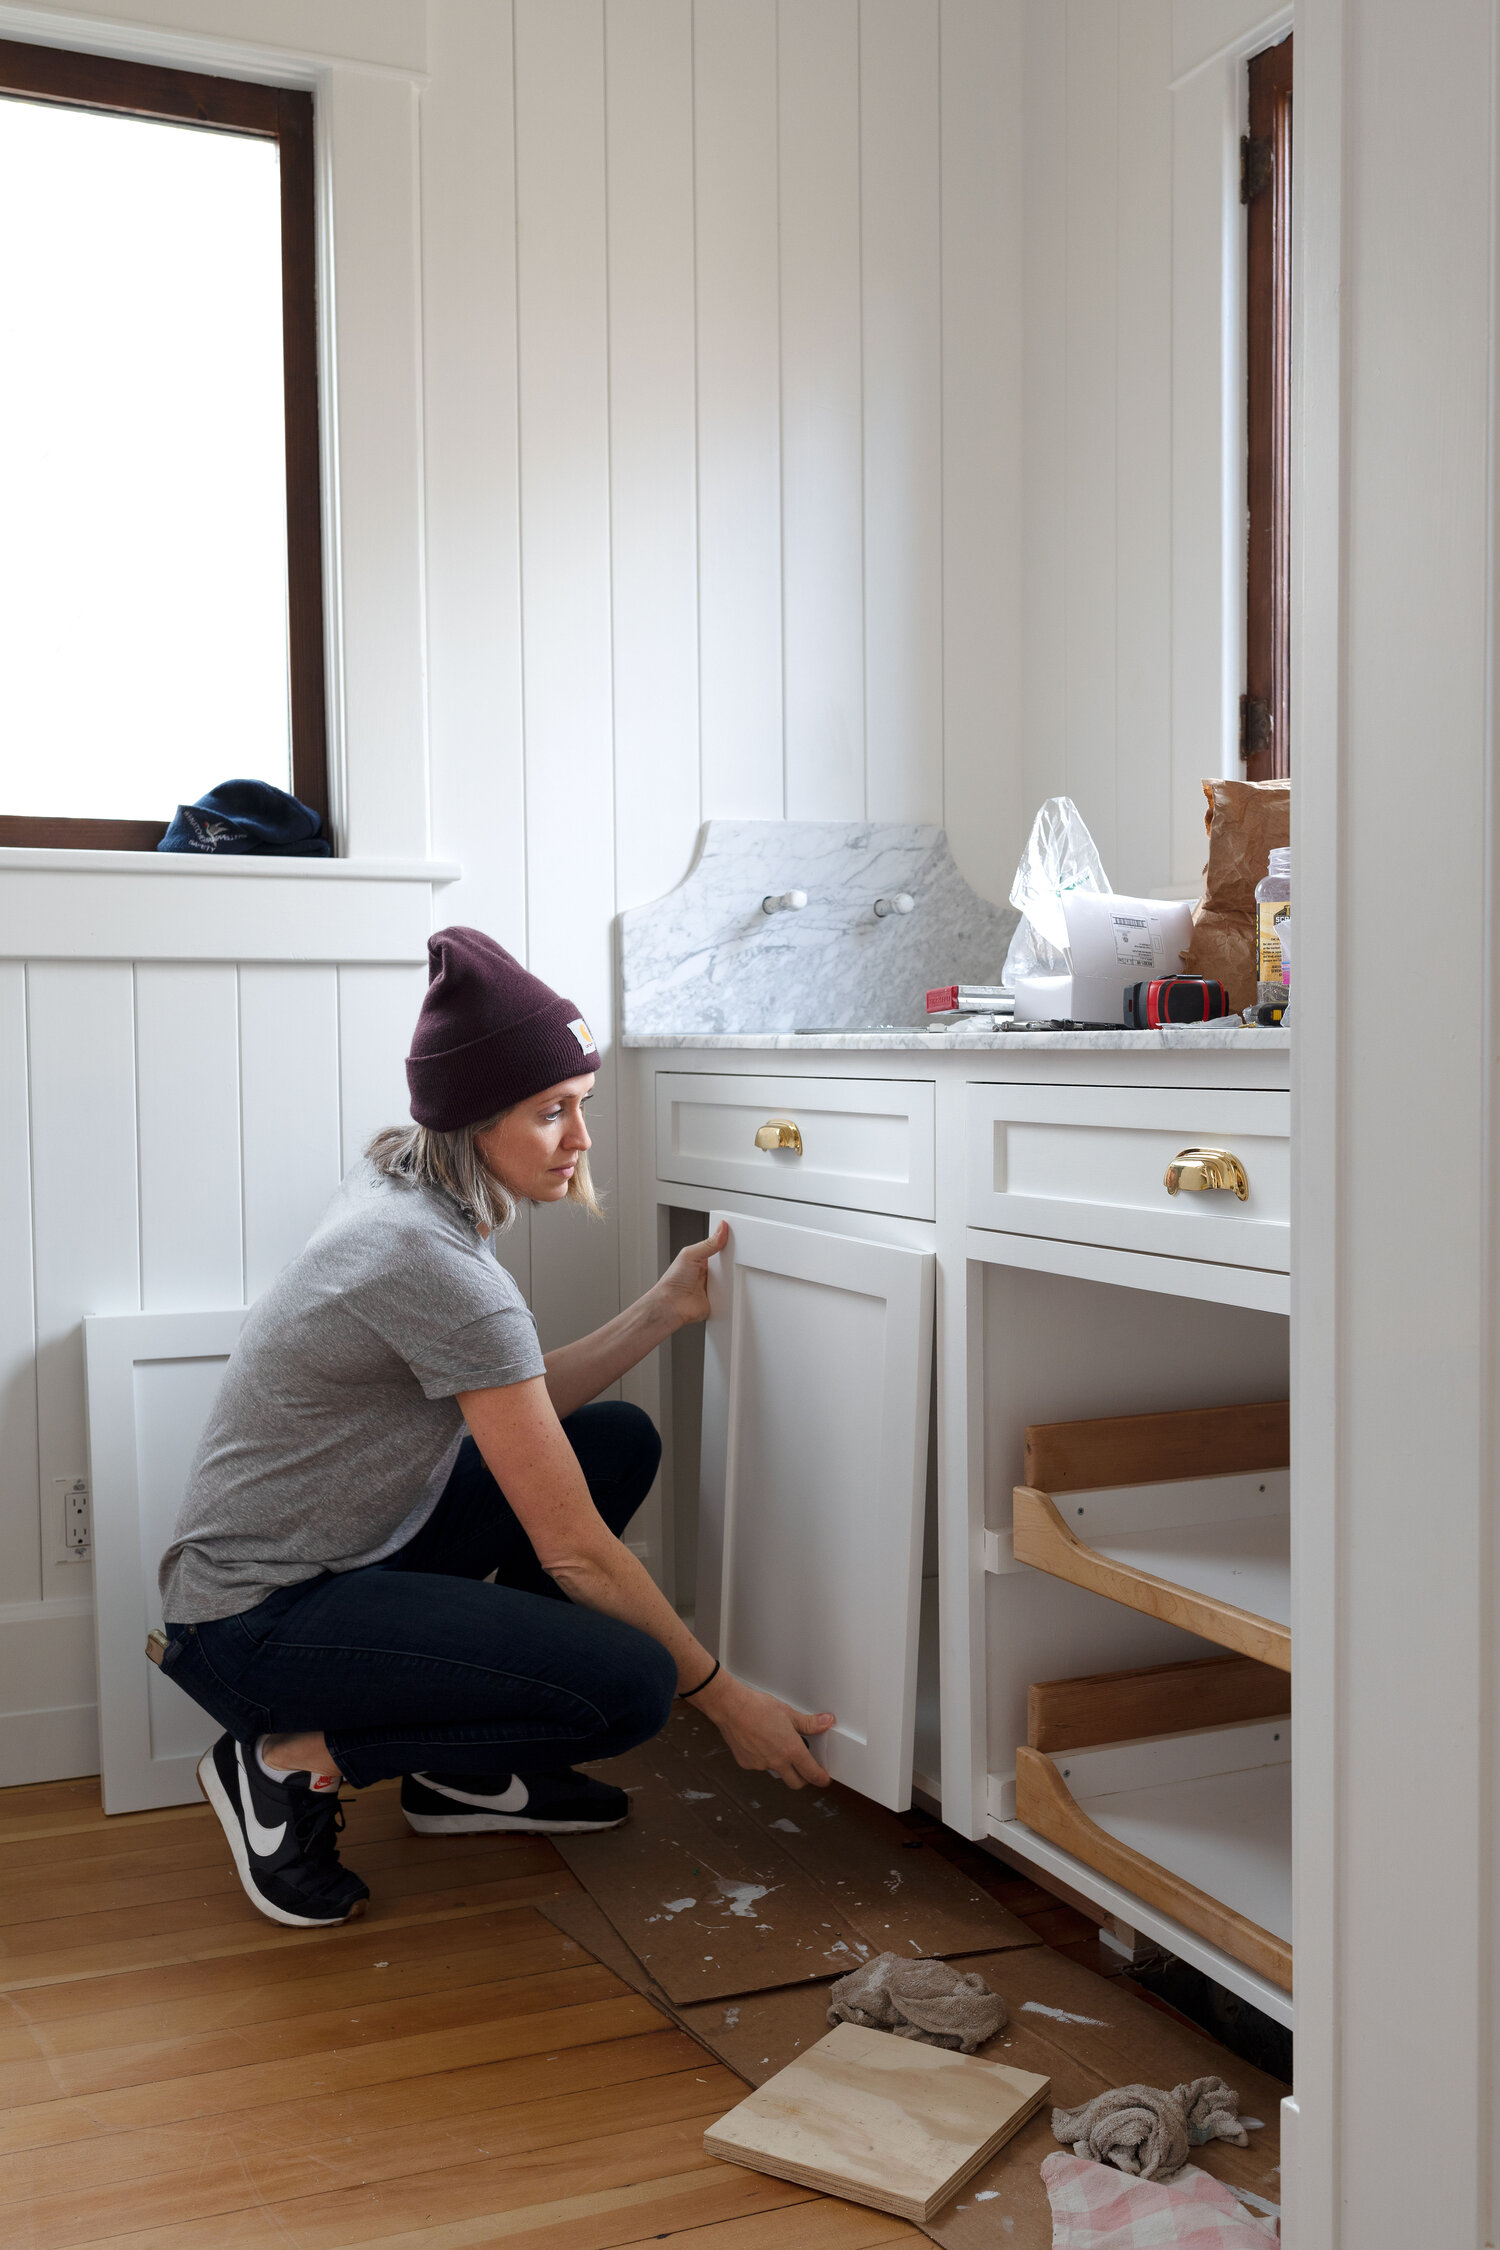
Remove Or Cover Handles And Knobs
Removing handles and knobs is the best way to protect them from paint. Use a screwdriver to carefully take them off and store them in a safe place. If you don’t want to remove them, cover each handle or knob with painter’s tape. Make sure to press the tape firmly so paint doesn’t seep underneath.
Have you ever tried painting around hardware without removing it? It’s tricky, and paint can easily build up, making your cabinets look messy. Removing hardware gives you cleaner edges and a smoother finish.
Shield Hinges And Locks
Hinges and locks can be tricky since they’re attached to the cabinet and door. Cover them with painter’s tape by cutting small strips to fit around the shapes. Press the tape tightly over the metal parts to prevent paint from sticking.
If your hinges are very old or rusted, consider removing them to repaint separately. This prevents paint build-up that could affect how your doors open and close. Sometimes, investing a little time here can save you from frustration with sticking or squeaky doors later on.

Credit: www.ultrimaxstore.com
Choose The Right Masking Materials
Choosing the right masking materials is crucial for a smooth and clean kitchen cabinet painting job. The right supplies help protect surfaces you don’t want painted and ensure sharp, professional-looking edges. Using poor-quality materials can lead to paint bleed, wasted time, and a messy cleanup.
Select Quality Painter’s Tape
Not all painter’s tapes are created equal. A good-quality painter’s tape sticks firmly but peels off easily without damaging your cabinets or leaving residue behind. Look for tapes labeled specifically for delicate surfaces or cabinets—they provide just the right balance of adhesion.
Using cheap masking tape might seem like a money saver, but it often allows paint to seep underneath. I once used generic tape and ended up scrubbing for hours to fix the bleed marks. Investing in reliable tape saves you frustration and keeps your cabinets looking sharp.
Use Plastic Sheeting And Drop Cloths
Protect your countertops, floors, and appliances with plastic sheeting and drop cloths. Plastic sheeting is great for covering large surfaces quickly and prevents paint splatters from ruining your kitchen. Drop cloths absorb spills and provide a safer, non-slip surface to work on.
Think about where paint is most likely to land accidentally. You want to cover those areas fully but avoid excess material that can get in your way. Lightweight plastic sheeting combined with sturdy drop cloths offers the perfect balance of protection and ease of movement.
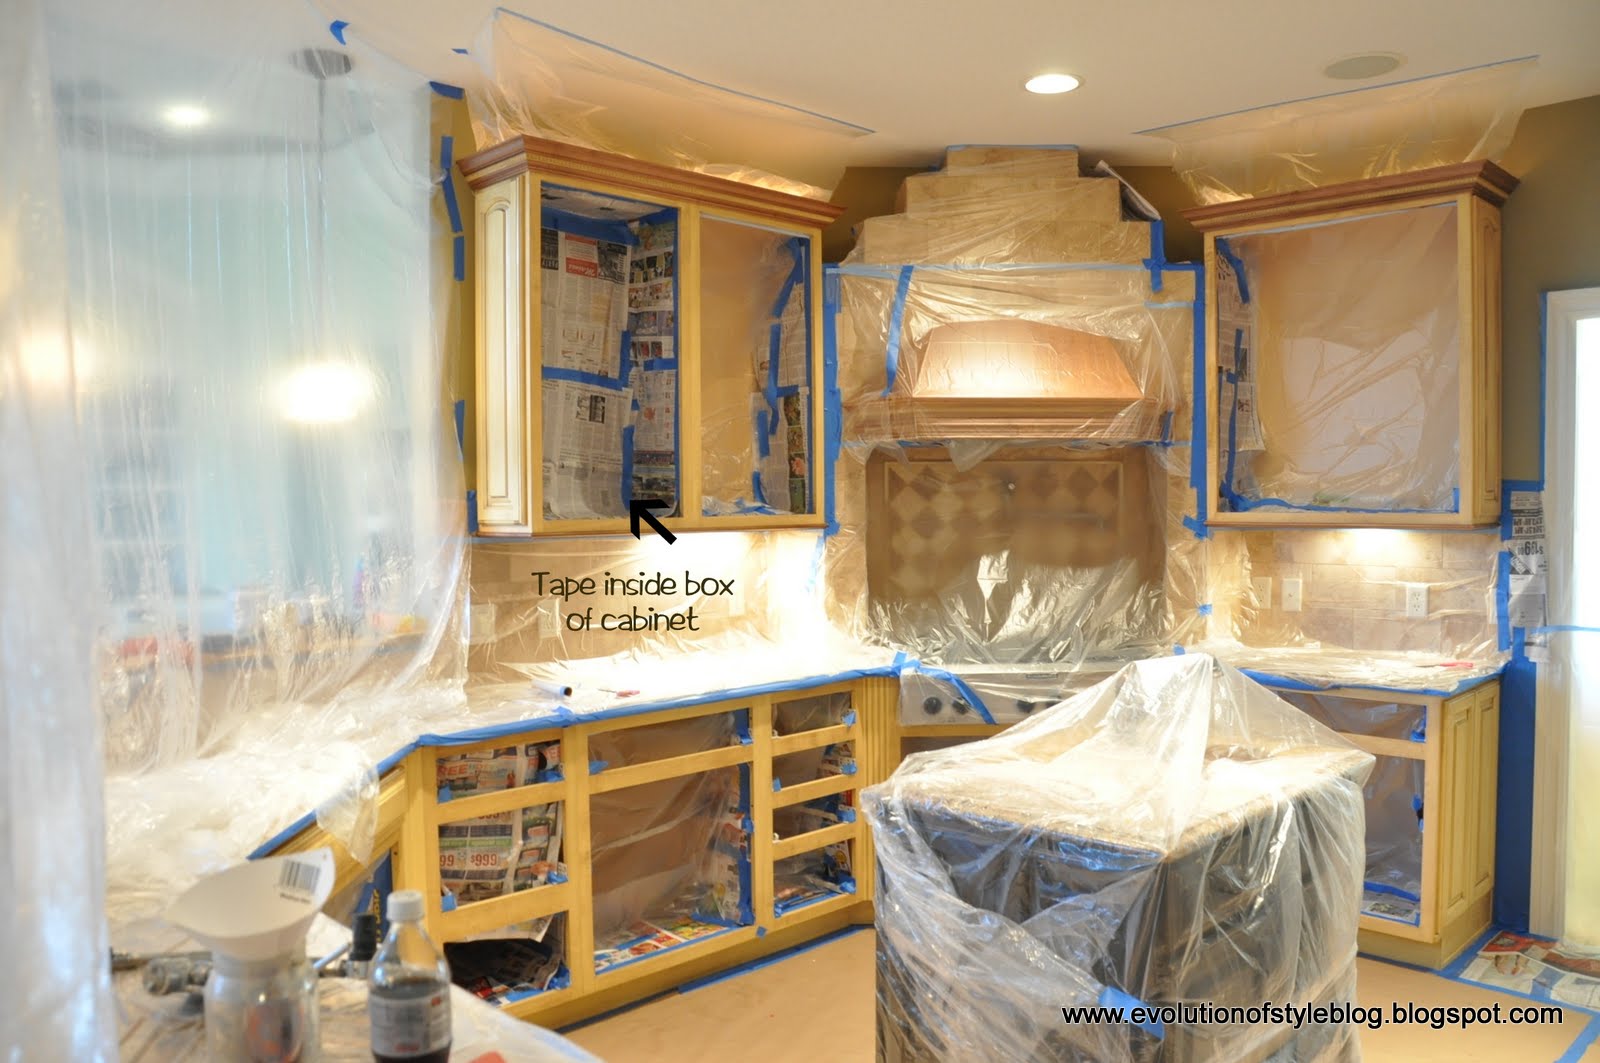
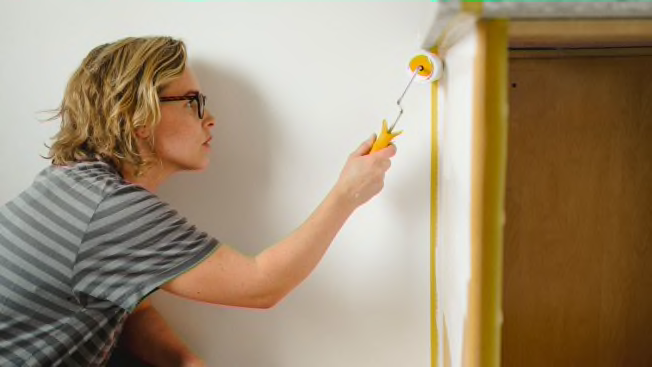
Apply Masking Tape Correctly
Apply masking tape carefully to protect kitchen cabinets during painting. Ensure edges are smooth and secure to prevent paint seepage. Clean surfaces first for optimal tape adhesion.
Applying masking tape correctly is a crucial step in painting kitchen cabinets. It sets the foundation for a professional-looking finish. This task might seem straightforward, but a few strategic techniques can drastically enhance your results.
Create Clean Edges
Precision is key to achieving clean edges. Start by choosing a high-quality painter's tape. Ensure the surface is clean and dry before applying the tape. Press the tape down firmly along the edges to prevent any gaps. A small tool like a putty knife can help you press down the tape more securely. Remember, a well-sealed edge is your best friend for crisp, clean lines.
Avoid Paint Bleed
Paint bleed can ruin even the most meticulous paint job. To combat this, apply the tape and then run a damp cloth along the edge of the tape to activate the adhesive. This simple trick can significantly reduce the risk of paint seeping underneath. Another effective method is to apply a thin layer of the base color over the tape edge before applying the new paint color. This seals the tape edge and minimizes bleed-through. Have you ever noticed how a small detail can make a huge difference in a project? Masking tape, when used correctly, can be the difference between a novice-looking paint job and a professional finish. Keep these tips in mind, and you'll be on your way to beautifully painted kitchen cabinets.
Mask Surrounding Areas
Masking the surrounding areas is essential before painting kitchen cabinets. It prevents paint from splattering on unwanted surfaces. Proper protection keeps your kitchen clean and saves time on cleanup. Focus on covering walls, countertops, and flooring carefully.
Cover Walls And Countertops
Use painter’s tape along cabinet edges where they meet walls. Press tape firmly to stop paint from seeping underneath. Cover walls with plastic sheets or drop cloths to catch any drips. Lay protective paper or plastic on countertops to avoid stains. Secure covers with tape to prevent shifting during painting.
Protect Flooring
Place a drop cloth or plastic sheeting over the floor area around cabinets. Tape edges down to keep covers in place. Use heavier materials near high-traffic zones to avoid tears. Protecting floors stops paint spills and dust from damaging surfaces. Check covers often and adjust if they move during work.
Inspect Masking Before Painting
Inspecting the masking before painting is crucial for a clean finish. It protects surfaces from paint splatter and keeps edges sharp. Take your time to check every corner carefully. A small gap or loose tape can cause paint to bleed through. Avoid this by examining the masking closely before you start painting.
Check For Gaps Or Loose Tape
Look closely along the edges of the tape. Small gaps let paint sneak underneath. Loose tape can lift during painting and ruin your work. Press the tape down firmly to ensure it sticks well. Make sure the tape covers all the areas you want to protect.
Reinforce As Needed
If you find any gaps or loose spots, fix them right away. Use extra tape to cover weak areas. Press the tape firmly to create a tight seal. Reinforcing prevents paint from leaking onto unwanted surfaces. It also helps your painting project look neat and professional.
Remove Masking After Painting
Removing masking tape after painting kitchen cabinets is a crucial step. It affects the final look of your project. Doing this carefully prevents damage to fresh paint and keeps edges sharp. Knowing the right time and technique to remove tape ensures a smooth, professional finish.
Timing For Tape Removal
Remove the tape while paint is still slightly wet. Waiting too long makes the paint dry and stick to the tape. Pull tape off slowly at a 45-degree angle. This helps avoid lifting or peeling paint. Check a small area first to see if the paint is dry enough.
Prevent Paint Peeling
Peeling happens when tape pulls paint from the cabinet surface. To stop this, use low-tack painter’s tape designed for delicate surfaces. Avoid pressing the tape too hard before painting. After painting, remove tape gently without rushing. If paint starts to peel, use a small brush to fix edges after tape removal.
Troubleshoot Common Issues
Masking kitchen cabinets for painting can sometimes lead to unexpected problems that slow down your progress or affect the final look. Tackling these common issues early keeps your project on track and your cabinets looking sharp.
Fix Paint Seepage
Paint seepage happens when paint slips under the masking tape, leaving uneven edges or spots on areas you meant to protect. To stop this, press the tape down firmly along the edges before you start painting. If you notice seepage after the paint dries, gently sand the area with fine-grit sandpaper to smooth it out.
Another trick is to apply a thin layer of the base cabinet color along the tape edge before painting with the new color. This seals the gap and prevents the new paint from seeping underneath.
Handle Tape Residue
Peeling off masking tape often leaves behind sticky residue that can be frustrating to remove. Use a soft cloth dampened with warm, soapy water to wipe the area first. If residue persists, try a small amount of rubbing alcohol or a commercial adhesive remover, but test it on a hidden spot to avoid damage.
Removing tape while the paint is still slightly wet can also reduce residue and cracking around edges. Have you ever pulled tape too late and ended up peeling off fresh paint? Timing your tape removal right can save you from that headache.
Credit: www.consumerreports.org
Frequently Asked Questions
How Do I Prepare Kitchen Cabinets For Masking?
Clean the cabinets thoroughly to remove grease and dirt. Sand lightly to create a smooth surface. Remove hardware to avoid paint stains. Use painter’s tape to cover edges and surfaces not to be painted.
What Materials Are Best For Masking Kitchen Cabinets?
Use painter’s tape for edges and plastic sheeting or paper for covering surfaces. Quality tape prevents paint bleed. Plastic or paper protects from drips and dust during painting.
How Long Should Painter’s Tape Stay On Cabinets?
Keep painter’s tape on until the paint is dry to the touch. Removing tape too early may cause smudging. Generally, wait 24 hours for best results.
Can I Reuse Masking Materials For Cabinet Painting?
Painter’s tape should be new for each project for optimal adhesion. Plastic sheeting or paper can be reused if clean and undamaged, but fresh materials ensure better protection.
Conclusion
Masking kitchen cabinets carefully protects them during painting. Use painter’s tape and plastic sheets to cover edges and hardware. Take your time to apply the tape straight and tight. This helps avoid paint bleeding and keeps surfaces clean. Proper masking makes your painting job look neat and professional.
Remember, patience in preparation leads to better results. Keep your tools ready and follow each step with care. Your kitchen will look fresh and beautiful after painting. Simple steps make a big difference in your home project.