

Are you ready to transform your kitchen with fresh, white cabinets but worried about those annoying brush strokes ruining the smooth finish? You’re not alone.
Painting kitchen cabinets white can instantly brighten your space and give it a modern, clean look. But achieving that flawless, professional finish without visible brush marks can feel tricky. Don’t worry—this guide will show you exactly how to paint your cabinets white so they look sleek and smooth, even if you’re not an expert.
Keep reading to discover simple tips and techniques that will make your kitchen cabinets look like they were painted by a pro.
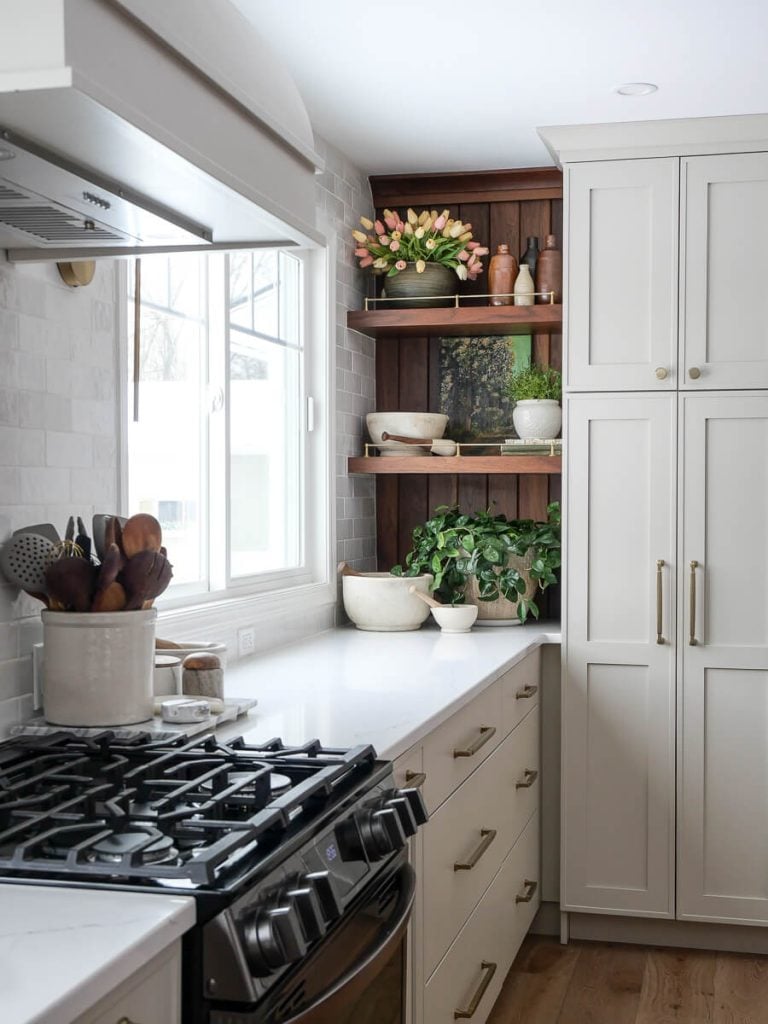
Credit: graceinmyspace.com
Choosing The Right White Paint
Choosing the right white paint is crucial for achieving flawless kitchen cabinets without brush strokes. The type of paint, its finish, and the brand all impact the final look and durability. Your choice can make the difference between a smooth, professional finish and a textured, uneven surface.
Types Of Paint For Cabinets
Not all white paints are created equal, especially for cabinets. You want a paint that adheres well and resists chipping. Acrylic latex paints are popular because they clean up easily and provide a smooth finish.
Oil-based paints offer a hard, durable surface but take longer to dry and require solvents for cleanup. Waterborne alkyd paints combine the best of both worlds—easy cleanup and durability. Consider your drying time and cleanup preferences when choosing.
Finish Options For Smooth Look
The finish you pick affects how light reflects off your cabinets, which can hide or reveal brush strokes. Satin and semi-gloss finishes are often best for kitchen cabinets because they are easy to clean and have a subtle shine that masks imperfections.
Matte finishes can show brush strokes more easily, while high gloss might highlight every bump. Think about how much shine you want and how much wear your cabinets will face daily before deciding.
Best Brands For Durability
Durability matters, especially in a busy kitchen. Some brands consistently deliver smooth finishes that hold up over time. Benjamin Moore’s Advance line offers a self-leveling formula that reduces brush marks.
Sherwin-Williams ProClassic also provides excellent adhesion and smoothness. If you want a balance of ease and durability, these brands are worth considering to keep your cabinets looking fresh for years.
Credit: graceinmyspace.com
Preparing Cabinets For Painting
Preparing kitchen cabinets for painting is essential to achieve a smooth, brush-stroke-free finish. This stage sets the foundation for the entire project. Proper preparation helps the paint stick better and last longer. Each step requires attention to detail to avoid imperfections later on.
Cleaning And Degreasing
Start by cleaning the cabinets thoroughly. Use a mild detergent mixed with warm water. Wipe all surfaces to remove dirt and grime. Grease and oils from cooking can prevent paint from adhering properly.
For tough grease, use a degreaser or a mixture of vinegar and water. Rinse with clean water and let the cabinets dry completely. Clean surfaces ensure paint sticks evenly without bubbles or peeling.
Removing Hardware
Remove all knobs, handles, and hinges from the cabinet doors and drawers. This step helps you paint every area smoothly. Leaving hardware on can cause uneven paint layers or drips.
Keep screws and small parts in a container. Label them to avoid confusion when reattaching. Removing hardware also prevents accidental damage during sanding and painting.
Sanding Techniques For Smooth Surface
Sanding creates a smooth surface for paint to grip. Use fine-grit sandpaper, like 220 grit, for the final sanding. Sand in the direction of the wood grain to avoid scratches.
Focus on edges and corners where old paint or varnish may peel. After sanding, wipe down cabinets with a damp cloth to remove dust. Dust can cause bumps and uneven paint finish.
Repairing Imperfections
Check cabinets for dents, holes, or cracks. Fill small holes with wood filler using a putty knife. Let the filler dry completely before sanding it smooth.
For deeper cracks, apply multiple layers of filler if needed. Sand the repaired areas carefully to blend with the surrounding surface. Smooth, even surfaces are key to a brush-stroke-free paint job.
Selecting Tools For Flawless Application
Painting kitchen cabinets white can transform your space. Achieving a smooth, brush stroke-free finish requires choosing the right tools. The tools you select greatly impact the final look. Let's explore the best options for flawless application.
Rollers Vs. Brushes
Rollers and brushes each have their benefits. Rollers cover large surfaces quickly. They help maintain an even coat. Foam rollers work best for smooth finishes. Brushes offer precision. They help with detailed work. Choose high-quality brushes for minimal brush strokes.
Using Paint Sprayers
Paint sprayers provide an even application. They cover surfaces uniformly without leaving marks. Sprayers are ideal for large projects. They reduce painting time. Ensure proper ventilation when using a sprayer. Practice on a test surface first. This helps you achieve the best results.
Choosing Quality Applicators
Quality applicators make a big difference. Invest in good brushes and rollers. High-quality tools last longer. They deliver better results. Avoid cheap options. They might leave streaks or shed bristles. Always clean your tools after use. This keeps them in good condition for future projects.
Credit: graceinmyspace.com
Priming For Perfect Adhesion
Priming is a crucial step when painting kitchen cabinets white to achieve a flawless finish without brush strokes. It creates a smooth base, improves paint adhesion, and helps avoid uneven textures. Skipping or rushing through priming can lead to chipping, peeling, or visible brush marks that ruin your hard work.
Types Of Primer
Choosing the right primer affects how well your paint sticks and the final look. There are several types to consider:
- Oil-based primers:Great for sealing knots and stains, but they take longer to dry and have a strong odor.
- Water-based primers:Dry quickly and clean up easily; ideal for cabinets that don’t have heavy stains.
- Shellac primers:Perfect for blocking tough stains and odors, though they require good ventilation during use.
Think about your cabinet material and condition before picking a primer. Have you checked if your cabinets have stains or knots that need sealing first?
Applying Primer Evenly
Even application is key to avoiding brush strokes and bumps. Use a high-quality synthetic brush or a foam roller designed for smooth surfaces to get a consistent coat.
Apply thin, light layers rather than thick coats. Thick primer can drip and leave uneven textures that show through the paint.
Work in sections, maintaining a wet edge to prevent visible lines. If you notice brush marks starting to form, lightly sand the surface once dry before adding another coat.
Drying Time Tips
Allowing primer to dry fully before painting ensures the best adhesion and finish. Follow the manufacturer’s drying time, but keep in mind that humidity and temperature affect drying speed.
Try to prime on a dry day with good airflow. If the primer isn’t dry enough, paint can peel or brush strokes become more obvious.
If you’re in a hurry, a quick tip is to use a fan or open windows to speed up drying without causing dust to settle on the surface. Have you ever rushed drying only to regret it later?
Painting Techniques To Avoid Brush Strokes
Painting kitchen cabinets white without brush strokes requires careful techniques. Brush marks often show when paint dries unevenly. The right approach keeps the surface smooth and clean.
Focus on how you apply the paint. Use tools and methods that reduce visible strokes. Work with the paint’s drying time to avoid lines. These techniques make your cabinets look professionally painted.
Proper Roller Technique
Use a high-quality foam roller for smooth coverage. Roll the paint on lightly and evenly. Avoid pressing too hard to stop roller marks. Roll in one direction and then lightly cross-roll. This blends the paint and hides strokes.
Spray Painting Tips
Spray painting creates a fine, even coat without brush marks. Keep the spray can or gun moving steadily. Hold it about 6-12 inches from the surface. Apply thin layers to avoid drips. Practice on cardboard first to control spray patterns.
Maintaining Wet Edges
Work on small sections to keep paint edges wet. Wet edges blend smoothly without lines. Avoid stopping halfway on a panel. Plan your painting path to overlap wet areas. This prevents visible seams between coats.
Multiple Thin Coats
Thin coats dry evenly and reduce brush strokes. Thick paint causes drips and rough texture. Apply several light layers instead of one heavy one. Sand lightly between coats for a smooth finish. Thin coats improve paint adhesion and look.
Drying And Curing Process
Understanding the drying and curing process is key to achieving smooth, brush stroke-free white kitchen cabinets. Proper drying allows the paint to settle evenly. Curing strengthens the paint, making it durable and long-lasting. Skipping this process can cause imperfections and reduce paint life.
Optimal Drying Conditions
Keep the room temperature between 65°F and 75°F. Avoid high humidity, which slows drying and causes streaks. Ensure good air circulation but no direct wind on the cabinets. A stable environment helps paint dry evenly without texture issues.
Avoiding Dust And Debris
Dust particles ruin smooth paint surfaces. Cover the cabinets lightly with a clean cloth or plastic sheet after painting. Turn off fans and close windows to limit dust. Clean the workspace before starting to reduce airborne debris.
Curing Time For Durability
Drying feels quick, but curing takes longer. Allow at least 7 days for the paint to fully harden. Avoid heavy use or cleaning until curing completes. This step ensures the paint resists scratches and stains for years.
Finishing Touches
Finishing touches can make or break the look of your freshly painted kitchen cabinets. After all the hard work to avoid brush strokes, the final steps ensure your cabinets not only look smooth but also last longer. Let’s dive into how you can seal in that perfect finish and keep your kitchen looking great for years.
Applying Protective Topcoat
A protective topcoat shields your cabinets from daily wear and tear. Choose a water-based polyurethane or a clear acrylic finish to maintain the crisp white color without yellowing over time.
Apply thin, even layers using a high-quality foam roller or a fine spray. Avoid heavy coats, which can cause drips or brush marks that ruin your smooth surface.
Allow each layer to dry completely before applying the next. This patience helps create a durable, flawless finish. Have you ever rushed a project only to see imperfections later? Taking your time here pays off.
Reinstalling Hardware
Before putting handles and knobs back, check if they need cleaning or updating. Sometimes new hardware can give your cabinets a fresh, modern edge without extra painting.
Use clean, soft cloths and mild soap to wipe hardware before reattaching. This prevents any dirt or oils from damaging your pristine paint.
Take your time during reinstallation to avoid scratches or chips. A small slip here can undo all your hard work.
Cleaning And Maintenance Tips
Keeping your white cabinets spotless means regular, gentle cleaning. Use a soft cloth with warm water and a bit of mild dish soap—harsh chemicals will dull the finish.
Spot clean spills immediately to prevent staining. This simple habit preserves your cabinets’ fresh look.
Have you noticed how small maintenance steps extend the life of painted surfaces? Treat your cabinets with care, and they’ll stay beautiful much longer than you expect.
Troubleshooting Common Issues
Painting kitchen cabinets white without brush strokes can be tricky. Common problems like drips, uneven texture, and small mistakes can spoil the smooth finish. Knowing how to fix these issues keeps your cabinets looking fresh and clean.
Quick fixes save time and effort. They help maintain a professional look, even if you are new to painting. Here are simple solutions to common painting problems.
Fixing Drips And Runs
Drips happen when paint pools and flows down the surface. Wait for the paint to dry slightly but stay soft. Use a fine sanding block to gently smooth the drips. Sand lightly to avoid cutting into the paint layer.
After sanding, apply a thin coat of paint with a high-quality foam roller. Avoid brushing over the fixed area to keep the texture uniform. Let it dry fully to prevent new drips.
Dealing With Uneven Texture
Uneven texture often comes from too much paint or poor surface preparation. Lightly sand the entire cabinet surface with fine-grit sandpaper. This creates a smooth base for the next coat.
Use a foam roller for the next layer of paint. Roll in long, even strokes to spread paint smoothly. Keep the paint thin to avoid raised texture spots.
Touch-up Strategies
Touch-ups help fix small spots without repainting the whole cabinet. Use a small foam brush or a mini roller for precise coverage. Dab paint gently instead of brushing hard.
Match the paint color and sheen exactly. Blend the edges of the touch-up area into the surrounding paint. Allow the touch-up to dry fully before checking the result.
Frequently Asked Questions
How Do I Avoid Brush Strokes When Painting Cabinets?
Use a high-quality foam roller or paint sprayer for smooth coverage. Apply thin, even coats and sand lightly between layers for a flawless finish.
What Type Of Paint Is Best For Kitchen Cabinets?
Choose a durable, water-based acrylic or enamel paint. These paints resist moisture, stains, and wear, ensuring your cabinets look fresh longer.
Should I Sand Cabinets Before Painting White?
Yes, sanding removes old finish and creates a smooth surface. This helps paint adhere better and prevents visible brush strokes or bumps.
How Many Coats Of Paint Do I Need For Cabinets?
Typically, two to three thin coats provide full coverage. Allow each coat to dry completely before applying the next for a smooth, even finish.
Conclusion
Painting kitchen cabinets white without brush strokes takes patience and the right steps. Using quality paint and smooth tools helps create a clean finish. Light sanding and thin paint layers prevent bumps and marks. Allow each coat to dry fully before adding the next.
With careful work, your cabinets will look fresh and smooth. Enjoy a bright kitchen with a flawless white shine. Small details make a big difference in your painting project. Keep these tips in mind for the best results.