
Your kitchen floor sees a lot of action every day. From spills to crumbs, it can quickly become dirty and sticky.
But mopping your kitchen floor properly isn’t just about making it look clean—it’s about keeping your home healthy and safe. If you want to avoid streaks, missed spots, and wasted effort, this guide is for you. Keep reading to discover simple, effective steps that will make your kitchen floor shine like new every time.
You’ll be surprised how easy it is once you know the right way to do it.
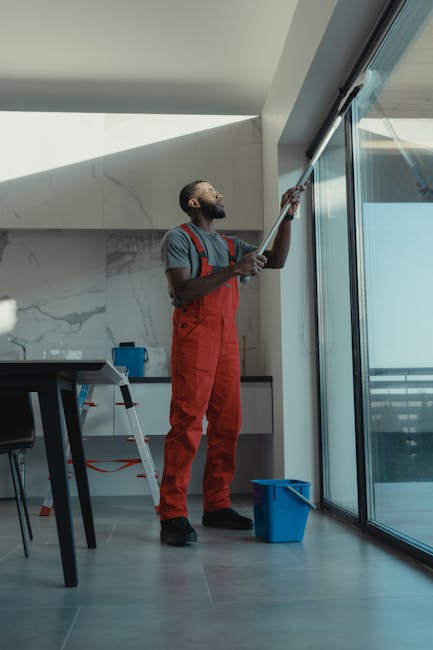
Credit: www.housework.com
Prepare The Area
Preparing the kitchen floor before mopping makes the task easier and more effective. Cleaning debris and choosing the right tools helps achieve a spotless floor. This section explains how to get the area ready for mopping.
Clear The Floor
Remove all items from the floor. Move chairs, mats, and trash bins out of the way. Clearing the floor prevents obstacles and allows full access for cleaning.
Sweep Or Vacuum
Pick up loose dirt and crumbs by sweeping or vacuuming. This step stops dirt from mixing with water and spreading during mopping. Use a broom or vacuum with a hard floor setting for best results.
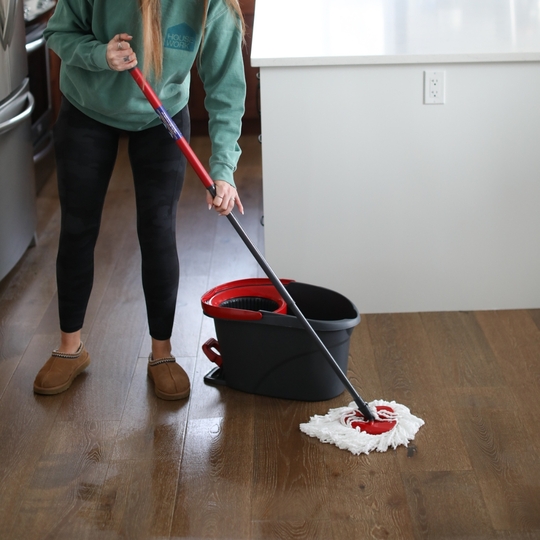
Choose The Right Mop
Select a mop suited for your kitchen floor type. Microfiber mops work well on tile and hardwood floors. Sponge mops absorb spills quickly. Avoid mops that leave streaks or excess water behind.

Credit: www.abt.com
Select Cleaning Solution
Choosing the right cleaning solution is key to mopping your kitchen floor effectively. The solution you use can make a big difference in removing dirt, killing germs, and preserving your floor’s finish. What kind of cleaner will give you the best results without causing damage?
Use Store-bought Cleaners
Store-bought cleaners are designed for convenience and effectiveness. You can find products specifically made for kitchen floors, which often include disinfectants to kill bacteria.
Look for labels that match your floor type, such as hardwood, tile, or vinyl. Many of these cleaners come in ready-to-use bottles or concentrated forms that you dilute with water.
One tip: test the cleaner on a small corner before mopping the entire floor. This helps avoid any unexpected discoloration or damage.
Make Diy Solutions
DIY cleaning solutions are a great option if you prefer natural ingredients or want to save money. Common household items like vinegar, baking soda, and lemon juice can clean effectively without harsh chemicals.
For example, mix 1 cup of white vinegar with 1 gallon of warm water for a simple, all-purpose cleaner. Adding a few drops of essential oil can improve the scent and add antibacterial properties.
Remember, avoid vinegar on stone floors like marble or granite, as the acid can etch the surface.
Consider Floor Material
Your floor’s material determines which cleaning solutions are safe and effective. Hardwood floors need gentle cleaners that don’t strip the finish or cause warping.
Tile and vinyl floors can handle stronger cleaners but be cautious with abrasive products that may scratch the surface. Laminate floors require minimal moisture, so use a damp mop with mild soap.
Ask yourself: Is your cleaning solution protecting your floor while getting it clean? Choosing wisely can keep your kitchen looking fresh for years.
Mopping Techniques
Mopping a kitchen floor might seem straightforward, but using the right techniques can make a huge difference in how clean and fresh your kitchen feels. The way you handle the mop affects how well dirt and grime are removed. Let’s dive into some practical mopping techniques that help you get the best results without extra effort.
Dip And Wring Properly
Always dip your mop into the cleaning solution and then wring it out thoroughly before touching the floor. Too much water can leave your floor sticky and create slippery spots, which can be dangerous. I learned this the hard way after slipping on a wet floor that wasn’t wrung properly—now I make sure to wring until the mop is damp, not soaked.
Try dipping and wringing in a bucket with a built-in wringer or use a separate wringing tool. This keeps your mop clean and prevents spreading dirty water around. It also helps your floor dry faster, which is especially important in a busy kitchen.
Use S-shaped Strokes
Move your mop in slow, S-shaped strokes instead of pushing straight back and forth. This technique covers more area and picks up dirt more effectively. It’s a simple change that makes a noticeable difference in how clean your floor looks.
When you use S-shaped strokes, you avoid pushing dirt into corners and edges. Have you noticed how straight strokes sometimes just move dirt around? This way, you actually lift the grime off the floor.
Focus On High-traffic Zones
Your kitchen floor has spots that get dirtier faster—near the sink, stove, and entry points. Spend extra time mopping these areas to prevent grime buildup. You don’t need to scrub the whole floor harder, just give these zones a bit more attention.
Personally, I keep a small hand towel nearby to quickly wipe spots that look especially dirty before mopping. This small habit saves time and stops dirt from spreading. What high-traffic spots in your kitchen demand extra care?
Dealing With Stubborn Stains
Stubborn stains need extra attention during mopping. Use warm water and a gentle scrub to lift tough spots without damaging the floor. Rinse well to avoid residue and keep your kitchen floor clean and fresh.
Dealing with stubborn stains on your kitchen floor can feel like a never-ending battle. You might wonder if your floors will ever look clean again. But don't worry—there's a strategy to tackle these tough spots with ease.
Spot Clean Before Mopping
Before you break out the mop, take a closer look at those persistent stains. Spot cleaning allows you to focus on specific areas that need extra attention. Use a damp cloth or sponge to dab the stain, applying a bit of pressure. This initial step helps to loosen the grime, making it easier to remove when you mop.
Use Scrubbing Tools
Sometimes, a simple wipe won't do the trick. That's when you need to bring out the scrubbing tools. A stiff-bristled brush or a non-scratch scrub pad can help lift stubborn stains without damaging your floor. Use small, circular motions and a bit of elbow grease to work the stain out. Have you ever noticed how satisfying it is to see a stain lift with just a bit of scrubbing?
Apply Stain Removers
For those really tough stains that refuse to budge, it's time to consider a stain remover. Choose one that's safe for your floor type. Apply it directly on the stain and let it sit for a few minutes. This allows the solution to break down the stain, making it easier to mop away. Always follow the instructions on the label for the best results. Have you ever tried using a natural solution like vinegar or baking soda? They can be surprisingly effective and are often right in your pantry.
Rinsing And Drying
Rinsing and drying your kitchen floor properly is crucial for a spotless finish and to avoid streaks or residue. Skipping or rushing through this part can leave dirt behind or make the floor sticky. Paying attention here ensures your kitchen floor looks fresh and clean for longer.
Rinse Mop Frequently
As you mop, you’ll notice dirt collecting on your mop head. Rinse it often to avoid spreading grime back onto the floor. I learned this the hard way when my floor ended up looking dirtier because I didn’t rinse enough. Keep a bucket of clean water nearby and dip the mop in it regularly to keep it fresh.
Use Clean Water For Final Pass
Never use the same dirty water for your last mop over the floor. Fresh water rinses away any leftover detergent or dirt. I found that using clean water at the end gives the floor a polished look and prevents sticky spots. It’s a simple step but makes a big difference in how clean your kitchen floor feels.
Allow Floor To Air Dry
After mopping, don’t rush to walk on the floor immediately. Let it air dry completely to avoid smudges and footprints. Have you noticed how floors sometimes get streaky when dried too quickly or wiped? Giving it time to dry naturally keeps your kitchen floor looking flawless and ready for your next meal prep.
Maintenance Tips
Keeping your kitchen floor spotless goes beyond just mopping. Maintenance plays a crucial role in preserving the shine and extending the life of your flooring. With simple habits, you can avoid stubborn stains and damage that often come from everyday wear and tear.
Regular Sweeping
Dirt and debris can scratch your floor if left unchecked. Sweeping daily or at least a few times a week helps prevent this damage. You don’t need fancy equipment—just a good broom or a vacuum designed for hard floors will do the trick.
Think about how often you walk into the kitchen with crumbs stuck to your shoes. Wouldn’t a quick sweep save you from scrubbing later? It’s a small step that makes a big difference.
Avoid Excess Water
Water is a mop’s best friend—but too much can be a nightmare for your floor. Excess water seeps into cracks or grout, leading to swelling or warping. Use a damp mop, not a soaking one, to keep your floor safe.
Ever noticed how some floors become sticky or dull after mopping? That’s usually from leftover water. Try wringing your mop well and changing the water frequently to keep your kitchen floor looking fresh and dry.
Use Floor Protectors
Furniture and heavy appliances can leave permanent marks on your kitchen floor. Adding floor protectors under chair legs, tables, and even your trash bin can prevent scratches and dents. Felt pads or rubber caps work well and are easy to install.
Imagine sliding a chair across your floor without any damage. These small protectors make moving furniture less risky. Have you checked if your kitchen chairs have these yet?

Credit: www.abt.com
Frequently Asked Questions
How Often Should I Mop My Kitchen Floor?
Mop your kitchen floor at least once a week to maintain cleanliness. High-traffic kitchens may require more frequent mopping to remove dirt and spills.
What Is The Best Mop For Kitchen Floors?
A microfiber mop is ideal for kitchen floors. It effectively picks up dirt, is gentle on surfaces, and dries quickly, preventing streaks and water damage.
Should I Use Hot Or Cold Water For Mopping?
Use warm water for mopping kitchen floors. Warm water helps dissolve dirt and grease better, making cleaning more effective without damaging the floor.
Can I Use Regular Floor Cleaner On Kitchen Tiles?
Yes, use a floor cleaner suitable for your tile type. Avoid harsh chemicals to prevent damage and ensure a safe, clean kitchen environment.
Conclusion
Mopping your kitchen floor keeps it clean and safe. Use the right tools and a good cleaning solution. Work in small sections to avoid streaks and missed spots. Let the floor dry fully before walking on it. Regular mopping stops dirt and germs from building up.
Clean floors make your kitchen look fresh and inviting. Simple steps bring great results every time. Keep your kitchen floor shining with regular care.