

Are you ready to make your kitchen more efficient and save time on dishwashing? Installing a dishwasher can transform your daily routine, but you might wonder where to start.
How do you fit a dishwasher seamlessly into your kitchen without a hassle? This guide will show you exactly how to put a dishwasher in your kitchen step-by-step. By the end, you’ll feel confident and ready to enjoy cleaner dishes with less effort.
Keep reading to discover simple tips that will make the whole process smooth and stress-free.
Credit: www.foodnetwork.com
Choosing The Right Spot
Choosing the right spot for your dishwasher is crucial for both convenience and efficiency in your kitchen. The location affects how easily you can load and unload dishes, connect plumbing and electrical lines, and maintain your kitchen’s overall flow. Taking time to plan this will save you headaches during installation and everyday use.
Measure Available Space
Start by measuring the space where you want to place the dishwasher. Most standard dishwashers are about 24 inches wide, 24 inches deep, and 35 inches high, but double-check your model’s dimensions.
Don’t forget to leave extra room for door clearance and ventilation. You might think your spot fits perfectly until you realize the door won’t open fully or blocks a cabinet.
Have a tape measure handy and note down width, height, and depth. Will your dishwasher fit without crowding other appliances?
Consider Plumbing And Electrical Access
Dishwashers need easy access to water supply, drainage, and power. Ideally, place it near your kitchen sink to simplify plumbing connections.
Check if there’s an electrical outlet nearby or if you’ll need to add one. Using an extension cord is not safe or recommended for dishwashers.
Have you inspected the location under your sink or nearby cabinets? Sometimes you might have to rearrange plumbing or wiring before installation.
Check Cabinet Layout
Look at how your cabinets are arranged around the potential dishwasher spot. Will removing a cabinet or drawer create the right opening?
Consider how the dishwasher door will open. Will it block a cabinet, or is there enough space to move freely? Think about your daily kitchen routine.
In my experience, placing the dishwasher next to the sink and near the trash bin made cleaning up smoother and faster. What cabinet layout will make your kitchen workflow easier?
Gathering Necessary Tools
Gathering the right tools makes installing a dishwasher easier and faster. Prepare everything before starting the installation. Missing tools can cause delays and frustration. Having all items ready helps maintain safety and efficiency during the process.
List Of Essential Tools
- Adjustable wrench for tightening nuts and bolts
- Phillips and flathead screwdrivers for screws
- Measuring tape to check space and alignments
- Level tool to ensure the dishwasher sits flat
- Drill with bits for making holes if needed
- Utility knife to cut packaging and trim materials
- Pliers for gripping and bending wires or pipes
- Bucket or container to catch water spills
Safety Equipment
- Protective gloves to guard your hands
- Safety glasses to protect your eyes from debris
- Knee pads for comfort while working low
- Mask to avoid inhaling dust or fumes
- Proper footwear to prevent slipping or injury
Preparing The Area
Preparing the Area Clear the kitchen space for the dishwasher installation. Ensure there's a suitable power outlet and water connection nearby. Check for any obstructions and measure the dimensions to ensure a perfect fit.
Preparing the area for a dishwasher installation is crucial. It ensures a smooth and hassle-free process. Start by organizing the space efficiently. This prevents any disruptions during the setup. Follow these steps to prepare your kitchen for a new dishwasher.
Turn Off Water And Power
Before starting, turn off the water supply. Locate the shut-off valve under the sink. Turn it clockwise to stop water flow. Ensure the power is off. Find the circuit breaker and switch it off. This prevents any electrical accidents during installation. Safety first!
Remove Existing Fixtures
Remove any fixtures from the installation site. This includes old dishwashers or cabinetry. Use a screwdriver to detach them carefully. Check for any screws or nails. Keep the area clear for the new appliance. Dispose of old parts responsibly.
Clear Space For Installation
Clear out any items under the sink. Ensure there's enough room for the dishwasher. Measure the space to confirm it fits. Keep cleaning supplies and tools nearby. This helps you have everything ready for installation. A tidy area makes work easier.
Connecting Water Supply
Connecting the water supply is a key part of installing a dishwasher. It allows water to flow into the machine for cleaning dishes. This step needs care to avoid leaks and ensure smooth operation. Using the right tools and parts helps create a secure connection. Follow these instructions to connect the water supply safely and efficiently.
Attach Water Line
First, locate the hot water supply valve under the sink. Turn off the valve to stop water flow. Next, connect the dishwasher’s water line to the valve. Use a flexible copper or braided stainless steel hose for durability. Tighten the connection with a wrench, but avoid over-tightening. Check that the water line is firmly attached and straight to prevent kinks.
Secure Hoses And Fittings
After attaching the water line, secure all hoses and fittings. Use hose clamps to keep the connections tight. Place the clamps at the ends where hoses meet fittings. Make sure hoses do not twist or bend sharply. This prevents damage and leaks. Finally, turn the water valve back on and check for leaks. Tighten any loose fittings if needed to ensure a leak-free setup.
Setting Up Drainage
Setting up proper drainage is crucial when installing a dishwasher in your kitchen. Without correct drainage, you risk leaks, odors, and poor performance. Let’s focus on how to connect the drain hose and ensure the water flows out safely and efficiently.
Connect Drain Hose
Start by attaching the dishwasher’s drain hose to the kitchen sink drain or garbage disposal outlet. Make sure the connection is tight to prevent any leaks. Use a clamp to secure the hose firmly in place.
Check the hose for any kinks or bends that could block water flow. If the hose is too long, trim it carefully to avoid sagging, which might cause drainage problems. Keep the hose as straight as possible for smooth water exit.
Install Air Gap Or High Loop
Adding an air gap or creating a high loop in the drain hose is vital to stop dirty water from flowing back into your dishwasher. An air gap device is installed on the countertop or sink, providing a physical barrier against backflow.
If you don’t have an air gap, looping the drain hose as high as possible under the sink works well. Secure this high loop with brackets to maintain its position and prevent water from draining back. This simple step can save you from costly repairs down the line.
Have you noticed your dishwasher water draining slowly or smelling bad? Double-checking these drainage setups might be the fix you need.
Credit: www.maytag.com
Wiring The Dishwasher
Wiring the dishwasher is a crucial step that ensures your new appliance runs safely and efficiently. It’s important to handle the electrical connections carefully to avoid any hazards. Let’s break down the process into manageable tasks that you can follow with confidence.
Connect Electrical Wiring
First, turn off the power at the circuit breaker to keep yourself safe while working. Locate the dishwasher’s junction box, usually found at the bottom front of the unit behind a panel. Inside, you’ll find color-coded wires—black, white, and green or copper.
Match these wires with the corresponding household wires: black to black (hot), white to white (neutral), and green or bare copper to the ground wire. Use wire nuts to twist the wires together securely, and wrap them with electrical tape for extra protection. Remember, loose connections can cause shorts or fires, so double-check each one.
Test Power Supply
After wiring, restore power at the breaker and test if your dishwasher is receiving electricity. You can use a multimeter to check voltage at the connection point—look for around 120 volts. If your dishwasher powers on, you’ve wired it correctly.
If it doesn’t turn on, re-examine your connections and ensure the breaker is not tripped. Have you ever skipped testing only to regret it later? Taking a few extra minutes now saves a lot of troubleshooting time down the road.
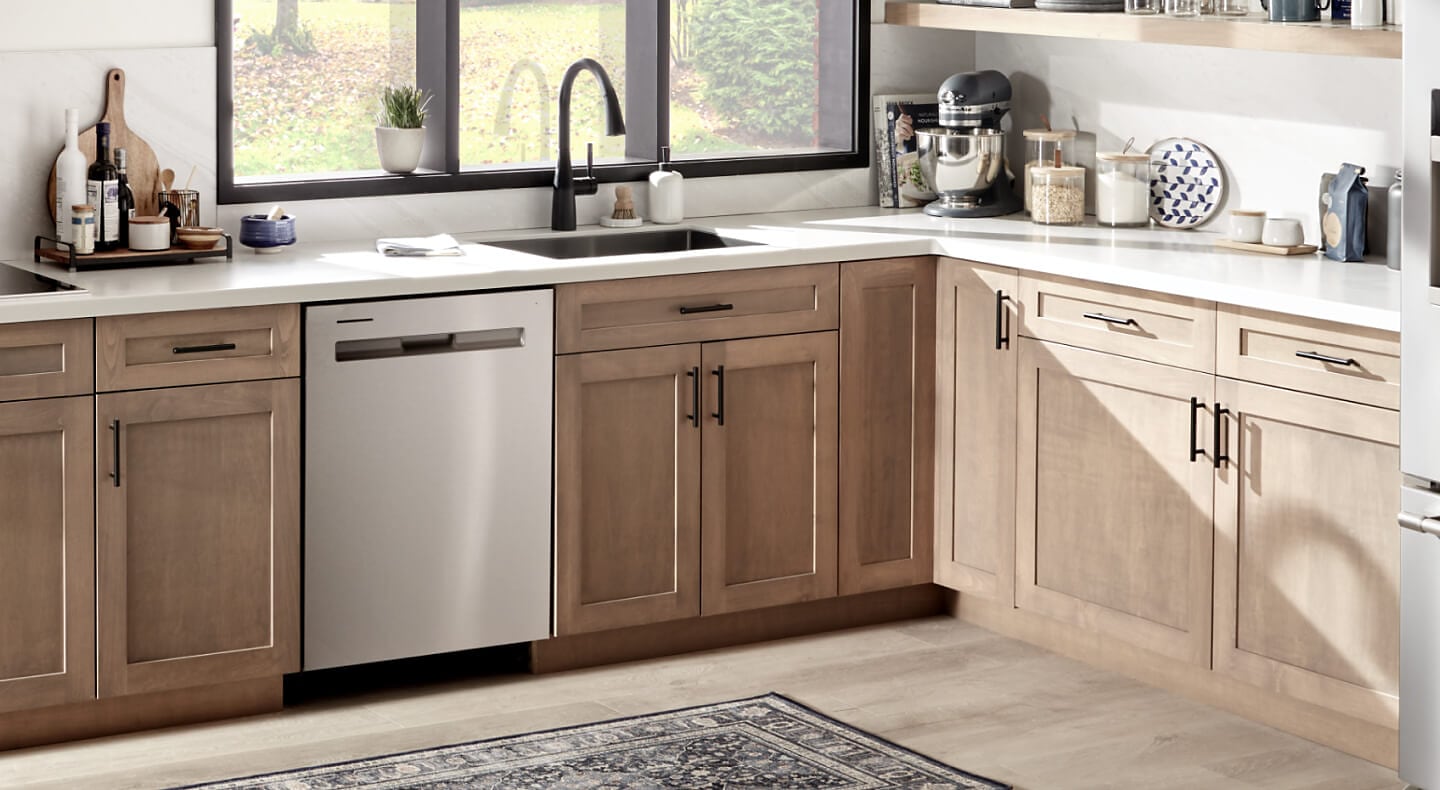
Positioning The Dishwasher
Positioning the dishwasher correctly in your kitchen is essential for both functionality and aesthetics. It’s not just about fitting the appliance into a gap; it’s about ensuring easy access, proper drainage, and a seamless look with your cabinets. Getting this right can save you from future hassles like leaks or awkward door swings.
Slide Into Place
Begin by carefully sliding the dishwasher into the designated space. Make sure the power cord, water supply line, and drain hose are not kinked or trapped as you push the unit in. Take your time here—rushing can damage connections or scratch your cabinets.
Check that the dishwasher door clears your adjacent cabinets and appliances when open. Does the door swing fully without obstruction? If not, consider adjusting the position slightly or modifying nearby cabinet doors.
Level The Appliance
Once the dishwasher is in position, leveling it is crucial to avoid leaks and ensure proper operation. Use a bubble level on the top and front edges to check if it sits evenly.
Adjust the leveling feet by turning them clockwise or counterclockwise. If your floor is uneven, this step can take some patience but it’s worth the effort. A well-leveled dishwasher will close smoothly and drain properly.
Have you noticed how a dishwasher that’s not level often causes water to pool inside? Fixing this early saves you from a watery mess later.
Securing The Dishwasher
Securing the dishwasher is essential for safe and efficient use. A well-secured dishwasher prevents movement during operation. It also protects your kitchen cabinets from damage. Proper securing keeps the appliance stable and aligned with the countertop.
Attach Mounting Brackets
Locate the mounting brackets on the dishwasher frame. These brackets help hold the dishwasher firmly in place. Use screws to attach the brackets to the underside of the countertop or cabinet sides. Make sure the screws are tight but not over-tightened. This step prevents the dishwasher from tipping or shifting.
Check Stability
After attaching the brackets, gently push the dishwasher. Check for any wobbling or movement. The dishwasher should feel steady and secure. Adjust the screws or reposition the brackets if needed. Confirm that the dishwasher door opens and closes smoothly without resistance.
Final Checks
Before you declare the dishwasher installation complete, it’s essential to perform some final checks. These steps ensure your appliance works efficiently and prevents water damage to your kitchen. Taking a few extra minutes now can save you from costly repairs later.
Test For Leaks
Start by inspecting all water connections carefully. Turn on the water supply and watch for any signs of dripping around the hoses and fittings. Even a small leak can cause mold or damage under your sink over time.
Use a dry cloth to wipe around the joints and check again after a few minutes. If you spot any moisture, tighten the connections gently but firmly. Remember, overtightening can damage the fittings, so adjust carefully.
Run A Test Cycle
Once you’re confident there are no leaks, run a complete wash cycle without any dishes inside. This helps flush out any debris and confirms the dishwasher is draining and spraying water correctly.
Pay attention to unusual noises or error lights during the cycle. If the dishwasher runs smoothly, it means your installation is solid. If not, it could be time to revisit the setup or consult the manual for troubleshooting tips.

Credit: www.espares.co.uk
Frequently Asked Questions
How Do I Choose The Right Dishwasher Size For My Kitchen?
Measure your kitchen space carefully before buying a dishwasher. Standard dishwashers are 24 inches wide. Compact models are 18 inches wide. Choose a size that fits your available space and meets your dishwashing needs efficiently.
Where Should I Install The Dishwasher In My Kitchen?
Install the dishwasher near the sink for easy plumbing connections. This location simplifies water supply and drainage. It also makes loading and unloading dishes more convenient. Ensure there’s enough clearance for door movement and ventilation.
What Plumbing Connections Are Needed For Dishwasher Installation?
Dishwashers require a hot water supply line and a drain connection. Connect the water supply to the household hot water line using a shutoff valve. Connect the drain hose to the sink drain or garbage disposal for proper waste water removal.
Can I Install A Dishwasher Without Professional Help?
Yes, if you have basic plumbing and electrical skills. Follow manufacturer instructions carefully. Turn off water and power before installation. If unsure, hiring a professional ensures safety and proper setup.
Conclusion
Installing a dishwasher can save time and effort in your kitchen. Choose a spot near the sink and power source for easy setup. Measure the space carefully before buying your dishwasher. Follow the instructions step by step to avoid mistakes.
A well-placed dishwasher keeps your kitchen neat and organized. Enjoy cleaner dishes with less work every day. Taking time to install it right pays off in convenience. Your kitchen will feel more modern and efficient with this simple upgrade.