
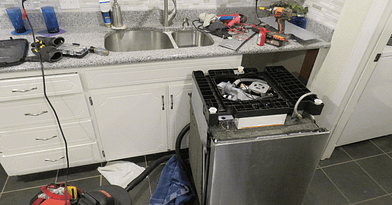
Are you ready to upgrade your kitchen with a new dishwasher but unsure how to get started? Removing a kitchen cupboard might sound tricky, but with the right steps, you can do it yourself without stress.
Imagine freeing up space quickly and easily, saving money on professional help. In this guide, you’ll discover simple, clear instructions to remove your cupboard safely and efficiently. Keep reading, and you’ll be one step closer to enjoying the convenience of your new dishwasher.
Tools Needed
Removing a kitchen cupboard for a dishwasher needs the right tools. These tools help you work safely and quickly. Gather them before you start to avoid interruptions.
Screwdriver Set
A screwdriver set with different heads is essential. Most cupboards use Phillips or flathead screws. Having both types saves time and prevents damage.
Power Drill
A power drill speeds up screw removal. Use it with screwdriver bits for faster work. It also helps if screws are tight or stuck.
Adjustable Wrench
An adjustable wrench is useful for loosening bolts. It fits various sizes, so you don’t need many tools. It helps especially with plumbing connections.
Utility Knife
A sharp utility knife cuts through caulk or paint sealing the cupboard. This makes it easier to remove without damage. Be careful and cut gently.
Pry Bar
A pry bar helps lift the cupboard away from the wall. It applies steady pressure without breaking the wood. Use it carefully to avoid marks.
Measuring Tape
Measure space before removal with a tape. This ensures the dishwasher fits perfectly after installation. Accurate measurement avoids surprises.
Safety Gear
Wear safety gloves to protect your hands. Use safety glasses to shield your eyes from dust or debris. Always work safely.
Preparing The Area
Preparing the area is crucial before removing a kitchen cupboard for a dishwasher. It ensures safety and makes the process smoother. Taking time to organize the space helps avoid damage and accidents. Follow these steps to get your kitchen ready.
Clear The Surrounding Space
Remove all items near the cupboard. This includes dishes, utensils, and small appliances. Clear the countertop and floor space. It gives you room to work freely and safely. Keep a container nearby for screws and small parts. This prevents losing anything during removal.
Turn Off Water And Power
Locate the water supply valve under the sink and shut it off. This stops water flow to the dishwasher area. Next, switch off the power from the circuit breaker. This prevents electric shocks while working. Double-check by testing the power with a voltage tester. Safety first. No shortcuts.
Emptying The Cupboard
Removing a kitchen cupboard makes space for a new dishwasher. Begin by emptying the cupboard and disconnecting any fixtures carefully. Gently unscrew the cupboard from the wall to avoid damage.
Emptying the cupboard is an essential first step in preparing your kitchen for a new dishwasher. This task may seem straightforward, but it sets the tone for a smooth installation. Whether you're a seasoned DIYer or a first-timer, tackling this with a plan will save you time and prevent potential mishaps.
Clear Out The Contents
Begin by removing everything inside the cupboard. This includes dishes, cookware, and any miscellaneous items. Place them on your countertop or dining table, ensuring they’re out of your way. This makes it easier to work without obstructions and reduces the risk of damaging any items during the process.
Organize And Sort
As you empty the cupboard, take a moment to sort through the items. Are there things you haven’t used in ages? This might be the perfect opportunity to declutter. Consider donating or discarding unused items, making room for a more organized kitchen in the future.
Inspect For Damage
With the cupboard empty, inspect its interior for any damage. Look for water marks, mold, or signs of pests. Addressing these issues now can prevent bigger problems later on. If you find damage, it might be time to consult a professional before proceeding with the dishwasher installation.
Clean Thoroughly
Before moving on, give the cupboard a good clean. Use a gentle cleaner to wipe down the surfaces and remove any dust or grime. A clean space will not only look better but also ensure that your new dishwasher has a fresh area for installation.
Prepare For The Next Steps
With everything out, sorted, and clean, you’re now ready to remove the cupboard itself. Double-check that you have all necessary tools and a clear understanding of the steps ahead. This preparation is key to a successful and stress-free kitchen upgrade. Have you thought about the benefits of replacing seldom-used items with something as functional as a dishwasher? This small change can make a big difference in your daily routine.
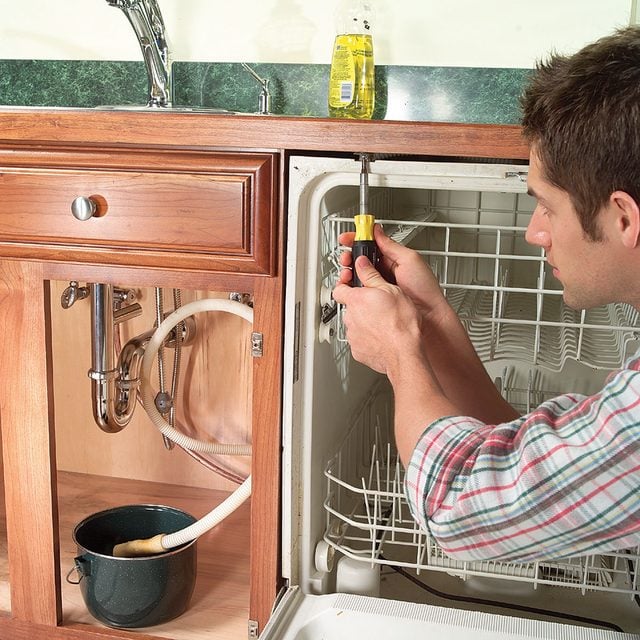
Credit: www.familyhandyman.com
Removing The Cupboard Doors
Removing the cupboard doors is a key step before installing a dishwasher. It creates space and protects the doors from damage. This process is simple and requires basic tools. Taking the doors off carefully makes the rest of the installation easier and safer.
Gather Necessary Tools
Start by collecting the right tools. You need a screwdriver that fits the hinge screws. A drill with a screwdriver bit can speed up the work. Have a cloth or towel ready to place the doors on. This prevents scratches or dents.
Unscrew The Hinges
Open the cupboard doors wide to access the hinges. Use the screwdriver to remove screws holding the hinges. Keep the screws in a small container to avoid losing them. Support the door with one hand while unscrewing to prevent it from falling.
Remove The Doors Safely
Once screws are out, carefully pull the door away from the frame. Place the door flat on the cloth or towel. Check if any hinges or hardware remain on the frame. Remove these if needed to clear the space fully.
Store Doors And Hardware Properly
Keep doors and screws in a safe place. Label them if necessary to remember their positions. This helps when reinstalling the doors after the dishwasher fits perfectly. Avoid stacking heavy items on top of the doors to prevent damage.
Detaching The Cupboard Frame
Detaching the cupboard frame is a key part of removing a kitchen cupboard for a dishwasher. This step ensures the cupboard comes away safely without damaging walls or other fixtures. Careful handling protects your kitchen and makes space for the new appliance.
Unscrewing Hinges And Brackets
Start by opening the cupboard doors fully. Use a screwdriver to remove all screws from the hinges. Keep the screws in a small container to avoid losing them. Next, locate any brackets holding the cupboard frame in place.
Unscrew these brackets carefully. Some cupboards have hidden clips or fasteners—check inside corners. Removing hinges and brackets frees the cupboard doors and frame for easier handling. Avoid forcing parts to prevent damage.
Handling Wall Attachments
Inspect where the cupboard frame meets the wall. Look for screws, nails, or adhesive strips securing it. Use a screwdriver or drill to remove screws from the wall attachments.
If adhesive or caulk holds the frame, gently slide a putty knife to loosen it. Work slowly to avoid wall damage. Once all attachments are removed, the cupboard frame should move freely away from the wall.

Credit: www.espares.co.uk
Safely Removing The Cupboard
Removing a kitchen cupboard to make space for a dishwasher might sound straightforward, but it demands careful handling. Your goal is to protect both the cupboard and the surrounding kitchen fixtures while creating a smooth path for the appliance. Safety isn't just about avoiding injury; it’s also about preventing damage that could add unexpected costs or delays to your project.
Gathering The Right Tools Before You Start
Having the right tools makes the entire process safer and faster. You’ll need a screwdriver, a pry bar, a drill, and possibly a utility knife.
Check your cupboard’s screws and hinges beforehand to choose the correct screwdriver type. Missing this step often means struggling with the wrong tools, which can lead to stripped screws or slips.
Turning Off Utilities And Clearing The Area
Before you touch the cupboard, ensure that any water or electrical connections nearby are safely turned off. This prevents accidents and protects your appliances.
Clear the area around the cupboard to give yourself plenty of room to work. A clutter-free zone helps you move tools and removed parts without tripping or causing damage.
Removing Doors And Shelves First
Taking off cupboard doors and shelves lightens the load and gives you better access to screws and brackets. Doors usually have hinges that can be unscrewed easily once you support the door to avoid sudden drops.
Remove shelves by lifting them out or unscrewing supports. This step reduces the risk of parts falling unexpectedly and causing injury or damage.
Carefully Unscrewing And Detaching The Cupboard
Focus on loosening screws that hold the cupboard to the wall or adjoining units. Use steady pressure with your screwdriver or drill to avoid stripping screws.
If the cupboard resists, gently use a pry bar to loosen it from the wall. Be cautious; too much force can damage drywall or cabinetry.
Handling The Cupboard Safely After Removal
Once free, the cupboard can be bulky and heavy. Ask someone to help you lift it out to avoid back strain or dropping it.
Consider where you’ll place the cupboard temporarily so it doesn’t block walkways or get damaged. Protect floors by placing the cupboard on a soft surface if possible.
Preparing For Dishwasher Installation
Preparing for dishwasher installation requires careful planning. Removing a kitchen cupboard creates the necessary space. Proper preparation ensures a smooth installation process. Measure the area accurately and adjust cabinets if needed. These steps help fit the dishwasher perfectly into your kitchen layout.
Measuring The Space
Start by measuring the width, height, and depth of the cupboard space. Use a tape measure for precise numbers. Note the measurements in inches or centimeters. Compare these with the dishwasher’s dimensions. Keep in mind the extra room needed for door clearance and connections.
Measure the floor area as well. Check for any obstacles like pipes or wiring inside the cupboard. Mark these on your notes. This avoids surprises during installation and saves time later.
Adjusting Cabinets If Needed
Sometimes the cupboard space needs adjusting to fit the dishwasher. Remove shelves or panels inside the cupboard. Check if the cupboard frame needs trimming or widening. Use a saw or screwdriver carefully for this task.
Ensure the cabinet edges are smooth to prevent damage to the dishwasher. If the cupboard is too small, consider removing adjacent cabinets. This creates enough space without forcing the dishwasher into place.
Adjusting cabinets properly supports the dishwasher’s weight. It also helps keep the kitchen tidy and functional after installation.
Cleaning Up After Removal
Cleaning up after removing a kitchen cupboard is important for a smooth dishwasher installation. The area often collects dust, debris, and leftover materials. A thorough cleanup helps prevent damage and prepares the space for the new appliance. It also makes your kitchen look neat and ready for use.
Clear Away Dust And Debris
Use a vacuum or broom to remove all dust and small debris. Wipe down surfaces with a damp cloth to catch fine dust. Check corners and hidden spots where dirt can hide. A clean area ensures the dishwasher fits properly without obstruction.
Remove Nails And Screws
Look for any nails, screws, or brackets left in the wall or floor. Use pliers or a screwdriver to pull them out carefully. Leaving them can cause damage or make the installation harder. Dispose of these items safely to avoid injury later.
Patch Up Holes And Scratches
Fill any holes or scratches with wood filler or putty. Smooth the surface with sandpaper after it dries. This step protects the wall and floor from moisture damage. It also gives a clean look to the kitchen space.
Clean The Floor Thoroughly
Sweep and mop the floor to remove all dirt and sticky spots. Pay attention to areas under the cupboard where spills may have occurred. A clean floor prevents slipping and helps the dishwasher stand evenly.
Check For Water And Electrical Connections
Ensure water lines and electrical outlets are clean and accessible. Remove any dirt or old tape from fittings. Clear connections reduce installation problems and ensure safety. Keep tools handy for any last-minute adjustments.
Credit: www.thegritandpolish.com
Frequently Asked Questions
How Do I Safely Remove A Kitchen Cupboard?
First, turn off power and water near the cupboard. Remove doors and shelves. Unscrew the cupboard from the wall carefully. Use a pry bar if needed to detach it fully.
What Tools Are Needed To Remove A Kitchen Cupboard?
You’ll need a screwdriver, drill, pry bar, and possibly a hammer. A level and tape measure help with alignment. Safety gloves and goggles protect you during removal.
Can I Remove A Cupboard Without Damaging Walls?
Yes, carefully unscrew and gently pry the cupboard away. Use a utility knife to cut any caulking. Move slowly to avoid wall damage and patch small holes afterward.
How Long Does It Take To Remove A Kitchen Cupboard?
Removing one cupboard typically takes 30 to 60 minutes. Time depends on cupboard size and how it’s secured. Preparation and careful work speed up the process.
Conclusion
Removing a kitchen cupboard for a dishwasher is simple and clear. Follow each step carefully to avoid damage. Take your time and work safely. Use the right tools and keep screws organized. This task helps create space for your new dishwasher.
A little effort brings big change to your kitchen. You can do this yourself with some patience. Enjoy the new look and function of your kitchen soon.